Table of Contents
Advertisement
To see installation videos, scan the QR Code
or visit www.safety1st.com
©2015 Dorel Juvenile.
4358-6840 Continuum.indd 1-2
4358-6840 Continuum.indd 1-2
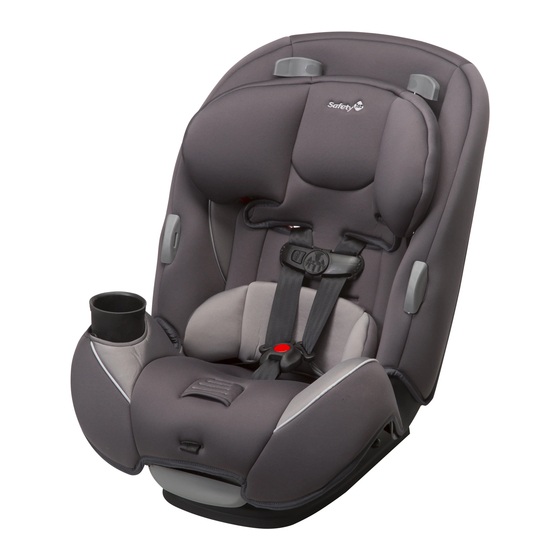
Continuum
3-in-1 Car Seat
rear-facing child restraint
5-40 lb (2.3-18 kg) and 19-40 in. (48-101.6 cm)
forward-facing child restraint
22-50 lb (10.1-22.6 kg) and 29-45 in.
(73.6-114.3 cm) and at least 2 years old
booster seat
40-80 lb (18.1-36.3 kg) and
43-52 in. (110.1-132.1 cm)
and at least 4 years old
KEEP INSTRUCTIONS FOR
FUTURE USE.
Read all instructions
before using this
child restraint.
Failure to follow the warnings on the labels and in the
instruction manual can result in serious injury or death
to your child.
4358-6840
10.16.15
10/16/15 2:46 PM
10/16/15 2:46 PM
Advertisement
Table of Contents

Summary of Contents for Safety 1st Continuum
- Page 1 Failure to follow the warnings on the labels and in the instruction manual can result in serious injury or death or visit www.safety1st.com to your child. ©2015 Dorel Juvenile. 4358-6840 Continuum.indd 1-2 4358-6840 Continuum.indd 1-2 10/16/15 2:46 PM 10/16/15 2:46 PM...
- Page 2 40-80 lb (18.1-36.3 kg) See page 15 to 43-52 in. (110.1-132.1 cm) store internal Lap and Shoulder Belt At least 4 years old harness system Install Page 50 4358-6840 Continuum.indd 3-4 4358-6840 Continuum.indd 3-4 10/16/15 2:46 PM 10/16/15 2:46 PM...
-
Page 3: Table Of Contents
Vehicle Seating Position ........... 26 Vehicle Information ......27 Understanding Your Vehicle ........27 Choosing LATCH or Vehicle Belts ......28 Knowing Your Vehicle Belts ........29 Aircraft Information ..........31 4358-6840 Continuum.indd 5-6 4358-6840 Continuum.indd 5-6 10/16/15 2:46 PM 10/16/15 2:46 PM... -
Page 4: Parts Of The Child Restraint
Instruction Manual Storage (see page 24) Rear-Facing Belt Path (in bottom of base) Harness Adjustment Strap Upper Shoulder Harness Tether (see page 42) Slots Tether Attachment for Storage 4358-6840 Continuum.indd 7-8 4358-6840 Continuum.indd 7-8 10/16/15 2:46 PM 10/16/15 2:46 PM... -
Page 5: Prepare Child Restraint To Fit Your Child
See page 5 for fi t guidelines. The Easy Out Harness Holders can be used two ways. 1. You can secure the harness straps around them as shown. 4358-6840 Continuum.indd 9-10 4358-6840 Continuum.indd 9-10 10/16/15 2:46 PM 10/16/15 2:46 PM... -
Page 6: How Does Your Child Fit
Shell and Pad To change buckle position, see pages 6-7. To adjust headrest/harness height, see page 8. To make adjustments for smaller infants, see pages 9-11. continued on next page 4358-6840 Continuum.indd 11-12 4358-6840 Continuum.indd 11-12 10/16/15 2:46 PM 10/16/15 2:46 PM... -
Page 7: Adjusting Headrest/Harness Height
Failure to follow these steps can result in serious injury or WARNING: Failure to place buckle’s metal retainer death. completely through pad and shell can result in serious injury or death. 4358-6840 Continuum.indd 13-14 4358-6840 Continuum.indd 13-14 10/16/15 2:46 PM 10/16/15 2:46 PM... -
Page 8: Harness System Adjustments For Smaller Infants
Plate From Top of Seat, Lay the Pull Harness Straps Out of Metal Retainer Flat Against Upper Shoulder Harness the Shell As Shown Slots continued on next page 4358-6840 Continuum.indd 15-16 4358-6840 Continuum.indd 15-16 10/16/15 2:46 PM 10/16/15 2:46 PM... -
Page 9: Securing Child In Child Restraint
The harness strap must be returned to the upper shoulder harness slots as your child grows. Failure to follow these steps can result in serious injury or death. continued on next page 4358-6840 Continuum.indd 17-18 4358-6840 Continuum.indd 17-18 10/16/15 2:46 PM 10/16/15 2:46 PM... -
Page 10: Reclining Child Restraint
It does not press on the child’s flesh or push the child’s body into an unnatural position. To Remove Child From Child Restraint: Loosen Harness Strap Unbuckle Harness Release Chest Clip Remove Child 4358-6840 Continuum.indd 19-20 4358-6840 Continuum.indd 19-20 10/16/15 2:46 PM 10/16/15 2:46 PM... -
Page 11: Storing Harness System
From Top of Seat, Undo Fasteners on Seat Pull Buckle of Shell and Pad As Shown Store the buckle in a safe place for future use. continued on next page 4358-6840 Continuum.indd 21-22 4358-6840 Continuum.indd 21-22 10/16/15 2:46 PM 10/16/15 2:46 PM... -
Page 12: Removing Seat Pad For Cleaning
Pull Elastic Straps and Wrap Around on Headrest Pad Over Bottom of Headrest Headrest/Harness Adjustment Levers As Attach fasteners on headrest pad Shown and seat pad. continued on next page 4358-6840 Continuum.indd 23-24 4358-6840 Continuum.indd 23-24 10/16/15 2:46 PM 10/16/15 2:46 PM... - Page 13 Push harness holders through slots in pad. Push pad behind headrest. Wrap around the top of shell. Slide harness straps into slots in pad. Attach fasteners. Attach elastic straps. Attach cup holder. 4358-6840 Continuum.indd 25-26 4358-6840 Continuum.indd 25-26 10/16/15 2:46 PM 10/16/15 2:46 PM...
-
Page 14: Installing Harness System
The buckle MUST Harness strap ends go through pull out. the back of buckle tongues and through the chest clip front to back as shown. continued on next page 4358-6840 Continuum.indd 27-28 4358-6840 Continuum.indd 27-28 10/16/15 2:46 PM 10/16/15 2:46 PM... -
Page 15: Accessories On Select Models
ON both sides of the splitter plate. out from behind the harness straps. sewn Correct WARNINGS: Harness system must be installed correctly. Failure to follow these steps can result in serious injury or death. 4358-6840 Continuum.indd 29-30 4358-6840 Continuum.indd 29-30 10/16/15 2:46 PM 10/16/15 2:46 PM... -
Page 16: Child Restraint Use
Do not use a child restraint that has been in a crash. You To help protect your vehicle seat’s upholstery from damage, use a must get a new child restraint. single layer towel underneath and behind child restraint. 4358-6840 Continuum.indd 31-32 4358-6840 Continuum.indd 31-32 10/16/15 2:46 PM 10/16/15 2:46 PM... -
Page 17: Understanding Your Vehicle
When used correctly the LATCH or vehicle Vehicle Seat Belts belts are equally safe. Do not use both the LATCH belt and vehicle belt at the same time. 4358-6840 Continuum.indd 33-34 4358-6840 Continuum.indd 33-34 10/16/15 2:46 PM 10/16/15 2:46 PM... -
Page 18: Knowing Your Vehicle Belts
If you have an ELR lap and shoulder belt, review the “Vehicle Latch Plate” section on page 30 to see if you need a locking clip. WARNING: ELR lap-only belts MUST NOT be used with this child restraint. 4358-6840 Continuum.indd 35-36 4358-6840 Continuum.indd 35-36 10/16/15 2:47 PM 10/16/15 2:47 PM... -
Page 19: Aircraft Information
This child restraint MUST always face the rear of the vehicle when the child is less than two years old. 4358-6840 Continuum.indd 37-38 4358-6840 Continuum.indd 37-38 10/16/15 2:47 PM 10/16/15 2:47 PM... -
Page 20: Latch Installation
Pull out on recline handle and push forward-facing belt path so both top of child restraint back. hooks are on the same side of the seat. continued on next page 4358-6840 Continuum.indd 39-40 4358-6840 Continuum.indd 39-40 10/16/15 2:47 PM 10/16/15 2:47 PM... - Page 21 It may be easier to pull pad away still in place and the belt is tight. from shell and tighten the belt through the belt path opening as shown. continued on next page 4358-6840 Continuum.indd 41-42 4358-6840 Continuum.indd 41-42 10/16/15 2:47 PM 10/16/15 2:47 PM...
-
Page 22: Vehicle Belt Installation
Failure to follow these warnings can result in serious injury or death. Fully Recline the Child Restraint Pull out on recline handle and push top of child restraint back. continued on next page 4358-6840 Continuum.indd 43-44 4358-6840 Continuum.indd 43-44 10/16/15 2:47 PM 10/16/15 2:47 PM... - Page 23 1st or 2nd Check often to be sure buckle slot. Do not place belt over padding is still in place and the child’s legs. Buckle vehicle belt. belt is tight. 4358-6840 Continuum.indd 45-46 4358-6840 Continuum.indd 45-46 10/16/15 2:47 PM 10/16/15 2:47 PM...
-
Page 24: Forward Facing
In this child restraint, your child can remain rear base as shown. facing up to 40 lb (18 kg) and up to 40 in. (101.6 cm). Gently tighten to remove slack. 4358-6840 Continuum.indd 47-48 4358-6840 Continuum.indd 47-48 10/16/15 2:47 PM 10/16/15 2:47 PM... -
Page 25: Latch Installation
Tether Anchor of the rear-facing belt path so Check vehicle owner’s manual for both hooks are on the same specific location. side of the seat. continued on next page 4358-6840 Continuum.indd 49-50 4358-6840 Continuum.indd 49-50 10/16/15 2:47 PM 10/16/15 2:47 PM... - Page 26 Store LATCH when not in use. See and pull the tether strap to remove page 28. all slack and create tension on the strap. 4358-6840 Continuum.indd 51-52 4358-6840 Continuum.indd 51-52 10/16/15 2:47 PM 10/16/15 2:47 PM...
-
Page 27: Vehicle Belt Installation
B. Reinstalling the child restraint. C. Changing to a specific location. different seating location. D. Switching to the lower anchor belt installation if lower anchors are available in your vehicle. 4358-6840 Continuum.indd 53-54 4358-6840 Continuum.indd 53-54 10/16/15 2:47 PM 10/16/15 2:47 PM... -
Page 28: Booster Seat
LATCH and tether strap to their storage locations. Failure to follow these warnings can result in serious injury or death. continued on next page 4358-6840 Continuum.indd 55-56 4358-6840 Continuum.indd 55-56 10/16/15 2:47 PM 10/16/15 2:47 PM... -
Page 29: Using A Locking Clip
Check periodically to make sure to the latch plate as possible. your child has not moved out of position and loosened the shoulder belt. continued on next page 4358-6840 Continuum.indd 57-58 4358-6840 Continuum.indd 57-58 10/16/15 2:47 PM 10/16/15 2:47 PM... -
Page 30: Troubleshooting
M-TH from 8 A.M. to 6 P.M. EST Columbus, IN 47202-2609 with a child restraint. FRI from 8 A.M. to 4:30 P.M. EST Fax: 1-800-207-8182 4358-6840 Continuum.indd 59-60 4358-6840 Continuum.indd 59-60 10/16/15 2:47 PM 10/16/15 2:47 PM... -
Page 31: Registration And Safety Notices
Model Number (8 to 9 characters):_________________ number, manufacture date, and line code on the label located on side of shell. Manufacture Date (mm/dd/yyyy):__________________ 4358-6840 Continuum.indd 61-62 4358-6840 Continuum.indd 61-62 10/16/15 2:47 PM 10/16/15 2:47 PM... -
Page 32: Warranty
Neither DJG nor the Card Number: dealer selling this product authorized any person to create for it any ___________________________________________ other warranty, obligation, or liability in connection with this product. Signature: ___________________________________________ 4358-6840 Continuum.indd 63-64 4358-6840 Continuum.indd 63-64 10/16/15 2:47 PM 10/16/15 2:47 PM...
Need help?
Do you have a question about the Continuum and is the answer not in the manual?
Questions and answers