Table of Contents
Advertisement
Operating Instructions
Microwave Oven
For Commercial Use
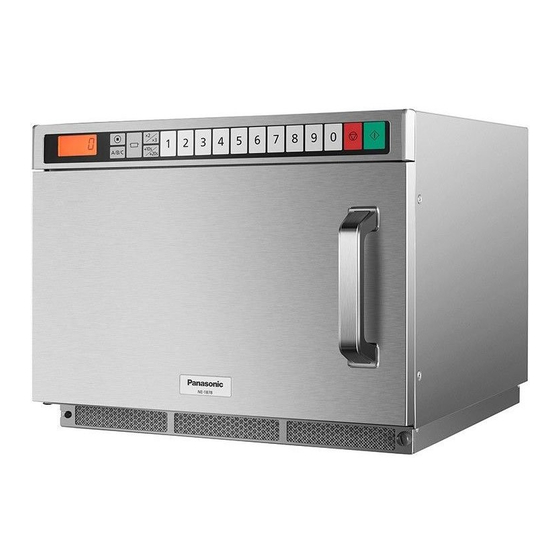
NE-1878
Model No.
Thank you for purchasing this Panasonic product.
CAUTION: Please read these instructions completely before operating this oven and keep for future reference.
Before using this product, please pay extra attention to "Important Safety Instructions" (pages 4-10).
Advertisement
Table of Contents

Subscribe to Our Youtube Channel
Related Manuals for Panasonic NE-1878


Summary of Contents for Panasonic NE-1878
- Page 1 For Commercial Use NE-1878 Model No. Thank you for purchasing this Panasonic product. CAUTION: Please read these instructions completely before operating this oven and keep for future reference. Before using this product, please pay extra attention to “Important Safety Instructions” (pages 4-10).
- Page 2 Information on Disposal for Users of Waste Electrical & Electronic Equipment (private households) This symbol on the products and/or accompanying documents means that used electrical and electronic products should not be mixed with general household waste. For proper treatment, recovery and recycling, please take these products to designated collection points, where they will be accepted on a free of charge basis.
-
Page 3: Table Of Contents
Class B means that this product may be used in normal household areas. Manufactured by: Panasonic Corporation, 1006 Oaza Kadoma, Kadoma City, Osaka, Japan Importer: Panasonic Marketing Europe GmbH... -
Page 4: Important Safety Instructions
If the plug contains a removable fuse cover, you must ensure that it is refitted when the fuse is replaced. If you lose the fuse cover, the plug must not be used until a replacement cover is obtained. A replacement fuse cover can be purchased from your local Panasonic Dealer. Fuse cover HOW TO REPLACE THE FUSE Open the fuse compartment with a screwdriver and replace the fuse. - Page 5 Important Safety Instructions VOLTAGE AND POWER WARNING The voltage used must be the same as specified on the microwave oven. Using another voltage than that which is specified is dangerous, and may result in a fire or other type of accident causing damage. Do not plug your oven in via an extension cable as this can be dangerous.
- Page 6 Important Safety Instructions WARNING 1. To reduce the risk of burns, electric shock, fire, injury to persons or excessive microwave energy: Read all instructions before using microwave oven. 2. If the door or door seals are damaged, the oven must not be operated until it has been repaired by a competent person.
- Page 7 Important Safety Instructions CAUTION 1. In order to maintain the high quality of the components, you are requested not to turn the oven on with no food inside. 2. High voltages are present inside the cabinet. Repairs and adjustments should be done only by qualified service personnel. 3.
- Page 8 Important Safety Instructions 12. DO NOT use this oven to heat chemicals or other non-food products. DO NOT clean this oven with any product that is labelled as containing corrosive chemicals. The heating of corrosive chemicals in this oven may cause microwave radiation leaks. 13.
- Page 9 Important Safety Instructions 20. If smoke is observed, unplug the oven, or shut off power at the fuse or circuit breaker, and keep the door closed in order to stifle any flames. 21. If the supply cord is damaged, it must be replaced by the manufacturer, its service agent or similarly qualified persons in order to avoid a hazard.
- Page 10 Important Safety Instructions 28. When the oven is not in use, it is recommended that items are removed. If left inside and the switch is accidentally activated, there is potential for damage to occur. 29. Do not use recycled paper products, as they may contain impurities which may cause sparks and/or fires when used, unless packaging states they are specifically designed for microwave use.
-
Page 11: Care Of Your Microwave Oven
Care of Your Microwave Oven Failure to maintain the oven in a clean condition could lead to deterioration of the surface that could adversely affect the life of the appliance and possibly result in a hazardous situation. 1. Remove the plug from the electrical socket before cleaning. 2. - Page 12 Care of Your Microwave Oven CLEANING OF THE AIR FILTER Clean the Air Filter regularly according to the following instructions. If the Air Filter becomes clogged with debris, this will cause an overheating problem with the oven. 1. Remove the Air Filter from the front bottom skirt by turning the right screw to the left.
-
Page 13: Types Of Container To Use
Types of Container to Use 1. GLASS DO USE: Heat resistant glass eg. Pyrex ® DO NOT USE: Delicate glass, lead crystal, etc, which may crack or arc. 2. CHINA/CERAMICS DO USE: Glazed china dishes, porcelain and ceramic dishes designed for cooking. DO NOT USE: Fine bone china dishes with metal patterns. - Page 14 Types of Container to Use 5. PLASTIC DO USE: High temperature plastic like Durable Polysulfon rather than soft flexible dishes. (Remove any metal twist ties.) DO NOT USE: Container made from Melamine, Polypropylene, Phenol Urea, also do not use plastic food storage bags and containers eg.
-
Page 15: Before Use
Before Use Cookware Other Helpful Instructions For best results 1. Heat-proof glassware, such as Pyroceram and 1. As microwave cooking times are much shorter Pyrex , is best suited for use in the Microwave ® than other cooking methods it is essential that Oven. -
Page 16: Definitions And Feature Explanations
Definitions and Feature Explanations This oven has many features not typically found on other commercial Microwave Ovens. FEATURE EXPLANATION Manual Heating Gives the user maximum flexibility to set the oven to desired heating time (See pages 18-20.) and power level. Ideal for menus that require variations in heating. Single Stage Heating Allows the oven to run at the selected power level for the selected heating (See pages 18-19.) -
Page 17: Outline Diagram
Outline Diagram ❶ ❷ ❸ ❹ ❺❻ ❼ ❽ ❾ Caution label is attached on the outside surface. 1 Digital Display Window (see below) 9 Start Pad 2 Prog (Program) Pad Door Handle 3 Shift (A/B/C) Pad Air Filter 4 Power Level Selector Pad ... -
Page 18: How To Operate
How to Operate POWER LEVEL SELECTOR PAD Each time the pad is touched, the Power Level switches as the illustration below. again. HIGH P10: 1800 W* DEFROST 340 W MEDIUM HIGH HEAT FROM PU1: TOP DOWN PU2: HEAT FROM PL1: MEDIUM BOTTOM UP PL2:... -
Page 19: Manual 2 To 5 Stage Heating
How to Operate 7. Open the door and take the food out. The oven lamp will turn on. The digital display will show the originally selected time and heating stage number. REPEAT FEATURE 1. You can repeat exactly the same manually selected heating time by touching only Start Pad, if you use the oven again within 1 minute. -
Page 20: Programming Memory Pads For Single Stage Heating
How to Operate 7. Open the door and take the food out. The oven lamp will turn on. The digital display will show the originally selected time and heating stage number. 8. Close the door. The oven lamp will turn off and 1 minute later the Digital Display Window will go blank. -
Page 21: Programming Memory Pads For 2 To 5 Stage Heating
How to Operate D. Programming Memory Pads for 2 to 5 Stage Heating 1. Follow Steps 1-5 in “C. Programming Memory Pads for Single Stage Heating” on page 20. 2. Select Power Level for the second stage by touching Power Level Selector Pad. The selected Power Level will be displayed in the window and the second stage heating indicator “2”... -
Page 22: Programming Double/Triple Quantity Pad
How to Operate 5. When all the time expires, the end of the cycle beep tone will sound. All heating will stop. The time display will blink “0000” until the door is opened. 1 minute later, cooling fan will stop. 6. -
Page 23: Memory Pad Heating For Double/Triple Quantity Heating
How to Operate G. Memory Pad Heating for Double/Triple Quantity Heating Make sure the unit is properly programmed. (See page 22.) 1. Follow Steps 1-2 in “E. Memory Pad Heating” on page 21. 2. Touch Double/Triple Quantity Pad once. Note: When you want triple quantity heating, touch Double/Triple Quantity Pad twice. -
Page 24: To Read The Cycle Counter
How to Operate I. To Read the Cycle Counter To display total cooking hours ever used 1. Open the door and leave it open. The oven lamp will turn on. “0” will appear in the display. 2. While touching Start Pad, touch Number Pad “3”. Total cooking hours ever used will appear. -
Page 25: To Read Program List
How to Operate L. To Read Program List 1. Open the door and leave it open. 2. While touching Start Pad, touch Number Pad “1”. All currently programmed information (the program set into each Number/ Memory Pad (A0 to C9), Beep Tone, Program Lock, Oven Lamp settings when the door is open, Oven Lamp blink settings at the end of heating cycle and Oven Lamp reduction settings during cooking information) will continuously appear. -
Page 26: To Select Beep Tone Options
How to Operate M. To Select Beep Tone Options The oven can not be programmed until the program lock feature is deactivated. (See page 24, K. To Deactivate Program Lock.) The beep tone can be set for loudness—(4 Levels), length of tone—(3 Options), pitch of tone—(3 Options) and pitch of filter cleaning alarm—(3 Options). -
Page 27: Procedure To Program The Air Filter Cleaning Cycle
How to Operate To Select Pitch of Tone There are 3 options for the pitch of tone at the end of the heating cycle. : Low, : Normal (Factory Setting), : High 7. Within 3 seconds after touching Prog Pad at Step 6, touch Start Pad. A. -
Page 28: Oven Lamp
How to Operate 4. Set the desired cleaning cycle by touching the appropriate Number Pads. (Up to 9999 hours) [Example]: Touch Number Pads “1”, “0” and “0” for 100 hours. To Program the Second Stage 5. Touch Start Pad. The display will show the length of time (in hours) between cleaning the Air Filter you have programmed in or the original time preset by the manufacturer. -
Page 29: Digital Display Window At The End Of Heating Cycle
How to Operate 2. While touching Start Pad, touch Number Pad “9”. “PROG” will start to blink. The previously set Oven Lamp settings are displayed. 3. Touch Start Pad. Note: “on” “oFF” “on” is repeated each time the Pad is touched. 4. -
Page 30: Before Cooking
Before Cooking Microwave Basics General Guidelines for Heating in a Microwave Oven Fundamental principles determine the success of microwave food preparation. For specific time, see each food category for They include: appropriate heating techniques, plus necessary pre-preparation of foods. 1. Temperature of Foods — Frozen or refrigerated food items will require longer Heating Foods from Refrigerated Temperature heating times to reach a desired serving... -
Page 31: Cooking Instructions - Heating And Defrosting Time Charts
Cooking Instructions – Heating and Defrosting Time Charts – The times given in the chart below are a guideline only. Many factors eg starting temperature of the food can affect the final heating time required. The cooking and defrosting times must be adjusted when necessary. All times are t ested using foods at starting temperatures as below;... - Page 32 Cooking Instructions – Heating and Defrosting Time Charts – Function Food Weight Power Level Approx. Time Other 500 g MEDIUM (P4) Melt Chocolate 2 min 30 sec Stir halfway. 50 g LOW (P3) 1 min 40 sec Melt Butter 500 g MEDIUM HIGH (P6) 2 min-2 min 30 sec Cut into 3 cm cube.
-
Page 33: Self Diagnostics Failure Code Explanation
Fig. 1. 2. For stacking installation, you must use the 2. Loosen the screw b. Panasonic Joint Plate A1134-3E11 (Available 3. The projection on the Joint Plate must face via service route). away from the oven. Place the Joint Plate on 3. -
Page 34: Specifications
Specifications Power Source 50 Hz, single phase 230 – 240 V Required Power 11.6 A 2650 W Output* HIGH P10: 1800 W* MEDIUM HIGH P9: 90% P8: 80% P7: 70% P6: 60% MEDIUM P5: 50% P4: 40% P3: 30% P2: 25% DEFROST P1: 340 W P0: 0%... - Page 35 – 35 –...
- Page 36 Panasonic Corporation A00033J90BP Website: http://www.panasonic.com F0518-0 © Panasonic Corporation 2018 Printed in Japan...
Need help?
Do you have a question about the NE-1878 and is the answer not in the manual?
Questions and answers