Table of Contents
Advertisement
User's Manual
Model ______________
STRC1400
WARNING
Read all precautions and
instructions in this manual before
using this equipment. Save this
manual for future reference.
Maximum user weight 200 lbs
IMPORTANT
Trampoline and Enclosures are
susceptible to winds. Be sure to
secure your trampoline and enclosure.
Wind Damage is not covered in the
warranty of your trampoline
Advertisement
Table of Contents

Summary of Contents for Skywalker STRC1400
- Page 1 User’s Manual Model ______________ STRC1400 WARNING Read all precautions and instructions in this manual before using this equipment. Save this manual for future reference. Maximum user weight 200 lbs IMPORTANT Trampoline and Enclosures are susceptible to winds. Be sure to secure your trampoline and enclosure.
-
Page 2: Table Of Contents
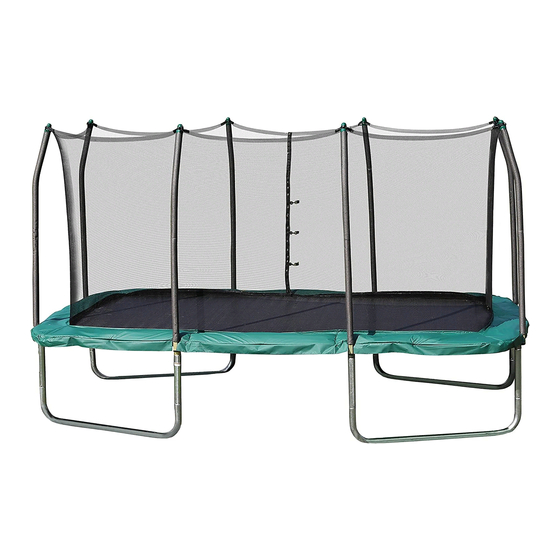
______ Model STRC1400 A serial decal is found on one of the trampoline legs. Model number decal tag is located on the jumping mat. CONTENTS Important Precautions...........3 Warning Label Placement........4 Before You Begin..........4 Trampoline Safety Information......5 Enclosure Safety Information.......6 Methods of Accident Prevention......7 Use and Instructional Material......8... -
Page 3: Important Precautions
USE INSTRUCTIONS WARNING To reduce the risk of serious injury, read and follow all of the warnings, precautions, and instructions in this manual before you use the trampoline enclosure. Warnings and instructions for care, maintenance, and use of this trampoline and enclosure are included to promote safe, enjoyable use of this equipment. It is the responsibility of the owner and supervisors of the Do not attach anything to the enclosure barrier that is not a trampoline and enclosure to make sure all users obey the safety... -
Page 4: Warning Label Placement
BEFORE YOU BEGIN Thank you for choosing your Skywalker Trampolines brand Trampoline. Skywalker Trampoline rectangle Trampolines are designed and crafted to provide many years of fun and fitness. This trampoline comes equipped with warnings and instructions for the assembly, care, maintenance, and use of the trampoline. -
Page 5: Trampoline Safety Information
TRAMPOLINE SAFETY INFORMATION In trampoline use, as in all active recreational sports, participants can be injured. However, there are steps that can be taken to reduce the risk of injury. In this section, primary accident patterns are identified and the responsibilities of supervisors and jumpers in accident prevention are described. -
Page 6: Enclosure Safety Information
ENCLOSURE SAFETY INFORMATION NEED FOR TRAMPOLINE ENCLOSURE SAFETY A trampoline enclosure is a recreational product. The information on this page and on pages 7-9 identify important safety precautions. The precautions are not all-inclusive, because an enclosure can be used in ways that this manual cannot cover completely. To prevent pinches and cuts during enclosure use, a frame pad must be installed on the trampoline (See the trampoline manufacturer’s instructions). -
Page 7: Methods Of Accident Prevention
METHODS OF ACCIDENT PREVENTION The Supervisor's Role in Preventing Accidents It is the responsibility of the supervisors of trampoline users to provide knowledgeable and mature supervision. They need to know and enforce all of the rules and warnings printed in this manual to minimize the likelihood of accidents and injuries. - Page 8 • Wear clothing that does not have drawstrings, hooks, loops or anything else that could get caught while using the trampoline/enclosure and result in entanglement or strangulation, or both. • Do not attach anything to the netting that is not a Skywalker Trampolines approved accessory or part of the of the trampoline enclosure.
-
Page 9: Use And Instructional Material
D-ring on the jump mat and that the horizontal clips are attached to the D-rings on the enclosure netting, both during use and after use. For additional information regarding equipment, contact Skywalker Holding, LLC. For additional information regarding skill training, contact a trainer certification organization. - Page 10 To secure the enclosure net opening before, during or after use, attach the Zipper Pull Clip attached the D-ring to the zipper loop as shown. Opening of the enclosure the first net hole zipper loop the first D- ring zipper pull clip Locked postition to secure Enclosure door opening ENTERING AND EXITING THE TRAMPOLINE ENCLOSURE The Trampoline should be used only under the appropriate adult supervision.
-
Page 11: Instructional Program And Model Lessons
INSTRUCTIONAL PROGRAM AND MODEL LESSONS The following lessons are examples of an instructional program. They should follow a complete discussion and demonstration of body mechanics between the supervision and the student(s). See also page 12. 1. Mounting and dismounting (getting on and off)-Demonstration and practice of proper techniques. 2. - Page 12 Lesson 5: Seat Drop Lesson 6: Front Drop 1. Review and practice of skills already learned. 1. To save time and avoid mat (bed) burns, all students should 2. Land in a sitting position with your legs parallel to the be requested to assume the front drop position on the floor mat.
-
Page 13: Assembly
ASSEMBLY ASSEMBLY (PUTTING THE TRAMPOLINE AND ENCLOSURE TOGETHER) IMPORTANT ASSEMBLY INFORMATION • Need phillips screw driver (included with trampoline) and 2 adjustable wrenches (for putting the trampoline together). A rubber mallet is also recommended to make assembly easier. • Assembly requires two adults. Keep children away from the trampoline and enclosure until they are completely put together. •... - Page 14 Repeat steps 1 and 2 other time to assemble one more leg sections. The two leg sections A will be completed 3. Lay the Left corner tube(5) and the Middle tube(2) on the ground in the position as shown, make sure the tubes are turned , so the small holes (spring hole ) are facing the ground Insert the Middle tube (2) into the Socket of the Left corner tube(5) as shown.
- Page 15 Note:This step requires two persons. Flip leg sections over so that the spring holes are now facing the sky instead of the ground. Stand two leg sections and hold them in the position as Large end shown. Slide the large end of one of the remaining Top Tubes onto the small end of the indicated Top Tube on one of the leg sections.
- Page 16 NOTE: Inspect the attachments of the enclosure netting to the trampoline mat (bed). Make certain each of the V-rings on the trampoline mat (bed) is threaded through the corresponding “buttonhole” in the netting. Note: There are 84 V-rings around the edge of the Mat (9) V-ring and 84 holes around the top of the frame.
- Page 17 Safety Note: Do not use the trampoline without the frame pad The Frame Pad is designed to reduce the possibility of injuries due to jumpers coming in contact with the trampoline frame. If you do not have a Frame Pad, contact your dealer to obtain one.
- Page 18 ENCLOSURE ASSEMBLY Make sure that you understand the information in the 2 Screw Holes box at the top of page 13. for pole cap (1) 1. Lay one Straight Tube (5) with foam and one Curved Tube (6) with foam (8) on the ground, insert the Straight Tube(5) into the curved tube(6) end that contains only one screw hole, secure with the screw(4).
- Page 19 3. Attach the Jump Mat to the trampoline frame by refer- ring to steps 7 in the trampoline assembly 4 . Attach the Frame Pad to the trampoline frame. Refer to step 8 in your trampoline assembly for further instruction Holes Strap Note: There is a Hexagon hole on the pole cap (1) with a nut...
- Page 20 Note: In Step 5 you will secure the enclosure poles Inset drawing to the frame of the trampoline. Jump Mat Start from the enclosure door, lift one of the poles assembled in Step 1, see the insert drawing. Insert the Straight Tube(5) through frame pad into the top hole of the Square Socket on trampoline frame as shown.
- Page 21 . Insert the end cap(3) into the bottom hole of the Socket. Insert end cap (3) into end of Socket Your trampoline enclosure is now fully assembled (put together). Make sure that all parts are securely attached. Familiarize yourself and all users with the trampoline and enclosure with the safety precautions, use and instructional materials, and care and mainte- nance instructions in this manual before using the...
-
Page 22: Care And Maintenance
WARNING TRAMPOLINE AND ENCLOSURE CARE AND MAINTENANCE Care To avoid damage to the trampoline and enclosure, do not allow pets or animals inside the enclosure. The trampoline is intended to be used by one person at a time who weighs not more than 200 pounds. The user should be either barefoot, wearing socks, or wearing gymnastic shoes. -
Page 23: Parts List
Climb on and off the trampoline. Do no jump on or off. Do not use the trampoline as a springboard to other tools objects. For further equipment information contact SKYWALKER TRAMPOLINES. For skill training information, contact a trainer certification organization. twl3... -
Page 24: Ordering Replacement Parts
PARTS LIST FOR ENCLOSURE . y t . y t Pole Cap M5x50mm Bolt Mesh with straps End Cap t - f 1 set Screw Driver s ’ r # These parts are not illustrated. Specifications are subject to change without notice End Cap t - f Pole Cap... -
Page 25: Limited Warranty
Skywalker Holdings, LLC authorized service center, or to products used for commercial or rental purpose. No other Warranty beyond that specifically set forth above is authorized by Skywalker Holdings, LLC.
Need help?
Do you have a question about the STRC1400 and is the answer not in the manual?
Questions and answers