bora CI11 Operating And Installation Instructions
Induction glass ceramic cooktop with 2 cooking zones
Hide thumbs
Also See for CI11:
- Operating and installation instructions (29 pages) ,
- Operating and installation instructions (28 pages)

Related Manuals for bora CI11


Summary of Contents for bora CI11
- Page 1 Operating and installation instructions CI11 Induction glass ceramic cooktop with 2 cooking zones CI11UMEN-000 1034795 www.bora.com...
- Page 2 T +49 (0) 8035 / 907-240 F +49 (0) 8035 / 907-249 info@bora.com www.bora.com The distribution and duplication of this document, as well as the use and disclosure of its contents are prohibited unless expressly authorised. © BORA Lüftungstechnik GmbH, 2014 All rights reserved.
-
Page 3: Table Of Contents
Switching on the power setting ..... 19 6.1.5 Switching the power setting off early .... 19 6.1.6 Switching off the cooking zone ..... 19 6.1.7 Pause function ..........19 6.1.8 Automatic heat up function ......19 6.1.9 Heat retention level ........20 www.bora.com... -
Page 4: General
General General INFO BORA Holding GmbH, BORA Vertriebs GmbH & Co KG, BORA APAC Pty Ltd and BORA Lüftungstechnik GmbH - hereinafter referred Target group to as BORA - shall not assume any liability for damage caused by non-compliance with these... - Page 5 CAUTION Indicates a possible hazard- ous situation which can cause minor injury if not respected. — CAUTION Indicates a situation which can cause minor injury if not respected. Tab. 1.2: Meaning of the warning symbols and signal words www.bora.com...
-
Page 6: Safety
Ensure a normal and comfortable indoor climate perty damage (see the Cleaning chapter). (45-60% humidity), e.g. through natural ventilation openings or domestic ventilation systems. www.bora.com... -
Page 7: Safety Instructions, Operation
Damage caused by hard and pointed objects! Hard and pointed objects may cause damage to the glass ceramic plate of the cooktop. Do not use the cooktop surface as a kitchen worktop. Do not use any hard and pointed objects when working on the cooktop. www.bora.com... -
Page 8: Safety Instructions, Assembly
Work on the gas connection may only be carried out by an 3 mm (miniature and automatic circuit authorised gas fitter in accordance with legal applicable breakers, fuses, contactors). regulations. Comply with local regulations of the utility companies. www.bora.com... -
Page 9: Safety Instructions, Spare Parts
Dispose of packaging correctly and promptly. BORA shall not assume any liability for damages caused by improper use or incorrect operation. Safety instructions, spare parts All misuse is prohibited! -
Page 10: Technical Data
Ø220 mm 2300 W power setting 3700 W Cooktop energy consumption Front cooking zone Ø155 mm 194.4 (Wh/kg) Back cooking zone Ø220 mm 176.4 (Wh/kg) Total (average) 185.4 (Wh/kg) Tab. 3.1: Technical data Device dimensions Fig. 3.1 Device dimensions www.bora.com... -
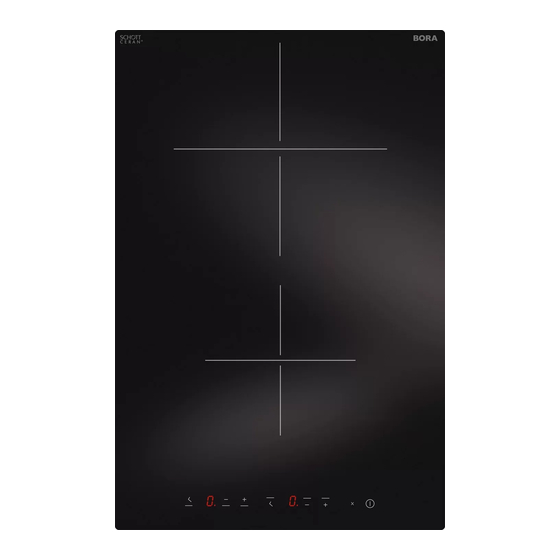
Page 11: Device Description
Indicator light for the activated timer [11] Cooking zone indicator [12] Timer button Fig. 4.1 Cooktop Front surface induction cooking zone Back surface induction cooking zone Operating panel for the back cooking zone Operating panel for the front cooking zone www.bora.com... -
Page 12: Functional Principle
The induction automatically takes into account the size of the used cookware which means that only the area in the cooking zone covered by the base of the pot is heated up. Observe the minimum pot base diameter (see the Technical data chapter). www.bora.com... -
Page 13: Automatic Heat Up Function
The pause function is limited to a maximum duration of 10 minutes. 4.3.7 Timer functions You can use 2 timer functions: Short-time timer (egg timer), no automatic switching off of a cooking zone. Automatic cut-off for automatically switching off a cooking zone. www.bora.com... -
Page 14: Safety Devices
02:00 08:40 06:45 05:15 04:20 03:30 02:45 hours:minutes Power level Switch off after 02:20 01:45 01:30 hours:minutes Tab. 4.5: Overview of the safety shut-down Switch the cooking zone back on (see Operating control) if you want to put the cooking zone back into operation. www.bora.com... -
Page 15: Installation
Check the scope of delivery for damage and make sure it is complete (see ). If there are any missing or damaged parts, please notify BORA Customer Services. Do not under any circumstances install parts which are damaged. Dispose of transport packaging in the proper manner (see Decommissioning and Disposal chapter). -
Page 16: Cut-Out Dimensions
Fig. 5.4 Surface installation Fig. 5.2 Flush installation Fig. 5.5 Surface mounting cut Cut-out dimensions when installing cooktops or cooktops and the BORA cooktop extractor next to each other: Cooktops / cooktop extractor A in mm B in mm Fig. 5.3 Flush installation cut... -
Page 17: Installing The Cooktop
The drawers and/or shelves in the floor unit must be Both designations can be found on the nameplate on removable for maintenance and cleaning purposes. the underside of the device. 5.5.1 Installing the cooktop Fig. 5.9 Built-in cooktop with cooktop extractor www.bora.com... -
Page 18: Power Connection
Explain all safety-relevant aspects of operation and Mounting bracket handling to the user. Fasten the cooktop [1] using the mounting bra- Provide the user with the accessories and operating ckets [2]. and installation instructions to be kept in a safe place. www.bora.com... -
Page 19: Operation
If a cooking zone is operated at power setting , the other show that the automatic heat up function is activated cooking zones can be operated at a maximum power level as well as the continuous cooking stage set, for example www.bora.com... -
Page 20: Heat Retention Level
Press the timer button Press until the timer display shows Each indicator light will blink and will appear in the cooking zone indicator. press simultaneously. The time in the timer display is immediately set to Press to set the required time. www.bora.com... -
Page 21: Activating/Deactivating The Childproofing Feature
The cooktop is switched on. Press the sensor buttons for the front cooking zone and for the back cooking zone at the same time. Then press the sensor button for the back cooking zone again. The child safety lock is deactivated. www.bora.com... -
Page 22: Cleaning And Maintenance
Do not push or pull cookware across the cooktop. Always lift pots and pans. Keep the cooktop clean. Remove any kind of soiling immediately. Only use cookware which is suitable for glass ceramic cooktops (see the Device description chapter). www.bora.com... -
Page 23: Troubleshooting
Tab. 8.1: Resolving a fault In all other instances, call BORA After Sales Service (see the Warranty, After Sales and Spare parts chapter). www.bora.com... -
Page 24: Decommissioning, Disassembly And Disposal
Therefore do not dispose of your old appliance as household waste. Take the old appliance to a regional collection centre for return and recycling of electronic and electrical parts and other materials. www.bora.com... -
Page 25: Warranty, After Sales Service And Spare Parts
10.3 Spare parts Only use original spare parts when making repairs. INFO Spare parts can be obtained from your BORA dealer, the BORA online service website at www.bora.com/service or by calling the service number provided. - Page 26 Notes: 11 Notes: www.bora.com...
- Page 28 F +49 (0) 8035 / 907-249 F +61 297 /124 131 info@bora.com info@boraapac.com.au www.bora.com www.boraapac.com.au Austria: BORA Vertriebs GmbH & Co KG Prof.-Dr.-Anton-Kathrein-Straße 3 6342 Niederndorf Österreich T +43 (0) 5373 / 62250-0 F +43 (0) 5373 / 62250-90 mail@bora.com www.bora.com...
Need help?
Do you have a question about the CI11 and is the answer not in the manual?
Questions and answers