
Related Manuals for flyscooters cadenza


Summary of Contents for flyscooters cadenza
- Page 1 Owner’s Manual Model: Cadenza Engine: 150cc Read this manual carefully. It contains important safety information. No one under the age of 16 should operate this scooter.
- Page 2 Flyscooter. We would also like to remind you to carefully review Flyscooters’ warranty policy available at www.flyscooters.com. To activate your warranty coverage, you must register online at www.flyscooters.com, under the section titled Rider Support and...
-
Page 3: Table Of Contents
Table of Content Front fork inspection ....34 SAFETY INFORMATION Fittings ........... 18 Steering inspection ...... 35 Important safety information..1-2 Lights, signals & switches ..18 Fuse replacement ......36 DESCRIPTION Mirrors ..........18 Battery ..........37 Left & right views ......3 Fuel .......... -
Page 4: Safety Information
Safety Information Important Safety Information Understanding the challenges that you will face when operating a scooter will greatly improve your safety and enjoyment on the roads. There are many things that you can do to protect your- self when riding. You will find many helpful recommendations throughout this manual. The following are a few points that we consider most important. - Page 5 Safety Information Ride Within Your Limit Pushing your limits is a common cause of scooter accidents. Never ride beyond your personal abilities or faster than conditions warrant. Remember that alcohol, drugs, fatigue and inatten- tion can significantly reduce your ability to make good decisions and to ride safely. Keep Your Scooter In Safe Operation For safe riding, it is important to inspect your scooter before every ride and perform recom- mended maintenance in accordance to the maintenance chart or when needed for safe opera-...
-
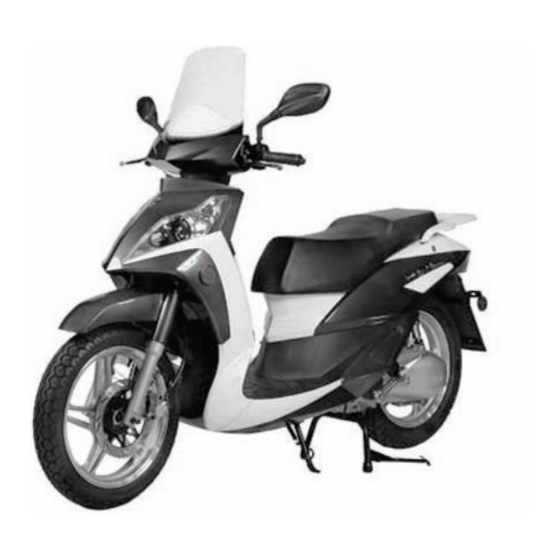
Page 6: Description
Description 1. R & L rear view mirrors 7. Air filter 13. Kick starter 2. R & L brake levers 8. Seat lock 14. Side stand 3. Helmet hook 9. Brake light 15. Muffler 4. Instrument panel 10. License plate holder 16. - Page 7 Description Speedometer Fuel Gauge Speed is indicated by mp/h and km/h on The fuel guage indicates the level of fuel speedometer. remaining in the fuel tank. It does not work when main switch is in the “OFF” position. Odometer Use only 90 octane or higher gasoline. The white digits in the black background High Beam Indicator indicates total miles traveled.
- Page 8 Description 1. Speedometer 2. Odometer 3. Tachometer 4. Turn Signal Indicators 5. High Beam Indicator 6. Fuel Gauge 7. Brake light 8. Clock - 5 -...
-
Page 9: Instrument Control Main Switch
Instrument Control Main Switch “ON” Position: “LOCK” Position: Electrical circuits are switched on. The The steering column is locked when in this engine can now be started by pressing the position. The ignition key can be removed. electric ignition button or by manually kick starting the engine. -
Page 10: Steering Lock
Instrument Control Turn the handlebar fully to the left and lock the steering column to prevent theft. 1. Push the key inward on the main switch. 2 . Turn the key fully to “LOCK” position. 3. Pull to remove the key. - 7 -... -
Page 11: Handlebar Switches
Instrument Control 1. Dimmer switch 4. Light switch Your scooter is designed to have High beam is on. constant running lights, in accordance Low beam is on. with DOT requirements. Lights can not 2. Turn signal switch be turned off. Use switch to signal your intention to 5. -
Page 12: Fuel Tank Cap
Instrument Control Seat Storage Access Gas Tank Access To access the storage compartment under the seat, insert the key into the lock and turn as shown below. Return the seat to its origi- nal position and press down to engage the lock. -
Page 13: Front / Rear Brake Lever
Instrument Control Rear Brake Lever Front Brake Lever The rear brake lever is located on the The front brake lever is located on the left handlebar. Squeeze the lever slowly right handlebar. Squeeze the lever to apply rear brake. slowly to apply front brake. - 10 -... -
Page 14: Glove Box Compartment
Instrument Control Glove Box Storage Compartment A built-in glove box storage compartment can be found in front, directly underneath the handle bars. To access this storage space, unlock the compartment with the ignition key. - 11 -... -
Page 15: Pre-Operation Check
Pre-operation Checks Pre-operation Checks Pre-operation checks should be made each time the scooter is ridden. This inspection can be accomplished in a very short time. The added safety of pre-operation checks is more than worth the time involved. ITEM SUMMARY PAGE Check operation, freeplay, fluid level and leakage. -
Page 16: Pre-Operation Check
Do not operate the scooter until the problem in the brake system has been corrected. Visit an authorized Flyscooters dealer for immediate repair. Check for correct free play in the brake levers and adjust them if necessary. Make... - Page 17 If any leakage is found, stop riding the scooter immediately and contact an authorized Flyscooters dealer for servicing. - 14 -...
-
Page 18: Throttle
Use only quality tion by spring force when it is released. motor oil with ratings of 10W-40. Ask an authorized Flyscooters dealer to make any necesary adjustments. - 15 -... -
Page 19: Tires
Pre-operation Checks Tire check To ensure maximum performance, longer durability, and safe operation, always check and adjust the tire pressure before each ride. The tire pressure must be adjusted accord- ing to the total weight of the cargo, rider, passenger, accessories, and vehicle speed. Refer to each tire wall for the proper inflation pressure guide. - Page 20 Tire Check Always check the tires before operating your The total weight of the cargo, rider, passen- scooter. Contact an authorized Flyscooters ger and accessories should not exceed the dealer to replace the tire immediately if the maximum loading limit of your scooter.
-
Page 21: Fittings
Always check that the chassis fittings and Adjust mirrors as shown in the illustration fasteners are tight before a ride. Take your below to ensure maximum visibility. scooter to an authorized Flyscooters dealer for proper torque adjustment every six months. Lights, Singals, and Switches Check all the lights. -
Page 22: Fuel
Pre-operation Checks Fuel *Use only high quality 90 octane or Fill the fuel tank up to the bottom of the filler higher unleaded gasoline. tube as shown in this illustration. Over-filling the tank can flood the fuel system, results in the scooter not starting and/or stalling out under normal operating conditions. -
Page 23: Operation
Operation Starting the Engine Only start the engine when your scooter is at a Completely release the throttle grip. complete stop. Check to be sure that all kick Squeeze and hold either brake lever. stands are returned to their original position. Press the electric starter switch. -
Page 24: Starting Off
Twist the throttle slowly to accelerate. within a short time. You must operate your scooter in an area with adequate ventila- * Flyscooters higly recomments taking a tion. riders safety course prior to riding. - 21 -... -
Page 25: Acceleration
Operation Acceleration Parking The speed of your scooter can be adjusted by When parking your scooter, look for a flat and twisting the throttle grip. Turning the grip firm surface to stop. Make sure there is no toward you increases the speed. Turning it gravel or other objects that can make the away from you decreases the speed. -
Page 26: Break-In Period
Operation Engine Break-in Period The most important period in the life of your Keep the riding speed below 50 miles per scooter is the period between 0 to 500 miles. hour within the first 500 miles. For this reason we ask that you carefully read 1. -
Page 27: Periodic Maintenance
This section is provided to you for educational and reference purposes only. All service and maintenance should be done at an authorized Flyscooters dealer. Im- proper adjustments and repairs may void your warranty. Consult your Flyscooters dealer whenever possible for questions and concerns. -
Page 28: Maintenance Chart
Periodic Maintenance PERIOD MAINTENANCE CHART ITEM RIDING DISTANCE IN MILES Weekly 1,000 2,000 3,000 4,000 5,000 6,000 7,000 8,000 9,000 10,000 11,000 12,000 Engine Oil Fuel Filter Gear Oil Spark Plug Valve Clearance Cam Chain Carburetor Brake System Front Tire RearTire Air Filter Throttle and Brake Cables... - Page 29 Periodic Maintenance Engine Oil Check Place the scooter on the center stand. Note: Be sure the scooter is in the upright Warm up the engine for several minutes. position. A slight tilt to the side can result in Turn off the engine. Wait a few minutes a false reading.
- Page 30 Periodic Maintenance Engine Oil Replacement (see our video at flyscooters.com) Replace engine oil after the initial 300 miles. Clean the oil filter with solvent. Reinstall Thereafter, replace engine oil every 1000 miles. the filter and tighten the drain plug. Start the engine to warm up for a few min- Fill the engine with high quality 10W-40 utes.
-
Page 31: Gear Oil Replacement
Periodic Maintenance Gear Oil Replacement (see our video at flyscooters.com) Replace the gear oil after the first 300 miles. Caution Thereafter, replace gear oil again every six Do not let foreign material enter the gear months or 1,000 miles, whichever occurs first. -
Page 32: Cleaning Air Filter
Periodic Maintenance Air Filter Cleaning The air filter affects the performance and fuel Remove the air filter element. Wash it consumption of your scooter. Keep it clean! It gently but thoroughly in solvent, do not should be cleaned at intervals specified in this use water. -
Page 33: Spark Plug Inspection
Periodic Maintenance Spark Plug Inspection The spark plug is an important engine com- Before installing the spark plug, adjust the ponent. The condition of the spark plug can gap to 0.8mm with a gauge for best perfor- indicate the condition of the engine. There- mance. -
Page 34: Brake Fluid Check
Periodic Maintenance Inspection of Brake Fluid Level Insufficient brake fluid may allow air to enter When checking the brake fluid level, make the brake system, which causes the brakes to sure the reservior is level. Use only DOT4 become ineffective. Before riding, check that brake fluid when refilling. -
Page 35: Brake Fluid Replacement
Periodic Maintenance Brake Fluid Replacement A complete brake fluid flush should be done only by trained personnel at authorized Flyscooters dealerships. The following components should be replaced during periodic maintenance checks or when they become damaged. a. Replace all rubber seals every 2 years. -
Page 36: Center/Side Stand Lubrication
Periodic Maintenance Center and Side Stand Lubrication Lubricate the pivoting joints, while checking to see that the center and side stands move up and down smoothly. Check the torque of screws. Make sure the stands are securely tighted to the frame. Apply blue Locktite to kickstand bolts on initial check of scooter. -
Page 37: Front Fork Inspection
If any damage, oil leakage or jerky Place the scooter securely on the center movement is found with the front forks, stand for support and see if the forks are contact an authorized Flyscooters straight. dealer for repair. Operation Check: Place the scooter on a level surface. -
Page 38: Steering Inspection
Raise the front wheel does not turn smoothly. Consult an off the ground. Hold the lower end of the authorized Flyscooters dealer if any front forks and move them forward and abnormality is found. backward. If any free-play can be felt, ask an authorized Flyscooters dealer to inspect and adjust the steering. -
Page 39: Fuse Replacement
If there is no spare fuse, you can purchase damage and possibly a fire. fuses from your authorized Flyscooters dealer. Be sure to use a 15A fuse. If fuse blows, contact your dealer. -
Page 40: Battery
Periodic Maintenance Battery This scooter uses a sealed and non-refillable The battery will lose it’s charge if the scooter type of battery. It is unnecessary to check or is not operated for an extended period of add liquid. time. Remove the battery from the scooter when you do not plan to ride your scooter for more than a month. -
Page 41: Electric Circuit Diagram
Electric Circuit Diagram - 38 -... -
Page 42: Ecs Warranty
FLYSCOOTERS LLC – EMISSION CONTROL SYSTEM WARRANTY YOUR WARRANTY RIGHTS AND OBLIGATIONS The emission control system warranty period for this vehicle begins on the date the vehicle is delivered to the first purchaser other than an authorized dealer, or the date it is first used as a demonstrator, lease, or company vehicle, whichever comes first and continues for 30 months after that date, or 5,000km, whichever comes first, provided there has been no abuse, neglect or improper maintenance of your vehicle.
Need help?
Do you have a question about the cadenza and is the answer not in the manual?
Questions and answers