Table of Contents
Advertisement
Quick Links
Advertisement
Table of Contents

Summary of Contents for thomann DP-7U
- Page 1 DP-7U digital piano user manual...
- Page 2 Musikhaus Thomann e.K. Treppendorf 30 96138 Burgebrach Germany Telephone: +49 (0) 9546 9223-0 E-mail: info@thomann.de Internet: www.thomann.de 05.05.2014, ID: 325970...
-
Page 3: Table Of Contents
8.3 MIDI functions........................ 28 8.3.1 What is MIDI?....................... 28 8.3.2 USB connection......................29 8.3.3 MIDI connection......................29 8.3.4 MIDI applications ...................... 29 8.4 Troubleshooting......................30 Voice list............................ 31 Rehearsal and demo songs....................37 MIDI implementation chart..................... 39 Technical specifications....................41 DP-7U... - Page 4 Table of contents Plug and connection assignment................. 42 Protecting the environment................... 43 digital piano...
-
Page 5: General Notes
Our products are subject to a process of continuous development. Thus, they are subject to change. 1.1 Further information On our website (www.thomann.de) you will find lots of further information and details on the following points: Download This manual is also available as PDF file for you to download. -
Page 6: Symbols And Signal Words
General notes Instructions The individual steps of an instruction are numbered consecutively. The result of a step is indented and highlighted by an arrow. Example: Switch on the device. Press [Auto]. ð Automatic operation is started. Switch off the device. Cross-references References to other locations in this manual are identified by an arrow and the speci‐... -
Page 7: Safety Instructions
With loudspeakers or headphones connected, the device can produce volume levels that may cause temporary or permanent hearing impair‐ ment. Do not operate the device permanently at a high volume level. Decrease the volume level immediately if you experience ringing in your ears or hearing impairment. DP-7U... - Page 8 Safety instructions CAUTION! Risk of injury due to heavy weight Due to the heavy weight of the device, at least two persons are required for transport and installation. NOTICE! Operating conditions This device has been designed for indoor use only. To prevent damage, never expose the device to any liquid or moisture.
-
Page 9: Features
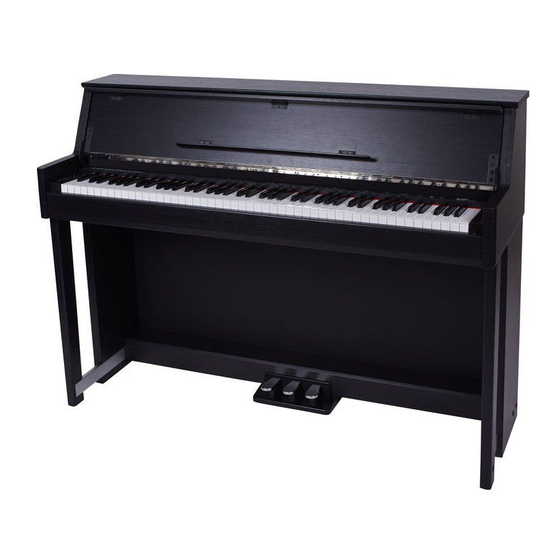
Speaker: 2 × 20 W, 8 Ω and 2 × 25 W, 8 Ω 3 pedals Connections: 2 × headphones out, stereo AUX IN/OUT, USB MIDI 2.0, MIDI IN/ Weight: 55 kg Dimensions (W × D × H): 1376 × 452 × 1008 mm Finish: matt black Automatic switchoff DP-7U... -
Page 10: Assembly Instructions
Assembly instructions Assembly instructions You need a Phillips screwdriver (not supplied) for the assembly of the digital piano. Open the package and please make sure before assembling that the entire scope of delivery is present, as posted here. 1. Digital piano housing 7. - Page 11 Attach the rear panel with each three screws 4 ´ 20 (4) to the pedal box (5) and to the rear sides of the side panels (2) and (3). Put the digital piano housing (1) on the stand and affix it using the two hand screws (9) and the two screws 6 ´ 12 (10). DP-7U...
- Page 12 Assembly instructions Insert the pedal cable plug into the PEDAL socket on the bottom side of the digital piano. Move the digital piano to its designated location. Connecting the power supply Make sure that the device is turned off before you connect it to the power supply or disconnect it.
- Page 13 Assembly instructions Plug the AC power cord into a properly wired mains wall outlet. DP-7U...
-
Page 14: Control Panel And Connections
Control panel and connections Control panel and connections Control panel left and right 1 Rotary control [VOLUME] to set the volume. 2 [START/STOP] button to playback rehearsal songs. 3 [FUNCTION] button. Press and hold this key while you call up a specific func‐ tion with a piano key. - Page 15 AUX IN Input for external audio devices like MP3 or CD players, playback via internal speakers. AUX OUT Output for external audio devices like active speakers or amplifiers. MIDI IN MIDI IN port Connect the MIDI OUT port of another MIDI device here. DP-7U...
- Page 16 Control panel and connections MIDI OUT MIDI OUT port Connect the MIDI IN port of another MIDI device here. USB USB/MIDI interface To connect a computer. Piano keys The keyboard keys are referred to in this manual as shown below. digital piano...
-
Page 17: Connectivity Options
– MIDI IN: The device receives MIDI data from other devices through this port. – MIDI OUT: MIDI data generated by the digital piano is sent to other MIDI devices through this port. DP-7U... -
Page 18: Switching On / Off And Basic Operation
Switching on / off and basic operation Switching on / off and basic operation 7.1 Switching the digital piano on 7.1.1 Normal switching on / off Press the On/Off switch to the right of the keyboard to switch the digital piano on or off. -
Page 19: Demo Song
The demo song is playing in an endless loop. Press the buttons [FUNCTION] and [DEMO L – R] again or the [ START/STOP] button, to stop playback and exit the current mode. During playback, the piano keys are muted. DP-7U... -
Page 20: Functions
Functions Functions 8.1 Rehearsal songs 8.1.1 Selecting, playing and stopping rehearsal songs The digital piano offers 60 rehearsal songs for practising in total (see Ä Chapter 10 ‘Rehearsal and demo songs’ on page 37). Keep the button [FUNCTION] pressed and press the [ START/STOP] button, to enter the playback mode for rehearsal songs. -
Page 21: Voices And Effects
Keep the [FUNCTION] button pressed and press the two desired piano keys in the [VOICE] area. Select the first voice with the first piano key and the second voice with the second piano key. If Dual mode is selected, the Split mode is automatically switched off. DP-7U... -
Page 22: Split Mode
Functions 8.2.3 Split mode With this function, you can assign different voices to certain keyboard areas. Keep the [FUNCTION] button pressed and press the piano key [Lower] in the [VOICE] area. This splits the keyboard automatically into two areas with dif‐ ferent voices. -
Page 23: Touch Sensitivity
Hard In this setting, the volume is lower than usual even when playing with a hard touch. Keep the [FUNCTION] button pressed and press one of the piano keys in the [TOUCH] area to adjust the touch sensitivity. DP-7U... -
Page 24: Digital Effects
Functions 8.2.6 Digital effects 8.2.6.1 Reverb and Chorus With the reverb and chorus functions you can simulate acoustic effects under dif‐ ferent environmental conditions. Keep the [FUNCTION] button pressed and press one of the piano keys in the [REVERB] or [CHORUS] area to adjust the desired effect. Piano key in the [REVERB] area in the [CHORUS] area... - Page 25 Functions 8.2.6.2 Equalizer effect The equalizer function allows three different settings. Keep the [FUNCTION] button pressed and press one of the piano keys in the [EQ] area to adjust the desired effect. Piano key Equalizer setting Standard Classic Modern DP-7U...
-
Page 26: Metronome
Functions 8.2.7 Metronome Turning the metronome on / off Keep the [FUNCTION] button pressed and press the piano key [ON/OFF] in the [METRONOME ] area to turn the metronome on or off. Setting the time signature Keep the [FUNCTION] button pressed and press one of the piano keys [0], [2], [3], [4], [5], [6] in the [METRONOME ] area to set the desired time signature. -
Page 27: Transposing
[TUNE] area to fine tune the keyboard. The value changes by 0.2 Hz in a range from –100 to +100 Hz per keystroke. – Press the [+] and [–] buttons in the [TUNE] area simultaneously to restore the default setting (0 Hz). DP-7U... -
Page 28: Key Tone
Functions 8.2.11 Key Tone With this function, you can turn the Key Tone on or off. By default, the Key Tone is turned on. Keep the [FUNCTION] button pressed and press the piano key [BEEP] to turn the Key Tone on or off. If you keep the [FUNCTION] button pressed and turn on the Key Tone, you will hear a beep tone every time you press a function button. -
Page 29: Usb Connection
Connect additional devices via the MIDI interface. 8.3.4 MIDI applications The digital piano can control other equipment or electronic instruments. You can use other devices to control the digital piano. The digital piano can play MIDI files from a computer. DP-7U... -
Page 30: Troubleshooting
Functions 8.4 Troubleshooting Problem Possible causes and solutions You hear a 'pop' sound from the speakers when switching the This is normal. No need to worry. digital piano on and off. No sound can be heard when playing the piano. Make sure that the volume control is set appropriately. -
Page 31: Voice List
Clavichord Music Box Vibraphone Marimba Drawbar Organ Percussive Organ Church Organ Church Organ 2 Reed Organ Rock Organ Accordion Harmonica Stereo Strings Stereo Strings 2 Synth Strings Choir Aahs Sweet Trumpet Soprano Sax Tenor Sax Sweet Oboe Pan Flute DP-7U... - Page 32 Voice list GM Voice list Pro. Bank Name Piano Acoustic Grand Piano Bright Acoustic Piano Electric Grand Piano Honky-tonk Piano Electric Piano 1 Electric Piano 2 Harpsichord Clavi Chromatic Percussion Celesta Glockenspiel Music Box Vibraphone Marimba Xylophone Tubular Bells Dulcimer Organ Drawbar Organ Percussive Organ...
- Page 33 Synth Bass 1 Synth Bass 2 Strings & Orchestral Instruments Violin Viola Cello Contrabass Tremolo Strings Pizzicato Strings Orchestral Harp Timpani Ensemble String Ensembles 1 String Ensembles 2 Synth Strings 1 Synth Strings 2 Choir Aahs Voice Oohs Synth Voice DP-7U...
- Page 34 Voice list GM Voice list Pro. Bank Name Orchestra Hit Brass Trumpet Trombone Tuba Muted Trumpet French Horn Brass Section Synth Brass 1 Synth Brass 2 Reed Soprano Sax Alto Sax Tenor Sax Baritone Sax Oboe English Horn Bassoon Clarinet Pipe Piccolo Flute...
- Page 35 Pad 7 (halo) Pad 8 (sweep Synth SFX FX 1 (rain) FX 2 (soundtrack) FX 3 (crystal) FX 4 (atmosphere) FX 5 (brightness) FX 6 (goblins) FX 7 (echoes) FX 8 (sci-fi) Ethnic Misc. Sitar Banjo Shamisen Koto Kalimba Bag Pipe DP-7U...
- Page 36 Voice list GM Voice list Pro. Bank Name Fiddle Shanai Percussive Tinkle Bell Agogo Steel Drums Woodblock Taiko Drum Melodic Tom Synth Drum Reverse Cymbal Guitar Fret Noise Breath Noise Seashore Bird Tweet Telephone Ring Helicopter Applause Gunshot Drums Standard Set Room Set Power Set Electronic Set...
-
Page 37: Rehearsal And Demo Songs
Dancing Raindrops Santa Claus Is Coming To Town From a Story Book Music Box Dancer Comin' 'Round the Mountain Symphony No.9 In E Minor Largo From ‘The New World’ Song of the Brook Larghetto Puck French Suites Cotton-pickin' Fingers DP-7U... - Page 38 Rehearsal and demo songs Demo song Name Fantasia digital piano...
-
Page 39: Midi Implementation Chart
Yes, 9nH, Yes, 9nH, v = 1 – 127 v = 1 – 127 Note OFF No, 9nH, Yes, 9nH, v = 0 v = 0 or 8nH, v = 0 – 127 After Touch Keys Channels Pitch Bend DP-7U... - Page 40 MIDI implementation chart Function Sent Received Notes Control Change Bank Select Modulation Portamento Time Data Entry Volume Expression Sustain Pedal Portamento ON/OFF Sostenuto Pedal Soft Pedal Reverb Program Chorus Program Reverb Level Chorus Level All Sound Off Reset All Controllers All Notes Off Program Change True #...
-
Page 41: Technical Specifications
(1/4" phone jack), AUX IN, AUX OUT, USB, MIDI IN, MIDI OUT Speaker 2 × 20 W, 8 Ω 2 × 25 W, 8 Ω Operating supply voltage 230 V (AC) Dimensions (W × D × H) 1376 mm × 452 mm × 1008 mm Weight 55 kg DP-7U... - Page 42 Plug and connection assignment Plug and connection assignment Introduction This chapter will help you select the right cables and plugs to connect your valuable equipment in such a way that a perfect sound experience is ensured. Please note these advices, because especially in ‘Sound & Light’ caution is indicated: Even if a plug fits into the socket, an incorrect connection may result in a destroyed power amp, a short circuit or ‘just’...
- Page 43 Dispose of this device through an approved waste disposal firm or through your local waste facility. When discarding the device, comply with the rules and regulations that apply in your country. If in doubt, consult your local waste disposal facility. DP-7U...
- Page 44 Notes digital piano...
- Page 45 Notes DP-7U...
- Page 46 Notes digital piano...
- Page 48 Musikhaus Thomann e.K. · Treppendorf 30 · 96138 Burgebrach · Germany · www.thomann.de...
Need help?
Do you have a question about the DP-7U and is the answer not in the manual?
Questions and answers