Table of Contents
Advertisement
Quick Links
Advertisement
Table of Contents

Summary of Contents for ASUSTOR AS-604RD/RS
- Page 1 Quick Installation Guide For Network Attached Storage Ver.1.1.0.0320...
-
Page 2: Table Of Contents
ASUSTOR NAS Quick Installation Guide Table of Contents Notices......................... 3 Safety Precautions ......................4 Package Contents ....................5 Hardware Installation Guide ................... 6 2.1. Hard Disk Installation ..................6 2.2. Connecting and Powering on the NAS ..............8 Software Installation Guide ..................9 3.1. -
Page 3: Notices
ASUSTOR NAS Quick Installation Guide Notices Federal Communications Commission Statement This device complies with FCC Rules Part 15. Operation is subject to the following two conditions: • This device may not cause harmful interference. • This device must accept any interference received, including interference that may cause undesired operation. -
Page 4: Safety Precautions
ASUSTOR NAS Quick Installation Guide Safety Precautions The following safety precautions will increase the life of the NAS. Follow all precautions and instructions. Electrical safety • Unplug this product from the power source before cleaning. • Use only the bundled power adapter. Using other power adapters may damage your device. -
Page 5: Package Contents
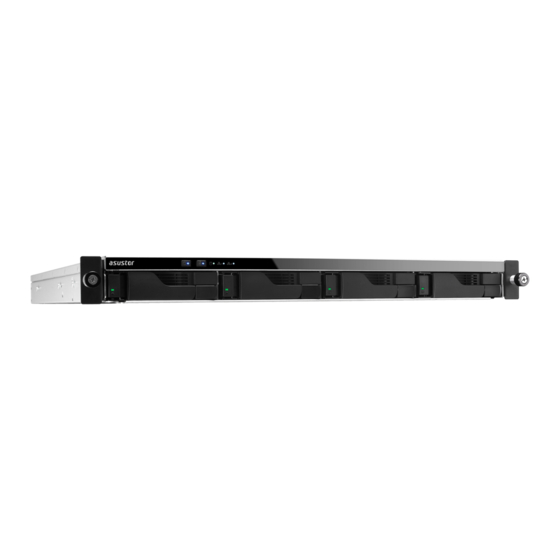
ASUSTOR NAS Quick Installation Guide Applicable Models: AS-604RD, AS-604RS, AS-609RD, AS-609RS Contents AS-604RD/RS AS-609RD/RS NAS device Power cord AS-604RD AS-604RS AS-609RD AS-609RS RJ45 network cable Screws for use with 3.5” HDD Screws for use with 2.5” HDD Installation CD Quick Start Guide... -
Page 6: Hardware Installation Guide
ASUSTOR NAS Quick Installation Guide All data stored on the hard disk(s) will be erased and CANNOT be recovered. Please back up all important data before initializing the system. 2.1. Hard Disk Installation Press the button on the lower portion of the hard disk tray to release the latch. - Page 7 ASUSTOR NAS Quick Installation Guide 2.5-inch hard disks and SSD hard disks: Place the hard disk into the area of the disk tray outlined in red (see picture below). Make sure that the mounting holes on the bottom of the hard disk and disk tray are lined up. Secure the drive with four screws.
-
Page 8: Connecting And Powering On The Nas
ASUSTOR NAS Quick Installation Guide 2.2. Connecting and Powering on the NAS Connect the NAS to its power supply. Connect the NAS to your router, switch or hub using an Ethernet cable. Press and hold down the power button for 1 – 2 seconds until the blue power LED indicator is lit. -
Page 9: Software Installation Guide
CD-menu. The installation wizard will install ASUSTOR Control Center onto your computer. After ASUSTOR Control Center has been installed, it will automatically begin to scan your network for ASUSTOR NAS devices. Select your NAS from the list and follow the installation wizard’s instructions to complete the configuration process. -
Page 10: Mac Users
The installation wizard will install ASUSTOR Control Center onto your computer. At this time you can also choose whether or not you want to install Download Assistant. After ASUSTOR Control Center has been installed, it will automatically begin to scan your network for ASUSTOR NAS devices. -
Page 11: Web Installation
ASUSTOR NAS Quick Installation Guide 3.2. Web Installation If you already know your NAS’s current IP address, you can open up a web browser and enter in your NAS’s IP address (for example: http://192.168.1.168:8000) to begin initialization. Please follow the instructions from the installation wizard to complete the configuration process. -
Page 12: Appendix
ASUSTOR NAS Quick Installation Guide 4.1. LED Indicators 1. Power LED Indicator 2. Inspection LED Indicator 3. System Status LED Indicator 4. Network LED Indicator 5. Hard Disk LED Indicator Color Description State Indicator Steadily lit Power on Blue Flashing... -
Page 13: Rear Panel
3. Certification 4.4. Troubleshooting Q: Why can’t I detect my ASUSTOR NAS using ASUSTOR Control Center? A: If you are having trouble detecting your NAS using ASUSTOR Control Center, please do the following: 1. Please check your network connection: a. Make sure that your computer and your NAS are part of the same local area network. - Page 14 ASUSTOR NAS Quick Installation Guide b. Click on [Change adapter settings] in the left hand panel. c. Right-click on [Local Area Connection] and select [Properties]. Page 14 of 16...
- Page 15 ASUSTOR NAS Quick Installation Guide d. Under the [Networking] tab select [Internet Protocol Version 4 (TCP/IPv4)] and click on [Properties]. e. Under the [General] tab select the [Use the following IP address] radio button. Set the [IP address] to 169.254.1.1 and the [Subnet mask] to 255.255.0.0 and then click on [OK].
- Page 16 ASUSTOR NAS Quick Installation Guide Open up ASUSTOR Control Center to scan for your NAS. 4. If the above mentioned procedures have not managed to solve your problem, please contact your local ASUSTOR dealer or ASUSTOR Customer Service. Page 16 of 16...
Need help?
Do you have a question about the AS-604RD/RS and is the answer not in the manual?
Questions and answers