Table of Contents
Advertisement
Available languages
Available languages
Advertisement
Chapters
Table of Contents

Summary of Contents for cahors TVT 280 HD
-
Page 3: Consignes De Sécurité
Consignes de sécurité Le récepteur ne doit être utilisé que branché à une prise 220-240V VAC 50Hz, à l’intérieur dans un endroit sec et aéré. La prise secteur sert de dispositif de sectionnement de l’alimentation 230V, même si l’appareil est éteint. La fiche d’alimentation doit être aisément accessible. - Page 4 ACCESSOIRES N’utilisez aucun accessoire non recommandé; cela pourrait être une source de danger ou endommager le récepteur. BRANCHEMENT SUR LA TV Débranchez l’appareil de l’alimentation principale avant de brancher ou de débrancher le câble TV. LE NON-RESPECT DE CETTE CONSIGNE POURRAIT ENDOMMAGER LA TV. EMPLACEMENT Placez le récepteur à...
-
Page 5: Introduction
Introduction Ce manuel vous aidera à apprendre les fonctions de base comme l’installation, la sélection des chaînes et les nombreuses autres fonctions de l’appareil. Toutes les fonctions peuvent être commandées à l’aide de la télécommande La télécommande est conçue pour accéder facilement à toutes les fonctions tout de suite et pour une tenue en main confortable. -
Page 6: Principales Caractéristiques
Principales caractéristiques • • Sortie Multimédia haute définition (HDMI) Compatible avec les standards de diffusion HD et SD • • Sortie composante YUV (Y/Pb/Pr) Sortie audio numérique optique: S/PDIF • • Sortie composite CVBS USB2.0 Host pour la lecture des fichiers vidéo et MP3, images JPEG et mise à... -
Page 7: Table Of Contents
Sommaire Consignes de sécurité ....................... 3 Introduction ........................5 Principales caractéristiques ..................... 6 Sommaire ........................... 7 Contenu ..........................8 Face avant / face arrière ....................9 Télécommande ......................... 10 Branchements sur l’adaptateur TNT ................13 Raccordement au Téléviseur ..................... 13 Sortie antenne (Loop Out) .................... -
Page 8: Contenu
Déballez l’appareil et vérifiez que tous les éléments suivants sont inclus dans l’emballage : 1 x télécommande 1 x manuel d’utilisation 2 x piles AAA 1 x adaptateur TNT HD TVT2 0HD Nous espèrons que vous prendrez plaisir à utiliser votre adaptateur TNT HD CAHORS. -
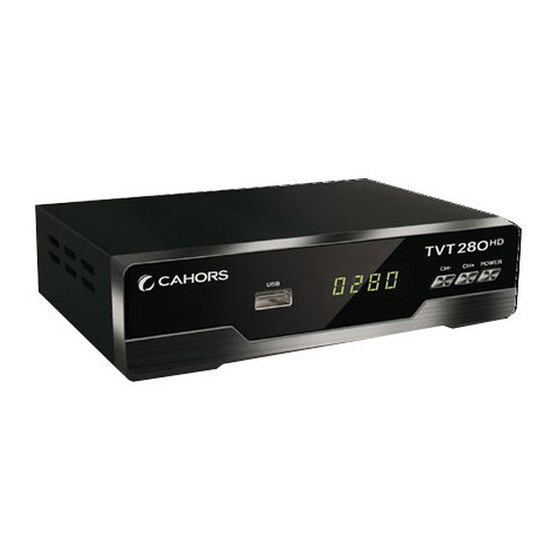
Page 9: Face Avant / Face Arrière
Face avant / face arrière Connecteur Fonction ANT. IN IEC 169-24 male Entrée antenne ANT. OUT IEC 169-24 femelle Sortie antenne COAX Prise audio SPDIF Connecteur HD Connecteur HD Audio/Vidéo numérique Péritel TV Prise péritel TV AC IN Cordon Raccordement au secteur Prise USB2.0 Host pour lecture Vidéo &... -
Page 10: Télécommande
Télécommande... - Page 11 POWER POWER Bascule entre le mode Opération et le mode Standby. Bascule entre le mode Opération et le mode Standby. BOUTONS NUMERIQUES BOUTONS NUMERIQUES Changent les chaînes ou sélectionnent les options des menus. Changent les chaînes ou sélectionnent les options des menus. TV/RADIO TV/RADIO Bascule entre le mode TV et le mode Radio.
- Page 12 19. REPEAT Répète la lecture du fichier multimédia Affiche le programme précédent 21. EXIT Retour au menu précédent PAGE +/-(▲/▼) Appuyez pour passer à la page suivante / précédente 23. VOL (◄ / ►) Monte/baisse le volume, navigation dans les menus 24.
-
Page 13: Branchements Sur L'adaptateur Tnt
Branchements sur l’adaptateur TNT Connecter la fiche de l’antenne terrestre à l’entrée TV IN de l’adaptateur. Raccordement au Téléviseur L’adaptateur peut être connecté au téléviseur via la prise HDMI ou la prise péritel. A : Prise HDMI Si votre téléviseur possède une prise HDMI, connecter un câble HDMI entre le connecteur HDMI du TV et le connecteur HDMI du TVT280HD. -
Page 14: Mise En Service
Mise en service 1ère utilisation Une fois les raccordements effectués, vous devez : 1. Allumer le téléviseur. 2. Mettre le TVT280HD sous tension. 3. Choisir le canal auxiliaire sur le téléviseur correspondant à l’entrée sur laquelle le TVT280HD est raccordé. (Voir le manuel d’utilisateur du téléviseur HDMI ou péritel) 4. -
Page 15: Utilisation
Utilisation Manipulation de base Choisir une chaîne Il existe plusieurs façons de choisir une chaîne: • Par son numéro de canal : Si vous connaissez son numéro de canal, utiliser les touches numériques de la télécommande puis valider par OK. Si ok n’est pas pressé, le canal sélectionné apparaitra dans environ 2s). -
Page 16: Réglage Du Volume
Astuce : utiliser les boutons “page” pour naviguer plus rapidement dans la liste Par liste favorite : Appuyer sur le bouton FAV pour afficher vos chaînes favorites. Utiliser les touches ▲/▼ pour sélectionner la chaîne désirée. Puis appeler la chaîne en validant par OK. Voir page 17 pour créer une liste favorite. -
Page 17: Obtenir Des Informations Sur La Chaîne
Obtenir des informations sur la chaîne • Appuyer INFO pour afficher le bandeau d’information. Les informations sur le programme en cours et le programme suivant sont affichées. Les informations sur la disponibilité des sous-titres (SUB), télétexte(TTX) sont également signalés par l’affichage en gras de TTX ou SUB. -
Page 18: Arrêt Sur Image
Pour désactiver les sous-titres : 1. Appuyer sur la touche SUB de la télécommande et choisir Arrêt. Arrêt sur image • Appuyer sur PAUSE pour geler l’image. • Appuyer sur PAUSE à nouveau pour dégeler l’image. Edition des programmes Vous pouvez créer une liste favorite de chaîne (Par exemple si vous habitez proche d’une frontière et que vous désirez intégrer des chaines étrangères dans votre numérotation. -
Page 19: Ajout D'une Chaîne Dans La Liste Favorite
Ajout d’une chaîne dans la liste favorite Suivre cette procédure pour ajouter ou supprimer une chaîne de la liste favorite. 1. Pour créer une liste favorite, sélectionner Editer programme puis OK La liste des chaînes apparaît : Choisir la chaîne à ajouter à la liste avec les touches ▲/▼. 3. -
Page 20: Organiser Les Chaînes
Organiser les chaînes Les chaînes peuvent être organisées via le menu Editer programmes. 1. Bloquer :Choisir la chaîne à bloquer avec les touches ▲/▼ puis valider avec la touche jaune. Confirmer le blocage en saisissant le code parental (Code par défaut 000000).Appuyer sur le bouton rouge à nouveau pour déverrouiller le programme. - Page 21 Disque USB supportés: 1) La plus part des disques USB du marché sont supportés. Cependant si un modèle n’était pas supporté, merci de nous signalé avec quel produit vous avez rencontré des soucis. 2) Le système de fichier recommandé est le FAT32 Instructions pour enregistrer une chaîne: 1.
-
Page 22: Guide Des Programmes (Guide)
Guide des programmes (GUIDE) Les informations concernant le guide des programmes sont disponibles via la touche GUIDE de la télécommande. Il est possible de naviguer dans le guide des programmes et d’afficher les informations en cours en utilisant les touches de navigation. Pour quitter le guide des programmes appuyer à nouveau sur GUIDE ou EXIT. -
Page 23: Recherche De Chaînes
Recherche de chaînes Le menu installation permet d’effectuer une recherche des chaînes disponibles via votre antenne. Il est nécessaire d’effectuer une nouvelle recherche de s chaînes si une nouvelle chaîne est transmise, ou bien que vous désirez ajouter une chaîne précédemment effacée. Une nouvelle recherche est également nécessaire si vous installez l’adaptateur dans un nouveau site. -
Page 24: Alimentation Antenne
Alimentation antenne Permet d’activer d’alimentation de l’antenne électronique Multi-audio Certaines chaînes diffusent plusieurs langues audio. La langue française et la langue en version originale par exemple. 1. Appuyer sur la touche lang 5. Choisir la langue audio désirée et appuyer sur OK pour valider 3. - Page 25 Les réglages ci-dessous peuvent être ajustés : • Mode vidéo HDMI: 576i, 576p, 720p, 1080i, et 1080p • Ratio écran : 4:3 ou 16:9 • Format vidéo – Plein écran, recadrage, boite aux lettres • Sortie Vidéo péritel : RVB, CVBS Presser la touche EXIT une fois les réglages accomplis Option Permet de définir la langue par défaut...
-
Page 26: Réglages Système
Réglages système Contrôle parental Le code parental par défaut est 000000 .Il est nécessaire pour modifier les paramètres parentaux 1. Sélectionner le contrôle parental. 2. Saisir le code parental puis appuyer sur OK. 3. Accès chaîne & menu, si activé, permet de protéger l’accès aux menus et chaînes via la saisie du code parental si la fonction est activée. -
Page 27: Heure
Mise à jour du logiciel 1. Pour mettre à jour le récepteur, copier le nouveau firmware sur une clé USB (non fournie) à la racine de cette dernière. Ne pas copier le fichier dans un dossier 2. Insérer la clé USB dans un port USB du TVT280HD 3. -
Page 28: Auto Standby (Mise En Veille Automatique)
Auto stand-by (Mise en veille automatique). Par défaut, la mise en veille automatique est activée. L’adaptateur passera automatiquement en veille au bout de 3 heures si aucune action de la télécommande n’est détectée. Allumer / éteindre L’appareil peut être démarré et/ou éteint pour une période déterminée dans ce menu Timer 8 programmes d’enregistrements peuvent être définis dans le menu programmateur. - Page 29 1. appuyer sur la touche timer de la télécommande 2. Appuyer sur la touche ROUGE pour crée une programmation. La touche Verte pour modifier une programmation La touche Bleu pour supprimer une programmation La touche EXIT pour quitter le menu 2.
-
Page 30: Dépannage
Dépannage Si vous rencontrez des problèmes avec votre adaptateur, consultez le tableau ci-dessous. Cela n’est peut-être pas un problème : Symptôme Cause probable Solution Vérifiez soigneusement la prise Appareil sous tension, mais d’alimentation pour s’assurer qu’elle est Insérez entièrement les fiches dans aucun affichage à... -
Page 31: Spécifications
Spécifications Input Connector Antenna IEC 169-2 Female Output Connector – RF Loop Out IEC 162-2 Male Frequency range 174MHz–230MHz, 474MHz–868MHz Tuner 75Ω Input impedance & Channel Decoder IF bandwidth 7 and 8 MHz (switchable) Code Rate 1/2, 2/3, 3/4, 5/6, 7/8 Guard Interval 1/4, 1/8, 1/16, 1/32 Standard... - Page 33 USER GUIDE TVT 280HD...
- Page 34 Important Safety Instructions To avoid electric shock, do not open the unit. • There are no user-serviceable parts inside. Servicing can only be performed by qualified service • personnel. Connection can only be to a 240V AC mains supply. • All safety and operating instructions should be read before the product is operated.
- Page 35 VENTILATION The slots on top of the STB must be left uncovered to allow proper airflow to the unit. Ensure a minimum distance of 5cm around the apparatus for sufficient ventilation. Ensure that the ventilation is not impeded by covering the ventilation openings with items such as newspapers, table-cloths, curtains, etc.
- Page 36 Main Features • High Definition Multimedia Interface (HDMI) Decodes high definition and standard • • output definition broadcasts Component output (Y/Pb/Pr) Dolby Digital audio output: S/PDIF optical • • Composite output USB2.0 Host for Video&MP3 Playback,JPEG • • Viewing and Software Multi-video definitions: 576i/ 576p/720p/1080i Auto and manual channel searching •...
- Page 37 Contents Important Safety Instructions ............................2 Contents .................................... 6 General Introduction ................................ 7 UNPACKING ..................................7 Controls and Indicators ..............................8 How to Connect ................................12 Getting Started ................................14 First-time use ..................................14 Operation ..................................15 Basic operations ................................15 Selecting a channel ...............................
-
Page 38: General Introduction
General Introduction UNPACKING pack the unit and check to make sure that all of the following items are included in the packaging. 1 x Remote Control Unit (RCU) 1 x User Manual 2 x AAA batteries 1 x Digital Terrestrial Receiver We hope you enjoy using your digital Terrestrial receiver! We hope you enjoy using your digital Terrestrial receiver! -
Page 39: Controls And Indicators
Controls and Indicators Front panel and rear panel Connecteur Fonction ANT. IN IEC 169-24 male Entrée antenne ANT. OUT IEC 169-24 femelle Sortie antenne COAX Prise audio SPDIF Connecteur HD Connecteur HD Audio/Vidéo numérique Péritel TV Prise péritel TV AC IN Cordon Raccordement au secteur Prise USB2.0 Host pour lecture Vidéo &... - Page 40 Remote Control...
- Page 41 1. STANDBY: To switch to stand-by mode 19. Repeat : Play again usb file when the receiver is on (or vice versa) 20 . To return to the previous channel or 2. Numeric Keys (0–9): To choose a channel station directly, or to enter numeric information 21.
- Page 42 Installing the batteries in the remote control 1. Press down on the retaining catch on the lid of the battery recess on the remote control and remove the lid. 2. Insert two AAA batteries into the recess. Be careful to insert the batteries as shown in the diagram inside the recess. 3.
-
Page 45: Getting Started
Getting Started First-time use Once you have connected the STB to your antenna and to your television, you need to: 1. Turn on the television. 2. Plug the TVT280HD into mains power. 4. Select the video or AV input channel to which the STB is connected: this can be done by pressing the TV/AV or VIDEO button on your TV remote control. -
Page 46: Operation
Operation Basic operations Selecting a channel There are a number of ways to select a TV channel or radio station: Number pad on the remote control: If you know the channel number, enter the number using • the number keys on the remote control and then press OK. (If you don’t press OK, the channel selected appears after approximately 2 seconds.) To choose a radio station using the number keys, press TV/RADIO first and then enter the number. -
Page 47: Adjusting The Volume
favourites list. Press ▲ or ▼to see each favourite in turn. See “Favourites” on page 17 for instructions on creating a favourites list. Scroll: Press▲ or ▼on the remote control to scroll through the channels in channel number • order. (You can also scroll through the channels in order by pressing the channel up and channel down buttons on the front panel of the STB.) By EPG: Press EPG on the remote control, select the channel from the electronic program guide •... -
Page 48: Picture Freeze
To turn on closed captions (or turn them off): 1. Press the SUB button on the remote control. The Subtitle window appears. 2. With Off highlighted, press ▲ or ▼until the option you want—Off or Language—is shown. 3. If the subtitles are being broadcast in more than one language and you want to choose a to highlight the Language option language other than the one shown on the screen, press and then press ▲... -
Page 49: Adding Channels Or Stations To Your Favourites List
Adding channels or stations to your favourites list Follow this procedure to add channels or stations to your favourites list, or to remove them. 1. Press MENU on the remote control. The Main Menu appears. 2. If Channel Manager is not seen in the main menu, press ▲ or ▼ until it is and then press OK. The Channel Manager menu appears. -
Page 50: Selecting A Favourite To Watch Or Listen To
9. Press OK. to return to normal viewing. Selecting a favourite to watch or listen to Press FAV on the remote control. The first channel or station or channel in your favourites list appears. Note that the information panel reads FAV channel. Organising channels and stations The Channel Manager option on the Main Menu enables you to organise channels and stations. -
Page 51: Usb
▲ or ▼ 4. LOCK:Press until the channel or station you want to lock is highlighted.Press SUB button(the red button)again the program will be un-locked.(The default password is 000000) ▲ or ▼ until the channel or station you want to lock is highlighted.Press AUDIO 5. - Page 52 Multimedia .Press ▲ or ▼to select the USB Media option, then Press OK, Multimedia appears. 1. MUSIC: press ▲ or ▼ to select Music.Select the audio file what you want to play. 2. PHOTO: press ▲ or ▼ to select Photo. Select the photo what you want to view. Press the PLAY key to view next picture.
-
Page 53: Electronic Program Guide (Epg)
of USB Key’s or Stick’s being available in the market with different quality levels, we cannot guarantee any damage of your USB Key or Stick will occur from attempting to record on to it. 2) Do not remove your USB device from the STB while it is in use during any USB multimedia function. Electronic Program Guide (EPG) Some providers broadcast information about their programs. -
Page 54: Rescanning For Channels And Stations
Rescanning for channels and stations The Install option on the main menu enables you to scan for—that is, detect—digital TV and radio stations available in your area. You will need to rescan if new channels or stations become available, if you want to reinstate a channel or station you have deleted, or if you move to a new location. -
Page 55: Manual Searching
Manual Searching NOTE: Automatic searching (described above) is suitable in most cases. You might use manual searching if you have deleted a channel and now want to access it again. In this case, you would just search for that particular channel. 1. - Page 56 Timer 1.When you are watching a channel , press Blue Key for booking a timer. 2.. Press SUB key ( the red button) to add a timer you want to.The Event Add screen appears. ▼ or ▲ 3, All the timer options should now be available to you (see below). Press CH to activate to select a timer you want to set.You can Edit and Delete the timer.
-
Page 57: Av Settings
Multi-language and Dolby Digital broadcasting If a channel is being broadcast in more than one audio language, you can choose which language to listen to. Similarly, if a channel is being broadcast in more than one audio format, you can choose which format to listen to. 1. - Page 58 With this menu you can control the following settings: Aspect ratio : 4:3 or 16:9 • Resolution : 576i, 576p, 720p 1080i and 1080P • TV Format : PAL , NTSC • VIDEO Output : RGB, CVBS • 3. Select an option you want to change. If necessary, press ▲ or ▼until the option is highlighted. 4.
-
Page 59: Parent Control
Parent control The STB is shipped with a default personal identification number (PIN). The default PIN is 000000. The PIN is required if you have enabled the parental lock To change the PIN: 1. Press MENU on the remote control. The Main Menu appears. 2. -
Page 60: Time Settings
Time settings You can set up to eight timers at which specified channels will automatically come on or the unit will turn off. Follow this procedure to set or change a timer. 1. Press MENU on the remote control. The Main Menu appears. 2. -
Page 61: System Maintenance
System Maintenance You can upgrade the software in your STB as new versions become available. Information about the current version (and information about the hardware) is available from the menu to help you determine if you need to upgrade. This information might also be useful if you need to obtain technical support from Technologies. -
Page 62: Clearing And Resetting Data
Clearing and resetting data You can reset the STB, by restoring the unit to the default settings it had when it left the factory. This clears all channels, stations, preferences and other user settings. You will need to rescan for channels and stations before you can continue watching digital TV or listening to digital radio. -
Page 63: Software Update
Software Update If a new version of software STB becomes available, you can download the software to your PC and then transfer it to your STB. You will need a USB memory stick (not supplied with the STB). 1. Once you have obtained an upgrade file, transfer it to a USB memory stick. You need to place the file at the root (or top) level on the memory stick, not inside a folder or directory. -
Page 64: Troubleshooting
Troubleshooting There may be a number of causes of abnormal operation. Occasionally receivers can hang (just as a PC will do from time to time). In this case, you should disconnect the STB from mains power, wait 30 seconds and then reconnect it to mains power. If the unit is still not operating correctly, refer to the following table for the indicated problem and likely solution. -
Page 65: Specifications
Specifications Input Connector Antenna IEC 169-2 Female Output Connector – RF Loop Out IEC 162-2 Male Frequency range 174MHz–230MHz, 474MHz–868MHz Tuner Input impedance 75Ω & Channel Decoder IF bandwidth 7 and 8 MHz (switchable) Code Rate 1/2, 2/3, 3/4, 5/6, 7/8 Guard Interval 1/4, 1/8, 1/16, 1/32 Standard...
Need help?
Do you have a question about the TVT 280 HD and is the answer not in the manual?
Questions and answers