
Subscribe to Our Youtube Channel
Related Manuals for Impecca IWA06-QS20

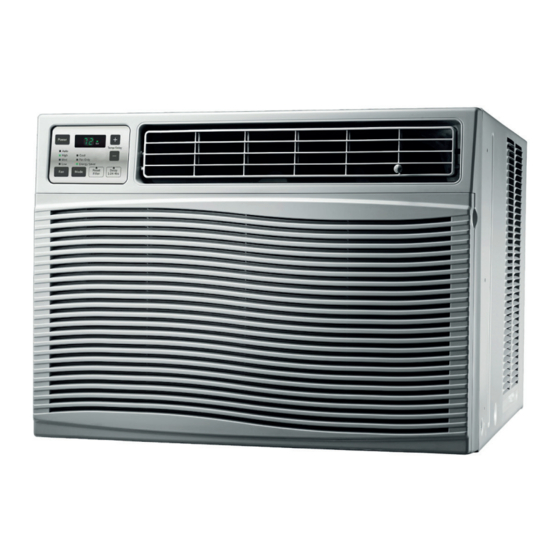
Summary of Contents for Impecca IWA06-QS20
- Page 1 Portable Air Conditioner—User Manual Aire acondicionado—Manual de usuario Models: IWA06-QS20/ IWA08-QS20 www.impecca.com...
- Page 2 Warning: To avoid permanent damage to unit: Ensure it is in the upright position for at least 24 hours before powering on the first time. Advertencia: Para evitar daños permanentes a la unidad: Asegúrese de que está en la posición vertical durante al menos 24 horas antes de encender la primera vez.
-
Page 3: Safety Notice
INTRODUCTION Thank you for purchasing this quality Impecca in-window air conditioner unit. To ensure the longest life and highest energy efficiency of your unit, please carefully follow these operating instructions. Keep these instructions in a safe place and consult them as needed. Please note... -
Page 4: Operating Conditions
OPERATING CONDITIONS • The air conditioner must be operated within the temperature range of 62°F to 95°F (16°C to 35°C). • A perimiter of 12′′(30cm) around the air conditioner should be free of all objets. • Do not operate the air conditioner in humid environments. •... -
Page 5: Control Panel Overview
USING YOUR AIR CONDITIONER CONTROL PANEL OVERVIEW PRIMARY FUNCTIONS 1. Power ON/OFF button: Use this button to turn the unit on or off. 2. Mode button: Cycle between cooling mode, dehumidifier mode, and fan mode. 3. Fan button 4. Reset filter button 5. -
Page 6: Using The Remote Control
REMOTE CONTROL ON/OFF button Fan +/- buttons Temperature ▲/▼ buttons Mode button Auto button Timer +/- buttons Timer (DELAY) button USING THE REMOTE CONTROL ON/OFF BUTTON Press the ON/OFF button to turn the unit on or off. FAN +/- BUTTONS Press the respective button to increase (+) or decrease (-) fan speed. - Page 7 TIMER (DELAY) BUTTON • When the unit is running, press this button to program a time when the unit will automatically turn off. Use the +/- buttons to change the air conditioners display to determine the delay (in hours) until the unit will shut down in 1 hour incre- ments.
-
Page 8: Pre-Installation Instructions
PRE-INSTALLATION INSTRUCTIONS Gather the following tools and unit accessories before beginning your installation: UNIT & ACCESSORIES 1. Air conditioning unit 7. Screws - Type A (x4) 2. Flexible window adapter set 8. Screws - Type B (x6) 3. Sealing strip (no adhesive) 9. -
Page 9: Installing Your Unit
WEATHER-PROOF WINDOW MODIFICATIONS If you have weather proof windows, the exterior window frame will be slightly higher than the window sill, which results in a slanted air conditioning unit that will not properly drain. Perform these modifications to ensure proper operation of your unit. If you have a standard window, skip this step. - Page 10 STEP 3: SEALING STRIP ON WINDOW FRAME 1. Affix an adhesive sealing strip to the bottom of the window frame. STEP 4: MOUNT THE UNIT HOUSING IN THE WINDOW FRAME 1. With the help of another person, center the unit on the windowsill. The lower guide should be completely flush with the windowsill.
- Page 11 STEP 5: SECURING THE WINDOW 1. To keep the window from being unintentionally opened and risk damaging the unit or injuring passerby, use one type C screw to fasten the security bracket to the window. If your window frame is made of wood, fasten the bracket into the window (Detail 1).
-
Page 12: Cleaning And Maintenance
CLEANING & MAINTENANCE SAFETY WARNING To avoid electric shock, fire, damage, or injury while performing maintenance on your unit: • Always turn off and disconnect the air conditioner from electric power. • Never submerge the unit in water or spray liquids directly on the unit. •... -
Page 13: Cleaning The Filter
CLEANING THE OUTER HOUSING AND INTAKE GRILLE If dust has accumulated on the unit, use a soft, dry dusting towel to wipe it off. If grease or other harder to remove substances is on the unit, use a wrung-out cloth dampened with warm, soapy water. - Page 14 The air conditioner does not restart immediately after turning it off. • The unit can not be restarted for 3 minutes to allow the condenser to cool and avoid risk of fire. Wait a few minutes before restarting the unit. The air conditioner unit starts and stops frequently.
-
Page 15: Unit Error Codes
H6: Unplug and restart your unit to clear the error. If the error persists, contact a qualified service technician. OTHER ERROR CODES: Contact a qualified service technician. TECHNICAL SUPPORT For additional assistance, please visit our website or contact technical support. Web: www.impecca.com Phone: +1 866–954–4440 Email: support@impecca.com –13–... -
Page 16: Aviso De Seguridad
INTRODUCCIÓN Gracias por comprar esta unidad de aire acondicionado para ventana de calidad Impecca. Para asegurar una larga vida útil y la más alta eficiencia de energía de su unidad, siga cuidado- samente estas instrucciones. Mantenga estas instrucciones en un lugar seguro y consúltelas cuando lo requiera. -
Page 17: Condiciones De Operación
• No permita que niños o personas con capacidades físicas, sensoriales o mentales disminuidas operen o estén cerca de la unidad sin la supervisión directa de un adulto. • No permita que los niños realicen la limpieza u otras operaciones de manteni- miento sin la supervisión directa de un adulto. - Page 18 FAMILIARIZÁNDOSE CON SU UNIDAD DE AIRE ACONDICIONADO 1. Salida de aire frío 2. Cuchillas direccionales de aire frío 3. Entrada de aire caliente 4. Cable de suministro de energía 5. Panel de control –16–...
-
Page 19: Descripción General Del Panel De Control
USANDO SU UNIDAD DE AIRE ACONDICIONADO DESCRIPCIÓN GENERAL DEL PANEL DE CONTROL NCIONES PRINCIPALES 1. Botón POWER: use este botón para encender y apagar su unidad de aire acondicionado 2. Botón MODE: Con este botón puede recorrer los diferentes modos de funciona- miento: modo de enfriamiento (cooling), modo de deshumidificador (dehumidi- fier), y ventilador (fan) 3. -
Page 20: Usando El Control Remoto
CONTROL REMOTO Botón ON/OFF Botones Fan +/- Botones de temperatura ▲/▼ Botón Mode Botón Auto Botones del Temporizador +/- Botón Timer (DELAY) USANDO EL CONTROL REMOTO BOTÓN ON/OFF Presione el botón ON/OFF para encender o apagar la unidad. BOTONES FAN +/- Presione el botón correspondiente para aumentar (+) o disminuir (-) la velocidad del ven- tilador. - Page 21 BOTÓN TIMER (DELAY) • Cuando la unidad está funcionando, presione este botón para programar el tiem- po en que la unidad se ha de apagar. Use los botones +/- para cambiar la pantalla del aire acondicionado para ajusta el tiempo (en horas, en incrementos de 1 hora) en que la unidad ha de apagarse.
-
Page 22: Instrucciones De Pre-Instalación
INSTRUCCIONES DE PRE-INSTALACIÓN Reúna las siguientes herramientas y accesorios de la unidad antes de comenzar la instalación: UNIDAD Y ACCESORIOS 1. Unidad de aire acondicionado 7. Tornillos – Tipo A (x4) 2. Adaptador flexible para ventana 8. Tornillos – Tipo B (x6) 3. - Page 23 MODIFICACIÓN PARA VENTANAS RESISTENTES A LA INTEMPERIE Si cuenta con ventanas resistentes a la intemperie, el marco exterior estará ligeramente más alto que el alféizar de la ventana, lo cual resulta en una unidad de aire acondiciona- do inclinada que no podrá drenar la condensación adecuadamente. Realice estas mo- dificaciones para asegurar una adecuada operación de su unidad.
- Page 24 PASO 3: TIRA SELLADORA EN EL MARCO DE LA VENTANA 1. Coloque un tramo de tira selladora adherible en la parte inferior del marco de la ventana. PASO 4: MONTANDO EL CHASIS DE LA UNIDAD EN EL MARCO DE LA VENTANA 1.
- Page 25 PASO 5: ASEGURANDO LA VENTANA 1. Para evitar que la ventana sea abierta de forma involuntaria y que la unidad se dañe o cause un accidente a alguien que pase por debajo de la ventana, utilice un tornillo tipo C para colocar el seguro a la ventana. Si su marco de la ventana está...
-
Page 26: Limpieza Y Mantenimiento
LIMPIEZA Y MANTENIMIENTO ADVERTENCIAS DE SEGURIDAD Para evitar descargas eléctricas, incendios, daños y lesiones al realizar el mantenimiento de su unidad: • Siempre apague y desconecte del tomacorrientes la unidad de aire acondicionado • Nunca sumerja la unidad en agua o rocíe líquidos directamente sobre ella •... - Page 27 REVISIÓN DE LA UNIDAD EN LA POST TEMPORADA DE CALOR Después de utilizar su unidad de aire acondicionado en los cálidos meses del verano, siempre realice las siguientes revisiones: • Desconecte la unidad del tomacorrientes • Limpie el filtro y el chasis de la unidad •...
-
Page 28: Solución De Problemas
SOLUCIÓN DE PROBLEMAS El aire acondicionada no funciona para nada • ¿El cable de suministro de energía esta adecuadamente conectado en un toma- corrientes que funciona y está aterrizado? • ¿Existe alguna falla como un fusible quemado o se disparó el cortacircuitos? •... - Page 29 La unidad emite un sonido fuerte o inusual y vibraciones • Coloque la unidad en una superficie nivelada Se escucha un sonido de “estrujamiento” • Ocasionalmente la circulación del refrigerante dentro de la unidad puede cau- sar este ruido. Se escucha un sonido como de “palmaditas” •...
-
Page 30: Soporte Técnico
H6: Desconecte y reinicie la unidad para borrar el error. Si el error persiste, contacte a un técnico de servicio calificado. OTROS CÓDIGOS DE ERROR: Contacte a un técnico de servicio calificado. SOPORTE TÉCNICO Para mayor ayuda, visite nuestro sitio web o contacte a soporte técnico. Sitio Web: www.impecca.com Teléfono: +1 866–954–4440 Email: support@impecca.com –28–...
Need help?
Do you have a question about the IWA06-QS20 and is the answer not in the manual?
Questions and answers