Advertisement
Quick Links
_____________________________________________________________________________________________________
ASSEMBLY & OPERATING INSTRUCTIONS
Model No.
114686
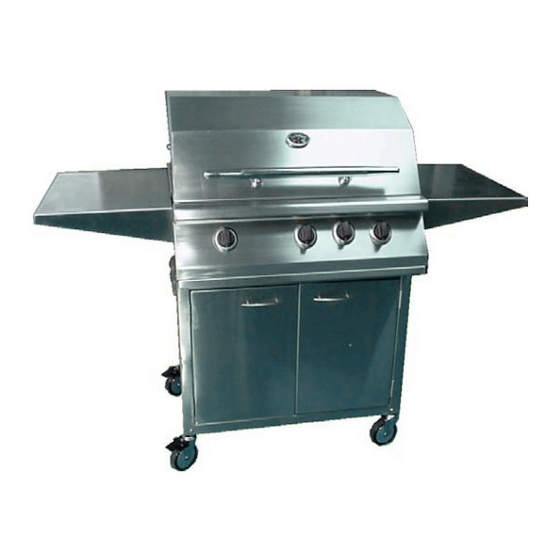
3 Burner Stainless Steel Texan Grill, LP
With Rotisserie Burner and Kit
Model No.
114693
3 Burner Stainless Steel Texan Grill, NG
With Rotisserie Burner and Kit
TABLE OF CONTENTS
SAFETY INSTRUCTIONS ...............................................................................................................
ASSEMBLY INSTRUCTIONS ......................................................................................................
INSTALLATION INSTRUCTIONS...................................................................................................
LIGHTING & OPERATING INSTRUCTIONS ........................................................................................
CLEANING & MAINTENANCE ..........................................................................................................
TROUBLESHOOTING ....................................................................................................................
PARTS LIST .................................................................................................................................
WARRANTY...................................................................................................................................
READ THE FOLLOWING INSTRUCTIONS CAREFULLY AND BE SURE YOUR GRILL IS PROPERLY INSTALLED,
ASSEMBLED AND CARED FOR. FAILURE TO FOLLOW THESE INSTRUCTIONS MAY RESULT IN SERIOUS
BODILY INJURY AND/OR PROPERTY DAMAGE. IF YOU HAVE QUESTIONS CONCERNING ASSEMBLY OR
OPERATION, CONSULT YOUR DEALER, GAS APPLIANCE SERVICE REPRESENTATIVE OR YOUR GAS COMPANY
NOTE TO INSTALLER:
LEAVE THESE INSTRUCTIONS WITH THE CONSUMER
AFTER INSTALLATION.
NOTE TO THE CONSUMER
RETAIN THESE INSTRUCTIONS FOR FUTURE REFERENCE.
THIS OUTDOOR COOKING GAS APPLIANCE IS NOT INTENDED TO BE INSTALLED IN OR ON RECREATIONAL
VEHICLES AND/OR BOATS.
Ontario, California 91762
1
PAGE
2
4
6
10
13
14
15
18
Revision 01/06
Advertisement

Related Manuals for Bull 114686

Summary of Contents for Bull 114686
-
Page 1: Table Of Contents
Ontario, California 91762 _____________________________________________________________________________________________________ ASSEMBLY & OPERATING INSTRUCTIONS Model No. 114686 3 Burner Stainless Steel Texan Grill, LP With Rotisserie Burner and Kit Model No. 114693 3 Burner Stainless Steel Texan Grill, NG With Rotisserie Burner and Kit TABLE OF CONTENTS PAGE SAFETY INSTRUCTIONS …………………………………………………….…………………………..………………... -
Page 2: Safety Instructions
SAFETY INSTRUCTIONS Read carefully before assembling and operating your gas grill This gas grill must be installed in accordance with local codes or, if in an area without local codes, with the latest edition of the National Fuel Gas Code ANSI Z223.1. In Canada, installation must conform to the standard CAN/ CGA 1-b149.1 and/or .2 (Installation Code for Gas Burning Appliances and Equipment) and any local codes. - Page 3 NATURAL GAS SAFETY Your Natural Gas grill is designed to operate on natural gas ONLY, at a pressure of 4” water column (W.C.) regulated at the natural gas regulator attached at the back of the grill. Check with your gas utility for local gas pressure and with your local municipality for building code requirements.
-
Page 4: Assembly Instructions
ASSEMBLY INSTRUCTIONS Before attempting to assemble your gas grill, check that all the necessary parts included by using the illustrated part list. The grill is assembled and fire tested but minor assembly is required on casters and side shelves as below. We recommend for the assistance of another person when assembling casters. - Page 5 8. Remove two screws on left side of grill hood and place motor bracket on it. Replace two bolts back. You may leave this motor bracket on at all time. Install rotisserie kit when you want to rotisserie cook. Remove rotisserie motor and rotisserie kit when you are finished rotisserie cooking.
-
Page 6: Installation Instructions
INSTALLATION INSTRUCTIONS Install OPTIONAL Side Burner Connect rubber hose to inlet of side burner. Insert the other end thru hole of right side panel. After insert thru hole of right side panel, connect to inlet of grill head located on the right bottom of control panel. - Page 7 INSTALLATION INSTRUCTIONS PLEASE READ THESE INSTRUCTIONS BEFORE INSTALLING YOUR GAS GRILL NOTE TO INSTALLER: Leave these instructions with the consumer for future reference. Your grill must be installed in accordance with all local building codes. SPECIFICATIONS FOR BARBECUE STRUCTURE For Propane Gas LP TANK STORAGE AREA MUST BE ISOLATED FROM GRILL AND VENTED. Do not use any combustible materials for this construction.
- Page 8 INSPECTING I CLEANING BURNERS AND GAS VALVE ORIFICES By following these cleaning procedures on a timely basis, your grill will be kept clean and working properly with minimum effort. BURNER CLEANING 1. Remove burner from the grill bowl (See drawing on right). Bend a stiff wire (a light-weight coat hanger works well) into a small hook as shown below.
- Page 9 COOKING COMPONENT INSTALLATION IMPORTANT: Before first use wash flame tamers, cooking grids, and warming rack with warm, soapy water. Rinse and dry thoroughly. Season metal surfaces with cooking oil occasionally. (After cooking is completed, turn grill to high setting for NO MORE THAN five minutes to burn off excess grease or food residue) CAUTION: DO NOT LEAVE GRILL UNATTENDED.
-
Page 10: Lighting & Operating Instructions
LIGHTING & OPERATING INSTRUCTIONS LIGHTING PROCEDURES Lighting Main Burner(s): 1. Become familiar with safety guidelines at front of manual. DO NOT SMOKE WHILE LIGHTING GRILL OR CHECKING GAS SUPPLY CONNECTIONS. 2. If your grill fuel source is a LP gas cylinder, check to see that cylinder is filled. 3. - Page 11 LIGHTING & OPERATING INSTRUCTIONS OPERATING PROCEDURE Burn-off: Before cooking on your gas grill for the first time, burn the grill to get rid it of any odors or foreign matter by igniting the burners, closing the lid, and operating at “HI” setting for about five minutes. You may then either set the controls to “OFF” or cook on your grill immediately by turning the control knobs to a lower setting.
- Page 12 LIGHTING & OPERATING INSTRUCTIONS ROTISSERIE COOKING Rotisserie is mostly used to cook large pieces of meat and poultry to assure slow, even cooking. The constant turning provides a self-basting action, making food cooked on a rotisserie exceptionally moist and juicy. Rotisserie cooking generally requires 1 ½...
-
Page 13: Cleaning & Maintenance
CLEANING & MAINTENANCE CLEANING THE COOKING GRIDS After cooking, turn control knobs to “OFF” and let grill cool before attempting to clean your cooking grids. Before first use and periodically it is suggested that you wash the cooking grids in a mild soap and warm water solution. You can use a washcloth or a vegetable brush to clean your cooking grids. -
Page 14: Troubleshooting
TROUBLESHOOTING If grill fails to operate properly 1. Turn off gas at source, turn control knobs to “OFF”, and wait five minutes before trying again 2. Check gas supply/connections. 3. Repeat lighting procedure and, if grill still fails to operate properly, TURN “OFF” GAS AT SOURCE, TURN CONTROL KNOBS TO “OFF”, wait for grill to cool, and check the following: a. -
Page 15: Parts List
PARTS LIST Model No. 114693 3 Burner Stainless Steel, NG With Rotisserie Burner and Kit Model No. 114686 3 Burner Stainless Steel, LP With Rotisserie Burner and Kit REF# DESCRIPTION REF# DESCRIPTION LID-FRONT SIDE PANEL,RIGHT LID-REAR BOTTOM PANEL BOWL ASSEMBLY CROSS METAL BAR—REAR... - Page 16 HOW TO ORDER REPLACEMENT PARTS Please refer to the parts list. To make sure you obtain the correct replacement parts for your gas grill, the following information is required to assure getting the correct part. 1. Gas grill model number (see data sticker on grill) and type of gas hook up. 2.
- Page 17 ILLUSTRATED PARTS LIST Revision 01/06...
-
Page 18: Warranty
LIMITED WARRANTY Bull Outdoor Products, Inc. warrants to the original purchaser at the original site of delivery with proof of purchase of each Outdoor Gas Grill that when subject to normal residential use, it is free from defects in workmanship and materials for the periods specified below. This warranty excludes grills used in rental or commercial applications.
Need help?
Do you have a question about the 114686 and is the answer not in the manual?
Questions and answers