
Related Manuals for Teleview TEL-17P


Summary of Contents for Teleview TEL-17P
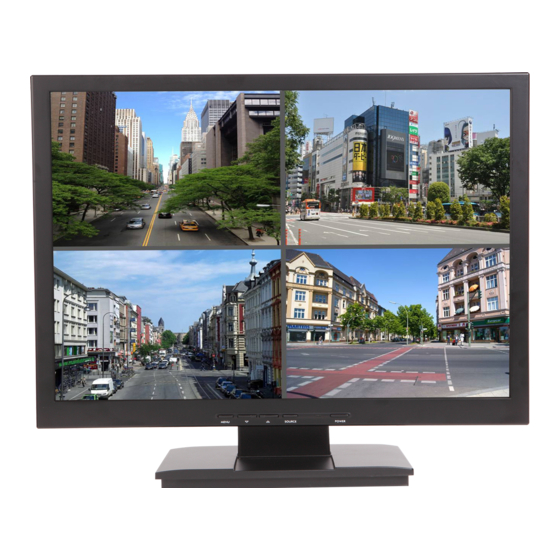
- Page 1 English CCTV LCD Monitor User Manual For models: TEL-17P TEL-19P ____________________...
-
Page 2: Table Of Contents
Contents 1. Introduction………..............................1 2. Work Safety Information............................2 2.1. Product Safety Precautions information......................2 2.2. Safety Guidelines............................3 2.3. Important Notice Concerning Power Cord Selection..................3 2.3.1 For the United States and Canada......................3 2.3.2 For European Countries..........................3 2.3.3 For the United Kingdom..........................4 3. Standards and Guidelines..........................5 3.1. -
Page 3: Introduction
Introduction Thank you for purchasing the professional CCTV LCD Monitor and welcome to a fantastic new technology that will completely change the way you look at monitors. The following sections describe just a few of the major advantages of this LCD monitor. You’ll discover more of its wonderful features as you use it. -
Page 4: Work Safety Information
Work Safety Information Caution and Warning CAUTION !! RISK OF ELECTRIC SHOCK DO NOT OPEN CAUTION: To reduce the risk of electric shock, do not remove cover (or back). No internal parts can be serviced by users. Refer servicing to qualified personnel. TO PREVENT FIRE OR SHOCK HAZARD, DO NOT EXPOSE THIS CCTV LCD MONITOR TO RAIN OR MOISTURE. -
Page 5: Safety Guidelines
Safety Guidelines WARNING This device must be operated with the original power supply. The socket outlet should be installed near the equipment and should be CAUTION easily accessible. Use a power cord that is properly grounded. Always use the appropriate AC power cord that is certified for the individual country. -
Page 6: For The United Kingdom
2.3.3 For the United Kingdom For your safety please read the following text carefully. If the fitted molded plug is unsuitable for the socket outlet, then the plug should be cut off and disposed of safely. Do not plug the cut-off plug into a socket outlet! There is a danger of severe DANGER electrical shock! If a new plug is to be fitted, please observe the wiring code as shown below. -
Page 7: Standards And Guidelines
Standards and Guidelines FCC Requirements This device complies with Part 15 of the FCC Rules and Regulations. Operation is subject to the following two conditions: (1) This device may not cause harmful interference, and (2) this device must tolerate any interference encountered, including interference that may cause improper operation. -
Page 8: Rohs Compliance Statement
RoHS Compliance Statement This display defined in this user manual is 100% RoHS complaint and meets all the requirements set forth in European Union Directive 2002/95/EC, Restriction of the Use of Certain Hazardous Substances in Electrical and Electronic Equipment. Information on Disposal for Your Old Product Used electrical and electronic equipment must be treated separately and in accordance with legislation that requires proper treatment, recovery and recycling of used electrical and electronic equipment. -
Page 9: Hardware Installation
Hardware This chapter will guide you through the correct installation procedures for the LCD monitor. 4.1. Checking the Accessories Supplied LCD monitor body + Desk Stand x 1 pc AC power cord x 1 pc Adaptor x 1 pc ... -
Page 10: Buttons And Connections
5. Buttons and Connections 5.1 Buttons ○ ○ ○ ○ ○ ○ Power : Press button to turn the power on and press again to turn the power off. “Source/Exit” ○ 1. To select the input signal source when the OSD menu is Off. The available signal source will be shown in the following order: PC,HDMI, AV1, AV2, S-Video . -
Page 11: Connections
5.2 Connections Item Connector Function ○ DC 12V Input Please use DC 12V, 3A Power Adaptor ○ ○ Stereo audio input , “R“ is right channel (Red) of audio connector, Stereo RCA Audio Input “L“ is the left channel(White) of the audio of connector. (L/R) ○... -
Page 12: Osd Setup
6. OSD Setup Picture (Video Mode) 1. Press the “Menu” key on the buttons to call out the OSD Menu . Press “▲/+” or “▼/-“ to select “Picture” mode and press “Menu” key again to select the “Picture” option. 2. Various picture settings are available from the “Picture” menu. - Page 13 Sound (Video Mode) 1. Press the “Menu” key on the buttons to call out the OSD “Menu” . Press “▲/+” or “▼/-“ to select “Sound” option and press “Menu” key again to select the “Sound” mode. There are 2 sound modes to choose from (1) Standard (2) User.
- Page 14 Display (Video Mode) Press the “Menu” key on the buttons to call out the OSD “Menu” . Press “▲/+” or “▼/-“ to select “Display” mode and press “Menu” key again to select the “Display” option. H-Position Use to change horizontal position of the picture. You may press “▲/+” or “▼/-“ key to select “H-Position” and press “▲/+”...
- Page 15 3. 4:3 Over-H The format is the “Pan Scan” over scan mode that shows the real 4:3 video source on 5:4 panel format without distortion. In order to erase the black bar on both top and bottom, cut about 4% on “Vertical” line to fill up the screen 4.
- Page 16 Language The default language is English, you may press the “Enter” key and press “▲/+” or “▼/-“ key to select language you want. There are 6 languages to select (1) English (2) French (3) Germany (4) Spanish (5) Italian (6).Chinese OSD Time If you want the OSD Menu to stay longer on the screen, you may press “▲/+”...
- Page 17 Picture (PC Mode) 1. Press the “Menu” key on the buttons to call out the OSD“Menu” . Press “▲/+” or “▼/-“ to select “Picture” Mode and press “Menu” key again to select the “Picture” option. 2. Various picture settings are available from the “Picture” menu.
- Page 18 Display (PC Mode) Press the “Menu” key on the buttons to call out the OSD “Menu” . Press “▲/+” or “▼/-“ to select “Display” mode and press “Menu” key again to Select the “Display” option. H-Position Use to change horizontal position of the picture. You may press “▲/+” or “▼/-“ key to select “H-Position” and press “▲/+”...
- Page 19 Image Optimize Select the “ Image Optimize” for best image setting. Press “Menu” to enter “OK” mode. To select the Auto Color, The monitor will auto fine-tune the color as default. Phase Use phase to fine-tune the monitor to perfectly ADC clock phase synchronize to the video signal source under RGB mode.
-
Page 20: Troubleshooting Guide
8. Troubleshooting Guide When you experience issues with the CCTV LCD Monitor , before contacting your retailer where you made your purchase, please check the following items. The most common issue is with the connection of AV equipment or graphic card. We recommend that at the same time of troubleshooting, also refer to the AV equipment or graphic card user manual. -
Page 21: Applicable Video Timing For Pc- Analog Video
Applicable Video Timing for PC- analog Video The following table list are the better display quality modes for analogy signal (PC) supported by this LCD monitor. The LCD monitor will stop working or has poor picture quality when other modes out of below list input. -
Page 22: Technical Data
10. Technical Data ※Specifications and product design are subject to change without notice... -
Page 23: Dimension
11. Dimension TEL-17P TEL-19P...
Need help?
Do you have a question about the TEL-17P and is the answer not in the manual?
Questions and answers