Table of Contents
Advertisement
Quick Links
Advertisement
Table of Contents

Summary of Contents for Samsung MX-HS6800
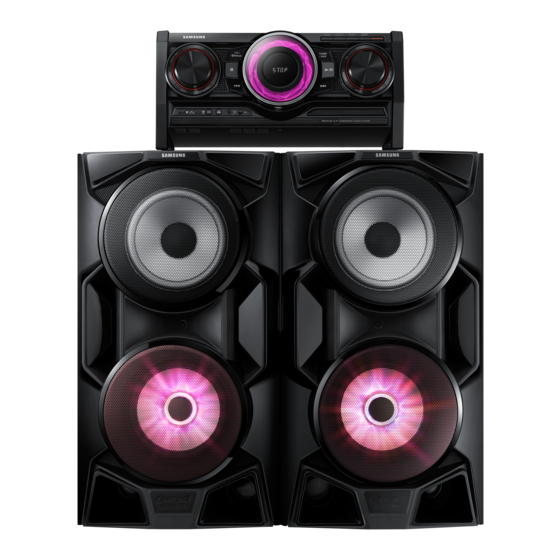
- Page 1 MX-HS6800 PREMIUM Hi-Fi component System (MP3/WMA/CD-DA Playback with CD/USB) user's manual imagine the possibilities Thank you for purchasing this Samsung product. To receive more complete service, please register your product at www.samsung.com/register...
-
Page 2: Safety Information
Safety Information Warning TO REDUCE THE RISK OF ELECTRIC SHOCK, DO NOT REMOVE THE COVER (OR BACK). NO USER-SERVICEABLE PARTS ARE INSIDE. REFER SERVICING TO QUALIFIED SERVICE PERSONNEL. CAUTION This symbol indicates “dangerous voltage” inside the product that presents RISK OF ELECTRIC SHOCK DO NOT OPEN a risk of electric shock or personal injury. -
Page 3: Precautions
Precautions • To turn this apparatus off completely, you must disconnect it from the wall outlet. • Ensure that the AC power supply in your house Consequently, the wall outlet and power complies with the identification sticker located plug must be readily accessible at all on the back of your product. - Page 4 Safety Information Supported Audio Formats • Condensation may form if warm air comes into contact with cold parts inside the product. When condensation forms inside the product, it File Audio Sampling Bit Rate may not operate correctly. If this occurs, remove Extension Codec Rate...
-
Page 5: Table Of Contents
Using the Bluetooth Power On TV SoundConnect Front Panel To connect the Hi-Fi component to a Rear Panel SoundConnect Compatible Samsung TV Remote Control To disconnect the TV from the Hi-Fi component Accessories To disconnect the Hi-Fi component from the TV... -
Page 6: Getting Started
Getting Started Front Panel HDMI/ OPTICAL/ TUNER/AUX COAXIAL & REMOTE CONTROL SENSOR AUX IN 1 jack Connecting an external device such as an FORWARD SEARCH/SKIP button MP3 player. PLAY/PAUSE button • Connect AUX IN 1 on the front panel of the product to the Audio Out of an HDMI/OPTICAL/COAXIAL button external device/MP3 player. -
Page 7: Rear Panel
Rear Panel Cooling fan OPTICAL DIGITAL AUDIO IN JACKS • The fan operates while the unit is powered on. • Receives the audio signal from a video player If you set the unit to the minimum volume, the (DVD, TV). fan won't operate. -
Page 8: Remote Control
Getting Started Remote Control MUTE (Turn off the sound temporarily. Press again to turn the sound back on.) Power BEAT WAVING HDMI/OPTICAL/COAXIAL TV SoundConnect CD/Bluetooth USB REC REC SPEED TUNING MODE MO/ST TUNER/AUX +PANNING NON-STOP MUSIC RELAY DJ BEAT EFFECT LEVEL/AV SYNC TEMPO AV SYNC SKIP... -
Page 9: Accessories
Accessories Check for the supplied accessories below. Remote Control Microphone User Manual Power Cable HDMI Cable FM Antenna / Batteries (MIC) • Figures and illustrations in this user's manual are provided for reference only and may differ from actual product appearance. Connecting the Speakers Recommended speaker setup. -
Page 10: Connecting External Devices/Your Tv Via Hdmi
Getting Started Connecting External Devices/your TV via HDMI HDMI is a digital standard interface for connection to such devices as a TV, projector, DVD player, Blu-ray player, set-top box and more. HDMI removes any loss of signal from analog conversion, enabling you to enjoy video and audio sound quality as it was originally created in the digital source. -
Page 11: Hdmi Function
Anynet+ is a function that enables you to control other Samsung Devices with your Samsung TV's remote control. Anynet + can be used by connecting this Hi-Fi component to a SAMSUNG TV using an HDMI Cable. This is only available with SAMSUNG TVs and SAMSUNG AV Products that support Anynet+. -
Page 12: Connecting A Dvd Or Bd(Blu-Ray) Player
Getting Started Connecting a DVD or BD(Blu-ray) Player AUDIO OPTICAL COAXIAL DVD or BD Player Audio Connection Connect the Digital Input (OPTICAL ) on your Hi-Fi component to the Digital Output of the DVD/BD player. Connect the Digital Input (COAXIAL) on your Hi-Fi component to the Digital Output of the BD/DVD player. Connect AUDIO IN (AUX IN) on your Hi-Fi component to the Audio Out of the DVD/BD player. -
Page 13: Functions
Functions ARC Function Input mode The ARC function is activated in D.IN mode if the unit Press an appropriate button on the remote control is connected to an ARC supporting TV. to select a desired mode: D.IN, AUX, HDMI, BT, COAXIAL,TV Sound Connect, or USB mode. -
Page 14: The Display Function
Functions The Display function Playing a CD You can view functions available on the display, adjust the Loading a Compact Disc brightness of the display, and set the Display/LED either on or off. You can play standard compact discs that Changing Display mode require no adapter. -
Page 15: Selecting A Track
Selecting a Track To adjust the volume: • Turn the VOLUME control on the product. You can select a desired track while the disc is • Press the VOL+ or VOL- button on the being played. remote control. To play the previous track The volume level can be adjust in 31 steps (VOLUME MIN, VOLUME 01 ~ VOLUME Press the 1 button within 3 seconds after the... -
Page 16: Playing Usb Devices
Functions To Select a File from a USB Device 2. When you want to stop the repeat function, press the REPEAT button until "OFF" is You can select an MP3 file while the product is displayed. playing. • OFF : Cancels repeat playback. | NOTES | • TRACK : Repeatedly plays the selected track. -
Page 17: To Use High Speed Search
To Use High Speed Search Read Before Connecting USB Storage Devices You can search a desired section quickly while the product is playing. • Some USB devices may not work properly with Press the 3, 4 button. this product. • Each time you press the button, you move • This product only supports external HDD`s that forward/backward quickly through the section. -
Page 18: Searching For A Track Quickly
Functions Searching for a Track Quickly Press the button to play the programmed tracks. You can select a track directly without the 1 , 2 Press the 5 button to stop playing the button. programmed tracks, Press the 5 button CDDA/MP3-CD/USB again to cancel playing the programmed tracks. -
Page 19: Bluetooth
- A part of your body is in contact with the • You will see a list of scanned devices. receiving/transmitting system of the Bluetooth Select "[Samsung] HI-FI XXXXXX" from the device or the Hi-Fi component. list. - It is subject to electrical variation from obstructions caused by a wall, corner, or • When the product is connected to the... -
Page 20: To Disconnect The Bluetooth Device From The Hi-Fi Component
Functions ✎ Only one Bluetooth device can be paired at a time. ✎ In Bluetooth connection mode, the Bluetooth ✎ Once you have turned off the Hi-Fi component connection will be lost if the distance between and the pairing is disconnected, the pairing will the Hi-Fi component and the Bluetooth device not be restored automatically. -
Page 21: Tv Soundconnect
To disconnect the TV from the Hi-Fi component Before activating this function, be sure to activate You can disconnect the TV from Hi- Fi the Samsung TV's SoundConnect or SoundShare Component. mode. For instructions, see the TV's user manual. Press the TV SoundConnect button of • When the Hi-Fi component is disconnected... -
Page 22: Using My Karaoke
Functions Using My Karaoke Auto Change Function You can use the MY Karaoke function to sing You can play a disc followed by a USB device along with your favorite CDs and USB tracks. connected to USB1 and/or USB2 continuously. AUTO CHANGE Connect the microphone to the MIC jack on Press the... -
Page 23: Selecting A Stored Station
Timer Function 3. Select a station by: • Pressing and holding the TUNING/ALBUM Setting the Clock , or . button on the remote control to automatically search for active broadcasting stations. For each step, you have a few seconds to set the required options. - Page 24 Functions 3. Set the timer switch-on time. Press the ¬ button. Result: REC N is displayed. You can press a. Press the TUNING/ALBUM , or . the TUNING/ALBUM , or . button to button to set the hours. select REC Y or REC N, and then press ¬ b.
-
Page 25: Cancelling The Timer
Cancelling the Timer • Connect a USB device to USB 1 jack of your product. After you have set the timer, it will start • Press the USB button to select USB 1. automatically. If you no longer want to use the • Play a song from USB 1. -
Page 26: Recording Speed
Functions Recording Speed | NOTES | ✎ Do not disconnect the USB device or the During the CDDA disc mode, Each time you press AC Cord during recording as this may cause the REC SPEED button on the remote control, damage to the file. -
Page 27: Special Sound Effect
Special Sound Effects ✎ If no buttons are pressed within 8 seconds, your settings will automatically be cancelled and the previous settings will be saved. Selecting EQ Mode ✎ The EQ mode may be different depending on Your Hi-Fi component system provides predefined your region. -
Page 28: Giga Sound Function
Functions sound of a jet engine revving up and down. GIGA SOUND Function • CHORUS : Creates an effect similar to a singing The GIGA SOUND function amplifies the bass chorus. • WAHWAH : Creates a 'Wah~ Wah~' effect. sound and provides twice the bass for powerful, realistic sound. -
Page 29: Panning Function
+PANNING Function | NOTES | ✎ When the DANCE TIME sound file finishes Increases the left and right speaker's output in playing, the DANCE TIME mode changes to turn and makes it seem as if the sound is moving DANCE TIME OFF. from side to side. -
Page 30: Appendix
Refer to the chart below when this product does not function properly. If the problem you are experiencing is not listed below or if the instructions below do not help, turn off the product, disconnect the power cord, and contact the nearest authorized dealer or Samsung Electronics Service Center. Symptom Check/Remedy I cannot eject the disc. -
Page 31: Specifications
AUX IN1 1.2V, AUX IN2 2.0V *: Nominal specification - Samsung Electronics Co., Ltd reserves the right to change the specifications without notice. - Weight and dimensions are approximate. - Design and specifications are subject to change without prior notice. - Page 32 Contact SAMSUNG WORLD WIDE If you have any questions or comments relating to Samsung products, please contact the SAMSUNG customer care centre. Area Contact Centre Web Site ` Asia Pacific AUSTRALIA 1300 362 603 www.samsung.com/au/support NEW ZEALAND 0800 SAMSUNG (0800 726 786) www.samsung.com/nz/support...
Need help?
Do you have a question about the MX-HS6800 and is the answer not in the manual?
Questions and answers