
Related Manuals for LG WF-S150S


Summary of Contents for LG WF-S150S
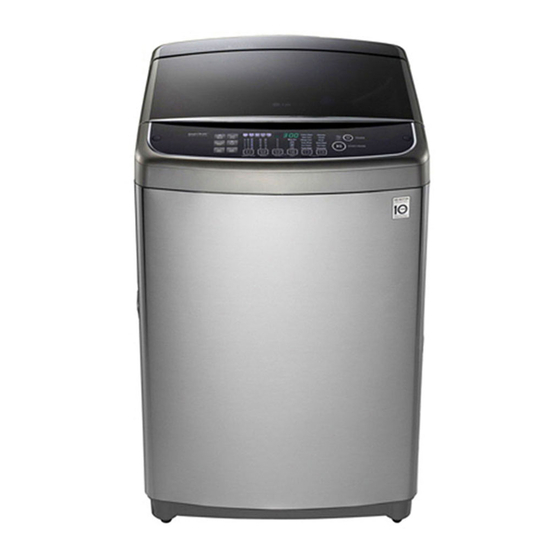
- Page 1 OWNER’S MANUAL WASHING MACHINE Please read this manual carefully before operating your washing machine and retain it for future reference. WF-S150S MFL69022778...
- Page 2 Product Features The Turbo Drum DD washing machine does not operate with the lid open. If the lid is opened during wash, rinse and spin cycles, the machine will stop automatically. Please close the door gently. Closing the door in an aggressive manner can cause damage and or injury.
-
Page 3: Table Of Contents
Contents READ THIS MANUAL Inside you will find many helpful hints on how to use and maintain your washer properly. Just a little preventive care on your part can save you a great deal of time and money over the life of your washer. - Page 4 Safety Information Read carefully and thoroughly through this booklet as it contains important safety information that will protect the user from unexpected dangers and prevent potential damages to the product. This booklet is divided into 2 parts : Warning and Caution. : This is a warning sign specifying user’s applications which might be dangerous.
- Page 5 Safety Information WARNING YOUR • Keep the area underneath and around your appliances free of combustible LAUNDRY materials such as lint, paper, rags, chemical, etc. AREA Operating with such materials around the machine may trigger explosion or fire. • The appliance is not intended for use by young children or infirm persons without supervision.
- Page 6 Safety Information WARNING WHEN USING THE WASHER Do not use a plug socket and wiring equipment for more than their rated capacity. Exceeding the limit may lead to electric shock, fire , break down, and/or deformation of parts. Do not mix chlorine bleach with ammonia or acids such as vinegar and/or rust remover. Mixing different chemicals can produce toxic gases which may cause death.
-
Page 7: Identification Of Parts
Identification of Parts Body * Picture might be different by model. WATER SUPPLY HOSE Make sure the water SOFT SAFETY DOOR does not leak. TEMPERED GLASS POWER PLUG POWDER AND LIQUID If the supply cord is DETERGENT BOX damaged, it must be replaced by the BLEACH manufacturer or its... -
Page 8: Function Information
Function Information Our machine provides various washing methods which suits various conditions and types of laundry. Different types of laundry washing Use this Course for everyday washing e.g. sheets, towels, T-shirts. (refer to page 16) Normal Wash Use this Course to get better rinsing performance. (refer to page 16) Smart Rinse To save water and detergent for less than 7kg of laundry that is not too dirty. -
Page 9: Preparation Before Washing
Use nylon nets for long, DELICATE items. For laundry with long strings or long length, a net will prevent tangling during washing. Fasten zippers, hook, and strings to make sure that these items don't snag on other clothes. ※ Nylon net is not supplied by LG. -
Page 10: Use Of Water, Dispenser Drawer, Detergent, Bleach And Softener
Use of Water, Dispenser Drawer, Detergent, Bleach and Softener Using Water Amount of WATER LEVEL • This machine detects the quantity of laundry automatically, then sets the Water Level and proper amount of Detergent. • When you select a wash Course, the Water Level will be shown on the control panel. •... - Page 11 Using Detergent Detergent Follow the Detergent package directions. Using too little Detergent is a common cause of laundry problems. Use more Detergent if you have hard water, large loads, greasy or oily soils or lower Water Temperature. Choosing the right Detergent We recommend the use of domestic Detergent, (powder, liquid or concentrated).
- Page 12 Use of Water, Dispenser Drawer, Detergent, Bleach and Softener Using Liquid Bleach • Check clothing care label for special instructions and separate the laundry to be bleached Bleach dispenser • Dilute liquid chlorine bleach. • Measure the recommended amount of liquid bleach carefully following instructions on the bottle.
-
Page 13: Special Guide For Stain Removal
Special Guide for Stain Removal WARNING Do not use or mix liquid chlorine bleach with other household chemicals such as toilet cleaners, rust removers, acid or products containing ammonia. These mixtures can produce dangerous fumes which can cause serious injury or death. ■... -
Page 14: Function Of Each Button
Function of each Button Display laundry progress Display remaining time, reservation time, and alarm for trouble • Laundry progress is indicated • During operation this indicates time to finish of laundry. here. indicates remaining time of laundry, rinse, spin • Process to be done will have dry during operation/pause. - Page 15 SmartDiagnosis Air dry START/PAUSE button POWER button Function Display • To shorten dry time. • Use to start or pause • Use to turn the power • It marks the place on or off. • Air dry is a stand the washing process.
- Page 16 Washing Course Washing dd the Course laundry the Detergent Used for normal loads, this mode automatically selects the most appro- • Add the appropriate quantity priate conditions and completes the of Detergent As indicated by sequence in one operation. the Water Level. Or follow The built-in sensor detects the size of the Detergent Manufacturer's the load and the ideal wash power...
- Page 17 Close the lid Finish Caution & Note • If water is already in the tub, or putting wet laundry into the tub before starting will increase the Water Level. • With lightweight bulky loads, Water Level can be set low. •...
-
Page 18: Quick Wash
Washing Course Washing dd the Course laundry the Detergent • Add the appropriate quantity • Select the Use this mode when washing of Detergent as indicated by Quick Wash lightly soiled clothes for a short the Water Level. Course on the time. - Page 19 Close the lid Finish Caution & Note • Lay out in cool floor or on a hanger covered by a towel to dry these type of clothes. • It might have damped clothes because spin dry intensity and time are set to short to prevent damage of clothes.
-
Page 20: Favorite Wash
Favorite Wash Press the POWER button to turn power on. Press Water Wave button and select Water Wave. Put laundry in and Press the Course button to Select Favorite Course. ("Medium Wave" if nothing is selected) • Select Water Level by pressing Water Level button. •... -
Page 21: Soak Wash
Soak Wash Press the POWER button to turn power on. Delicates, Quick Wash, Normal Course do not suppose soak laundry. Put laundry in and Press the Course button to Select Washing Course. Pre Wash+ • “Soak laundry” can be selected by pressing button and indicated by light on soak Press soak laundry button. -
Page 22: Intensive Rinse
Intensive Rinse Press the POWER button to turn power on. Intensive Rinse can only be selected only under Normal, Smart Rinse, Normal, Put laundry in and Press the Course button to Select Washing Course. School Care, and Favorite. Pre Wash+ •... -
Page 23: Tub Clean
Tub Clean If scrud is allowed to build-up in the machine it can result in stains on your clothes or unpleasant smell in your washer. Scrud is the way build-up that can occur within any washer when the fabric softener comes into contact with Detergent, and according to particular degree of dirtiness or quality of water to be use, in these case, use this Course to clean inner tub and outer tub. -
Page 24: Air Dry
Air Dry Press the POWER button to turn power on. Other function cannot be selected during Air Dry. Press Spin for 3 seconds to select Air Dry. • Automatically set to 60 minutes upon selection. • Press Spin button again to select duration (90min ▶ 120 min ▶ 60 min.) •... -
Page 25: Option Washing
Option Washing When you only need the Wash, Wash/Rinse or Rinse cycles, these can be set manually. Press the POWER button to turn power on. Only Wash Only Spin Only Rinse Press the Wash button to Press the Rinse button to Press the Spin button to select the desired timing. -
Page 26: Time Delay (Reservation) Wash
Time Delay (RESERVATION) Wash Press the POWER button to turn power on. Put laundry in and detergent and Press the Course button to Select Put detergent in a slot for reserved synthetic powder detergent. Washing Course. • This Course will not work in Delicates and Tub Clean Course. •... -
Page 27: Other Useful Functions
Other Useful Functions Child Lock Function If you want to lock all the keys to prevent settings from being changed by a child, you can use the child lock option. How to Lock Press the POWER button. • Turn Power on. Press the START/PAUSE button to start washing. -
Page 28: Placing And Leveling
Placing and Leveling Please ensure that transit restraint has been removed before operating your machine. We suggest a minimum clearance of 2 cm to the Place the machine on a flat and firm surface which allows proper clearance. right side and left sides of the machine for ease of more than 10 cm installation. -
Page 29: Connecting Water Supply Hose
Connecting Water Supply Hose Before connecting the Water Supply Hose to the water tap, check the hose type and then choose the correct instruction here under. Note that the Water Supply Hose supplied may vary from country to country, Make sure to connect the blue inlet hose to the COLD water tap, and the orange inlet hose to the HOT water tap. - Page 30 Middle Fixed Sticker Pressing Rod Connector Pressing Handle Middle Pressing Rod Fixed Sticker Water Supply Hose Connector Pressing Handle Connecting Water Supply Hose Water Supply Hose Pressing Rod Middle Fixed Sticker (Normal tap without thread & one touch type inlet hose.) Connector Pressing Handle Pressing Rod...
- Page 31 Water tap Water tap Water tap Rubber Packing Screw Type Rubber Packing Water Supply Hose Rubber Packing Water Supply Hose Water tap Push the water supply hose up so that the rubber Attach the water supply hose to the tap. Water Supply Hose packing within the hose can adhere completely to Rubber Packing...
-
Page 32: Connecting Drain Hose
Connecting Drain Hose Before connecting the Drain Hose, check your Drain Hose model and choose the correct instructions. Pump Model Fit the end of the drain hose to the outlet of the Hose drain pump and secure the clamp. Guide Hose Guide Put the other end of the drain hose over the standpipe or... -
Page 33: Grounding Method
Grounding Method Earth wire should be connected. If the earth wire is not connected, there is possible a danger of electric shock caused by the current leakage . Grounding Method with Ground insert space Terminal Ground If the AC current outlet has a ground terminal, then sepa- Terminal rate grounding is not required. -
Page 34: Cleaning And Maintenance
Cleaning and Maintenance • If you always use COLD water, we recommend that a WARM or HOT wash be used at a regular Cold water washing intervals e.g. every 5th wash should be at least a WARM one. • Turn off taps to prevent the chance of flooding should a hose burst. When you have finished •... - Page 35 Cleaning and Maintenance When there is a fear of freezing • Close the water taps and remove the Water Supply Hose. • Remove the water which remains in the water supply. • Lower the drain hose and drain the water in the bowl and the drain hose by spinning. If frozen •...
-
Page 36: Soft Safety Door
Soft Safety Door • Using tempered glass, inside can be seen while washing and safety is guaranteed. •To prevent sudden close of door, it uses smart hinge so the door closes softly. •Door is heavy. Be careful not to be caught in hand or other material. It might cause injury or damage on product. -
Page 37: Common Washing Problems
Common washing problems Many washing problems involve poor soil & stain removal, residues of lint and scum, and fabric damage. For satisfactory washing results, follow these instructions. WASH PROBLEM Problems Solutions & Preventive Measures Possible Causes • Use correct amount of Detergent for load size, amount of soil and •... - Page 38 In this case, you would see the message again after Tub Clean Alarm few washing times. Once performed Tub Clean cycle, will disappear until next point of time to clean the tub. • Please call your nearest LG Electronics service center for help.
- Page 39 Accordingly, LG does not guarantee that Smart Diagnosis would accurately troubleshoot any given issue.
- Page 40 Terms of Warranty What Is Not Covered: • Service trips to your home to teach you how to use the product. • If the product is connected to any voltage other than that shown on the rating plate. • If the fault is caused by accident, neglect, misuse or Act of God. •...
- Page 41 Specification WF-S150S Model 15.0 kg Wash capacity 220 V~, 60 Hz Power supply 700 W Rated input 30 - 800 kPa (0.3 - 8.0 kgf/cm Water tab pressure 50 kg Weight 632(W) × 670(D) × 1020(H) mm Size ※ In our continuing effort to improve the quality of our appliances, it may be necessary to make...
- Page 42 Memo...
- Page 43 Memo...
- Page 44 Memo...
- Page 45 Memo...
- Page 46 Memo...
- Page 47 Memo...
Need help?
Do you have a question about the WF-S150S and is the answer not in the manual?
Questions and answers