Table of Contents
Advertisement
Quick Links
Advertisement
Table of Contents

Related Manuals for easynet ED-U1600

Summary of Contents for easynet ED-U1600
- Page 1 Ultra Series DVR ED-U1600/U3200...
-
Page 3: Table Of Contents
This manual is intended for initial setup only. The user should read the entire instructions manual before using this product. The user instructions manual can be downloaded via NUVICO website. www.nuvico.com TABLE OF CONTENTS HOW TO SET REMOTE CONTROL ID ........................... 2 HOW TO MOUNT THE HDD TO THE DVR ........................ -
Page 4: How To Set Remote Control Id
HOW TO SET REMOTE CONTROL ID Example: How to program ID 1 (Factory Default) into the remote control. It is a 3 step process. • Press ID button, then, press 1 button, then finally, press ID button again to save. -
Page 5: How To Mount The Hdd To The Dvr
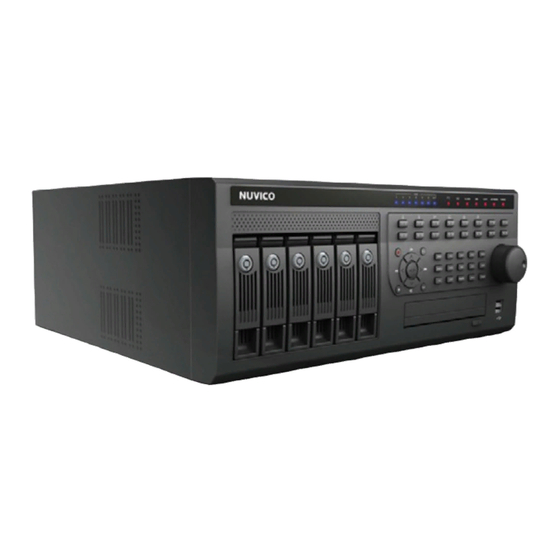
HOW TO MOUNT THE HDD TO THE DVR 1. When you unpack the DVR box, locate the removable HDD tray, shown below. 2. The removable HDD tray, shown below needs to be inserted into the empty slot of the DVR. - Page 6 3. With the latch pointing upwards, slide the tray into the slot. 4. Lock the tray in the slot by applying downward pressure to the latch.
- Page 7 5. Finally, use the supplied tray key to lock the HDD tray into the chasis to prevent unauthorized removal.
-
Page 8: How To Start The Dvr
HOW TO START THE DVR 1. Connect the supplied USB mouse into any available USB port. 2. Connect the power cable from the power source outlet (preferably a UPS) to the back of the DVR. Turn on and start the DVR. •... -
Page 9: How To Initialize The Hdd For Recording
HOW TO INITIALIZE THE HDD FOR RECORDING 1. Follow the instructions below. • Using Front Panel/Remote: Press MENU button and press ↵ button. • Using Mouse: Click on the [Setup Menu] icon. 2. Select Advanced Setup. • Using Front Panel/Remote: Press button and ↵ button. •... - Page 10 3. Select Utility. • Using Front Panel/Remote: Press button many to highlight [UTILITY] and press ↵ button. • Using Mouse: Click on the [UTILITY]. 4. Select Disk Manager. • Using Front Panel/Remote: Press button many to highlight [Disk Manager] and press ↵ button. •...
- Page 11 6. Disk Manager will alert with caution message. • Using Front Panel/Remote: Press ↵ button to acknowledge and to move on. • Using Mouse: Click on the [OK]. 7. Select INT-1 HDD. • Using Front Panel/Remote: Press button to highlight the [Off] status of INT-1. Then, press ↵ button. •...
- Page 12 8. Select Add • Using Front Panel/Remote: Press button to highlight [Add] and press ↵ button. • Using Mouse: Click on the [Add]. 9. You are finished. To exit menu and to start recording video. • Front Panel/Remote: Press and hold onto ESC button for 2 seconds. •...
-
Page 13: How To Set Date/Time
HOW TO SET DATE/TIME When the DVR is powered on for the very first time, the time and date may be incorrect. Before any other operation of the DVR is started, it is important to setup the time and the date. 1. - Page 14 3. Change to the desired value. • Front Panel/Remote: Use and press buttons and ↵ button to modify to desired value. • Mouse: Click on the desired value and modify. Time Sync: When checked, it will synchronize the DVR’s time to its regional NTP (Network Time Server) if an active internet connection is maintained.
-
Page 15: Quick Record Setup
QUICK RECORD SETUP In GLOBAL RECORD under QUICK SETUP, you can set recording parameters that applies to entire cameras. 1. Follow the instructions below. • Using Front Panel/Remote: Press MENU button and press ↵ button. • Using Mouse: Click on the [Setup Menu] icon. 2. - Page 16 3. Change to the desired value. • Front Panel/Remote: Use and press and ↵ button to modify to desired value. • Mouse: Click on the desired value and modify. REC.: On or Off. Refers to Continuous (24/7) recording for all cameras. RES: CIF,2CIF or 4CIF.
- Page 17 4. RECORD WIZARD –Continuous (24/7) Record Mode Only- • Front Panel/Remote: Use and ↵ button to modify to desired value. • Mouse: Click on the desired value and modify. Picture Quality –Better pictures quality but slower PPS- When the DVR is configured to Picture Quality Priority Mode, it will automatically adjust its recording frame rate and resolution based on the number of days specified to give you the highest picture quality possible.
- Page 18 5. Save the changes. • Front Panel/Remote: Press button to highlight [Save] and press ↵ button to save. • Mouse: Click on [Save] to save. 6. To exit out to the Live screen. • Front Panel/Remote: Press and hold onto ESC button for 2 seconds. •...
-
Page 19: How To Disable Use 2
HOW TO DISABLE USE 2 MONITOR (BNC) OUTPUT VERY IMPORTANT IF YOU USE ONLY 1 MONITOR The factory default setting for 2 Monitor is turned “On”. However, should you NOT want to take advantage of 2 Monitor “Main 2”, follow these instructions. 1. - Page 20 3. Access the sub-menu of SYSTEM. • Using Front Panel/Remote: Press button twice and press ↵ button. • Using Mouse: Click on the [SYSTEM]. 4. Uncheck to turn off [Monitor Key]. • Using Front Panel/Remote: Press button multiple times to highlight [Monitor Key], and press ↵ button. •...
- Page 21 5. Save the changes. • Front Panel/Remote: Press button to highlight [Save] and press ↵ button to save. • Mouse: Click on [Save] to save. 6. To exit out to the Live screen. • Front Panel/Remote: Press and hold onto ESC button for 2 seconds. •...
-
Page 22: How To Setup Ip Address Under The Network Setup
HOW TO SETUP IP ADDRESS UNDER THE NETWORK SETUP The network menu allows for adjustment to the TCP/IP settings for viewing video across a local area network or through the internet. 1. Follow the instructions below. • Using Front Panel/Remote: Press MENU button and press ↵ button. •... - Page 23 3. Select Network and access the sub-menu of NETWORK. • Using Front Panel/Remote: Press button multiple times to move over to [NETWORK], then, press button twice to highlight [NETWORK], and press ↵ button. • Using Mouse: First, click on the [NETWORK] icon, and then click on the [NETWORK] text. 4.
- Page 24 • Mouse: For DHCP, click on the “On” checkmark to enable or to disable. For IP, Netmask, Gateway, DNS1, DNS2, Port, follow the instructions below. (These parameters are given by your Internet Service Provider or Network Administrator on a corporate network environment.) Highlight and click the IP portion on the screen.
- Page 25 DHCP: Obtains IP, Netmask, Gateway, DNS1, DNS2 automatically from your internet device or Router. Only enable this when you know that DHCP is supported by your device. IP: IP Address Netmask: Subnet Mask Gateway: Gateway, usually referred to as IP Address of your router on the network. DNS1: Primary Domain Name Server Address, given by your Internet Service Provider or Network Administrator.
- Page 26 5. Save the changes. • Front Panel/Remote: Press button to highlight [Save] and press ↵ button to save. • Mouse: Click on [Save] to save. 6. To exit out to the Live screen. • Front Panel/Remote: Press and hold onto ESC button for 2 seconds. •...
-
Page 27: How To Search For Video Using "Time Search" Method
HOW TO SEARCH FOR VIDEO USING “TIME SEARCH” METHOD 1. Follow the instructions below. • Using Front Panel/Remote: Press SEARCH button. • Using Mouse: Click on the [Search] icon. 2. Select Time Search. • Using Front Panel/Remote: Press button twice to highlight [Time Search] and press ↵ button. •... - Page 28 3. Enter your desired Date and Time. • Using Front Panel/Remote: Press ↵ button and use to change to the desired value for Month/Day/Year and Hour/Minute/Second. When finished, press ↵ button. Then, press button couple of times to highlight [Start] and press ↵ button. Your desired video will start playing.
-
Page 29: How To Search For Video Using "Calendar Search" Method
HOW TO SEARCH FOR VIDEO USING “CALENDAR SEARCH” METHOD 1. Follow the instructions below. • Using Front Panel/Remote: Press SEARCH button. • Using Mouse: Click on the [Search] icon. 2. Select Calendar Search. • Using Front Panel/Remote: Press button three times to highlight [Calendar Search] and press ↵ button. •... - Page 30 3.Select Year, then Month, and Finally the day of the month. • Using Front Panel/Remote: Press button to highlight Month and press ↵ button. Use and press buttons to select your desired month and press ↵ button to exit. Use the same method for year and day.
-
Page 31: How To Copy Videos Into Cd/Dvd/Usb
5. To exit out to the Live screen. • Front Panel/Remote: Press button. • Mouse: Click on the X (Close). HOW TO COPY VIDEOS INTO CD/DVD/USB 1. Follow the instructions below. • Using Front Panel/Remote: Press COPY button. • Using Mouse: Click on the [Copy] icon. - Page 32 2. Set your desired video copy parameters. • Using Front Panel/Remote: Use and press either buttons to highlight different parameters and press ↵ button to get into the sub-menu to change the value. When the value is changed, press ↵...
-
Page 33: How To View Copied Video
HOW TO VIEW COPIED VIDEO 1. Insert the copied medium such CD/DVD or USB Thumbdrive into the DVR. 2. Follow the instructions below. • Using Front Panel/Remote: Press SEARCH button. • Using Mouse: Click on the [Search] icon. 3. Choose your desired medium such as DVD or USB. •... - Page 34 4.DVR will search for video from your desired medium.
- Page 35 5. DVR will display videos that are available on your desired medium. 6. Follow Time Search method that is explained on page 25.
-
Page 36: How To Log In To The Dvr
HOW TO LOG IN TO THE DVR To start using the DVR, first, you have to log in. 1. Follow the instructions below. • Using Front Panel/Remote: Press LOCK button. • Using Mouse: Click on the [Log In] icon. 2. You need to input admin password [0 0 0 0 0 0] for the DVR. •... - Page 37 3. On screen keyboard should now appear. The default admin password for the DVR is [0 0 0 0 0 0]. • Using Front Panel/Remote: Use and press either button repeatedly to highlight [0], then, press ↵...
- Page 40 NUVICO Corporate Headquarters NUVICO International Corporation 53 Smith Street Englewood, NJ 07631 R#1001, KOFOMO Tower, 16-3 Sunae-Dong, Bundang-Gu, Tel: 201-541-1605 Toll Free: 866-523-1700 Fax: 201-541-1620 Seongnam-Si Gyeonggi-Do, 463-825, Korea sales@nuvico.com | www.nuvico.com Tel: 82-31-712-8814 Fax: 82-70-7500-9164 | export@nuvico.com NUVICO ® Copyright 2011 Version 1.11 Follow us by going to www.twitter.com/nuvico for our latest company news or sign up to receive our eNewsletters by emailing us at: Designs and specifications are subject to change newsletters@nuvico.com...
Need help?
Do you have a question about the ED-U1600 and is the answer not in the manual?
Questions and answers