Table of Contents
Advertisement
Quick Links
Advertisement
Table of Contents

Summary of Contents for AVer E5016
- Page 1 E5000 series E5016/E5016H User Manual V 2.3.1.3...
- Page 2 The information contained in this documentation is subject to change without notice. In no event will AVer Information Inc. be liable for direct, indirect, special, incidental, or consequential damages arising out of the use or inability to use this product or documentation, even if advised of the possibility of such damages.
- Page 3 © 2015 AVer Information Inc. All rights reserved. All rights of this object belong to AVer Information Inc. Reproduced or transmitted in any form or by any means without the prior written permission of AVer Information Inc. is prohibited. All information or specifications are subject to change without prior notice.
-
Page 4: Table Of Contents
Contents CHAPTER 1 HARDWARE INTRODUCTION ..............1 Package Contents....................1 1.1.1 E5016 ......................1 1.1.2 E5016H ....................... 2 Front Panel ......................3 Back Panel ......................4 1.3.1 E5016 ......................4 1.3.2 E5016H ....................... 5 Hard Disk Installation .................... 6 Pin Definition of Sensor/Relay/RS485 Port ............7 CHAPTER 2 MAIN SYSTEM CONFIGURATION ............ - Page 5 2.5.2.2 Customizing System Login Setting ........... 30 2.5.3.3 Customizing System Miscellaneous Setting ........31 2.5.4 Update/Export/Import ................32 2.5.4.1 Importing NVR/DVR System Configuration ........33 2.5.4.2 Exporting NVR/DVR System Configuration ........35 2.5.4.3 Upgrading NVR/DVR Firmware ............37 2.5.4.4 Upgrading IP Camera Module Patch ..........39 2.5.4.5 Upgrading Video Server Firmware............
- Page 6 2.8.1 Connect the Analog Camera ..............62 2.8.2 Connect the IP Camera ................63 2.8.2.1 Use Active IP Function ..............66 2.8.3 Camera Detail Configuration ..............68 Info ....................68 Basic ....................69 Preference ..................70 Exposure ..................72 Stream ..................... 73 ROI ....................
- Page 7 Record Management ..................92 2.10 Schedule Setting ....................95 2.10.1 Setup Alarm Schedule ................95 2.11 Backup Setting ....................97 2.12 Alarm Setting ...................... 99 2.12.1 Setup Alarm Condition ................99 2.12.2 Setting Alarm Action ................105 2.13 User Account Setting ..................113 2.13.1 Creating an User Account ................
- Page 8 2.18.2 Using On Screen Keyboard ..............136 CHAPTER 3 MONITORING THE NVR/DVR ............. 137 Managing Camera Channels ................138 Meaning of Icons and Figures ................139 Enable/Disable the Camera Channel ..............140 Changing Screen Channel Display Mode ............141 Enable/Disable the Sound of the Channel ............142 Switching Multiple Screen to Single Screen Display ..........
- Page 9 4.6.2 Enable/Disable Sound of the Channel ............. 161 4.6.3 Switching Multiple Screen Display to Single Screen Display ....162 4.6.4 Full Screen Display .................. 163 4.6.5 Hiding Camera List .................. 164 4.6.6 Output a Video Clip to a USB Pen Drive ..........165 4.6.7 Snapshot the Screen View ...............
-
Page 10: Chapter 1 Hardware Introduction
Chapter 1 Hardware Introduction Package Contents 1.1.1 E5016 E5016 NVR unit Accessories kit for USB optical mouse (Rack ear is not included) HDD bay Software CD Power adaptor Power cable Manual CD... -
Page 11: E5016H
1.1.2 E5016H E5016H DVR unit USB optical Accessories kit for (Rack ear is not included) mouse HDD bay Software CD Power cable Manual CD Video In cable Audio In cable Loop Out cable (2 Spot monitor cables are (optional) not supported) -
Page 12: Front Panel
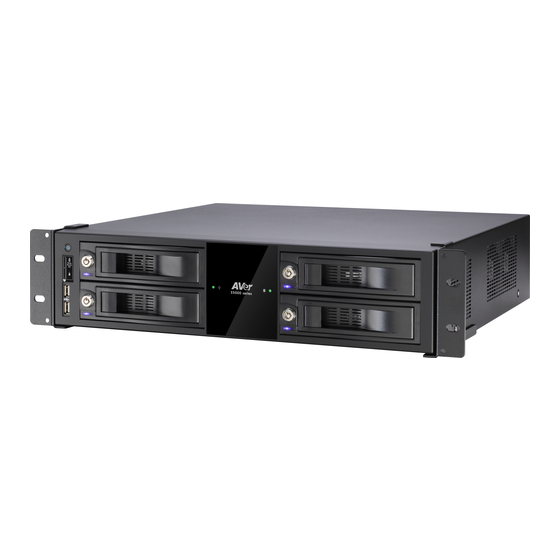
Front Panel ○ ○ Power button System power indicator ○ ○ USB port Recording status indicator ○ ○ USB port(mouse) HDD bay ○ ○ HDD bay HDD bay ○ HDD bay... -
Page 13: Back Panel
Back Panel 1.3.1 E5016 ○ ○ RS232 port Audio output port ○ ○ LAN1/LAN2 port RS485 port ○ ○ TV output port Sensor input port ○ ○ VGA output port Alarm(relay)output port ○ ○ HDMI port Power connector port ○... -
Page 14: E5016H
1.3.2 E5016H ○ ○ RS232 port RS485 port ○ ○ LAN1/LAN2 port Sensor input port ○ ○ TV output port Alarm(relay)output port ○ ○ VGA output port Power connector port ○ ○ HDMI port e-SATA port ○ ○ USB port Audio In port ○... -
Page 15: Hard Disk Installation
Hard Disk Installation The DVR unit can support up to 4 SATA hard disks. Follow the illustrated instructions below to install the hard disk: Open the door of HDD bay. Slide the hard disk into the HDD bay and push the hard disk inside the HDD bay completely. -
Page 16: Pin Definition Of Sensor/Relay/Rs485 Port
Pin Definition of Sensor/Relay/RS485 Port The I/O card enables you to connect 16 sensor inputs and 4 relay outputs. Just connect the external sensor and relay pin directly to the I/O card pinhole. Check the table below and locate which pinhole is assigned to sensor input and relay output. The signal from the sensor (i.e., infrared sensors, smoke detectors, proximity sensors, door sensors, etc.) is being transmitted to the I/O card and this triggers the system to respond and send signal to relay device (i.e., alarm, telephone etc). - Page 17 Sensor Pin definition Definition Definition Sensor Signal 1 Sensor Signal 9 Sensor Signal 2 Sensor Signal 10 Sensor Signal 3 Sensor Signal 11 Sensor Signal 4 Sensor Signal 12 Sensor Ground Signal Sensor Ground Signal Sensor Signal 5 Sensor Signal 13 Sensor Signal 6 Sensor Signal 14 Sensor Signal 7...
-
Page 18: Chapter 2 Main System Configuration
Chapter 2 Main System Configuration Getting Started 1. Connect the power cable and mouse to NVR/DVR unit. 2. Power on the NVR/DVR unit and wait for system start up processing to complete. 3. For security purpose, the NVR/DVR system would require user to enter User ID and Password before it can be accessed. -
Page 19: Familiarizing Icons On Dialog Box
Format Hard Disk: The hard disk must be formatted before use it to save recording data (see also Chapter 2.7.1). Before formatting hard disk, please make sure no operations is running on NVR/DVR system. Setup Storage Path: Select the hard disk to be a storage path for saving recorded video. -
Page 20: Familiarizing Functions In Preview Mode
Familiarizing Functions in Preview Mode Name Function Click Setup button to configure settings for cameras, recording, (1) Setup network, scheduler, backup, sensors, relays, alarms and user authentication. Switch to Preview mode. This allows you to view live camera (2) Preview display. - Page 21 Name Function (7) POS Log Viewer Search and display POS event logs (see also Chapter 2.16.3). (8) Date and Time It shows the current system date and time. Switch to Playback mode. This allows you to view the recorded (9) Playback video file.
- Page 22 Name Function (17) Alarm Log Viewer Alarm log: To view and search the alarm event logs (see also Chapter 2.17.2).
-
Page 23: Familiarizing Functions In Playback Mode
Familiarizing Functions in Playback Mode Click playback tab to switch to playback mode. Name Function Click Setup button to configure settings for cameras, recording, (1) Setup network, scheduler, backup, sensors, relays, alarms and user authentication. Switch to Preview mode. This allows you to view live camera (2) Preview display. - Page 24 Name Function NVR/DVR supports 2 type of searching in playback mode – (6) Search Event Search and Visual Search. - Event Search: Search from the recorded activities that were recorded in event log such as Sensor, Motion, Video Loss (see also Chapter 4.
- Page 25 Name Function (10) Date and Time It shows the current date and time. Switch to Playback mode. This allows you to view the recorded (11) Playback video file. To hide the side area and give more view of screen. (12) Hide button (13) Split Screen Mode Select from 6 kinds of split screen type to playback the recorded video file of all the camera, or one camera over the other or...
- Page 26 Name Function (19) Power button Call up the Power dialog box. In the Power dialog box, user may do the following: Exit: Shutdown the NVR/DVR system. Compact: Switch to compact mode. In compact mode, user’s authority is limited (see also Chapter 2.4.2).
- Page 27 Name Function (24) To expand the playback time bar from an hour to minute. (Zoom in/ out) (25) Minimize Click to close up the progress bar. Click again to open up. Show the progress of the file being played. You may move the (26) Progress bar bar to seek at any location of the track.
-
Page 28: Compact Mode
Compact Mode The preview and playback are both supported compact mode. To switch to Compact mode, click power button (located at upper right corner) and select Compact button in Power dialog in preview or playback mode. To switch back to Advance mode, click power button and select Advance button in preview or playback mode. -
Page 29: Familiarizing Function In Preview Compact Mode
2.4.1 Familiarizing Function in Preview Compact Mode Name Function (1) Setup Click Setup button to configure settings for cameras, recording, network, scheduler, backup, sensors, relays, alarms and user authentication. (2) Split Screen Mode It provides 6 kinds of split display modes for your selection. User can select the split display modes by clicking the split mode icon. - Page 30 Name Function Use the entire area of the screen to only display the video. To (4) Full screen return, click the arrow icon at bottom of right. Click to switch back to normal display mode. When you switch to full screen in multiple-screen mode, Left click to toggle to only display one of the video in the multiple-screen mode or all.
-
Page 31: Familiarizing Function In Playback Compact Mode
2.4.2 Familiarizing Function in Playback Compact Mode Name Function (1) Setup Click Setup button to configure settings for cameras, recording, network, scheduler, backup, sensors, relays, alarms and user authentication. (2) Split Screen Mode It provides 6 kinds of split display modes for your selection. User can select the split display modes by clicking the split mode icon. - Page 32 Name Function Use the entire area of the screen to only display the video. To (3) Full screen return, press the right button of the mouse or ESC on the keyboard or click the arrow icon. Click to switch back to normal display mode.
- Page 33 Name Function Mark a reference point when reviewing the recorded video file to (5) Bookmark which you may return for later reference (see also Chapter 4. Save the playback file to USB pen drive (see also Chapter 2.11). (6) Backup Click it to view NVR/DVR system’s version and copyright.
- Page 34 Name Function Show the progress of the file being played. You may move the (12) Progress bar bar to seek at any location of the track. Using the Zoom In/Out button to expand the playback time from an hour to minute. (13) Status bar Display the recorded date, time and play speed.
-
Page 35: System Setup
System Setup Click Setup tab in preview/playback mode to switch to system setup mode. In Setup mode, user should see the System Information dialog box is displayed at the first place. In System Information dialog box, it displays the setting options of Language, Date/Time, Network1, Netowrk2 and Storage. -
Page 36: General System Setting
2.5.1 General System Setting Setup the language of NVR/DVR system, video type, system date and time, synchronize the system time. Click Setup tab > System Setting; click + to expand list of System Setting and click System Configuration. After changing the settings, click Apply button to save the settings. -
Page 37: System Advanced Setting
2.5.2 System Advanced Setting In Advanced of System Configuration, user can setup the daylight saving time, system login setting, and some other system related setting. Click Setup tab > System Setting; click + to expand list of System Setting and click System Configuration >... -
Page 38: Daylight Saving Time Setting
2.5.2.1 Daylight Saving Time Setting User can setup daylight saving mode as user is desired. Select the mode of Daylight saving. Mode 1: Mode 1 is setting up specific start date/time and end date/time. Mode 2: Mode 2 is setting up fixed day of month in every year for start and end date/time. -
Page 39: Customizing System Login Setting
2.5.2.2 Customizing System Login Setting Enable the conditions in Login section you want the system to automatically carry out. Click Apply to save the setting. Auto Login after system boot up: Login NVR/DVR system automatically when NVR/DVR operating system is started. ... -
Page 40: Customizing System Miscellaneous Setting
2.5.3.3 Customizing System Miscellaneous Setting Enable the conditions in Miscellaneous section you want the system to perform. Click Apply to save the setting. Auto Scan Period: Set the time gap of the Auto Scan function from 3 to 10 seconds. This automatically switches to the next video in cycle depending on the set time gap. -
Page 41: Update/Export/Import
2.5.4 Update/Export/Import In Configure Update, user can import the backup configure file to NVR/DVR system and export the configure file to external USB pen drive. Also, user can update the NVR/DVR system’s firmware and IP camera patch file. Click Setup tab > System Setting; click + to expand list of System Setting and click System Configuration >... -
Page 42: Importing Nvr/Dvr System Configuration
1. Plug the USB pen drive into the NVR/DVR unit that contains the backup configuration file that user has exported previously. 2. In Configure/Update page, click Import button in Configuration section. 3. In Import dialog box, user should see the backup configuration file path and file name (E5016.cfg). - Page 43 4. Then, click Import button. 5. A message dialog box will appear to remind user that the NVR/DVR system will reboot after restoring the backup configuration file. Click OK button to continue. To cancel click Cancel button. 6. After restoring backup configuration file, a message dialog box will appear to inform user that import process is completed.
-
Page 44: Exporting Nvr/Dvr System Configuration
2.5.4.2 Exporting NVR/DVR System Configuration Backup a copy of all the settings and allows you to regain the same settings back. 1. Plug in the USB pen drive for saving configuration file. 2. In Configure/Update page, click Export button in Configuration section. - Page 45 3. In Export dialog box, user should see the backup configuration file path and default backup configuration file name (E5016.cfg). 4. Next, click Export button. 5. A message dialog box will appear to notice user that export process is completed. Click OK button to finish the export process.
-
Page 46: Upgrading Nvr/Dvr Firmware
To update the firmware of NVR/DVR system. 1. Plug the USB pen drive that contains the NVR/DVR firmware file. To get the newest NVR/DVR firmware, go to website http://www.aver.com > Support > Download center. 2. In Configure/Update page, click Update button of Firmware. - Page 47 3. In upgrade dialog box, the NVR/DVR system will detect the firmware file and shows the firmware file path, firmware file name, and version information. 4. Click Upgrade button and an upgrade process dialog box will appear. 5. A message dialog box will appear to inform user that the upgrade process is completed. Click OK button to restart the NVR/DVR system.
-
Page 48: Upgrading Ip Camera Module Patch
2.5.4.4 Upgrading IP Camera Module Patch To update the firmware of NVR/DVR system. 1. Plug the USB pen drive that contains the IP camera patch file. 2. In Configure/Update page, click Update button of IPCam Module. 3. In upgrade dialog box, the NVR/DVR system will detect the patch file and show the path of patch file, patch’s file name, and version information. -
Page 49: Upgrading Video Server Firmware
2.5.4.5 Upgrading Video Server Firmware To update the firmware of NVR/DVR system. 1. Plug the USB pen drive that contains the video server’s patch file. 2. In Configure/Update page, click Update button of Video Server. 3. In upgrade dialog box, the NVR/DVR system will detect the patch file and show the path of patch file, patch’s file name, and version information. -
Page 50: Setup Dual Monitor
2.5.5 Setup Dual Monitor The NVR/DVR system support dual monitor connection. User can choose the function UI to display on second monitor. In default, the main monitor is the monitor connect on HDMI port. Click Setup tab > System Setting; click + to expand list of System Setting and click System Configuration >... - Page 51 Click Switch Control Monitor button can change control to another monitor. User can operate the function on another monitor.
-
Page 52: Reset To Factory Default
2.5.6 Reset to Factory Default Reset the NVR/DVR system back to factory default value. All configurations will be lost after reset to factory default. Click Apply button of Factory default and NVR/DVR system will reboot automatically. -
Page 53: Network Setting
Network Setting Select type of IP mode, setup the IP address of NVR/DVR, and configure the DDNS. 1. Click Setup tab > System Setting; click + to expand list of System Setting and click Networking. 2. MAC Address: Displays the MAC address of Ethernet port on LAN card. 3. - Page 54 gateway IP address DNS: Domain Name Server translates domain names (such as www.abb.com.tw) to IP addresses. Enter the IP address of DNS if it is available. DHCP: Uses DHCP server assigning NVR/DVR server an IP address. PPPOE: Point-to-Point Protocol over Ethernet is a network protocol for encapsulating PPP frames in Ethernet frames.
-
Page 55: Setup Nvr/Dvr Server Name
2.6.1 Setup NVR/DVR Server Name Assign a name for the NVR/DVR system. Alphabet letters and numbers only. Click Setup tab > System Setting; click + to expand list of System Setting and click Networking. User will see the Network Setting dialog box appear. Enter the desire name in Server Name column, then, click Apply button to save the settings. -
Page 56: Network Advanced Setting
2.6.2 Network Advanced Setting User can setup camera transmitting, UPnP function, bandwidth limit setting, and network port setting. Click Setup tab > System Setting; click + to expand list of System Setting and click Networking > Advanced tab. Click Setting to configure. -
Page 57: Setup Transmitting Camera
2.6.2.1 Setup Transmitting Camera Select and click on the camera number in the Transmitting Camera section you want to make it accessible via internet using PCViewer, Remote site control, and iPhone/Andorid Viewer. To select all the cameras, enable the ALL check box. 2.6.2.2 Setup UPnP Assign a port number for UPnP service. -
Page 58: Setup Network Port
2.6.2.4 Setup Network Port Assign a Network Port for remote accessing connection. -
Page 59: Storage Setting
Storage Setting In storage setting, user can add the storage path, remove the storage path, format hard disk, and set the hard disk recycle time. Click Setup tab > System Setting; click + to expand list of System Setting and click Storage. In Storage page, click HDD Location button can view the each HDD bay number. -
Page 60: Formatting Hard Disk
2.7.1 Formatting Hard Disk Follow the steps below to format the hard disk for first time installation or re-format the hard disk to the type that can be saved recording video. 1. In Storage Setting page, click Storage tab. 2. In Storage Setting page, user should see the hard disk in Detected HDD section that NVR/DVR system has detected. -
Page 61: Creating Raid Drive
2.7.2 Creating RAID Drive RAID (redundant array of independent disks) is a storage technology that combines multiple disk drive components into a logical unit for the purposes of data redundancy and performance improvement. The NVR/DVR system supports RAID 0, RAID 1, and RAID 10. Each RAID description is shown when user chooses the RAID type. - Page 62 Follow the below steps to build an RAID storage. 1. In Storage Setting page, click Create RAID button. 2. In Create RAID page, select hard disks (Step A) and click Next button to go to Step B.
- Page 63 3. Then, select the RAID type (Step B). There are some rules for each RAID type; therefore read the description of each RAID type before choosing. 4. Click Build RAID button to start RAID creating process. To re-choose the hard disk or RAID type, click Back button.
- Page 64 7. When the RAID is created, you should see the RAID drive in Detected HDD section. 8. Click Detail button of RAID drive, it displays the hard disks location of RAID on NVR/DVR unit and related information. When the word “STAT#” is display in red text, it means HDD status is un- normal.
-
Page 65: Setup Storage Path For Recording Data
2.7.3 Setup Storage Path for Recording Data Without storage path, the NVR/DVR system won’t be able to record. After storage path is added, the system will star to record. Add a storage path for saving recording video data. In Storage Setting page, click Storage tab. Select hard disk, RAID drive, or iSCSI HDD and click button. - Page 66 The selected hard disk, RAID drive, or iSCSI HDD will be added into Use for Recording HDD section. To remove the hard disk or RAID drive, select hard disk, RAID drive, or iSCSI HDD in Use for Recording HDD section and click button.
-
Page 67: Setup Hard Disk And Event Log Recycle Time
2.7.4 Setup Hard Disk and Event Log Recycle Time Delete Recorded Data After Days: If user wants the system to automatically erase the data after a certain days, enable the Delete Recorded Data After check box and enter the numbers of days in Days text box. -
Page 68: Iscsi Setting
2.7.5 iSCSI Setting Connect the iSCSI server on your network to use as a storage path for saving recorded data. Enter the following information to connect the iSCSI server on your network. Initiate Name: The initiate name of iSCSI server. User can find out on iSCSI server. ... - Page 69 Click Storage tab, user will see the iSCSI HDD is listed in Detected HDD section. To format iSCSI HDD, select it and click Format button. To add iSCSI HDD as a storage path, select it and click button.
-
Page 70: Camera Management
Camera Management Connect and configure the IP camera. Click Setup tab > Camera Setting. -
Page 71: Connect The Analog Camera
2.8.1 Connect the Analog Camera 1. Connect the DVI cable to the video in port of DVR. 2. Connect the analog camera to the DVI cable of DVR and power on the analog camera. 3. In Camera List, select the channel that connect with Analog camera and select Type of camera as Analog. -
Page 72: Connect The Ip Camera
Available (MP) column. - Search List: To perform the auto search IP camera on your LAN network and list search result. Also, the NVR/DVR system provides Active IP function for user to configure AVer IP cameras series from NVR/DVR site (see also Chapter 2.8.2.1). - Page 73 3. Click Search button to find IP cameras on LAN network. 4. In Search result list, select the IP camera that user wants to connect. Then, select the IP camera channel that user wants to connect the selected IP camera. Enter the User name and Password of IP camera if the connection authentication is required.
- Page 74 IP Address: Enter the IP camera’s IP address. Port: Enter the port of connecting IP camera. Protocol: Enter the brand name of the IP camera. For example: AVer, AXIS...etc. Model: Enter the model type of the IP camera. For example: SF2012H-B ...
-
Page 75: Use Active Ip Function
2.8.2.1 Use Active IP Function The Active IP function allows user to configure the AVer IP camera series’ IP mode, IP address, subnet mask, gateway, port, login ID, and password on NVR/DVR system. The Active IP function supports AVer IP camera series only. - Page 76 In Active IP dialog box, user can change IP mode of the IP camera and configure related parameters. After configuring, click OK to save the setting.
-
Page 77: Camera Detail Configuration
2.8.3 Camera Detail Configuration User can configure the IP camera’s stream settings and related parameters. Click Setup tab > Camera Setting; click + to expand list of Camera Setting and click the Camera number that user wants to configure. Or, click Setting button of IP camera in Camera Management dialog box. -
Page 78: Basic
Basic Video Adjustment: Configure the Brightness, Contract, Hue, Saturation, and Sharpness of IP camera. IP Camera: Enable/disable Speaker and MIC of IP camera. Audio: Enable/disable audio function of IP camera. -
Page 79: Preference
Preference In Preference page, user can tune the IP camera white balance, select display color or black & white, set the flicker frequency, change the video orientation, and adjust the some advance settings. After completing the setting, click Apply to save the setting and Cancel to keep the old setting. - Page 80 Denoise: Select Disable/2D/3D/Auto to reduce the excessive noise on the video image. Select Auto and set the Sensitivity level. AE Profile (Auto Exposure Profile): Select the auto exposure scenes – Indoor, Outdoor, or ManualIRIS. IR-cut Filter: The IR cut filter is a mechanism that prevents the infrared light from hitting the sensor.
-
Page 81: Exposure
Exposure In Exposure page, user can set the exposure area, exposure mode, and calibrate the DC Iris. After completing the setting, click Apply to save the setting and Cancel to keep the old setting. The Exposure setting only support for IP camera. ... -
Page 82: Stream
Stream User can setup Codec, Resolution, FPS, Bitrate Mode, and Quality of Stream 1 on the IP camera channel. The Stream 1 is enabled in default. After completing the setting, click Apply to save the setting and Cancel to keep the old setting. The NVR/DVR system doesn’t support for stream 2 setting. -
Page 83: Roi
ROI stands for Region on Interest. It helps users to optimize bandwidth and storage. Users can select 1 or 2 key area(s) to transmit as separate streams for targeted preview and recording. The ROI setting only support for IP camera. 1. -
Page 84: Smart Stream
Smart Stream Smart Stream optimizes bandwidth and storage space by increasing or decreasing quality for selected areas based upon criticality. Users can define up to 5 areas per stream to ensure sharp images for crucial areas, while saving bandwidth on non-essential areas. Typical applications include entrances, access gates, production lines, art galleries and museums. -
Page 85: Privacy Mask
Privacy Mask In Privacy Mask page, user can enable 3 privacy masks. Simply adjust the size and position the mask on the area user wants to conceal. The viewer will not be able to see the masked area. It will cover the video screen with black frame. -
Page 86: Motion Detection
Motion Detection In the motion detection page, the frame will blink when the motion detected has reached the percentage threshold setting. This feature can be utilized to trigger a response in Event setting. 1. Enable the region check box (Region 1, Region 2, Region 3) to create a motion detection frame. -
Page 87: Iva
Form drop-down list select the IVA function – Cross detection, Tampering, Missing object, or Suspicious object. -
Page 88: Cross Detection
Cross Detection Cross detection function detects moving objects that cross the virtual lines that user has set up in IP camera application and to trigger the alarm. Enable Cross line 1/2 check box You will see the red/green line is shown on the video screen. Drag the red line or green line to set the area for cross detection. -
Page 89: Tampering
Tampering Select Enable tamper detection to enable tampering function. And, alarm will trigger when the following situation has occurred. Spray-painting: Alarm is triggered when the camera has detected the painting sprayed on the camera’s view for over 2 seconds. ... -
Page 90: Missing Object
Missing Object Select a certain object on the screen for the camera system to detect; System gives alarm when the object disappears. 1. Select the Missing Object from the drop-down list. 2. A red frame will show up on the screen. Click and drag the red frame to the object position and click the frame to adjust the size of frame. -
Page 91: Suspicious Object
Suspicious Object Suspicious Object is an unusual object appears on the screen. 1. Select the Suspicious Object from the drop-down list. 2. A red frame and green frame will show up on the screen. The red frame is defined as detecting zone and green frame is defined as object size frame. -
Page 92: Sensor
Sensor Setup the sensor of IP camera. 1. In Camera Management dialog box, click Sensor tab. 2. Click the drop-down list and select the sensor ID number. 3. Enter sensor name in Name column 4. In the Content section, display the NVR/DVR system automatically detects the camera and input relates information. -
Page 93: Relay
Relay Setup the relay of IP camera. a. In Camera Management dialog box, click Relay tab. b. Click the drop-down list and select the relay ID number. c. Enter relay name in Name column d. In the Content section, display the system automatically detects the camera and input relates information. -
Page 94: Mfz
The IP camera has motorized lens can perform MFZ function(motorized focus and zoom). The MFZ setting only support for IP camera. To adjust the focus or zoom in/out the view of IP camera. Name Function Auto focus Automatically focus on where focus cursor ( ) has pointed. - Page 95 Name Function Press to zoom out continuous. Continuous zoom out To reset the zoom back to the center of screen view in Reset default value (1x).
-
Page 96: Ptz Function
PTZ Function Setup IP PTZ User can enable PTZ function if the IP camera has supported. 1. In Camera Management dialog box , click Setup tab 2. Then, select Camera # > PTZ tab. 3. In PTZ setup page, click Use PTZ to enable PTZ function. 4. -
Page 97: Setup Analog Ptz
5. DwellTime: for how long the camera stays in that position before it moves to the next one (the setup time period is 1~60 seconds). After is done, click Save to keep the settings. 6. Restore AutoPan Time: set a time period for restoring auto path function after the PTZ camera has been moved. - Page 98 5. Preset Setting: use the control panel to adjust the position of the camera and select the Preset Number to assign a number for the camera preset position. After is done, click Save to keep the settings. Use these 2 buttons to Zoom in/Zoom out Use the direction the lens.
-
Page 99: Familiarizing Functions On Ptz Control Panel
2.8.4 Familiarizing Functions on PTZ Control Panel User can control PTZ camera through PTZ control panel in preview mode. Enable and set up the PTZ camera; refer to Setting PTZ Function. 1. In preview mode, click (PTZ) icon to call out PTZ control Panel. - Page 100 2. The functions’ description of PTZ control panel is as following. Name Function (1) Camera preset Move the PTZ camera to the preset point. position number (2) Group AutoPan Select to automatically operate PTZ camera in group. (3) Direction buttons’ Adjust the moving speed of the PTZ camera lens.
-
Page 101: Record Management
Record Management The recording schedule is always record in default. If the storage path is not set, the NVR/DVR system couldn’t record. Click Setup tab. Then, select Record Management. Mark Active Optimized Recording to enable dual stream recording. Select the day for High-quality record data retain days to recycle the high quality record data. - Page 102 Event Recording Start recording the video from the selected camera only when the system detects movement. Once a motion is detected, the system automatically saves the previous frames and stop based on the Start Record Prior (0~10 seconds) and Stop Record After(0~999 seconds) settings.
- Page 103 After selecting the recording mode, select date and time on date time table. To select or un-select all blocks, click the area in red circle. If user wants to apply this record schedule to other or all camera channels, uses Copy from and Apply to function to apply to other camera channel.
-
Page 104: Schedule Setting
2.10 Schedule Setting 2.10.1 Setup Alarm Schedule Setting up the schedule for alarm action that user has setup in Alarm setting (see also Chapter 2.12). According to the alarm schedule, the alarm actions will be active and alarm will be issued when action has matched the conditions. - Page 105 2. Click View button to switch to Alarm Schedule window. 3. Next, click Schedule Setting button to go to Alarm schedule page. 4. In Alarm schedule page, select the Enable and click on the date and time to setup the schedule.
-
Page 106: Backup Setting
2.11 Backup Setting Backup the recorded files to external USB pen drive. In Backup setting, user can select different channels or time period to backup at the same time. The backup files can be playback on PC by Qplayer application that is included when backup. Playing backup file on PC refer to Chapter 1. - Page 107 5. User can backup multiple recorded file (different channels and different time period) at the same time. Repeat the above steps to create the backup file and click Add button. The different backup files are distinguished by Folder Name that user has given. The multiple backup files limit is 3 files at the same time.
-
Page 108: Alarm Setting
2.12 Alarm Setting To setup an alarm setting, user needs to complete following steps: Setting up the alarm conditions (see also Chapter 2.11.1). Setting up the alarm actions (see also Chapter 2.11.2). Setting up the alarm schedule (see also Chapter 2.9.2). - Page 109 4. In No. column displays the alarm setting number. The number of alarm is assigned by NVR/DVR system in default. 5. Enter alarm name and description for this alarm setting in Name and Description column. 6. Next, select “Trigger if any” to activate alarm if system falls to one of the conditions or “Trigger if all”...
- Page 110 7. In Camera section, select and click on the camera number in Motion, Video Loss, IVA to set the condition for the system to alarm. If IVA alarm status is not enabled, the IVA functions that user has enabled will not issue any alarm when IVA functions have triggered.
- Page 111 IVA: click the camera number (01 to 16) to set the alarm condition when IVA functions are triggered. Click the Setting button to setup the system to send out the alarm when IVA functions have triggered and status last the time that user has entered in Continuous trigger duration.
- Page 112 9. In System section, mark the check box to set the conditions that are caused by system. Reboot: when the NVR/DVR system reboot without abnormal condition, the system will send out the alarm message. Abnormal Reboot: when the NVR/DVR system reboot in irregular condition, the system will send out the alarm message.
- Page 113 13. To delete the alarm #, select the alarm # that user wants to delete and click Delete button.
-
Page 114: Setting Alarm Action
2.12.2 Setting Alarm Action Setup the alarm action for system to perform when the alarm condition has been triggered. 1. Click Setup tab > Alarm Setting. 2. Then, click Setting button of Alarm # that user has created in Alarm Information dialog box. Also, user can select the Alarm# from the list under Alarm Setting. - Page 115 4. The No., Name, Description, and Priority column display the current alarm’s information. The Trigger Type displays the current alarm’s trigger condition. 5. In Alarm Reset section, click the camera number to set the reset condition of alarm. Once alarm is reset, all alarm action will stop at the moment. If the sensor normal status is high, set the alarm reset condition to low.
- Page 116 Enlarge Camera View Switch to only display video in Preview mode from where the alarm is activated. a. Select the camera from drop down list to specify which camera video to be enlarged on screen when the alarm is triggered. b.
- Page 117 IP Camera Relay Set to enable/disable the relay operation when the alarm is activated. Play Warning Sound Play alarm sound. Send E-mail Send an electronic text message. Beside the Send Email check box, click Detail. In the E-mail Setting dialog box, click OK to exit and save the setting and Cancel to exit without saving the setting.
- Page 118 Mail Server Enter the SMTP Server and port. If your e-mail system requires user identification, enable Authentication check box and enter ID and Password. Mail Fill the mailing information. Click Test Account button can exam the mail is workable or not.
- Page 119 Get a Google account. Go to Google website and follow the instruction to get a Google user account. Copy the below URL to your Google browser. http://www.aver.com/Youtube Using your Google account to login and click “Allow” to enable Google WAN storage function.
- Page 120 Get a Dropbox account. Go to Dropbox website and follow the instruction to get a Dropbox user account. Copy the below URL to your browser. http://www.aver.com/Dropbox Using your Dropbox account to login and click “Allow” to enable Dropbox WAN storage function.
- Page 121 PTZ preset point Position the PTZ camera based on the preset point setting. Beside the PTZ preset point check box, click Detail. In the Trigger PTZ Preset Setting dialog box, select the PTZ camera number then select the Enable check box. Select the position of the PTZ camera when the alarm is activated and ended.
-
Page 122: User Account Setting
2.13 User Account Setting Only administrator level authority can access User Setting. The maximum user accounts are 2.13.1 Creating an User Account 1. Click Setup tab. 2. Then, click User Setting and the User Information dialog box is displayed. The Admin is default user and cannot be deleted. 3. - Page 123 4. In User Setting dialog, Select and fill in the following information. Name: Enter the user name. Description: Enter the user description. Password: Enter the user password. Confirm Password: Enter the same user password for confirmation. ...
- Page 124 5. Click Apply to save the account setting. The user account is list in User Setting list. Adding another user account, repeat above steps. Modifying the user account; click Setting of user account in User Information dialog.
-
Page 125: Deleting An User Account
2.12.1 Deleting an User Account User can remove un-wanted or expired user account. 1. Click Setup tab in Preview mode. 2. Then, click User Setting in Advanced NVR/DVR Setting section and the User Information dialog is displayed. 3. Mark the user account in User Information dialog; then, click Delete button. -
Page 126: I/O Setting
2.14 I/O Setting Setup I/O device status. 2.14.1 Sensor Setting 1. Click Setup tab > Alarm Setting > Sensor tab. 2. Click the drop-down list and select the Sensor #. - Page 127 3. Enter sensor name in Name column. 4. The system automatically detects the card and input number. In the Content section, user can enter a short description of sensor in Description column. 5. In the test section, click Test to check the sensor status. Red is high and Green is low. 6.
-
Page 128: Relay Setting
2.14.2 Relay Setting 1. Click Setup tab > Alarm Setting > Relay tab. 2. Click the drop-down list and select the Relay #. 3. Enter relay name in Name column. 4. The system automatically detects the card and input number. In the Content section, user can enter a short description of relay in Description column. -
Page 129: Emap Setting
2.15 Emap Setting E-Map can hold up to 8 maps in *.jpg or *.bmp format. User may locate the camera, sensor and relay on the map. 2.15.1 Setting Emap Click Emap Management. The Emap dialog box will appear on screen. - Page 130 Click Edit button to switch to Emap setup mode. Then, click the Map number (1 to 8) that user want to setup. Next, click icon to setup name of Emap and load a map figure. When the Emap Setting dialog box appears, click the open file icon ( ) to locate and select the map Enter a name for this Emap in Name column.
- Page 131 When the inserted map appears on the Emap screen, user may now drag the camera, sensor, and relay icons to its place on the map. Icons on the map can be relocated anywhere. If user is going to locate the icon on the map to other area, right-click on the icon on the Emap and click remove to put the icon back to the Resource list.
-
Page 132: Ipos Setting
2.16 iPOS Setting Set from which camera screen to display the data from the POS equipment. Click Setting, to set the POS Console Setting. 1. Click Setup tab. Click + to expand the System Setting list and select Hardware Device. 2. - Page 133 4. In the POS Mapping dialog box, fill and select the following settings. Click OK to save the settings and Cancel to exit without saving the new setting. Name: Enter a name to identify the POS. Protocol: Select the protocol. ...
- Page 134 6. To modify the iPOS setting, click the Setting button of iPOS. 7. To delete the iPOS, mark the iPOS and click Delete button. 8. To view the iPOS event log, refer to Chapter 2.16.3.
-
Page 135: Log Viewer
2.17 Log Viewer Show the record of activities (alarm, event, iPOS) that take place in the system. User can view and search for specific log. 2.17.1 Using the Event Log Viewer Select the channel that user wants to search. Click the channel on screen. Click Event Log icon ( ) in preview mode. - Page 136 To filter the logs, select and click the select Type -- System, Network, Operation, Event, or All. Set the Start Date/Time and End Date/Time period to search the logs. User also can search specific logs by specific Keyword. Click Search button to start searching. The search results are displayed in the below column.
- Page 137 Click on the event log can view the log video. Click Export button can output the log result list to external USB pen drive in *.cvs file format.
-
Page 138: Using The Alarm Log Viewer
2.17.2 Using the Alarm Log Viewer The alarm log viewer is both supported in preview and playback mode. Viewing Alarm Event Alert and display warning information. Click Alarm Log icon ( The Alarm Log Viewer dialog box is appeared and located at bottom of left side screen. User can click icon to expand the Alarm Log Viewer dialog box on the screen. - Page 139 Clicking Refresh button to refresh the alarm events list. Double-click on alarm event can playback the event video.
-
Page 140: Searching Alarm Event Logs
Searching Alarm Event Logs Searching the specific alarm event. Click Alarm Log icon ( The Alarm Log Viewer dialog box is appeared and located at bottom of left side screen. User can click icon to expand the Alarm Log Viewer dialog box on the screen. Then, click Search tab in Alarm Log Viewer dialog box. - Page 141 In Alarm Log Viewer dialog box, select the Camera that user wants to search. Multiple cameras selection is allowed. Set the searching period at Start Date/Time and End Date/Time column. Searching by specific keyword, enter the keyword in Keyword column. Click Search button to start searching.
-
Page 142: Using Pos Log Viewer
2.17.3 Using POS Log Viewer Search the iPOS event. The POS Log viewer is both supported in preview and playback mode. 1. Click POS Log ( 2. The POS Viewer dialog box is appeared and located at bottom of left side screen. User can click icon to expand the POS Log Viewer dialog box on the screen. - Page 143 3. In POSViewer dialog box, select the Camera that user wants to search. 4. Set the searching period at Start Date/Time and End Date/Time column. 5. Searching by specific keyword, enter the keyword in Keyword column. Mark Match whole words exactly option to 100% match the keyword that user has entered. 6.
-
Page 144: Nvr/Dvr System Tools
2.18 NVR/DVR System Tools 2.18.1 Hard Disk Calculator Estimate the hard disk recording capacity. The result of calculation is a rough value which only for reference. The hard disk record capacity will be varied by the real record quality and complexity of video scene. -
Page 145: Using On Screen Keyboard
In Hard Disk Calculator dialog box, enter the expect hard disk size or expect recording time in Expected HD Size(GB) or Expected Record Time(Days), and then click Calculate button. The Total Recording time(Days) column is shown the current hard disk recording capacity. Click OK to exit the hard disk calculator window. The hard disk calculation is based on the recording setup and current hard disk capability. -
Page 146: Chapter 3 Monitoring The Nvr/Dvr
Chapter 3 Monitoring the NVR/DVR After setting up the NVR/DVR system, user can start to monitor the NVR/DVR in preview mode. The following chapters are going to describe the monitoring functions in preview mode. -
Page 147: Managing Camera Channels
Managing Camera Channels User can arrange the channel display position as user is desired. Select the camera in Camera section. Then, drag the camera to the channel that user wants to be displayed. Next, User should see the live video on the channel screen. The channels can be switched between each channel;... -
Page 148: Meaning Of Icons And Figures
Meaning of Icons and Figures The description of icons on each channel: The icon is indicated the current recording status. - Red color( ): recording - Gray color( ): no recording The icon is indicated the motion record status. - Red color( ): motion recording - Gray color(... -
Page 149: Enable/Disable The Camera Channel
Enable/Disable the Camera Channel In Camera list, user can enable/disable camera. When camera is disabled, monitor and record function are both disable. Right-click on the camera in Camera list, select disable or enable the camera. -
Page 150: Changing Screen Channel Display Mode
Changing Screen Channel Display Mode The NVR/DVR has provided 6 types of screen display mode – single ( ), QUAD ( 9-split screen ( ), 16-split screen ( ), 8-split screen ( ), and 13-split screen ( ). To select the screen display mode, click on the screen display icon. -
Page 151: Enable/Disable The Sound Of The Channel
Enable/Disable the Sound of the Channel User can click the audio icon ( ) to mute ( ) the sound of channel. Click audio icon ( again to turn on the sound. Muting the sound Turn on the sound... -
Page 152: Switching Multiple Screen To Single Screen Display
Switching Multiple Screen to Single Screen Display In multiple screen display mode, user can double-click on the channel screen to switch to single display screen mode. Double-clicking again on channel screen, the screen display will switch back to multiple screen display mode. Double-clicking on channel screen can switch to single screen display mode... -
Page 153: Viewing Emap
Viewing Emap Click Emap( ) to call out the Emap dialog box. Click icon on E-map dialog box to expand the E-map dialog box on the preview screen. When alarm occurred, the icons on the map will turn to flash status. Click Map #(ex: Map 2) can switch to the selected map. -
Page 154: Snapshot The Screen
Snapshot the Screen Taking a quick capture of current display screen and save in *.jpg format to external USB pen drive. 1. Plug in the USB pen drive to USB port of NVR/DVR unit. 2. In preview mode, Click the snapshot icon ( ) and the snapshot dialog box is appeared. -
Page 155: Full Screen Display
Full Screen Display View the surveillance screen in full screen display mode. In preview mode, click full screen icon ( ) to switch to full screen display. Click full screen icon ( ) on the bottom of right corner to return back to normal display mode. Click it to return back to normal display mode... -
Page 156: Hiding Camera List
3.10 Hiding Camera List User can hide the camera list to have larger view of surveillance screen. In preview mode, click icon and the camera list will be hided. To show the camera list again, click icon. -
Page 157: Auto Display Channel In Cycle
3.11 Auto Display Channel in Cycle Click to start channel display in cycle automatically. To stop auto cycle display, click again. If total channels are 16 channels and in 16-split screen display mode, the auto display cycle function won’t work. -
Page 158: Enable/Disable 2-Way Audio Function
3.12 Enable/Disable 2-Way Audio Function This function allows the NVR/DVR server site and IP camera site to talk via internet using microphone. Make sure your microphone and speakers work before using this function. Click icon to enable 2-way audio function. To disable, click icon again. -
Page 159: Viewing Sensor Status
3.13 Viewing Sensor Status [Note] This function can be operated in preview mode only. User can view the sensor status of NVR/DVR server and IP camera. 1. In preview mode, click + of sensor or click + of camera to expand the list. 2. -
Page 160: Changing Relay Status
3.14 Changing Relay Status [Note] This function can be operated in preview mode only. User can change the relay status of NVR/DVR server and IP camera. 1. In preview mode, click + of sensor or click + of camera to expand the list. 2. -
Page 161: Chapter 4 Playback Recorded Video On Nvr/Dvr System
Chapter 4 Playback Recorded Video on NVR/DVR System In this chapter, it is going to description how to playback recorded video on NVR/DVR system in several ways and introduce some functions that user can operates in playback mode. Playback on NVR/DVR System User can playback the recorded video on NVR/DVR system instantly. -
Page 162: Playback The Specific Date/Time Period
Playback the Specific Date/Time Period User can select the specific date and time period to playback. 1. In playback mode, click Calendar ( ) icon. 2. In Calendar dialog box, select the date (date, month, year) that user wants to playback. The date in bold text indicates it has recorded data. -
Page 163: Using Event Search To Playback The Event
Using Event Search to Playback the Event In playback mode, user can use Event Search to find the specific event to playback. 1. Select the channel that user wants to search. Click the channel on screen. 2. Click (Search) icon >> (Event Search) Then, the Event Search dialog box would appear at side area. - Page 164 5. When the Event list appears, click and select the item user wants to view; but not all the events can be playback such as Sensor. 6. To close the Event Search dialog, click icon.
-
Page 165: Using Visual Search To Playback The Specific Time
Using Visual Search to Playback the Specific Time In playback mode, user can use Visual Search to find the specific time to playback. 1. Click (Search) icon, then select (Visual Search) icon. The Visual Search dialog box would appear under the area. 2. - Page 166 5. When a series of frames appear by date, click on the frame to display another series of frames and search by every 2 hours of that date, every 8Minutes of that hour, and every 30seconds of that minute. Using to go to hour, minute, and second page.
-
Page 167: To Bookmark A Section Of The Video For Playback
To Bookmark a Section of the Video for Playback User can bookmark a specific time of video section. 1. Using the mouse to move the playback time progress bar to the time that user wants to bookmark. 2. Then, click icon. - Page 168 Select and click one in the bookmark list to review the file. To modify the bookmark, select the bookmark and click Edit button. To delete the bookmark, select the bookmark and click Delete button. To close the Bookmark dialog box, click icon.
-
Page 169: Playback Mode Management
Playback Mode Management 4.6.1 Managing Channel Display Position User can arrange the channel display position that user is desired. Select the camera in camera list section. Then, drag the camera to the channel that user wants to playback. Next, User should see the video playback on the channel screen. The channels can be switched between each channel;... -
Page 170: Enable/Disable Sound Of The Channel
4.6.2 Enable/Disable Sound of the Channel First, switch to single screen display mode. Then, Click the icon on the channel screen to disable the sound play. Click again to enable sound play. - Page 171 4.6.3 Switching Multiple Screen Display to Single Screen Display In multiple screen playback mode, user can double-click on the channel screen to switch to single display screen mode. Double-click on channel screen again; the screen display will switch back to multiple screen playback mode. Double-click on the channel can switch to single screen display...
-
Page 172: Full Screen Display
4.6.4 Full Screen Display View the playback screen in full screen display mode. In playback mode, click full screen icon ( ) to switch to full screen display. Click full screen icon ( ) on the bottom of right corner to return back to normal display mode... -
Page 173: Hiding Camera List
4.6.5 Hiding Camera List User can hide the camera list to have larger view of surveillance screen. In playback mode, click icon next to preview tab and the camera list will be hided. To show the camera list again, click icon. -
Page 174: Output A Video Clip To A Usb Pen Drive
4.6.6 Output a Video Clip to a USB Pen Drive 1. Switch the playback screen to 1 single screen display mode. 2. Using button to expand the time bar for easy to set the segment period. 3. Click (Segment) button to set the mark. 4. - Page 175 Start Date/Time: Displays the begin time and date of segment video file. End Date/Time: Displays the end time and date of segment video file. Video Format: Select the video format -- *.DVR or *.mp4 that user wants to save. ...
-
Page 176: Snapshot The Screen View
4.6.7 Snapshot the Screen View 1. Select the channel or all channels. 2. Plug the USB pen drive to NVR/DVR unit. 3. Click Snapshot ( ) button. 4. In Snapshot dialog box, check the Save path has been detected by NVR/DVR system. If the save path doesn’t found, click Rescan Device button to re-detect it. -
Page 177: Chapter 5 Playback By Qplayer
Chapter 5 Playback by Qplayer You can playback the backup files by using QPlayer applications on the PC. When you back up the recorded file, QPlayer applications are automatically included in the backup folder if user has enabled the selection of Inculde player when backup when backup recorded file. With QPlayer, it is similar in Playback mode and supports different split screen types to view all the video at the same time. -
Page 178: Familiarizing Functions Of Qplayer
Familiarizing Functions of Qplayer In Qplayer main UI, click File > Open File to located the backup file folder. Please copy the whole backup folder under hard disk direction of PC (ex: C:\). The functions of Qplayer will be described in following: (5) (6) (7) (8) (10) - Page 179 Name Function (2) Split Screen Mode Select from 7 kinds of split screen type to playback the recorded video file of all the camera, or one camera over the other or alongside on a single screen. To only display one of the video in the multiple-screen mode, double click on the video screen you only want to display.
- Page 180 Name Function (10) Power button Call up the Power dialog box. In the Power dialog box, user may do the following: Exit: To shutdown the NVR/DVR system. Cancel: To exit Logout dialog box. If the keyboard is not available, you may use the Virtual (11) On Screen Keyboard.
- Page 181 Name Function Show the progress of the file being played. You may move the (16) Progress bar bar to seek at any location of the track. Using the Zoom In/Out button to expand the playback time from an hour to minute. Meaning of color in progress bar: - Red: Alarm record - Green: Motion record...
- Page 182 5.1.1 To Bookmark a Section of the Video for Playback User can bookmark a specific time of video section. Using the mouse to move the playback time progress bar to the time that user wants to bookmark. Then, click icon. The Bookmark dialog box is appeared on the screen. Click Add button to create the new reference mark in the bookmark list.
- Page 183 Select and click one in the bookmark list to review the file. To modify the bookmark, select the bookmark and click Edit button. To delete the bookmark, mark the bookmark and click Delete button. To close the Bookmark dialog box, click icon.
-
Page 184: Chapter 6 Using The Pcviewer
Chapter 6 Using the PCViewer User can use Microsoft Internet Explorer to access NVR/DVR system by entering the IP address. To use this feature, make sure that your PC and NVR/DVR server both are connected to the internet and the Network feature is enabled. Accessing this feature for the first time you need to install plugin component, allow or click to install and you should be able to connect and login afterwards. -
Page 185: Familiarizing Functions Of Pcviewer
Familiarizing Functions of PCViewer (6) (7) Name Function (1) Playback Click it to switch to playback mode and playback recorded video form remote NVR/DVR server(see also Chapter 6.2). (2) Preview Click it to switch to preview mode. Lists all cameras. Click the camera # to view in single screen (3) Camera list display mode or click camera group to view in multi-screen display mode. - Page 186 6.2 Familiarizing Functions of Playback Mode (12) (13) (10) (11) Name Function (1) Playback Click it to switch to playback mode (2) Preview Click it to switch to preview mode (see also Chapter 6.1). (3) Camera list Lists all cameras. Click the camera # to view in single screen display mode or click camera group to view in multi-screen display mode.
- Page 187 Name Function (7) Result display area Display the search result of found recorded data. (8) Date and Time It shows the current date and time. Display the recorded date, time and play speed. (9) Status bar From left to right order: (10) Playback Control Buttons Previous: Click it to go to previous time period.
-
Page 188: Appendix Recovering Nvr/Dvr System Through The Usb Port
1. Download the firmware from website http://surveillance.aver.com/ >> Support >> download Center >> Embedded hybrid DVR >> E5016 >> firmware. Then, click Search button to search firmware. 2. After download the firmware file, un-zip the file and save on USB pen drive. - Page 189 7. After all procedures have completed, the Reboot window is show up. Remove the USB pen drive from DVR unit and click Reboot button to restart NVR/DVR system.
-
Page 190: Warranty Notice
WARRANTY NOTICE LIMITED WARRANTY AVer Information, Inc. warrants this product to be free of defects resulting from faulty manufacture or components under the following terms: WARRANTY LENGTH Labor is warranted for (3) three year from the date of purchase. Parts are warranted for (2) two year from the date of purchase. - Page 191 This warranty gives you specific legal rights, and you may also have other rights granted under state law. These rights vary from state to state CONTACT INFORMATION Taiwan & International No. 157, DA-An Rd., Tucheng Dist., New Taipei City, Taiwan TEL: 886-2-2269-8535 Web Site: http://www.aver.com/...
Need help?
Do you have a question about the E5016 and is the answer not in the manual?
Questions and answers