Table of Contents
Advertisement
Quick Links
Advertisement
Table of Contents

Related Manuals for LG 238C


Summary of Contents for LG 238C
- Page 1 ENGLISH User Guide LG 238C www.lg.com XXXXXXXXXX (1.0)
- Page 3 Copyright ©2016 LG Electronics, Inc. All rights reserved. LG and the LG logo are registered trademarks of LG Group and its related entities. All other trademarks are the property of their...
- Page 4 [See 15 USC §2311.] 1. WHAT THIS WARRANTY COVERS: LG offers you a limited warranty that the enclosed subscriber unit and its enclosed accessories will be free from defects in material and workmanship, according to the following terms and conditions:...
- Page 5 (6) The customer shall bear the cost of shipping the product to the Customer Service Department of LG. LG shall bear the cost of shipping the product back to the consumer after the completion of service under this limited warranty.
- Page 6 In addition, LG will not re-install or back-up any data, applications or software that you have added to your phone. It is therefore recommended that you back-up any such data or information prior to sending the unit to LG to avoid the permanent loss of such information.
- Page 7 LG Electronics Service- Mobile Handsets, P.O. Box 240007, Huntsville, AL 35824 DO NOT RETURN YOUR PRODUCT TO THE ABOVE ADDRESS. Please call or write for the location of the LG authorized service center nearest you and for the procedures for obtaining warranty claims.
- Page 8 Any dispute between you and LG shall not be combined or consolidated with a dispute involving any other person’s or entity’s product or claim.
- Page 9 AAA in the manner described in the AAA Rules. You must also send a copy of your written demand to LG at LG Electronics, USA, Inc. Attn: Legal Department-Arbitration1000 Sylvan AvenueEnglewood Cliffs, NJ 07632.
- Page 10 LG for all monies previously disbursed by it that are otherwise your obligation to pay under the AAA Rules. Except as otherwise provided for, LG waives any rights it may have to seek attorneys’ fees and expenses from you if LG prevails in the arbitration.
- Page 11 purchased; (c) the product model name or model number; and (d) the IMEI or MEID or Serial Number, as applicable (the IMEI or MEID or Serial Number can be found (i) on the product box; (ii) on a label on the back of the product beneath the battery, if the batter is removable;or (iii) from the settings menu via the following path: Settings >...
-
Page 12: Table Of Contents
Contents Contents ..........10 Phone Overview ......... 13 Menus Overview ........ 16 Entering and Editing Information ..28 Getting Started with Your Phone ..19 Contacts in Your Phone’s Memory ..29 Using the Phone Menus ..... 36 Quick Access to Convenient Features .. 1. - Page 13 1. Take picture ........56 1. New contact .......38 2. Record voice .......58 3. Pictures ........58 2. Contact list .........39 3. Favorites ........39 4. Ringtones ........60 4. Groups ........40 5. Speed dials ........41 1. Voice commands ......63 6. My vCard ........42 2.
- Page 14 Contents 4. Mono audio ........80 5. Turn off all sounds .......80 1. Sounds settings ......81 2. Display settings ......85 3. Phone settings ......89 4. Call settings........96 5. Memory ........99 6. Phone info ........100 Safety ..........103 Glossary ........... 105 Terminology ........105 Acronyms and Abbreviations ..105...
-
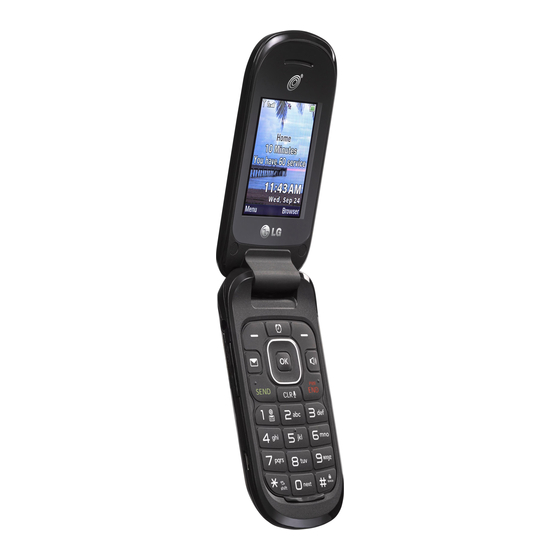
Page 15: Phone Overview
Phone Overview Camera Lens Lets you take pictures. Earpiece Lets you hear the caller and automated prompts. LCD Screen Displays messages and status icons. When the phone is turned on, Power Save mode automatically dims the screen and then darkens it if no keys are pressed. - Page 16 Phone Overview Message Key Quickly and easily opens a new text message. Send Key Use to make and answer calls. Press once to access the All Calls list. Alphanumeric Keypad Use to enter numbers and characters and select menu items. Vibrate Mode Key Use to set Vibrate mode (from standby mode press and hold for about 3 seconds).
- Page 17 Headset Jack Allows you to plug in an optional 3.5mm headset for convenient, hands-free conversations. Volume Keys Use to adjust the Master Volume in standby mode and the Earpiece Volume during a call. Use to adjust font sizes when viewing messages, entering phone numbers (in standby mode) or browsing menus (except for the Main menu).
-
Page 18: Menus Overview
Menus Overview Menu Access While in standby mode, press the Left Selection Key [Menu] to access your phone’s menus. There are two methods of accessing menus and submenus: Use the Directional Keys to highlight a menu/option and press to select it. Press the number key on the keypad to activate the corresponding menu/option. - Page 19 2. Default pictures 6. Stopwatch 1. Full Readout 3. Buy graphics 7. Notepad 2. Menu Readout 4. Ringtones 8. Unit converter 3. Digit dial Readout 1. My sounds 1. Area 4. Caller ID Readout 2. Default ringtones 2. Length 5. Passwords Readout 3.
- Page 20 Menus Overview 3. Voicemail 2. List 4. Call settings 4. Emergency tone 5. Font type 1. Answer options 5. Missed call 6. Font size 2. TTY mode 4. Keypad volume 1. Dial digits 3. One touch dial 5. Service alerts 2.
-
Page 21: Getting Started With Your Phone
Getting Started with Your Phone Getting Started with Your Phone The Battery Installing the Battery Use the fingernail cutout at the bottom of the back cover to lift and remove the cover. Align the battery contacts with the terminals near the top of the battery compartment and insert the battery into the compartment. - Page 22 Getting Started with Your Phone Charging the Battery Use the charger provided with your phone. WARNING: Use only the charger provided with the phone. Using any charger other than the one included with the phone may damage your phone or battery.
- Page 23 NOTICE: Please make sure that the 'B' side faces up before inserting a charger or USB cable into the Charger/ Accessory Port of your phone. Plug one end of the charging adapter into the phone’s Charger/Accessory Port and the other end into an electrical outlet. The charge time varies depending upon the battery level.
- Page 24 Getting Started with Your Phone Battery Charge Level You can find the battery charge level at the top right corner of the LCD screen. When the charge level becomes low, the battery sensor sounds a warning tone, blinks the battery icon, and/or displays a warning message. If the battery charge level becomes exceedingly low, the phone automatically switches off and any function in progress is not saved.
- Page 25 Making Calls Make sure the phone is turned on. Enter the phone number. Press the Send Key to dial the call. Press the Power/End Key to end the call. NOTE: Your phone has a Voice commands feature that also lets you make calls by saying a phone number or contact name.
- Page 26 Getting Started with Your Phone Receiving Calls When the phone rings or vibrates, you can answer the call by simply opening the flip. NOTE: If the 'Flip open' ( Menu > Settings > Call settings > Answer options) answer option is NOT MARKED, you can: Open the flip and press the Left Selection Key [Quiet] to mute the ringing or vibration for that call.
-
Page 27: Quick Access To Convenient Features
Quick Access to Convenient Features Quick Access to Convenient Features Vibrate mode Sets the phone to vibrate instead of ringing ( is displayed). To set Vibrate Mode, open the flip and press and hold . To return to Normal mode, press and hold again. - Page 28 Quick Access to Convenient Features Quick Font Resize When you view messages, enter phone numbers, or view sub-menus, press the Volume Keys up or down to quickly adjust the font size. 3 levels (small, normal, large) of font sizes are available. NOTE: Not supported on the Main menu.
- Page 29 Caller ID Caller ID displays the number and/or name and picture (if applicable) of the person calling when your phone rings. Voice commands Voice commands allow you to do things by verbal command (e.g., make calls, check Voicemail, etc.). With the flip open, press the Voice Commands Key the keypad.
-
Page 30: Entering And Editing Information
Entering and Editing Information Text Input The following key functions are available to help with text entry: Left Selection Key: Press to change the text input mode. Shift: Press to change capitalization (initial cap, caps lock, lowercase). Next: Press to display other matching words in the database in T9 word mode. -
Page 31: Contacts In Your Phone's Memory
Contacts in Your Phone’s Memory Storing Basics With the flip open, enter a number (max. 48 digits), then press the Left Selection Key [Save]. Use the Directional Key to highlight Add new contact/ Update existing, then press Use the Directional Key to highlight Mobile 1/ Home/ Business/ Mobile 2/ Fax, then press Enter a name (max. - Page 32 Contacts in Your Phone’s Memory Speed Dial Allows you to set up your Speed dials. Open the flip and press Left Selection Key [Menu]. Press Contacts. Press Contact list. Use the Directional Key to highlight a Contact entry, then press the Left Selection Key [Edit].
- Page 33 With the flip open, enter the phone number, then press the Right Selection Key [Options]. Use the Directional Key to highlight Add 2-sec pause or Add wait, then press Enter the additional number(s) (e.g., pin number, credit card number, etc.). Press the Left Selection Key [Save].
- Page 34 Contacts in Your Phone’s Memory Enter the additional number(s), then press [Save] to update your contact entry. Adding Another Phone Number From standby mode With the flip open, enter a phone number, then press the Left Selection Key [Save]. Use the Directional Key to highlight Update existing, then press Use the Directional Key to highlight an existing entry then press...
- Page 35 Changing Saved Information To edit any information you stored, access the Edit Contact screen: Open the flip and press Left Selection Key [Menu]. Press Contacts. Press Contact list. Use the Directional Key to highlight a Contact entry, then press the Left Selection Key [Edit].
- Page 36 Contacts in Your Phone’s Memory Deleting Deleting a Contact Entry Open the flip and press Left Selection Key [Menu]. Press Contacts. Press Contact list. Use the Directional Key to highlight an entry. Press the Right Selection Key [Options]. Press Erase. Press [Yes] to confirm.
- Page 37 Speed Dialing Allows you to make phone calls quickly and easily to numbers stored in Contacts. NOTE: Speed dial 1 is reserved for Voicemail. Single Digit Speed dials Press and hold the speed dial digit. Your phone recalls the phone number from your Contacts, displays it, and dials it for you.
-
Page 38: Using The Phone Menus
Using the Phone Menus Prepaid Allows you to access various prepaid services. 1. Add airtime Allows you to add airtime. Open the flip and press Left Selection Key [Menu]. Press Prepaid. Press Add airtime. Enter airtime PIN and press Read the displayed message, then select Yes or No. 2. -
Page 39: My Phone Number
3. My phone number This menu displays your phone number. Open the flip and press Left Selection Key [Menu]. Press Prepaid. Press My phone number. 4. My airtime info This menu displays your available minutes and service end date. Open the flip and press Left Selection Key [Menu]. -
Page 40: Serial Number
Using the Phone Menus 6. Serial number This menu simply displays the information of your phone’s MEID. Open the flip and press Left Selection Key [Menu]. Press Prepaid. Press Serial number. Contacts The Contacts menu allows you to store names, phone numbers and other information in your phone’s memory. -
Page 41: Contact List
NOTE: For more detailed information, see page 21. 2. Contact list Allows you to view your Contact list. Open the flip and press Left Selection Key [Menu]. Press Contacts. Press Contact list. Use the Directional Key to scroll through your Contacts alphabetically. Press the Right Selection Key [Options] to select one of the following: New contact/ Erase/ New message/ Call/ Manage contacts/... -
Page 42: Groups
Using the Phone Menus Press [Add]. TIP: You can add up to 10 Contacts and/or Contact groups as Favorites to easily make calls, send messages, and view messages. Select whether you want to add a favorite from your Contacts or Groups. Use the Directional Key to scroll through your Contacts or Groups alphabetically and press... -
Page 43: Speed Dials
Add a new group Press the Left Selection Key [New] to add a new group to the list. Enter a name, insert a picture (if necessary), and press [Save]. Group's options Press the Right Selection Key [Options] to select one of the following: New message/ Edit group name &... -
Page 44: My Vcard
Using the Phone Menus 6. My vCard Allows you to create, edit, and view your own personal Contact information including name, phone numbers, and email address in one entry. Open the flip and press Left Selection Key [Menu]. Press Contacts. Press My vCard. -
Page 45: New Message
New Message Alert Your phone can alert you when you have new messages. Options include: The phone displays a message on the screen. The message icon ( ) is displayed on the screen. In the case of a high priority message, the icon ( ) will flash. - Page 46 Using the Phone Menus Select Recipient(s) Using the Add Function Open the flip and press Left Selection Key [Menu]. Press Messages. Press New message. With the To field highlighted, press the Right Selection Key Add. Select an option and press From contacts To select a recipient from your Contact List.
- Page 47 Select an option and press Attach 1. Picture Allows you to insert a picture. Highlight a picture, then press 2. Take picture Allows you to take a picture and insert it. 3. Sound Allows you to insert a sound. Highlight a sound, then press 4.
-
Page 48: Inbox
Using the Phone Menus 2. Inbox The phone alerts you in up to 3 ways when you receive a new message: By displaying a notification message on the screen. By sounding a tone or vibration, if set. By displaying (The icon will be when you get a high priority message.) Viewing Your Inbox Open the flip and press Left Selection Key [Menu]. - Page 49 Manage inbox Allows you to manage (lock, erase and more) multiple messages. Sort by sender/time Allows you to sort messages alphabetically by sender's name or by time received. Message Icon Reference New text message Read text message New media message received Unread multimedia message Read multimedia message Message delivered...
-
Page 50: Sent
Using the Phone Menus 3. Sent The Sent menu stores your sent messages. Open the flip and press Left Selection Key [Menu]. Press Messages. Press Sent. Highlight a message. The following options are available. Press [Open] to view the message. Press the Left Selection Key [Erase] to erase the message. -
Page 51: Voicemail
Press the Right Selection Key [Options] for the following options. Send Sends the selected message. Add to contacts Stores the number, email address, and numbers from the address included in the message into your Contacts. Manage drafts Allows you to manage (erase or lock) messages. Message Icon Reference Text Message Draft Media Message Draft... -
Page 52: Templates
Using the Phone Menus Enter your phone number and press the Send Key from your phone or dial your wireless phone number from any touch-tone phone. Press and hold from your phone, as a speed dial to your voicemail. When the recorded announcement begins, press to interrupt (if applicable). - Page 53 Message Settings Options Entry mode Select T9 Word, Abc, ABC, 123, T9 Palabra to be your default input method. Messages font size Allows you to select Small, Normal or Large for the size of the text characters. TXT instant reply Select On to text a reply instantly.
-
Page 54: Erasing Messages
Using the Phone Menus Erasing messages You can erase messages stored in your inbox, sent, or drafts folders. You can also erase all messages at the same time. Open the flip and press Left Selection Key [Menu]. Press Messages. Press the Right Selection Key [Options] then select one of the following: Erase inbox/ Erase sent/ Erase drafts/ Erase all Press... -
Page 55: Received Calls
Press [Open] to open the entry. Press the Send Key to place a call to the number. Press the Right Selection Key [Options] to select: Save to contacts(Contact info)/ Erase/ Lock(Unlock)/ Erase all/ Call timer Press the Left Selection Key [Message] to send a message to the number. -
Page 56: Dialed Calls
Using the Phone Menus 3. Dialed calls Allows you to view the list of outgoing calls; up to 90 entries. Open the flip and press Left Selection Key [Menu]. Press Recent calls. Press Dialed calls. Use the Directional Key to highlight an entry, then Press [Open] to open the entry. -
Page 57: Call Timer
Save to contacts(Contact info)/ Erase/ Lock(Unlock)/ Erase all/ Call timer Press the Left Selection Key [Message] to send a message to the number. SHORTCUT: To view a quick list of all your recent calls, press the Send from standby mode. 5. -
Page 58: Take Picture
Using the Phone Menus Games & apps Allows you to enjoy downloaded games and apps. Open the flip and press Left Selection Key [Menu]. Press Games & apps. Select a game or press Buy games to browse for more. Browser Allows you to access news, sports, weather, and email from your device. - Page 59 Press Multimedia. Press Take picture. Set the brightness by pressing the Directional Key up and down, zoom by pressing the Directional Key left and right, and press the Right Selection Key [Options] to change other settings. NOTE: Zooming is not available on the highest resolution. Select the option(s) to customize.
-
Page 60: Record Voice
Using the Phone Menus Preview Allows you to choose the preview screen size. Choose from Actual view/ Full screen. Take a picture by pressing [Take]. Press the Left Selection Key [Save]. The picture is stored in My pictures. 2. Record voice Allows you to record voice. - Page 61 Press Multimedia. Press Pictures. Press My pictures. Highlight a picture with the Directional Key The following options are available: Press [View] to view it. Press the Left Selection Key [Erase] to delete it. Press the Right Selection Key [Options] to select from the following options: Send Allows you to share the picture with others via message or Bluetooth.
-
Page 62: Ringtones
Using the Phone Menus 3.2 Default pictures Allows you to view and manage default photos stored in the phone. Open the flip and press Left Selection Key [Menu]. Press Multimedia. Press Pictures. Press Default pictures. Highlight a picture with the Directional Key The following options are available: Press [View] to view it. - Page 63 4.1 My sounds Allows you to record a new sound or select a desired sound. How to record a new sound Open the flip and press Left Selection Key [Menu]. Press Multimedia. Press Ringtones. Press My sounds. Press Record new and press to start recording, then press [Stop] to end recording.
- Page 64 Using the Phone Menus 4.2 Default ringtones Allows you to manage your preloaded sounds. Open the flip and press Left Selection Key [Menu]. Press Multimedia. Press Ringtones. Press Default ringtones. Use the Directional Key to highlight a ringtone and press [Play] to play the ringtone or the Left Selection Key [Set as] to set the ringtone as:...
-
Page 65: Voice Commands
Tools Your phone tools include Voice commands, Calculator, Ez tip calculator, Eco- calculator, Info search, Stopwatch, Notepad, and Unit converter. Open the flip and press Left Selection Key [Menu]. Press Tools. 1. Voice commands This feature provides you with the following options equipped with AVR (Advanced Voice Recognition) technology. - Page 66 Using the Phone Menus Train voice This option allows you to train the phone to recognize your voice patterns. Choose from Train words/ Train digits. Prompts Allows you to set how you are notified by the voice commands system and the duration in which you can respond. Choose from Mode/ Audio playback/ Timeout.
- Page 67 number or group. It will automatically start a message. If you say a full-sentence command, such as 'Send Message to Bob', it will automatically start a text message without asking for the message type. When using 'Send Message' command, speak clearly and say the name, number or group exactly as it is entered in your Contact List.
-
Page 68: Calculator
Using the Phone Menus 2. Calculator Allows you to perform simple mathematical calculations. Open the flip and press Left Selection Key [Menu]. Press Tools. Press Calculator. Enter the numbers to get the value you want. To clear entered items, press the Left Selection Key [Clear]. -
Page 69: Eco-Calculator
4. Eco-calculator Allows you to keep track of your walking and cycling distances. The amount of CO that is decreased by walking and cycling is displayed for you to see. Open the flip and press Left Selection Key [Menu]. Press Tools. -
Page 70: Info Search
Using the Phone Menus 5. Info search Allows you to search items stored on the phone. Open the flip and press Left Selection Key [Menu]. Press Tools. Press Info search. Enter two or more characters in the search field and press [Search]. -
Page 71: Notepad
Pressing [Stop] will stop or resume Stopwatch time. While measuring time, press the Left Selection Key [Lap] to record a lap. After time has stopped, press the Right Selection Key [Reset]. 7. Notepad Allows you to add, read, edit, and erase notes to yourself. Open the flip and press Left Selection Key [Menu]. -
Page 72: Calendar
Using the Phone Menus My schedule Allows you to keep your agenda convenient and easy to access. Simply store your appointments and your phone will alert you with a reminder you set. 1. Calendar Allows you to keep your agenda convenient and easy to access. Simply store your appointments and your phone will alert you with a reminder you set. -
Page 73: Alarm Clock
Use the Directional Key to highlight the setting you want, then press Press [Save] when Calendar information is complete. Editing and Deleting calendar entries From the calendar entry list, press [View]. Press [Edit] to edit the calendar entry or press the Left Selection Key [Erase] to delete the calendar entry. - Page 74 Using the Phone Menus Press Erase to delete an alarm or Erase all to delete all alarm entries. Press [Yes]. How to edit alarms From the Alarm Clock list, press [View] and then press [Edit]. Bluetooth Your phone is compatible with devices that support the Headset, Handsfree, Phonebook access, Object push, and File transfer profiles.
-
Page 75: Add New Device
Press the Left Selection Key [Turn on]. ® NOTE: By default, your device’s Bluetooth functionality is turned off. 1. Add new device Pairing is the process that allows the handset to locate, establish, and register 1-to-1 connection with the target device. ®... - Page 76 Using the Phone Menus ® Once connected, you will see the device listed in the Bluetooth Menu and ® when the pair is transferring information the Bluetooth indicator will show up on your screen. Icon Reference in Adding New Device ®...
-
Page 77: My Phone Info
Device info: Shows the device information. NOTE: While in the Bluetooth menu, you can turn the Bluetooth functionality off by pressing the Left Selection Key [Turn off]. Reversely, you can turn it on by pressing the Left Selection Key [Turn on]. -
Page 78: Discovery Mode
Using the Phone Menus Press to clear the existing name. Use the keypad to enter a new custom name. Press [Set] to save and exit. Discovery mode Allows you to set whether your device is able to be discovered/found by other ®... -
Page 79: Readout
Press Supported profiles. Choose a Bluetooth profile to view information about it. Accessibility Allows you to set the Accessibility settings. Open the flip and press Left Selection Key [Menu]. Press Accessibility. 1. Readout Allows you to set the Readout settings. Open the flip and press Left Selection Key [Menu]. - Page 80 Using the Phone Menus 1.2 Menu Readout Allows you to set the phone to read out menus. Open the flip and press Left Selection Key [Menu]. Press Accessibility. Press Readout. Press Menu Readout. Use the Directional Key to highlight a setting, then press [Set].
-
Page 81: Invert Color
1.5 Passwords Readout Allows the phone to read out your passwords. Open the flip and press Left Selection Key [Menu]. Press Accessibility. Press Readout. Press Passwords Readout. Use the Directional Key to highlight a setting, then press [Set]. 1.6 Speech rate Allows you to set the menu readout speech rate. -
Page 82: Large Text
Using the Phone Menus 3. Large text Allows you to use larger font for menus. Open the flip and press Left Selection Key [Menu]. Press Accessibility. Press Large text. Use the Directional Key to highlight a setting, then press [Set]. 4. -
Page 83: Sounds Settings
Settings This menu allows you to set various phone settings and view phone information. 1. Sounds settings Provides options to customize the phone’s sounds. 1.1 Master volume Allows you to quickly set the main Sounds settings for keypad volume, incoming calls and messages (text, multimedia, and Voicemail). - Page 84 Using the Phone Menus 1.2.1 Call ringtone Allows you to set the ringtones for incoming calls. Open the flip and press Left Selection Key [Menu]. Press Settings. Press Sounds settings. Press Call sounds. Press Call ringtone. Hightlight a submenu and press to open it.
- Page 85 1.2.3 Caller ID Readout Allows you to set how you want the Caller ID to be read out. Open the flip and press Left Selection Key [Menu]. Press Settings. Press Sounds settings. Press Call sounds. Press Caller ID readout. Use the Directional Key to highlight a setting, then press [Set].
- Page 86 Using the Phone Menus Press Sounds settings. Press Keypad volume. Adjust the volume with the Directional Key and press [Set] to save the setting. 1.5 Service alerts Allows you to set any of the three available service alerts. Open the flip and press Left Selection Key [Menu].
-
Page 87: Display Settings
1.7 Hearing assist Allows you to set the phone to automatically adapt to noisy environments by adjusting the listening level and improving speech intelligibility. NOTE: The Hearing assist feature is automatically disabled when you use the speakerphone or the hands-free devices. Open the flip and press Left Selection Key [Menu]. - Page 88 Using the Phone Menus Press Display settings. Press Backlight. Highlight a Backlight submenu and press Display backlight: 7 Seconds/ 15 Seconds/ 30 Seconds/ Always off Keypad backlight: 7 Seconds/ 15 Seconds/ 30 Seconds/ Always off 2.2 Brightness Allows you to set the backlight levels. Open the flip and press Left Selection Key [Menu].
- Page 89 Highlight a Wallpaper submenu and press Highlight a picture and press [Set] to set it as the wallpaper. 2.4 Menu style Allows you to choose between the different themes for the phone's menus. Open the flip and press Left Selection Key [Menu].
- Page 90 Using the Phone Menus 2.6 Font size Allows you to set the font size for Dial digits, Menu & List and Message. The Resizeable setting allows you to use the Volume Keys to instantly scale screen fonts. This setting is helpful for those who need the text to display a little bit larger. Open the flip and press Left Selection Key [Menu].
-
Page 91: Phone Settings
Press Clock format. Use the Directional Key to highlight a setting, then press [Set]. NOTE: Press the Left Selection Key [Preview] to preview the selected clock format. 2.8 Name match for dialing Allows you to display names when entering matching phone numbers to dial. Open the flip and press Left Selection Key [Menu]. - Page 92 Using the Phone Menus 3.2 Set shortcut keys Allows you to set shortcuts to phone menus using the down, up, left and right Directional Keys. 3.2.1 Set my shortcuts NOTE: To access these shortcuts, press the Directional Key from standby mode (by default) to display My shortcuts. Open the flip and press Left Selection Key [Menu].
- Page 93 Press Set shortcut keys. Press Set directional keys. Use the Directional Key to highlight a shortcut key you want to set. Press [Set] to display the available shortcuts. Use the Directional Key highlight one, then press [Set]. 3.3 Voice commands Please refer to page 63 for details.
- Page 94 Using the Phone Menus NOTES: GPS satellite signals are not always received by the phone, especially under bad atmospheric and environmental conditions, indoors, etc. When in Airplane Mode, services supporting Location On functionality will be suspended. 3.6 Security The Security menu allows you to secure the phone electronically. Open the flip and press Left Selection Key [Menu].
- Page 95 Press Edit codes. Select Phone only or Calls & services. Enter your new four-digit lock code. For confirmation, you will be prompted to enter the new lock code again. 3.6.2 Restrictions Allows you to set separate restrictions for calls, text and multimedia messages, and data.
- Page 96 Using the Phone Menus 3.6.3 Phone lock setting Keeps your phone from unauthorized use. Once the phone is locked, it's in restricted mode until the lock code is entered. You can still receive phone calls and make emergency calls. You can modify the lock code using Edit codes submenu within the Security menu.
- Page 97 NOTE: To unlock the phone from standby mode, press the Right Selection Key [Unlock] and enter the four-digit lock code. 3.6.5 Reset default Allows you to reset your phone to the factory default settings. Open the flip and press Left Selection Key [Menu].
-
Page 98: Call Settings
Using the Phone Menus 4. Call settings The Call settings menu allows you to set various configurations for calling features. 4.1 Answer options Allows you to determine how the phone will answer an incoming call. Open the flip and press Left Selection Key [Menu]. - Page 99 Press Call settings. Press TTY mode. An explanation message is displayed. Press to continue. Use the Directional Key to highlight a setting, then press [Set]. full: Users who cannot talk or hear send and receive a text message through TTY equipment. TTY + talk: Users who can talk but cannot hear receive a text message and send voice through TTY equipment.
- Page 100 Using the Phone Menus TTY mode (Teletypewriter) When making Transmission/ Menu User Menu communications with a Receiving Mode non-TTY terminal For hearing-/ Text message Operator TTY full verbally- transmission, text required impaired message receiving For hearing- Voice transmission, text TTY + talk Able to talk Operator required impaired...
-
Page 101: Memory
4.4 Voice privacy Allows you to set the voice privacy feature for CDMA calls. CDMA offers inherent voice privacy. Check with your service provider for availability. Open the flip and press Left Selection Key [Menu]. Press Settings. Press Call settings. Press Voice privacy. -
Page 102: Phone Info
Using the Phone Menus 6. Phone info Allows you to view the information specific to your phone and software. Open the flip and press Left Selection Key [Menu]. Press Settings. Press Phone info. 6.1 My number Allows you to view your phone number. Open the flip and press Left Selection Key [Menu]. - Page 103 Press Icon glossary. Select a submenu and browse through the icons. 6.4 SW/HW version Allows you to view the versions of various applications such as SW, PRL, Browser, AVR, MMS, Bluetooth, and hardware version. Open the flip and press Left Selection Key [Menu].
- Page 104 In addition to the source code, all referred license terms, warranty disclaimers and copyright notices are available for download. LG Electronics will also provide open source code to you on CD-ROM for a charge covering the cost of performing such distribution (such as the cost of media, shipping, and handling) upon email request to opensource@lge.com.
-
Page 105: Safety
Safety The highest SAR value for this model phone when tested for use at the ear is 1.18 W/kg and when worn on the body, as described in this user guide, is 0.79 W/kg (body-worn measurements differ among phone models, depending upon available accessories and FCC requirements). - Page 106 Safety your LG phone. Improper handling of the Accessory/Charger Port, as well as the use of an incompatible charger, may cause damage to your phone and void the warranty. Only use the approved battery charger. Otherwise, you may cause serious...
-
Page 107: Glossary
Glossary Glossary Terminology Ez tip calculator Feature for easy bill calculation using the total cost, tip, and number of people as variables. Voice commands Feature that allows you to perform a wide range of verbal commands by training the phone to recognize your individual speech patterns. ®... - Page 108 Glossary IS 2000 Type of digital signaling. It's the second generation of CDMA digital cellular, an extension of IS-95. Differences between signaling types have to do with pilot signal and links to provide more traffic channels, and control protocols. Number Assignment Module is how the phone stores the phone number and its electronic serial number.
Need help?
Do you have a question about the 238C and is the answer not in the manual?
Questions and answers