Table of Contents
Advertisement
Quick Links
Advertisement
Table of Contents

Summary of Contents for Olin OPVR-1000
-
Page 2: P V
Safety Instructions x Always read the safety instructions carefully x Keep this User Manual for future reference x Keep this equipment away from humidity x Lay this equipment on a reliable flat surface before setting it up. x Do not stand it on soft furnishings. x If any of the following situation arises, get the equipment checked by a service technician: - The equipment has been exposed to moisture. -
Page 3: Table Of Contents
Table of Contents Introduction………………………………………………………………………………….3 Front Panel and Rear Panel Illustration………………………………………………..4 Front Panel……………………………………………………………………………….4 Rear Panel………………………………………………………………………………...4 Remot e Control………………………………………………………………..5- 6 Installing the Batteries……………………………………………………………7 Connecting to Equipments………………………………………………………8-10 First Time Installation……………………………………………………………11 Basic Operations……………………………………………………………….12-15 Recording Function……………………………………………………………..16 Main Menu……………………………………………………………………..17-18 Me nu T ree…… ……… ……… …………… ………………… ……………… ..1 8 L I V E T V …... -
Page 4: Introduction
Introduction This High Definition Digital Terrestrial Receiver is designed to receive terrestrial free-to-air TV broadcast in Australia. It supports both HD and SD programs, furthermore a HDMI output ensuring that the end-user's experience is of the highest performance. HDMI output enables secure transfer of digital signals to the display. -
Page 5: Front Panel And Rear Panel Illustration
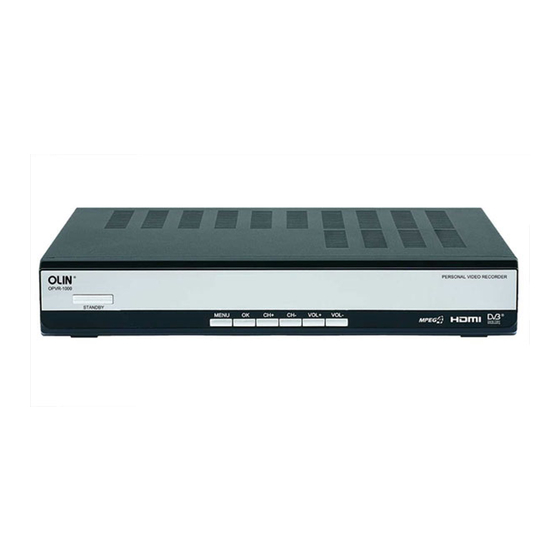
Front Panel and Rear Panel Illustration Front Panel STANDBY: To turn the standby mode ON/OFF. MENU: To enter into the main menu. Press again to exit to previous menu. OK: To confirm the selected menu item. CH+/-: To control the level of the volume. VOL+/-: To change the channel down/up. -
Page 6: Remot E Control
Remote control Remote key functions: POWER To turn the standby mode ON/OFF. SUB To switch the subtitle ON/OFF. TXT: To switch the Teletext service ON/OFF. (The availability of Teletext is subject to channel broadcasting in each region.) 4 COLOR KEY To assist the operation of the PVR. Numeric buttons (0-9) To control the numerical operation and especially to change program directly. - Page 7 Remote control TV/R: To switch the program between TV and Radio. PAGE DOWN To enter into the next / previous page. TIEMR: To add a new timer. REC To start an instant record on current channel. STOP: To stop the existing program (recording, time shift). END: To go to the end of the program.
-
Page 8: Installing The Batteries
Installing the Batteries Remove the battery cover from the remote control and put two AAA size batteries inside the compartment. The diagram inside the battery compartment shows the correct way to install the batteries. Caution: 1. Keep batteries out of children’s reach. 2. -
Page 9: Connecting To Equipments
Connecting to Equipments How to get good reception In general you are not required to change the existing antenna. However if your antenna is not in good condition you should consider replacing them to ensure uninterrupted digital television viewing. Viewers in areas of poor analog reception may need special advice about antenna requirements for digital reception in their area. - Page 10 Connecting to Equipments Connect the unit via YPbPr output and Audio output (for high definition viewing) Connect the antenna with ANT IN of the unit. Connect the RF loop cable via LOOP IN and LOOP OUT. Connect the unit to TV via YPbPr cable as the following figure. Connect the unit via HDMI output (for high definition viewing) Connect the antenna with ANT IN of the unit.
- Page 11 Connecting to Equipments Audio connections via Optical/Coaxial/Mixed Audio L/R Output Connect the antenna with ANT IN of the unit. Connect the RF loop cable via LOOP IN and LOOP OUT. Connect the unit to TV via AV cable as the following figure.
-
Page 12: First Time Installation
First Time Installation Note: Be sure to turn on the main power at the rear of the unit before using it. After all the connections have been made properly, switch on your TV. Make sure the unit is connected to the power supply and press Power on the remote control to switch on the unit. -
Page 13: Basic Operations
Basic Operations Switch Program 1. Press the NUMERIC keys (0~9) on the remote control to select the channel number you want. 2. Press the key on the remote control or CH+/- on the front panel of the unit to change the available channels upward/downward. - Page 14 Basic Operations Subtitle Press SUB key to switch subtitle on/off. Note: the availability of subtitle depends on the program providers. Teletext service 1. Press TXT key to open a teletext page (if the teletext is transmitted) 2. Press EXIT key again or press EXIT key to close the teletext. Note: The availability of Teletext is subject to channel broadcasting in each region.
- Page 15 Basic Operations Press REW key to rewind playing record or time shift (Support 2X, 4X, 8X, 16X, 32X). Press FF key to forward playing record or time shift (Support 2X, 4X, 8X, 16X, 32X). Press END key to go to the end of the program. Note: Pressing FIRST or REW key is non-effective at this point.
- Page 16 Basic Operations EPG (Electronic Program Guide) 1. Press EPG key to view the EPG information that is provided by the content providers. 2. Press key to view the event information such as event name and event time. 3. Press key to view the event information of the next day, press to view the event information of the previous day.
-
Page 17: Recording Function
Recording Function Instant Recording 1. Press REC key to pop up a box, press keys to select the options 30M, 1H, 2H, infinite. Press OK key to confirm and start recording in Live TV mode. A Hard disk symbol with recorded time indicator will be shown on the top-left of the screen. -
Page 18: Main Menu
Main Menu This section guides you to walk through of all options on the Menu screen. Navigation in the Main Menu 1. Press MENU key to bring up the main menu or return previous. 2. Press key to move upward/down to the sub menu. 3. - Page 19 Main Menu...
-
Page 20: L I V E T
LIVE TV Live TV 1. Go to Main menu > Live TV. 2. Press OK key to view TV program list. 3. Press key to select the program you want and press OK key to confirm. 4. Press EXIT key to exit all menu or press MENU key to return to the previous menu. -
Page 21: Recorded Program
Recorded Program 1. Go to Main menu > PVR > Recorded Program. 2. Press OK key to view PVR List. 3. Press key to select the program, press OK key to pre-view, and press OK key again to full-screen view. 4. -
Page 22: Storage Setting
Storage Setting Storage Information 1. Go to Main menu > PVR >Storage Setting >Storage information. 2. Press OK key to display detail. 3. Press EXIT key to exit all menu or press MENU key to return to the previous menu. Storage Format 1. -
Page 23: Setting
Setting Installation Auto Scan 1. Go to Main menu >Setting >Installation. 2. Press RED key to auto scan all the channels. 3. Press EXIT key to stop during the auto scan. Manual Scan 1. Go to Main menu > Setting >Installation. 2. -
Page 24: Program Edit
Setting Program Edit Edit Favorite 1. Go to Main menu > Setting>Program edit. 2. Press key to select the program. 3. Press RED key to add the program to the favorite list you selected, a FAV icon will appear. 4. Press RED key again to cancel this operation, the FAV icon will disappear. 5. - Page 25 Setting Delete Program 1. Go to Main menu > Setting >Program edit. 2. Press key to select the program. 3. Press YELLOW key to delete the program and a window will pop up asking you to confirm. Highlight OK and press OK key to confirm delete. 4.
-
Page 26: System Setup
Setting System Setup A/V Output Setting 1. Go to Main menu >Setting> System setup > A/V output setting. 2. Press key to select the options: Video Resolution, Aspect Radio, and Audio SPDIF. And press OK key to enter submenu of selected option. 3. - Page 27 Setting System Information 1. Go to Main menu > Setting > System Setup > System Information. 2. Press OK key to view the software/hardware Information of this unit. Factory Default 1. Go to Main menu > Setting >System Setup > Factory Default.
-
Page 28: User Preferences
Setting CH Info Bar Time Out Go to Main menu > Setting > User preferences >CH Info Bar Time Out. 2. Press key to select the CH Info Bar Time Out option, and press OK key to enter submenu. 3. Press key to select the timeout (4 timeout modes are available: 1 second, 3 second, 5 second, 10 second), and press OK key to confirm. -
Page 29: Parental Control
Setting Parental Control 1. Go to Main menu > Setting >Parental control. 2. Press key to select the Parental Control option, and press OK key and input the correct the PIN code to enter the submenu. 1. Parental Rating To set the rating level There are up to 8 levels are available. -
Page 30: Trouble Shooting
Trouble Shooting If you experience problems with this unit or its installation, in the first instance please read carefully the relevant sections of this User Manual and this Troubleshooting section. Problem Possible cause What to do Display on front panel not lit Main lead unplugged Check mains lead Main fuse blown... -
Page 31: Technical Specification
Technical Specification Item Specification TunerX2 VHF: 174MHz to 230MHz Frequency Range UHF: 470MHz to 862MHz Input Impedance 75Ohms unbalanced Signal Input Level -78~-25dbm Bandwidth 6/7/8M Demodulation Demodulator COFDM FFT Mode 2K,8K OFDM Modulation 2K, 8K FFT, SFN and MFN Packed Carries 2K/8K Guard Interval 1/4, 1/8, 1/16, 1/32...
Need help?
Do you have a question about the OPVR-1000 and is the answer not in the manual?
Questions and answers