
Subscribe to Our Youtube Channel
Summary of Contents for TV One C2-6104A
- Page 1 C2-6104A O PERATION ANUAL 99 Washington Street Melrose, MA 02176 Phone 781-665-1400 Toll Free 1-800-517-8431 Visit us at www.TestEquipmentDepot.com C2-6104A Video Processor Operation Manual...
-
Page 2: Table Of Contents
C2-6104A O PERATION ANUAL TABLE OF CONTENTS DISCLAIMER ....................1 Regulatory Agency Acceptance................1 FCC Statement....................1 Manual Version Information................. 2 Manual Copyright Notice ..................2 IMPORTANT SAFETY INSTRUCTION............3 CAPABILITY, DEVICE FEATURES AND PRODUCT FEATURES ....1 Device Capabilities....................1 Device Features .................... - Page 3 C2-6104A O PERATION ANUAL 8.3.3 ‘Aspect adjust’ = ‘Pixel’ ..................21 Items Associated with the Adjust keyers group..........22 Items Associated with the Adjust borders group ..........24 Items Associated with the Adjust sources group relating to source labeling..25 8.6.1...
- Page 4 C2-6104A O PERATION ANUAL 11.1 There is no picture on the Output..............71 11.2 The image is shifted and not fully viewable............71 11.3 The output resolutions no longer appear as expected........71 11.4 There is excessive flicker on the Output............72 11.5...
-
Page 5: Disclaimer
C2-6104A O PERATION ANUAL DISCLAIMER This product is intended for professional and/or home use. This product is not intended for use in a medical environment and does not have the required certifications for such use. Similarly, use aboard any aircraft or spacecraft... -
Page 6: Manual Version Information
Caution: This equipment is intended for use in the manner prescribed in the Instruction Manual. Any user changes or modifications not expressly approved by TV One Multimedia Solutions could void the user’s authority to operate the equipment. Connecting this equipment to external devices requires no specially shielded cabling for FCC compliance. -
Page 7: Important Safety Instruction
C2-6104A O PERATION ANUAL IMPORTANT SAFETY INSTRUCTION To insure the best from this product, please read this manual carefully. Read these instructions Keep these Instructions Heed all warnings Follow all instructions Do not use this apparatus near water ... - Page 8 PERATION ANUAL If you did not receive the correct plug, DO NOT attempt to modify it. Instead, immediately contact your dealer or contact TV One at the sales office nearest to your geographic location and request the proper plug. 2. 1...
- Page 9 C2-6104A O PERATION ANUAL CONSIGNE IMPORTANTE DE SECURITE Pour obtenir les meilleures performances avec ce produit, nous vous demandons de lire soigneusement ce manuel. Lisez ces consignes Conservez ces consignes Respectez tous les avertissements Respectez toutes les consignes ...
- Page 10 Si vous n'avez pas reçu la bonne prise, N'ESSAYEZ PAS de la modifier. Vous devez au contraire immédiatement contacter votre revendeur ou le bureau de vente TV One le plus proche de chez vous pour demander la bonne prise. 2. 1 Propriété...
- Page 11 C2-6104A O PERATION ANUAL WICHTIGE SICHERHEITSANWEISUNGEN Lesen Sie diese Bedienungsanleitung sorgfältig, um zu gewährleisten, dass Sie den optimalen Nutzen aus diesem Produkt ziehen. Lesen Sie diese Anweisungen. Bewahren Sie diese Anweisungen auf. Beachten Sie alle Warnhinweise. ...
- Page 12 Falls Sie nicht den richtigen Stecker erhalten haben, versuchen Sie NICHT, ihn zu ändern. Setzen Sie sich stattdessen mit Ihrem Fachhändler oder der Verkaufsniederlassung von TV One in Verbindung, die sich am nächsten an Ihrem Wohnort befindet, und fordern Sie den richtigen Stecker an.
- Page 13 C2-6104A O PERATION ANUAL INSTRUCCIONES IMPORTANTES DE SEGURIDAD Para garantizar el máximo rendimiento de este producto, lea cuidadosamente este manual. Lea estas instrucciones Guarde estas instrucciones Respete todas las advertencias Siga todas las instrucciones No use este aparato cerca del agua ...
- Page 14 Si no ha recibido la clavija correcta, NO intente modificarla. Póngase inmediatamente en contacto con su distribuidor o con TV One en la oficina de ventas más cercana a su localización geográfica y solicite la clavija adecuada. Propiedad intelectual Algunos chips con circuitos integrados presentes en este producto incluyen propiedad confidencial y/o secreta del sector.
- Page 15 C2-6104A O PERATION ANUAL BELANGRIJKE VEILIGHEIDSINSTRUCTIE Om dit product optimaal te kunnen gebruiken, dient u deze handleiding aandacht te lezen. Lees deze instructies Bewaar deze instructies Let op alle waarschuwingen Volg alle instructies Gebruik dit apparaat niet in de nabijheid van water ...
- Page 16 Als u niet de juiste stekker hebt ontvangen, breng dan zelf GEEN wijzigingen aan. Neem in plaats daarvan direct contact op met uw dealer of met de afdeling verkoop van TV One die zich het dichtst bij u in de buurt bevindt en vraag om de juiste stekker.
- Page 17 C2-6104A O PERATION ANUAL VIKTIGA SÄKERHETSANVISNINGAR För att få ut det bästa av din produkt bör du läsa denna bruksanvisning noggrant. Läs dessa anvisningar Spara dessa anvisningar Rätta dig efter alla varningar Följ alla instruktioner ...
- Page 18 C2-6104A O PERATION ANUAL Om du inte fick rätt stickkontakt FÅR DU INTE försöka anpassa den. Kontakta i stället omedelbart butiken eller TV Ones närmaste försäljningsställe och be att få rätt stickkontakt. Intellektuell egendom Vissa IC-chip i denna produkt innehåller konfidentiellt material och/eller företagshemligheter.
- Page 19 C2-6104A O PERATION ANUAL VIKTIGE SIKKERHETSANVISNINGER For at du skal få mest mulig ut av dette produktet, ber vi deg lese denne håndboken nøye. Les disse anvisningene. Ta vare på disse anvisningene. Vær oppmerksom på alle anvisningene.
- Page 20 Hvis du har fått feil støpsel, må du IKKE forsøke å modifisere det. I stedet må du straks kontakte forhandleren eller nærmeste salgskontor for TV One og be om riktig type støpsel. Opphavsrett Noen av IC-brikkene i dette produktet inneholder fortrolig informasjon og/eller fabrikkhemmeligheter.
- Page 21 C2-6104A O PERATION ANUAL TÄRKEITÄ TURVALLISUUSOHJEITA Lue tämä opaskirja huolellisesti, jotta saat parhaan hyödyn tästä tuotteesta. Lue nämä ohjeet Säilytä nämä ohjeet Ota kaikki varoitukset huomioon Noudata kaikkia ohjeita Älä käytä tätä laitetta veden lähellä...
- Page 22 C2-6104A O PERATION ANUAL Jos laitteen pistoke on väärä, ÄLÄ yritä muunnella sitä. Ota heti yhteys jälleenmyyjään tai lähimpään TV One -myyntikonttoriin ja pyydä oikeaa pistoketta. Immateriaaliomaisuus Jotkut tässä tuotteessa olevat IC-sirut sisältävät luottamuksellista ja/tai liikesalaisuusomaisuutta. Sen tähden sisältöä ei saa kopioida, muokata, kääntää, jakaa, takaisinmallintaa, mallintaa symbolisella konekielellä...
-
Page 23: Capability, Device Features And Product Features
CAPABILITY, DEVICE FEATURES AND PRODUCT FEATURES Device Capabilities ® The C2-6104A uses four proprietary CORIO 2 scaling engines to perform its functions, offering a powerful toolset for any application requiring high quality video signal conversion or image manipulation. All units feature four video processing and scaling engines, with video mixing, keying, fading, and source-labeling capabilities. - Page 24 C2-6104A O PERATION ANUAL ® processing hardware – the CORIO 2 scaling engine. See http://www.tvone.com/support for more detail.
-
Page 25: Product Images
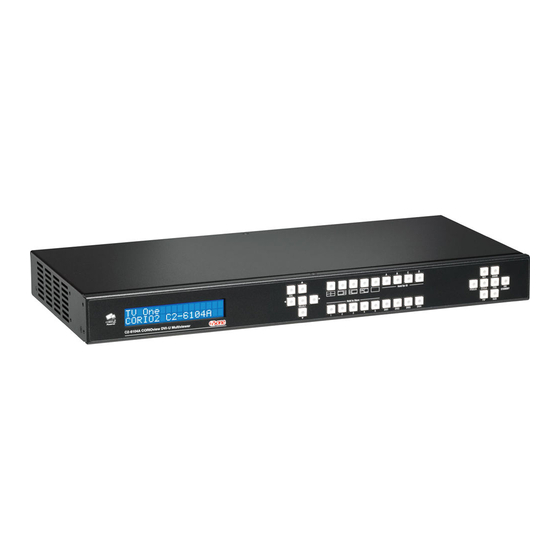
C2-6104A O PERATION ANUAL PRODUCT IMAGES Your product should look like the unit below. -
Page 26: Unpacking And Installation
If you did not receive the correct cable, DO NOT attempt to modify it. Instead, immediately contact your dealer or contact TV One at the sales office nearest to your geographic location and request the proper adaptor. -
Page 27: Front Panel Controls
C2-6104A O PERATION ANUAL FRONT PANEL CONTROLS The range of buttons on the front of the unit provides the user with quick access for selecting a variety of inputs and features. The cross-hair (up/down/left/right) buttons on the front panel provides the user with a way of navigating the Liquid Crystal Display menus (LCD) which is detailed in a later section. -
Page 28: Menu Navigation Buttons
C2-6104A O PERATION ANUAL Menu navigation buttons The LCD is controlled from the front panel by using these buttons. These functions let the user navigate through the menu structure or change a parameter, and are detailed in a later section. -
Page 29: Forcing Output To Specific Resolutions
C2-6104A O PERATION ANUAL All stored settings except resolutions are lost when the unit is reset. A Firmware update is the only way to perform a complete factory reset (including resolution data). 6.4.4 Forcing output to specific resolutions This can be done by holding down two buttons simultaneously as shown in the... -
Page 30: Video Inputs And Outputs
C2-6104A O PERATION ANUAL VIDEO INPUTS AND OUTPUTS C2-6104A This unit has 4x DVI-U inputs, 1x DVI-U background input and 1x DVI-I output. Computer & Video inputs Signal DVI-U input Analog RGBHV RGsB (sync on green) RGBS (composite sync at TTL levels) ... -
Page 31: Block Diagram / Product Architecture
C2-6104A O PERATION ANUAL Signal DVI-I output Analog RGBHV RGsB (sync on green) RGBS (composite sync at TTL levels) YUV/YPbPr (including tri-level) DVI-D This is altered in the ‘Adjust outputs’ menu, where the user can select between the above outputs. - Page 32 C2-6104A O PERATION ANUAL The resulting windows are merged together into a single output, according to the layer priority as set in Adjust windows. Not shown in the above diagram are the Still Image Stores (SIS1 through to SIS4) which can provide a static source for the Windows A through D (but not background Z), nor the border generators which can place borders of any color or opacity around each window.
-
Page 33: Menu Layout And Settings Adjustment
C2-6104A O PERATION ANUAL MENU LAYOUT AND SETTINGS ADJUSTMENT From here on, we’ll be looking at the menu structure and, more importantly, the individual menu items that allow you to take advantage of the power of the unit. You’ll be using the menu navigation buttons and the Liquid Crystal Display (LCD) to view the options and settings available to you. -
Page 34: Group Names And Descriptions
C2-6104A O PERATION ANUAL In some cases the functionality is global – meaning it has an effect on the unit as a whole (such as changing the output resolution). In the majority of cases, the function is related to a specific operational area of the unit, detailed by the text in the top line. -
Page 35: Items Associated With The Adjust Outputs Group
C2-6104A O PERATION ANUAL Items Associated with the Adjust outputs group This menu group allows adjustments to be made that specifically affect the output of the unit, including output resolution and locking/overlaying onto a computer or video source. 800 x 600 60Hz... - Page 36 C2-6104A O PERATION ANUAL Before turning the Lock feature on, you first must select a valid Lock source. Some units may not have all Lock sources available, depending on hardware limitations – see Specifications for details of limitations on your unit.
- Page 37 C2-6104A O PERATION ANUAL Status Description Effect message No display There is no display attached Nothing will be output on the DVI connector. (HOTPLUG is low). Unavailable The device attached is not As the DVI output cannot be HDCP encrypted, then capable of support ing HDCP.
-
Page 38: Items Associated With The Adjust Windows Group
C2-6104A O PERATION ANUAL source’s input – hence it should be turned Off it the CV/YC outputs are going to be used. Adjust outputs Stand. [NTSC-M/PAL-BDGHI] This menu item is only available when the Output resolution is set to PAL or NTSC. - Page 39 C2-6104A O PERATION ANUAL This menu item only appears on units with multiple windows or PIPs. It is used to select which one you want to modify. Alternatively, use one of the dedicated buttons on the front panel to choose the window to adjust.
- Page 40 C2-6104A O PERATION ANUAL By adjusting the H/V values, you can crop out the black areas to correct the size on the final output screen. Note that it does not change the shape or aspect ratio of the image – but just removes the parts of the image that are not required.
- Page 41 C2-6104A O PERATION ANUAL This is a feature only present in advanced units only. It greatly improves the method of frame-rate conversion, by allowing the unit to merge frames together during the process. When ‘Off’, the unit will use frame-repetition when converting 50Hz to 60Hz (i.e. it has to duplicate every 5th frame), or frame-dropping when converting 60Hz to 50Hz (i.e.
-
Page 42: Extended Scaling Controls
C2-6104A O PERATION ANUAL Adjust windows Audio bars Certain units can display audio bar measurements and this menu item displays how many stereo-bars are shown. A maximum of 4 stereo bars (8 bars in total, with left- right pairs next to each other) can be shown. Audio channels are always numbered from left to right, balanced to display bars on both sides of the each. -
Page 43: Aspect Adjust' = 'Advanced
C2-6104A O PERATION ANUAL Simple Advanced Pixel Zoom level % [100] Zoom H/V [100]100 1.333:1 In [ 0],0 640,480 H/V zoom pan% [50] 50 H/V zoom pan% [50] 50 Out [ 0],0 640,480 H/V crop % [ 0] 0 H/V crop % [ 0] 0 Shrink level % [50] Off ShrnkH/V [50] 50 1.333:1... -
Page 44: Items Associated With The Adjust Keyers Group
C2-6104A O PERATION ANUAL placed in the output video signal – in other words the ‘In’ and ‘Out’ positions and sizes. The diagram below should help to clarify the function of these values: 1024 1024 In the example above, ‘In’ has been set to 300,150 as its top-left source co- ordinate, with a size of 750,400. - Page 45 C2-6104A O PERATION ANUAL Normally, your foreground is the input (window) source and your background is the lock source. This then allows you to superimpose any graphics or video input on top of the lock source by keying out a certain color or range of colors in the input source.
-
Page 46: Items Associated With The Adjust Borders Group
C2-6104A O PERATION ANUAL Setting it to Off will cause the colour range that’s defined to be removed - remove the desired colors. Setting it to On will cause the colour range that’s defined to be kept - key out all other colors. -
Page 47: Items Associated With The Adjust Sources Group Relating To Source Labeling
C2-6104A O PERATION ANUAL Adjust borders Brdr opacity % [100] This parameter controls how visible the border is to the viewer. A setting of 0 renders the border invisible (transparent) whereas a setting of 100 makes the Logo fully visible. (In-between settings can give the Border a transparent appearance.) - Page 48 C2-6104A O PERATION ANUAL This menu item controls where the source label will appear within the window that uses this source. H position options: Off, Left, Center, Right V position options: Off, Top, Middle, Bottom When either of the options are set to ‘Off’, no source labelling will be shown.
-
Page 49: Items Associated With The Adjust Sources Group
C2-6104A O PERATION ANUAL This menu item allows the font, H-Size and V-Size of the characters to be altered. If you make the font size too big, it may become corrupted or disappear. Items Associated with the Adjust sources group The ‘Adjust Sources’... - Page 50 C2-6104A O PERATION ANUAL Setting Result Fill The source is stretched to fill the output. (default) Aspect The source’s aspect ratio is maintained on the output. H-fit The source is stretched to fill the horizontal dimension of the output, with the vertical dimension stretched by the same amount (and possibly clipped).
- Page 51 C2-6104A O PERATION ANUAL In most situations, the Audio input values would be different for each video source – so that when the first video source is selected, so is the first audio source (this is called ‘audio follow video’). The second video source then selects the second audio source, etc.
-
Page 52: Dvi Source Menu Items
C2-6104A O PERATION ANUAL Mode Function Normal/weave The two interlaced fields are simply combined/weaved together. This will often show artifacts on moving images, but can be used when the input is known to be still. Auto Automatically selects Film 3:2 or Medium Range Motion Compensation (M. - Page 53 C2-6104A O PERATION ANUAL Status Description Effect message Inactive HDCP is not active HDCP-encrypted material cannot be received at the DVI by the unit. connector. Active HDCP is active at HDCP-encrypted material can be received by the DVI connector. the unit, but only if a HDCP-compliant display or device is attached to the unit’s output.
-
Page 54: Rgb Source Menu Items
C2-6104A O PERATION ANUAL It should also be noted that some graphic cards will require your PC to be re-booted before they see that a change has occurred. If your unit allows ‘HDMI’ to be selected, this can also enable certain audio features depending on the abilities of your unit. -
Page 55: Cv & Yc Source Menu Items
C2-6104A O PERATION ANUAL pixel phase adjustment allows you to change the position (from 0 to 31) where the pixels are sampled, relative to the horizontal sync signal. To make this adjustment, select an RGB source and then provide an image from that source with fine detail, preferably with very sharp vertical lines. -
Page 56: Still Image Store / Testcard Source Menu Items
C2-6104A O PERATION ANUAL Saturation is the amount of color present in the image. Hue is the color “tint” parameter and the adjustment range is +90 degrees through to -90 degrees with 0 being the default. Source: YC1 Sharpness Within limits, you can enhance or soften the appearance of detail within an image. -
Page 57: Adjust Tally Menu Item
C2-6104A O PERATION ANUAL Adjust transitions Transition [Fade] This first adjustment controls the type of transition desired: ‘Cut’, ‘Fade’, ‘Wipe’ or ‘Push’. If you select ‘Cut’ or ‘Fade’, the only remaining menu items will be ‘Switching Fade Time’ and ‘Exit’. Selecting ‘Wipe’ or ‘Push’ exposes additional parameters. - Page 58 C2-6104A O PERATION ANUAL Tally / GPIO connections are connected via a D25 socket: Note that the TX+/- and RX+/- pins are duplicates of the RJ45 connector and support RS-422/485, as per the TSL specification. The RJ-45 connection is as shown below (as viewed from the rear):...
-
Page 59: Items Associated With The Adjust Ethernet Group
C2-6104A O PERATION ANUAL In Normal mode, the borders are set as follows: Tally input pin Activation result on pulled low a 4-window system Window A has a red border Window A has a green border Window B has a red border... - Page 60 C2-6104A O PERATION ANUAL In most networks, all computers and other electronic equipment will have a dedicated connection to a network hub or switch, with each item having its own ‘IP address’ (Internet Protocol address). This is the unique set of numbers that identifies the item on the network.
-
Page 61: Items Associated With The Adjust Resolutions Group
C2-6104A O PERATION ANUAL Enter 4 numbers one by one to form the IP address you wish to assign to the unit. The IP address is a series of four numbers between 0 and 255. Anything above 255 is not a valid number in an IP address range. The unit will not allow you to go above 255. - Page 62 C2-6104A O PERATION ANUAL DO NOT ADJUST THESE ITEMS UNLESS YOU’RE CERTAIN YOU KNOW WHAT YOU’RE DOING! THE ONLY METHOD TO UNDO CERTAIN CHANGES IS TO UPDATE THE FIRMWARE. TRY USING THE AUTOSET, SHRINK, SHRINK POS, TL & BR ADJUSTMENTS FIRST.
- Page 63 C2-6104A O PERATION ANUAL The H.freq.fine (Horizontal Sync Frequency) adjustment provides the option for changing the Horizontal Sync timing Frequency in 1 Hz steps. Use this option to fine tune after using the course adjust. Please note that the internal sync generator may be unable to generate the exact frequency you want.
-
Page 64: Items Associated With The System Group
C2-6104A O PERATION ANUAL Porch have a direct bearing on where the active (visible) portion of the image begins. Do not attempt this adjustment without monitoring the results with an oscilloscope. 800 x 600 60 Hz H/V Sync [ 128] x 4 There are standards for all current computer and broadcast resolutions that specify the correct width of both Vertical and Horizontal synchronizing pulses. - Page 65 C2-6104A O PERATION ANUAL designators and cannot be changed by the user however both designators are important to support personnel. System SW date: 2006-7-11 This is an information page showing when the currently installed software was released. The information is useful to the user as he or she compares the date to the website information describing the current software release.
- Page 66 C2-6104A O PERATION ANUAL System OSD on power up [On] This parameter controls whether the ‘welcome’ screen is displayed or not on power up for units with an on-screen display – it can be disabled as required. This is useful when a unit is installed as part of an overall system.
- Page 67 C2-6104A O PERATION ANUAL System Buzzer [ On] The screen labeled ‘Buzzer’ is actually the control for turning the “Beep” “On” or “Off”. Normally this is left in the “On” position to provide positive feedback that your data entries and parameter changes have been accepted.
- Page 68 C2-6104A O PERATION ANUAL System Hours in Use This is another informational display for usage audit purposes. System Temp.C 30 33 43 45 Certain units have built-in temperature sensors, and if yours has such a feature then the above menu item will appear. If the ambient temperature of the internal components becomes excessively high or low, the unit will shut down to prevent harm.
-
Page 69: Serial Port
C2-6104A O PERATION ANUAL SERIAL PORT Connection Your unit is fitted with a standard ‘D9’ plug or socket allowing it to be controlled from a computer or other type of terminal or console with a similar interface. Most computers fitted with an RS232 port, known as a ‘COM’ port, will have a ‘D9’ plug on them. - Page 70 C2-6104A O PERATION ANUAL Note: Any command you send to the unit will be replied to either with an error code or with the actual changed value. This may be different to the one you sent; for example, if trying to set a value too high or too low.
-
Page 71: Serial / Ip Control Specification
C2-6104A O PERATION ANUAL SERIAL / IP CONTROL SPECIFICATION PLEASE NOTE: Not all units support Serial and/or IP (Ethernet) communications – check to see if this feature is present on your unit. This section outlines how to control a unit via a Serial or Ethernet link (if fitted to your unit), using ASCII-based commands. -
Page 72: Packet Format
C2-6104A O PERATION ANUAL The ACK flag will be returned as 0 if the command is invalid for some reason – for example a bad FUNCTION, WINDOW, OUTPUT or PAYLOAD value. An ACK=0 message will be otherwise identical to the one you sent, so you know exactly which message has the error. - Page 73 C2-6104A O PERATION ANUAL returned means message was okay. ACK=0 returned means an error was present in the message. Bit 5 = 0 Reserved for future use. Bit 4 = 0 Reserved for future use. Bit 3 = 0 Reserved for future use.
-
Page 74: Function List
C2-6104A O PERATION ANUAL ASCII-hex byte that is the (check) sum of all previous bytes (excluding the SOP 'F' character). E.g. The command F0400410082000001C8 has the checksum of 04+00+41+00+82+00+00+01=C8, so the complete command to send is F0400410082000001C8. A short-cut for debugging allows the checksum to be replaced by 2 question marks, so in the previous example you could send F0400410082000001?? Instead. - Page 75 C2-6104A O PERATION ANUAL Adjust outputs Output enable 0=Blanked, 1=Active Lock source (connector) 0x10 to 0x1F = RGB1 to RGB16 0x30 to 0x3F = CV1 to CV16 0x40 to 0x4F = YC1 to YC16 0x50 to 0x5F = SDI1 to SDI16...
- Page 76 C2-6104A O PERATION ANUAL 4 = 16:9 Letterbox centre 5 = 16:9 Letterbox top 6 = >16:9 Letterbox centre 7 = 14:9 Full format 8 = 16:9 Full format Take 0->1 = Perform a Preview -> Program transition Audio amp. Volume -16 to 15 AES/SDI Chan.
- Page 77 C2-6104A O PERATION ANUAL In (top-left H) In (top-left V) In (H size) In (V size) Out (top-left H) Out (top-left V) Out (H size) Out (V size) Aspect change 0..2 = Normal, Letterbox, Pillarbox Aspect adjust 0..1 = Simple, Advanced Flicker reduction 0..3 = Off, Low, Med, High...
- Page 78 C2-6104A O PERATION ANUAL E.blnd size H 0.. limited by H width E.blnd size V 0.. limited by V height E.blnd gamma H 1..150 1=0.01, 150=1.50 E.blnd gamma V 1..150 1=0.01, 150=1.50 E.blnd comp cent 0..99 E.blnd comp side 0..99...
- Page 79 C2-6104A O PERATION ANUAL Label H. Size 10..5F 249 0..8 Label V. Size 10..5F 24A 0..8 Label H. Position 10..5F 24D 0..3 (Off / Left / Center / Right) Label V. Position 10..5F 24E 0..3 (Off / Top / Middle / Bottom) Label char.
- Page 80 C2-6104A O PERATION ANUAL M.comp.med., M.comp.high, Frame/bob (Film mode detected) 10..FF 0E3 0..1 = Not detected, Detected Diagonal interpolation 10..FF 22B 0..1 = Off, On Noise reduction 10..5F 23F 0..1 = Off, On Bright 30..5F 0BB 0..180 Contrast 30..5F 0BC 0..180...
- Page 81 C2-6104A O PERATION ANUAL 1 = Normal 2 = Presets Tally input number 1 to 8 Tally preset to load 1 to 50 Adjust resolutions Note: You MUST set the 'Image to adjust' value to the correct value first, and only then change the other values - otherwise you may be adjusting the wrong entry.
-
Page 82: Examples
C2-6104A O PERATION ANUAL Number of logos Read only Board temp. (deg.C) Read only Air temp. (deg.C) Read only Regulators temp.(deg.C) Read only PLD temp. (deg.C) Read only Fan speed (rpm) Read only Led brightness 0..100 LCD backlight 0..1 = Off, On... -
Page 83: Reading And Writing Macros
C2-6104A O PERATION ANUAL SOP CMD CHA WIN OUT FUN PAY CS EOP SOP CMD CHA WIN OUT FUN PAY CS EOP Set output 1 window B Source to RGB2 000011 D9 CR 000011 19 CR Set output 1 window A to Enable advanced aspect... -
Page 84: Reading A Previously Stored Macro
C2-6104A O PERATION ANUAL Menu text CHA FUNC Range of adjustment (decimal) (Hex) Macro Run macro 0..7 F1 0..1 = Run, Erase macro Number of items within 0..7 F4 Read Only macro Function to adjust 0..7 F2 0..4095 Value 0..7 F3 Value for Function 10.5.1 Reading a previously stored Macro... -
Page 85: Run And Restore Macros
C2-6104A O PERATION ANUAL 000001 3A CR 000001 7A CR Write the function for first item in macro 3 = Zoom 000086 C1 CR 000011 01 CR Write data for the first item = 100 000064 9E CR 000011 DE CR... - Page 86 C2-6104A O PERATION ANUAL Set to 720p 59.94Hz output 0000EB Set to 720p 60Hz output 0000EC Cycle presets (demo mode) 0100EE Select DVI-I1 as source 000200 Select DVI-I2 as source 000201 Select DVI-I3 as source 000202 Select DVI-I4 as source...
- Page 87 C2-6104A O PERATION ANUAL Run Macro 5 00021D Run Macro 6 000267 Run Macro 7 000268 Add to Macro 1 020119 Add to Macro 2 02011A Add to Macro 3 02011B Add to Macro 4 02011C Add to Macro 5...
- Page 88 C2-6104A O PERATION ANUAL Select CV1 as source for window A 00023F Select CV2 as source for window A 000240 Select CV3 as source for window A 000241 Select YC1 as source for window A 000242 Select YC2 as source for window A...
- Page 89 C2-6104A O PERATION ANUAL Select RGB2 as source 00027D Select YUV1 as source 000264 Logo 1A toggle on/off 000265 Logo 2B toggle on/off 000266 Window 1A toggle on/off 00026D Window 2B toggle on/off 00026E Go to Lock menu item 00027E...
-
Page 90: Reset Command
C2-6104A O PERATION ANUAL Erase Preset 3 280193 Erase Preset 4 280194 Erase Preset 5 280195 Erase Preset 6 280196 Erase Preset 7 280197 Erase Preset 8 280198 Erase Preset 9 280199 Erase Preset 10 28019A Set output to BLACK... -
Page 91: Common Operations
C2-6104A O PERATION ANUAL COMMON OPERATIONS This section provides step by step instructions for some common operations. 10.6 Operation of the Keyer Some units come equipped with a very powerful Luminance and Chrominance Keyer. The Keyer can take some time to master and below is a breakdown and series of simple steps to help you master the Keyer’s operation... - Page 92 C2-6104A O PERATION ANUAL to decrease the ‘min’ values and increase the ‘max’ values to broaden the range of colors keyed out. At this point, only the key color should remain transparent. Test Equipment Depot - 800.517.8431 - 99 Washington Street Melrose, MA 02176...
-
Page 93: Troubleshooting And Technical Support
C2-6104A O PERATION ANUAL TROUBLESHOOTING AND TECHNICAL SUPPORT If problems are experienced, please read through the symptom topics below in order to resolve the problem. After doing so, if you still need to, contact Technical Support at http://www.tvone.com/support. Please have the following details of... -
Page 94: There Is Excessive Flicker On The Output
C2-6104A O PERATION ANUAL 11.4 There is excessive flicker on the Output. Try using a different Flicker reduction mode. Turning the contrast down and the brightness up on the output device can have a large effect on flicker. Or try adjusting the brightness and contrast of the source input by selecting the Input adjust menu. -
Page 95: The Rgb Input Is Selected But The Image Is Rolling Or Pink
C2-6104A O PERATION ANUAL 11.11 The RGB input is selected but the image is rolling or pink. Check the Adjust sources menu and confirm that the input type and sync method is set correctly. (Having YUV input selected, instead of RGBHV often causes this problem). -
Page 96: Return Procedure
12.2 To return a unit for repair First contact TV One using the http://www.tvone.com/support website. Support personnel will determine whether a return to the factory is the appropriate solution. If that’s the case, a Return Authorization Number will be issued. You should... - Page 97 C2-6104A O PERATION ANUAL Please clearly state the return number on the outside packaging and on any accompanying documentation. This will greatly speed up processing. IMPORTANT: DO NOT return a unit for warranty repair without first obtaining a Return Authorization Number. No action will be taken on a unit returned in...
-
Page 98: Warranty Policy
Should this product, in TV One’s opinion, prove defective within this warranty period, TV One, at its option, will repair or replace this product without charge. Any defective parts replaced become the property of TV One. This... -
Page 99: Connector Pinouts
C2-6104A O PERATION ANUAL CONNECTOR PINOUTS 14.1 DVI-I connector PIN# SIGNAL PIN# SIGNAL T.M.D.S DATA 2- HOT PLUG DETECT T.M.D.S DATA 2+ T.M.D.S DATA 0- T.M.D.S DATA 2/4 SHIELD T.M.D.S DATA 0+ Not used T.M.D.S DATA 0/5 SHIELD Not used... - Page 100 C2-6104A O PERATION ANUAL...
-
Page 101: Specifications
C2-6104A O PERATION ANUAL SPECIFICATIONS See product front and rear diagrams for details of product I/O. 15.1 Computer Input DVI-D (on DVI-I connector) supporting up to 162MHz (1920x1200 @ 60Hz). HDCP support. EDID 1.3 data on DVI-D connector to communicate available resolutions. -
Page 102: Scaling / Sampling / Memory
C2-6104A O PERATION ANUAL 15.6 Scaling / sampling / memory Size and position: automatic via AutoSet or Manual Image size: 50 user-definable presets (presets 6 to 10 pre-defined) Image freeze: one video frame Settings memory: non-Volatile Zoom range: variable to 10x Zoom (1000%) -
Page 103: Mechanical
C2-6104A O PERATION ANUAL (The unit is not compatible with the CC-300 CORIOconsole unit.) 15.13 Mechanical Size (H x W x D): 1.725” x 17” x 7.92” (44 x 431 x 201mm) Weight (Net): 7.0 lbs (3.2 kg) 15.14 Optional Accessories...
Need help?
Do you have a question about the C2-6104A and is the answer not in the manual?
Questions and answers