Subscribe to Our Youtube Channel
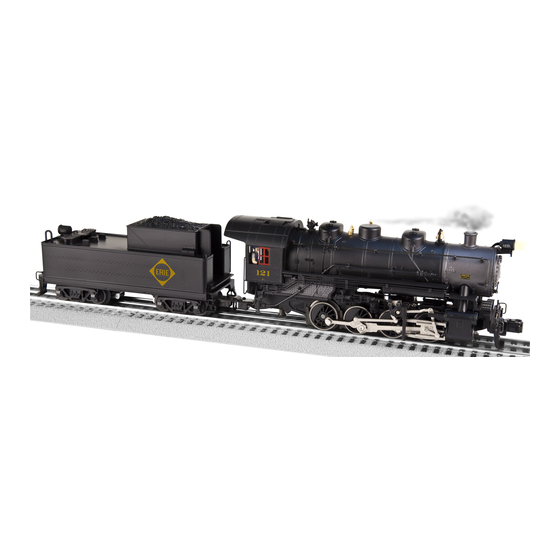
Summary of Contents for Lionel USRA 0-8-0 Yard Goat
- Page 1 71-1248-250 3/11 Lionel Conventional Lionel Conventional USRA 0-8-0 "Yard Goat" USRA 0-8-0 "Yard Goat" Steam Locomotive Steam Locomotive Owner’s Manual Owner’s Manual...
- Page 2 • Operating headlight • Operating coupler on rear of tender • Powerful maintenance-free motor with momentum flywheel • Traction tires • Puffing smoke • Engineer figure • Die-cast metal tender body and trucks • Minimum curve: O-31 The following Lionel marks are used throughout this catalog and are protected under law. All rights reserved. Lionel ® , LEGACY ™ , TrainMaster ®...
-
Page 3: Table Of Contents
Adding smoke fluid to your locomotive’s smoke generator Coupling Reverse unit procedure Conventional RailSounds operations Operating the conventional RailSounds sound system Installing a Lionel sound activation button Maintaining and servicing your locomotive Lubricating your locomotive Replacing your locomotive’s traction tire Replacing your locomotive’s headlamp... -
Page 4: Running Your Locomotive
Connect the drawbar between the locomotive and tender. See Figure 1. If the smoke unit switch is in the ON position, add Lionel smoke fl uid to your Caution! locomotive’s stack to prevent damage to the smoke unit. Refer to page 5 for additional information. -
Page 5: Adding Smoke Fluid To Your Locomotive's Smoke Generator
ON position. Refer to Figure 3 on page 7 for the loca- tion of the switch. The smoke generator requires the periodic addition of Lionel smoke fluid in order to function. Add 10-15 drops of fluid directly into the locomotive’s stack. Smoke production will commence after running for several minutes. -
Page 6: Coupling
Running your locomotive Coupling hen coupling your cars, at least one of the mating couplers must be open as shown at the left in Figure 2. Press down on the lock release to open the coupler, then push the cars toward each other until they lock together. -
Page 7: Reverse Unit Procedure
Running your locomotive Reverse unit procedure hen the reverse unit switch is in the RUN position, your locomotive sequences through a repeating pattern of operations: forward, neutral, reverse, neutral, and so on. To “lock” your locomotive into forward operation only, you can deactivate the reverse unit’s sequencing function. -
Page 8: Conventional Railsounds Operations
Conventional RailSounds operations Operating the conventional RailSounds sound system hen you power up the locomotive on the track, you will hear the sounds of the idling steam locomotive. The chuffing sounds will increase proportionally with the locomotive's speed. Use the volume control knob to adjust the volume. See Figure 4 for the location of this control, which is concealed under the hatch on the tender's deck. -
Page 9: Installing A Lionel Sound Activation Button
Conventional RailSounds operations Installing a Lionel Sound Activation Button for conventional opera- tion f your transformer lacks WHISTLE/HORN and BELL buttons, you will need to install Lionel no. 610-5906-001 Sound Activation Buttons (available separately) to activate the locomotive’s whistle and bell sounds. -
Page 10: Maintaining And Servicing Your Locomotive
We recommend that you purchase a Lionel Lubrication and Maintenance Kit (6-62927), available from your Lionel dealer. Two basic rules to keep in mind: never over-lubricate (a small amount will do) and avoid getting grease or oil on the locomotive’s wheels, contact rollers, or your track. -
Page 11: Replacing Your Locomotive's Traction Tire
To replace the traction tire, simply unscrew the drive rod screw from the wheel using a 3/16” nut driver. Remove the old traction tire from under the drive rod and slip on the replacement, Lionel part no. 6308661206. Replace the spacer, retighten the drive rod screw, and you’r e ready to pull that long freight back to the yard. -
Page 12: Lionel Limited Warranty Policy & Service
(or copy) from an Authorized Lionel Retailer*, will at the discretion of Lionel LLC, be repaired or replaced, without charge for parts or labor. In the event the defective product cannot be repaired, and a suitable replacement is not available, Lionel will offer to replace the product with a comparable model (determined by Lionel LLC), if available.


Need help?
Do you have a question about the USRA 0-8-0 Yard Goat and is the answer not in the manual?
Questions and answers