Table of Contents
Advertisement
Quick Links
Advertisement
Table of Contents

Subscribe to Our Youtube Channel
Related Manuals for Gaggenau BO 480/481 6 series

Summary of Contents for Gaggenau BO 480/481 6 series
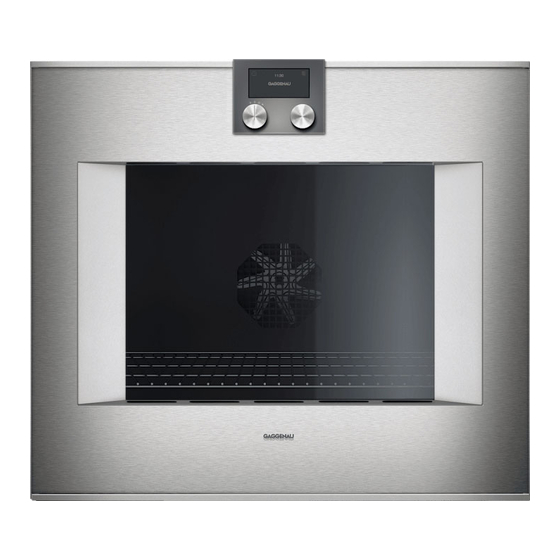
- Page 1 Gaggenau Use and care manual BO 480/481 6.. Built-in oven...
-
Page 2: Table Of Contents
Table of Contents U s e a n d c a r e m a n u Safety Definitions Timer functions Launching the timer menu Timer IMPORTANT SAFETY INSTRUCTIONS Stopwatch Proper Installation and Maintenance Cooking time Fire Safety End of cooking time Burn Prevention Child Safety Sabbath mode and Yom Tov mode... -
Page 3: Safety Definitions
Acrylamide in foodstuffs with this advisory. Note: This alerts you to important information and/or tips. Additional information on products, accessories, replacement parts and services can be found at www.gaggenau.com and in the online shop www.gaggenau-eshop.com... -
Page 4: Important Safety Instructions
IMPORTANT SAFETY INSTRUCTIONS READ AND SAVE THESE INSTRUCTIONS The oven door is heavy and fragile. Use both hands to I O N remove the oven door. The door front is glass. Handle WARNING carefully to avoid breaking. When properly cared for, your new appliance has Grasp only the sides of the oven door. -
Page 5: Burn Prevention
IMPORTANT SAFETY INSTRUCTIONS READ AND SAVE THESE INSTRUCTIONS Burn Prevention If materials inside an oven or warming drawer should ignite, keep door closed. Turn off the appliance and DO NOT TOUCH HEATING ELEMENTS OR disconnect the circuit at the circuit breaker box. INTERIOR SURFACES OF OVEN - Heating elements may be hot even though they are dark in color. -
Page 6: Child Safety
IMPORTANT SAFETY INSTRUCTIONS READ AND SAVE THESE INSTRUCTIONS Child Safety Birds have very sensitive respiratory systems. Keep pet birds out of the kitchen or other rooms where When children become old enough to use the kitchen fumes could reach them. During self-clean, appliance, it is the legal responsibility of the parents fumes are released that may be harmful to birds. -
Page 7: Causes Of Damage
Causes of damage Protecting the environment NOTICES: Unpack the appliance and dispose of the packaging in line with environmental requirements. ▯ Accessories, foil, baking paper or cookware on the bottom of the oven interior: do not place any accessories on the bottom of the oven interior. Do Tips for saving energy not line the bottom of the oven interior with any type of foil whatever or baking paper. -
Page 8: Getting To Know The Appliance
Getting to know the appliance You will get to know your new appliance here. We explain the control panel and the individual controls to you. You are informed about the oven interior and accessories. Oven Door seal Rotisserie spit drive Grill heating element Oven vents Socket for additional heating element... -
Page 9: Displays And Controls
Displays and controls Symbols These instructions apply to different versions of the Symbol Function appliance. Slight deviations are possible depending Start on the appliance type. Ø Stop Operation is identical for all appliance versions. Pause/end Cancel Ž Delete ™ Confirm/save settings Selection arrow Open appliance door Launching additional information... -
Page 10: Colors And Display
Colors and display Additional information Colors By touching the symbol, you can call up additional information. For example, information on the heating The various colors serve to guide you in the various function set or on the current temperature of the adjustment situations. -
Page 11: Program Selection Positions
Program selection positions Position Function/type of heating Temperature Application Off position ž Light 120 - 550°F (50 - 300°C) Convection: For cakes, cookies and baked cas- seroles on several levels. Default temperature 340°F Convection (170°C) The fan in the rear wall of the oven distributes the heat evenly throughout the cooking compart- ment. -
Page 12: Accessories
Position Function/type of heating Temperature Application 120 - 550°F (50 - 300°C) To grill flat pieces of meat, sausages or fillets of fish. Cooking "au gratin." Default temperature 430°F Broil (220°C) 120 - 550°F (50 - 300°C) Only the center part of the grill heating element is heated. -
Page 13: Special Accessories
After connection to the power, the GAGGENAU logo first appears for about 30 seconds, after which the "First settings" menu appears automatically. -
Page 14: Setting The Time Format
Setting the time format Setting the date the two possible formats 24h and AM/PM appear in The default date appears in the display. The day the display. The default format is 24h. setting is already active. Set the required format with the rotary selector. Set the required day with the rotary selector. -
Page 15: Completing Initial Set-Up
Make sure there are no packaging remainders left in ‒ There are various displays for the standby mode. the interior. The GAGGENAU logo and the time are set by Factory default. Refer to the section entitled Heat up the empty, closed oven to dispel the 'new' setting if you would like to change the display. -
Page 16: Operating The Appliance
Turning on Operating the appliance Set the required heating mode using the function selector. The chosen heating mode and the default temperature are displayed. Oven interior If you want to change the default temperature: The cooking compartment has five shelf levels. set the required temperature with the rotary selector. -
Page 17: Timer Functions
Start with Timer functions The Timer menu closes and the timer starts to run. Š The symbol for the timer appears on the display and In the timer menu, set: the time can be seen counting down. Š Timer Stopwatch Cooking time (not in the idle state) Cooking time end (not in the idle state) Launching the timer menu... -
Page 18: Cooking Time
Cooking time Start with The timer menu is closed and the time runs. The If you set a cooking time for your meal, the appliance symbol and the elapsing timer are shown in the switches off heating automatically after this time has display. -
Page 19: End Of Cooking Time
The appliance switches off after expiration of the Set the required cooking time end with the rotary selector. cooking time. The pulsates and a signal sounds. It ™ goes off prematurely if you touch the symbol, open Start with the appliance door or set the program selection to Interrupting the cooking time: Launch the timer menu. -
Page 20: Sabbath Mode And Yom Tov Mode
Setting the Sabbath mode Sabbath mode and Yom Tov mode ž Set the program selector to Touch the symbol. The suggested value of 24h at 185° F (85°C) Sabbath mode appears in the display. Start with - or - With this function, the appliance maintains a Change the cooking time and the temperature. -
Page 21: Yom Tov Mode
Yom Tov mode To set Stage 2 temperature: Rotate selector to desired Stage 2 temperature. With this function, the appliance is programmed to perform in three stages. Start with Stage 1 and 2 can be programmed for a maximum total The temperatures of Stage 1 and Stage 2 appear in duration of 74 hours. -
Page 22: Personal Recipes
Enter the core temperature for a phase: Personal recipes Insert the core temperature probe in the socket in the oven interior. Set the heating function and temperature. Touch the symbol. With the rotary You can save up to 50 individual recipes. You can selector, enter the required temperature and confirm it record a recipe. -
Page 23: Entering A Name
Starting a recipe Enter the core temperature for a phase: Choose the next phase with the symbol. Set the Set the program selection to any heating function. heating function and temperature. Touch the symbol is displayed. symbol. With the rotary selector, enter the required temperature and confirm it with Touch the symbol. -
Page 24: Core Temperature Probe
In the case of poultry, make sure that the tip of the Core temperature probe core temperature probe is not in the cavity in the center, but in the meat between the belly and upper leg. The core temperature probe enables exact cooking to the spot. -
Page 25: Core Temperature Guidelines
A signal sounds when the set core temperature in the Food Core food has been reached. The cooking mode is ended temperature ™ automatically. Confirm with and turn the program guideline selection to Pork Notes Pork roast 162 - 176°F ‒... -
Page 26: Rotisserie Spit
Food Core Rotisserie spit temperature guideline Using the rotisserie spit, you can prepare large roasts Lamb such as rolled roast and poultry particularly well. The Leg of lamb meat becomes crispy and brown all round. medium 140 - 149°F (60 - 65 °C) You can use the rotisserie spit in all modes of well-done operation. -
Page 27: Preparation
Preparation Switching on the rotisserie spit Insert both supports in the sockets on the grill Set the required temperature and heating tray. The drive is on the left. function. Plug the right retaining clip onto the rotisserie Touch the symbol. The rotisserie spit is spit and screw it in firmly. -
Page 28: Roasting Function
Roasting function Child lock Only with heating type "Roaster operation": The appliance has a child lock to make sure children In the pre-roast stage, the oven heats at full power for cannot operate it inadvertently. approx. 3 minutes. This way, you can cook steaks Notes quickly. -
Page 29: Factory Setting
- Date + GAGGENAU logo play with the rotary selector. - Clock + date The selection is displayed. - Clock + date + GAGGENAU logo Minimized Display screen Minimized*/Standard When is set, only the most impor- tant details are displayed after a short time. - Page 30 Date format D.M.Y* Setting the date format D/M/Y M/D/Y Date Current date Setting the date. Switch between the year/ month/day with the symbol. Temperature format °C*/°F Set the temperature unit Language German* / French / Italian / Spanish / Select language for the text display Portuguese / Dutch / Danish / Swedish Note: When the language is changed, the / Norwegian / Finnish / Greek / Turkish...
-
Page 31: Cleaning And Maintenance
Cleaning and maintenance Area Cleaning agents Door panels Glass cleaner: Clean with a soft cloth and dry with a microfiber cloth. Do not use a glass scraper. If taken care of and cleaned conscientiously, your appliance will stay beautiful and intact for a long time. Display Wipe with a microfiber cloth or a Here we explain how to take care of and clean your... -
Page 32: Removing Slide-In Racks
Microfiber cloth Self-clean (pyrolysis) The honeycomb-structure microfiber cloth is particularly suitable for cleaning sensitive surfaces such as glass, glass ceramics, stainless steel or During self-clean (pyrolysis), the oven heats up to aluminum (order No. 460770 available from after-sales 905°F (485°C). Thus, remainders from roasting, service or in the online shop). -
Page 33: Preparing Self-Clean (Pyrolysis)
Preparing self-clean (pyrolysis) Cleaning accessories with self-clean (pyrolysis) CAUTION Gaggenau baking trays and grill trays are coated with Fire risk! Loose food remainders, fat and roast pyrolysis-proof enamel. To arrive at an optimum juice can catch fire. Wipe out the oven interior cleaning result, you are nevertheless advised to with a moist cloth. -
Page 34: Troubleshooting
Troubleshooting You can often easily eliminate problems that may WARNING occur on your own. Before calling customer service, take into account the following information. Risk of electric shock Improper repairs are dangerous. Only an after- sales technician trained by us may perform repairs and may replace damaged connecting leads. -
Page 35: Replacing The Oven Lamp
Replacing the oven lamp Customer service You can replace the oven lamps. You can obtain replacement lamps after-sales service or from trade If your appliance needs repairs, our customer service dealers. Use the same type of halogen bulbs only. is there for you. We work hard to help solve problems ▯... -
Page 36: Tables And Tips
Tables and tips Notes ‒ Do not crowd the wire rack and baking trays too tightly. This guarantees optimal heat circulation. ‒ Always preheat the appliance. Here's how to get the best cooking results. The ‒ For the preparation of bulky foods, you can also cooking times specified refer to a pre-heated remove the side slide-in tray. -
Page 37: Vegetables
Vegetables ▯ ▯ Vegetables from the oven are a good alternative Vegetables are suitable as warm or cold to vegetables from the pan. The flavors are appetizers or vegetarian main dishes, or also as concentrated and the roasting aromas make them side dishes to be served with fish and meat. - Page 38 Dish Accessories Level Temperature Type of Cooking Observations in °F (°C) heating time in min. Vegetable bake Ovenproof 2 (3) 390 (200) 20 - 30 Pre-cook/blanch vegetables and other dish ingredients. Veggie burgers, Baking tray 2 (3) 430 (220) 12 - 15* frozen + grease- proof paper...
-
Page 39: Side Dishes And Dishes
Side dishes and dishes ▯ ▯ The best side dishes from the oven are based on Dishes that are suited for preparation in the oven potatoes, for example potatoes au gratin. are especially dishes that are gratinated, such as However, other outstanding side dishes can also casseroles and gratins. - Page 40 Dish Accessories Level Temperature Type of Cooking Observations in °F (°C) heating time in min. Mozzarella sticks, Baking tray 2 (3) 355 (180) frozen + grease- proof paper Feta Baking 2 (3) 480 (250) Recipe tip: put in a pan with oil, toma- sheet toes, onions, garlic, and rosemary and season with salt and pepper.
- Page 41 Dish Accessories Level Temperature Type of Cooking Observations in °F (°C) heating time in min. Tarte flambee, Baking 2 (3) 480 (250) 8 - 10 Recipe tip: classic or with fresh goat fresh sheet cheese, Parma ham, figs, and pring onions.
-
Page 42: Fish
Fish ▯ ▯ Fish should (for hygienic reasons) have a core For fillets with skin: if you place the fish skin-side temperature of at least 144 - 158°F (62 - 70 °C) up, the structure and aroma will be retained after cooking. -
Page 43: Meat
Meat ▯ ▯ For better results, use the core temperature Use the wire rack or the roasting dish for a large sensor. For notes and optimal target roast and for types of preparation that generate a Core temperature sensor temperatures, see the lot of liquid for roasting. - Page 44 Dish Accessories Level Temperature Type of Cooking Observations in °F (°C) heating time in min. Rolled pork Glass/grill 2 (3) 445 / 355 65 - 70*** tray (230 / 180) Wire rack + 2 (3) 445 / 355 75 - 80*** Grill tray (230 / 180) Veal...
- Page 45 Dish Accessories Level Temperature Type of Cooking Observations in °F (°C) heating time in min. Meatballs Baking tray 2 (3) 390 (200) 25 - 30 Recipe tip: very good for further combi- (25 g each) nations, e.g. meatballs with tomato Grease- sauce, Swedish meatballs, Königs- proof paper...
-
Page 46: Poultry
Poultry ▯ ▯ For better results, use the core temperature When cooking duck or goose, pierce the skin on sensor. Do not place it in the middle (hollow the underside of the wings to allow the fat to run space), but rather between the belly and upper out. -
Page 47: Grilling And Roasting
Grilling and roasting ▯ ▯ Grill only with a closed oven door. If you use wooden skewers, these can burn. In order to prevent this, cut the skewers as short as ▯ Use the grill tray with inlaid shelf for grilling possible or soak them overnight in water before (depending on the version, accessory or special spearing the ingredients or use metal skewers. -
Page 48: Cakes And Cookies
Dish Accessories Level Temperature Type of Cooking Observations in °F (°C) heating time in min. Cooking "au gratin" Springform 2 (3) 430 - 480 4 - 5** Remain near the appliance so that the cake pan (220 - 250) gratin does not burn. Dried plums Baking tray 3 (4) - Page 49 Dish Accessories Level Temperature Type of Cooking Observations in °F (°C) heating time in min. Sponge cake Springform 2 (3) 320 - 340 50 - 60 cake pan (160 - 170) 2 (3) 320 - 340 50 - 60 (160 - 170) Loaf cakes Loaf pan 2 (3)
- Page 50 Dish Accessories Level Temperature Type of Cooking Observations in °F (°C) heating time in min. Cake base Springform 2 (3) 355** (180**) 22 - 30 Pre-heat cake pan ø (according to 26 cm EN60350-1) Springform 2 (3) 300 - 355** 20 - 45 Pre-heat cake pan ø...
- Page 51 Dish Accessories Level Temperature Type of Cooking Observations in °F (°C) heating time in min. Brownies Baking tray 2 (3) 250 (120) 60 - 65 After baking, cut into squares. Typical is that the consistency is still a bit Grease- sticky.
- Page 52 Dish Accessories Level Temperature Type of Cooking Observations in °F (°C) heating time in min. Foccacia Baking tray 2 (3) 410 (210) 15 - 20 Top with various ingredients, e.g. with herbs, sea salt, olives, sardines, Grease- onions, ham, tomatoes or cheese. proof paper Garlic/herb Baking tray...
-
Page 53: Raising Dough
Raising dough ▯ ▯ Place the bowl with the dough on the wire rack. For small quantities of dough, for noodles or rolls, Select the "dough proofing" heating function. you can set the temperature to 105 - 115°F (40 - 45 °C). ▯... -
Page 54: Thawing
Thawing ▯ After half the defrost time has elapsed, turn the meat or fish. Separate defrosted food in pieces, ▯ e.g. berries or pieces of meat. Fish does not have For this, use the "defrost" heating function. to defrost all the way; it is sufficient if the surface ▯... -
Page 55: Boiling Down
Boiling down ▯ ▯ If possible, cook food immediately after purchase Open the cooking compartment door after the or harvesting. Longer storage decreases the cooking time has elapsed. Do not remove the vitamin content and can cause spoilage. canning jars from the appliance until they have completely cooled down. -
Page 56: Drying
Drying ▯ ▯ Drying is a preservation method with which, Place the prepared food on a roasting dish or tray through the feeding in of dry heat, up to 50% of covered with greaseproof paper. During the the liquid in food is removed. At the same time, drying process, turn the food every now and then. -
Page 57: Baking Stone
Baking stone ▯ ▯ You need the special accessory baking stone and When baking bread, we recommend using the heating element. core temperature sensor. Insert the core temperature sensor in the deepest part of the ▯ Whether crispy pizza or fresh bread – with the dough. -
Page 58: Roasting Dish
Roasting dish ▯ Tip: Instead of adding the fat to the roasting dish, You need the special accessory roasting dish and oil the meat. This ensures a direct heat transfer. heating element. ▯ ▯ Cooking liquids reduce down quickly. Make sure In the roasting dish, you can also braise large there is always sufficient cooking liquid. -
Page 59: Acrylamide In Foodstuffs
Dish Accessories Level Temperature Type of Cooking Observations in °F (°C) heating time in min. Stuffed peppers, Roasting 390 (200) Recipe tip: fill with cooked rice, Ebly vegetarian dish wheat or lentils and onions, cheese, herbs and spices. Chili con carne Roasting 430 / 265* Searing... - Page 60 Gaggenau BSH Home Appliance Corporation 1901 Main Street, Suite 600 Irvine, CA 92614 +1.877.442.4436 www.gaggenau-usa.com Gaggenau Hausgeräte GmbH Carl-Wery-Straße 34 81739 München GERMANY...
Need help?
Do you have a question about the BO 480/481 6 series and is the answer not in the manual?
Questions and answers