
Subscribe to Our Youtube Channel
Related Manuals for Surveon CAM4220


Summary of Contents for Surveon CAM4220
- Page 1 CAM4220 Megapixel IR Dome Indoor Network Camera User Manual Release 1.3 July, 2010...
-
Page 3: Copyright Statement
Product specifications are also subject to change without notice. Trademarks Surveon and Surveon logo are trademarks of Surveon Technology Inc. All other names, brands, products or services are trademarks or registered trademarks of their respective owners... -
Page 4: Table Of Contents
Surveon CAM4220 Table of Contents Copyright Statement................1 Table of Contents ................2 Chapter 1. Overview................4 1.1. Network Camera Introduction ............4 1.2. Network Camera Features............4 1.3. Network Camera Specifications ............5 System Structure ................7 1.4. Network Camera Hardware Installation ..........7 Chapter 2. - Page 5 DI & DO................43 Event Settings............... 45 System..................51 MicroSD Card Management ............51 System Status ............... 52 System log ................53 Firmware Upgrade..............54 Reset to Factory Default ............55 Export/Import & Reboot ............56 Surveon Network Camera User Manual...
-
Page 6: Chapter 1. Overview
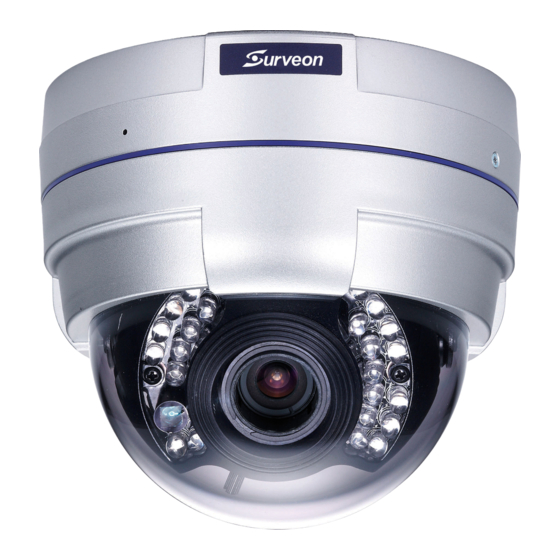
Chapter 1. Overview 1.1. Network Camera Introduction CAM4220 is a professional IP network camera utilizing Internet Protocol (IP) to transmit video streams and control signals over networks. Capable of operating over both LANs and WANs, CAM4220 provides a complete budget-conscious remote surveillance solution that is ultra clear and highly integrated. -
Page 7: Network Camera Specifications
Motion detection, tampering detection Intelligent (blocked, redirected, defocused, video or spray-painted) Built-in MIC Omni-directional Audio 32KHz, ADPCM compression Audio input 3.5mm phone jack Audio output 3.5mm phone jack Alarm in 2, terminal block Surveon Network Camera User Manual... - Page 8 Surveon CAM4220 Alarm out 1, terminal block AUX power 12VDC 400mA output Video buffer 2 second pre-alarm, 30 second post-alarm Send snapshot or video clip by FTP Event action or email, record to NAS, record to local storage, trigger DO...
-
Page 9: System Structure
Install the camera in a suitable spot. The camera should have an unobstructed view of the area to be surveyed. Connect the camera to a power source. CAM4220 can accept power from a power adapter or from Power over Ethernet enabled switches. -
Page 10: Chapter 2. Connecting To The Network Camera
This section demonstrates how to connect to the network camera through two methods: • Web Browser – A simple web-based interface. Internet Explorer is the recommended web browser for use with Surveon network cameras, and our examples will be from this browser. Usage on other browsers will be similar. •... -
Page 11: Connecting With A Web Browser
Enter the IP address of the network camera in the address bar of your browser and press enter. The IP address can be obtained using the Surveon IP Utility, or if your network does not have DHCP service, the default IP address is 192.168.88.10. -
Page 12: Logging Into The System For The First Time
Surveon CAM4220 Logging into the System for the First Time If this is the first time that the network camera is being accessed, the camera will prompt you to change the administrator password after your first login. Click Okay Click OK when informed of the need to change your password. This will cause a Configure Admin Password popup to display. -
Page 13: Installing Active X Components In Internet Explorer
Search for Download signed ActiveX controls. Under this heading select Prompt and then click OK. Continue installing the Active X components. After installing ActiveX, go to Tools> Internet Options> Trusted Websites> Sites and add the IP Address of the camera. Surveon Network Camera User Manual... -
Page 14: Logging Out Of The System
Surveon CAM4220 Logging Out of the System Logging off of the camera can be performed by closing the browser window. Users can also choose to click the Logout link located at the top of the screen. Using the Help Interface While using the web interface, you may click on the Help link located under the title bar. -
Page 15: Connecting With An Rtsp Player
Surveon CAM4220 2.2. Connecting with an RTSP Player Surveon cameras support connections through RTSP Media Players such as Real Player and QuickTime Player. Launch Real Player or QuickTime Player; Select File> Open URL, to open a URL dialog box. Enter the camera URL in the address bar. -
Page 16: Chapter 3. Web Interface
Surveon CAM4220 Chapter 3. Web Interface 3.1. Interface Layout This section demonstrates the layout of the network camera’s main interface. The 4 main areas on the interface are: 1. Menu Bar - The links on this bar allow use rs to toggle between live- view and settings screens, as well as logout and pull up the help menu. -
Page 17: Control Descriptions
Full-Screen: Goes to full-screen when clicked; press “ESC” to return to windowed view. Image Capture: When clicked, captures the current screen as an image in a new pop-up window and saves it in C:\Surveon\Record. This location can be changed under Settings> Recording> Recording Basic Settings. file name “Camera... - Page 18 Surveon CAM4220 Control Description Language: Sets the UI language. Available languages include English, Simplified Chinese, and Traditional Chinese. Streams: Allows users to choose which camera stream to view. The indicator above the stream will turn light green when the stream is selected.
-
Page 19: Settings
":" character. • Camera Name: by default set to "Surveon + model name"; after selecting Camera Name” from Settings> Video & Audio> Basic Settings, the Camera Name will show on the display. Users may replace the default name with a new name consisting of alphanumeric characters, spaces and the ":"... - Page 20 Surveon CAM4220 • System Status LED: changes the behavior of the status LED on the front of the camera. There are four possible behaviors: o LED on when camera is on - LED default on, flashing during camera access. o LED on during camera access - LED default off, flashing during...
-
Page 21: User Account
1 to 10 in this field to limit the number of users that can view the live view stream for this camera. This option will only be displayed once you add an account. Click OK to save or Cancel to abort the changes before you leave the page. Surveon Network Camera User Manual... - Page 22 Surveon CAM4220 Adding Accounts In General> User Account under the User Account heading, click on “Add”. Up to 10 accounts can be added to the system. All User Names and Passwords must be combinations of alphanumeric characters, “:”, “-“, “_” between 4 and 20 characters in length, and must begin with an alphabet letter.
- Page 23 In General> User Account under the User Account heading, select an existing account by clicking on the account entry. The entry will be highlighted in yellow. Click Remove and, when prompted to confirm deletion, click OK to remove the account. Surveon Network Camera User Manual...
-
Page 24: Date & Time
Surveon CAM4220 Date & Time Date and time settings can be accessed at General> Date & Time. Current Date & Time displays the current system date and time. Time Zone Settings The time zone can be set using the dropdown menu. This menu is only applicable when selectable when Synchronize with NTP Server is chosen under Time Settings. -
Page 25: Network
Surveon CAM4220 Network The network settings, including network configuration, port configuration, and universal plug and play (UPnP) settings are used to configure camera connectivity. These settings are found under the Settings > Network context. Surveon Network Camera User Manual... -
Page 26: Network Configuration
Surveon CAM4220 Network Configuration These settings are used to configure basic network access for the camera. They are found under Network> Network Configuration. Most of these settings vary with your specific hardware setup; therefore the defaults are set for common SOHO level usage. If you are using the camera in an enterprise environment, please check with your IT department to determine the correct settings for this section. -
Page 27: Port Settings
The RTP port number must be an even number. After entering the Note: RTP port number, the RTCP port number will automatically be set to the RTP port number + 1. Click OK to save or Cancel to abort the changes before you leave the page. Surveon Network Camera User Manual... -
Page 28: Upnp
Surveon CAM4220 UPnP Universal plug and play (UPnP) is a protocol that simplifies the implementation of networks by allowing new hardware to connect seamlessly to a network. The settings for this feature can be found under Network>UPnP . To enable UPnP, first check the Enable UPnP box. If you wish to change the default values, there are two fields that can be edited. -
Page 29: Video & Audio Settings
Camera Name - Displays the name of the camera. Audio Settings Select the desired button to turn audio from the camera on or off. Click OK to save or Cancel to abort the changes before you leave the page. Surveon Network Camera User Manual... -
Page 30: Image Appearance
Surveon CAM4220 Image Appearance These settings, found under Video & Audio> Image Appearance, deal with the video output of the camera. There are two tabs, Image Attributes and Sensor Configuration, as well as Advanced Settings. Image Attributes These parameters d eal with the image lighting and color. - Page 31 This brightens the image, at the cost of overexposing areas of high illumination. • AGC Gain - Automatic gain control (AGC) adjusts the video gain level to a variety of inputs to preserve a correct exposure levels. Surveon Network Camera User Manual...
- Page 32 Surveon CAM4220 Advanced Settings The Advanced Settings allow you to make changes to the following parameters: • Flickerless - Reduces flickering caused by the difference in frequency of the system and the environment lighting. o Auto – Automatically determines the compensation frequency.
-
Page 33: Video Streams
Stream 1 only), VGA(640x480), QVGA(320x240) , QQVGA(160x120, Stream 2 and MPEG4 only). • Video Frames per Second - Sets the number of frames per second. 1, 3, 5, 10, 15, 20, 25, 30 FPS are possible values. Surveon Network Camera User Manual... - Page 34 Surveon CAM4220 • Key Frame Interval - Sets the period between minimally compressed recovery frames that don't require other video frames to decode. 1/4s, 1/2s, 1s, 2s, 3s, and 4s are possible values. • Video Quality Settings - Sets the quality of the video image.
-
Page 35: Audio Settings
Only one bit rate, 32 Kbps, is currently supported. Audio will be encoded at this bit rate. Click OK to save or Cancel to abort the changes before you leave the page. Only Stream 1 supports audio. Note: Surveon Network Camera User Manual... -
Page 36: Ptz
Surveon CAM4220 RS-485 is a control standard that is used as a basis for controlling point-tilt- zoom (PTZ) cameras or mounts. The PTZ menu Settings> PTZ> RS-485 Settings allows configuration of the RS-485 controls. The following parameters are configurable: •... -
Page 37: Recording
Event/Schedule Record To: - Allows the user to set the destination for event or scheduled recording. Event and scheduled recording settings are found under Settings> Event Notification. Click OK to save or Cancel to abort the changes before you leave the page. Surveon Network Camera User Manual... -
Page 38: Recorded File Management
Surveon CAM4220 Recorded File Management This section, located at Recording> Recorded File Management allows users to manage videos recorded on the microSD cards. Locating Video Files To locate video files from a specific time frame, enter a begin and end time in the From: and To: fields below, and click Search. - Page 39 Live View screen, which will be stored directly into your local computer, and are not managed by this function. Please refer to the section on Manual Record for more information on this functionality. Surveon Network Camera User Manual...
-
Page 40: Event Notification
Surveon CAM4220 Event Notification Event Notification settings, found under Settings> Event Notification, deal with the event detection, scheduled recording, and notification abilities of the camera. Event Server The event server, which can be configured under Event Notification> Event Server, is the communications center of the camera. This section deals with the configuration of E-mail and FTP notifications, as well as remote recording. - Page 41 Password - The password of the NAS account. • Folder Name - The name of the CIFS account folder on the server. Click OK to save or Cancel to abort the changes before you leave the page. Surveon Network Camera User Manual...
-
Page 42: Motion Detection
Surveon CAM4220 Motion Detection The motion detection functionality of the camera can be found under Event Notification> Motion Detection. Motion Detection Window Management To detect motion, first a detection window must be created. First click the Window Settings tab to enter the window configuration, and click New to add a new detection window. - Page 43 When the motion value reaches or crosses the Trigger Threshold, denoted by the red line, a motion event will be triggered. Motion alarm handling and notifications can be configured under Event Settings. Surveon Network Camera User Manual...
-
Page 44: Tampering Detection
Surveon CAM4220 Tampering Detection Tampering detection is similar to motion detection in that it detects where there is a sudden unexpected change in the whole camera view. Parameters for this feature are found under Event Notification> Tampering Detection. Tampering alarm handling and notifications can be configured under Event Settings. -
Page 45: Di & Do
Normal Close – the DI requires a high voltage input (+12V), with the following configuration. It is triggered when it does not receive this input. • Off - DI inputs are closed at all times. The camera will not respond to any signals on this DI. Surveon Network Camera User Manual... - Page 46 Surveon CAM4220 Digital Output The camera can also be configured to send signals through the digital output. Each output has a Normal Status: • High – DO outputs a high voltage when triggered, and is connected to the output circuit in the following manner: •...
-
Page 47: Event Settings
Select – Clicking on an existing rule selects the rule, highlighting it in yellow. o Edit – A selected rule may be edited by clicking on the Edit button. o Delete – A selected rule may be deleted by clicking on the Delete button. Surveon Network Camera User Manual... - Page 48 Surveon CAM4220 Adding/Editing an Event Rule The Add and Edit screens contain the following triggering actions: If editing a rule that has not been triggered, the rule will not be Note: triggered after until after editing is complete. If the rule is triggered, any changes will not be applied until the current trigger is resolved.
- Page 49 • Disk Full - Trigger when the SD disk installed in the camera is full. • DI - Trigger when a DI trigger occurs. For more information please refer to the section on DI & Surveon Network Camera User Manual...
- Page 50 Surveon CAM4220 When Triggered The actions to take when trigger conditions are met are configured here. The following options are available: • Streams – Selects the stream from which the snapshot or recording will be obtained. • Email – E-mails notifications to the email address specified in the Event Server settings.
- Page 51 From: and To: boxes. • Never – The event is never triggered. Surveon Network Camera User Manual...
- Page 52 Surveon CAM4220 When Triggered The actions to take when trigger conditions are met are configured here. The following options are available: • Streams – Selects the stream from which the snapshot or recording will be obtained. • Email – E-mails notifications to the email address specified in the Event Server settings.
-
Page 53: System
Settings> System. MicroSD Card Management Surveon cameras can all access MicroSD class 4/6 cards for offline video storage and upgrade purposes. MicroSD installed in the camera can be managed under System> MicroSD Card Management. -
Page 54: System Status
Surveon CAM4220 Click OK to save or Cancel to abort the changes before you leave the page. System Status The camera status can be found under System> System Status. This section displays useful system information including: • Network Configuration defined manually or obtained from DHCP... -
Page 55: System Log
Clicking Email will send the log out as an email the notification e-mail address specified in Event Server; Clicking Download will begin the browser download process to download the log to the local PC. Surveon Network Camera User Manual... -
Page 56: Firmware Upgrade
In certain cases, improvements to the camera firmware will be made to improve the image quality or enhance the usability of the camera. These upgrades will be made available via Surveon support or our website www.surveon.com. Once you have obtained a new firmware file, firmware upgrades can be performed under System>... -
Page 57: Reset To Factory Default
“Reset” button on the bottom of the camera, press and hold the “Reset” button for 3 seconds. During this time, the LED indicator in front of the camera will blink in red. Surveon Network Camera User Manual... -
Page 58: Export/Import & Reboot
Surveon CAM4220 Export/Import & Reboot In certain situations it may be necessary to restart your network camera (network settings changed, DHCP added, etc). The settings under System> Export/Import & Reboot allow you to restart the camera. This menu also contains options to export configuration details (for backup or replication purposes), as well as import configuration details.
Need help?
Do you have a question about the CAM4220 and is the answer not in the manual?
Questions and answers