Table of Contents
Advertisement
Quick Links
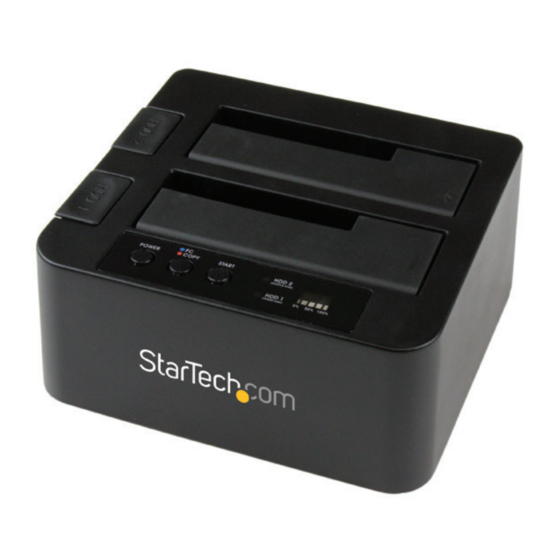
USB 3.0/eSATA 1:1 SATA Duplicator Dock
with UASP
SDOCK2U33RE
DE: Bedienungsanleitung - de.startech.com
FR: Guide de l'utilisateur - fr.startech.com
ES: Guía del usuario - es.startech.com
IT: Guida per l'uso - it.startech.com
NL: Gebruiksaanwijzing - nl.startech.com
PT: Guia do usuário - pt.startech.com
For the most up-to-date information, please visit: www.startech.com
Manual Revision: 06/18/2018
*actual product may vary from photos
Advertisement
Table of Contents

Subscribe to Our Youtube Channel
Summary of Contents for StarTech.com SDOCK2U33RE
- Page 1 DE: Bedienungsanleitung - de.startech.com FR: Guide de l'utilisateur - fr.startech.com ES: Guía del usuario - es.startech.com IT: Guida per l'uso - it.startech.com NL: Gebruiksaanwijzing - nl.startech.com PT: Guia do usuário - pt.startech.com For the most up-to-date information, please visit: www.startech.com Manual Revision: 06/18/2018...
- Page 2 StarTech.com. Where they occur these references are for illustrative purposes only and do not represent an endorsement of a product or service by StarTech.com, or an endorsement of the product(s) to which this manual applies by the third-party company in question. Regardless of any direct acknowledgement elsewhere in the body of this document, StarTech.com hereby...
-
Page 3: Table Of Contents
Table of Contents Product Diagram ..................1 Front View ..............................1 Rear View ..............................2 Introduction ....................3 Packaging Contents ..........................3 System Requirements ..........................3 Installation ....................3 Docking Station Installation ........................3 Drive Installation ............................4 Drive Removal..................4 Operation ....................5 Duplication Operation ..........................5 Docking Station Operation ........................ -
Page 4: Product Diagram
Product Diagram Front View 1. Power button and LED 2. PC/Copy Mode button and LED 3. Start Duplication button 4. HDD1/HDD2 Activity LED indicators 5. Duplication LED Progress bar 6. Hard drive #1 slot (Destination for Duplication) 7. Hard drive #2 slot (Source for Duplication) 8. -
Page 5: Rear View
Rear View 1. eSATA port 2. USB 3.0 port 3. Power adapter port Instruction Manual... -
Page 6: Introduction
Introduction Packaging Contents • 1 x SATA HDD duplicator dock • 1 x USB 3.0 cable • 1 x eSATA cable • 1 x universal power adapter (NA/JP, EU, UK, ANZ) • 1 x instruction manual System Requirements • Computer system with available eSATA port or USB 3.0/2.0 port •... -
Page 7: Drive Installation
Drive Installation 1. Carefully align and insert the 2.5” or 3.5” SATA drive(s) you wish to dock in the desired hard drive slot on the docking station, such that the SATA power and data connectors on the drive are properly aligned with the corresponding connectors inside the hard drive slot. -
Page 8: Operation
Note: We recommend ensuring the docking station is powered off before any drive is physically inserted or removed from the docking station. If two drives are docked simultaneously, and one drive is removed while the docking station is still powered on the other drive will momentarily disconnect from your computer which could cause drive damage or loss of data if other drive is still mounted. -
Page 9: Docking Station Operation
Docking Station Operation 1. Install your drives as per Drive Installation steps. 2. Turn your docking station on by pressing the power button and holding it for 3 seconds. 3. Ensure the docking station is set to PC mode by pressing the PC/Copy Mode button for 3 seconds until the mode LED is set to blue. -
Page 10: Led Indicators
LED Indicators Source (HDD2) Target (HDD1) Power PC/DUP State Blue Blue PC Mode; Powered and Solid Solid Ready Blue Blue PC Mode: Activity on Solid Solid Flashing Flashing HDDs Blue Blue Duplication Mode; Solid Solid Ready Blue Duplication Mode; Solid Solid Flashing Flashing... -
Page 11: Specifications
Note: Removing the connected drive prior to receiving notification that it is safe to do so, could result in losing or corrupting data stored on the drive. Once the Safe to Remove Hardware message appears, please remove the drive from the docking station. -
Page 12: Technical Support
Limitation of Liability In no event shall the liability of StarTech.com Ltd. and StarTech.com USA LLP (or their officers, directors, employees or agents) for any damages (whether direct or indirect, special, punitive, incidental, consequential, or otherwise), loss of profits, loss of business, or any pecuniary loss, arising out of or related to the use of the product exceed the actual price paid for the product. - Page 13 StarTech.com is an ISO 9001 Registered manufacturer of connectivity and technology parts. StarTech.com was founded in 1985 and has operations in the United States, Canada, the United Kingdom and Taiwan servicing a worldwide market.
Need help?
Do you have a question about the SDOCK2U33RE and is the answer not in the manual?
Questions and answers