
Summary of Contents for Fanimation CANCUN FP8042 SERIES
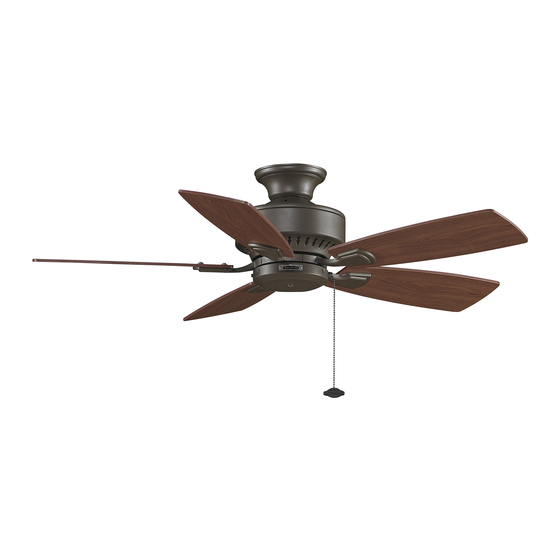
- Page 1 ™ The Cancun 42” Ceiling Fans Net Weight 6.97 kg (15.37 lbs) Model Nos. FP8042** OWNER’S MANUAL READ AND SAVE THESE INSTRUCTIONS...
-
Page 2: Table Of Contents
Under no circumstances may a fan be returned without prior authorization from Fanimation. The receipt of purchase must accompany authorized returns and must be sent freight prepaid to Fanimation. The fan to be returned must be properly packed to avoid damage in transit;... -
Page 3: Unpacking Instructions
Downrod/Hanger Ball – Four wire connectors Fanimation. Substitution of parts or accessories not – Chain fob/coupler Assembly designated for use with this product by Fanimation could • Blade Holder Set – Balance Kit result in personal injury or property damage. Contact •... -
Page 4: Energy Efficient Use Of Ceiling Fans
8 - 9 feet above the floor for optimal airflow. Consult your down into the occupied space. Remember to adjust your Fanimation Retailer for optional mounting accessories. thermostat when using your ceiling fan - additional energy and dollar savings could be realized with this simple step! Turn Off When Not in the Room Ceiling fans cool people, not rooms. -
Page 5: How To Assemble Your Ceiling Fan
How to Assemble Your Ceiling Fan (Downrod) Remove the hanger ball portion from the downrod/ hanger ball assembly by loosening the set screw in the hanger ball until the ball falls freely down the downrod. Remove the pin from the downrod, then remove the Downrod hanger ball. - Page 6 How to Assemble Your Ceiling Fan (Downrod)-Cont’d Cut off excess lead wire approximately 6 to 9 inches above top of the top of the downrod. Strip insulation off 1/2 inch from the end of each lead wire. (Figure 6) NOTE: All set screws must be checked, and retightened where necessary, before installation.
- Page 7 How to Assemble Your Ceiling Fan (Close to Ceiling)-Cont’d OUTLET Lift your fan motor assembly and hang it from the hanger bracket hook through one of the two screw HANGER holes in the canopy lip. Do not use the grooved slots. HOOK BRACKET Connect your fan’s wiring according to how to wire...
-
Page 8: How To Hang Your Ceiling Fan With Downrod
How to Hang Your Ceiling Fan with Downrod WARNING To avoid possible fire or shock, be sure electricity is turned off at the main fuse box before hanging. MAIN FUSE BOX (Figure 7) NOTE: If you are not sure if the outlet box is grounded, Figure 7 contact a licensed electrician for advise, as it must be grounded for safe operation. - Page 9 How to Wire Your Ceiling Fan (Cont’d) Connect the green grounding lead from the hanger BLACK FAN ball and the green grounding lead from the hanger WIRE BLACK LISTED GREEN WIRE OUTLET BOX bracket to the supply grounding conductor (this may (GROUND) be a bare wire or wire with green colored insulation).
-
Page 10: Installing The Canopy Housing
Installing the Canopy Housing (continued) Push the Canopy Trim Ring up to conceal the screws of Ceiling Canopy. (Figure 17) Canopy Trim Ring Figure 17 How to Assemble the Blades Remove and discard the five rubber motor stops from the motor assembly by removing the screws. (Figure 18) CAUTION Do not connect fan blades until the fan is completely... -
Page 11: Housing/Switch Cup Assembly
Housing/Switch Cup Assembly Disassemble the housing switch cup assembly by removing three screws. (Figure 21) Switch Cup Assembly Figure 21 Remove one of the three screws in the support bracket. Slightly loosen the remaining two screws. Assemble the adapter assembly to the housing support bracket using the two key slots in the switch cup assembly. -
Page 12: Parts List
Parts List Models FP8042** Ref. # Description FP8042** Hanger Bracket Assembly APGAC111BL Downrod/Hanger Ball Assembly ADRAC1-45** Canopy Trim Ring Assembly APPAC1081** Ceiling Canopy PPAC1003** Canopy Screw Cover Assembly APPAC1102** Motor Coupling Cover Assembly AP1115** Fan Motor Assembly AMA8042** Blade Holder Set AP804201** Blade Set AP804202**... -
Page 13: Exploded-View Drawing
FP8042** Exploded-View NOTE: The illustration shown is not to scale or its actual configuration may vary. -
Page 14: Trouble Shooting
Trouble Shooting WARNING For your own safety turn off power at fuse box or circuit breaker before trouble shooting your fan. Trouble Probable Cause Suggested Remedy 1. Fuse or circuit breaker blown. 1. Check main and branch circuit fuses or circuit breakers. - Page 15 10983 Bennett Parkway Zionsville, IN 46077 Toll Free (888) 567-2055 FAX (866) 482-5215 Outside U.S. call (317) 733-4113 Visit Our Website @ www.fanimation.com Copyright 2010 Fanimation 2010/11...
- Page 16 ™ The Cancun 42” Ventilador de techo Peso neto 6,97 kg (15,37 lb) Modelo N.º FP8042** MANUAL DEL PROPIETARIO LEA Y GUARDE ESTAS INSTRUCCIONES...
- Page 17 GARANTÍA LIMITADA DE POR VIDA DEL MOTOR - Si se produjera una falla en alguna de las partes del motor de su ventilador debido a un defecto en los materiales o en la fabricación durante el tiempo de vida del comprador original, Fanimation proporcionará la pieza de repuesto sin cargo una vez que el ventilador defectuoso sea devuelto a nuestro centro de servicios nacional.
-
Page 18: Instrucciones Para El Desempaque
La sustitución de piezas o accesorios no (pala a la sujeción de pala) • Unidad del soporte de designados por Fanimation para usar con este producto – Dieciséis arandelas de fibra suspensión podría ocasionar lesiones personales o daños en el –... -
Page 19: Uso Eficiente De La Energía En Ventiladores De Techo
óptimo. del reloj. Esto produce una suave corriente ascendente, Consulte en su tienda minorista de Fanimation para que obliga al aire cálido que se acumula cerca del techo a obtener accesorios de montaje opcionales. - Page 20 Cómo instalar su ventilador de techo (Barra Vertical) Extraiga la parte de la bola de suspensión de la Pasador unidad de bola de suspensión/barra vertical aflojando los tornillos ubicados en la bola hasta que ésta se libere de la barra vertical. Extraiga el enganche de la Barra Vertical barra vertical y extraiga la bola de suspensión.
-
Page 21: Cómo Ensamblar El Ventilador De Techo
Cómo instalar su ventilador de techo (Barra Vertical)-Cont. Corte el exceso de cable aproximadamente de 15 a 23 cm (6 a 9 pulgadas) por encima de la parte superior del barral. Pele 1,2 cm (½˝) del aislamiento en cada extremo del cable. (Figura 6) NOTA: Se deben revisar todos los tornillos de fijación y volver a ajustarlos cuando sea necesario antes de realizar la instalación. - Page 22 Cómo ensamblar el ventilador de techo (Cerca del techo)-Cont. Caja de Levante la unidad del motor de su ventilador y salida cuélguela del enganche de soporte del gancho a través Abrazadera de uno de los dos orificios de tornillos ubicados en la gancho para colgar tapa de la cubierta.
-
Page 23: Cómo Colgar Su Ventilador De Techo Con La Barra Vertical
Cómo colgar su ventilador de techo con la barra vertical ADVERTENCIA Para evitar una posible descarga eléctrica, asegúrese de cortar la alimentación eléctrica de la caja de PRINCIPAL CAJA DE FUSIBLES fusibles principal antes de colgar el ventilador. (Figura 7) NOTA: Si no está... -
Page 24: Instalación De La Cubierta Del Capuchón
Cómo realizar la instalación eléctrica del ventilador de techo (Cont.) 1. Conecte el conductor verde con conexión a tierra de Cable de ventilador negro Caja de salida Negro la bola para colgar y el conductor verde con conexión a homologada ón Cable verde (conexi a tierra) -
Page 25: Cómo Ensamblaje De Las Aspas Del Ventilador
Instalación de la cubierta del capuchón (Cont.) Presione hacia arriba el anillo de la cubierta de tornillos para ocultar los tornillos de la cubierta del techo. (Figura 17) Unidad de la cubierta circular estilizada Figura 17 Cómo Ensamblaje de las aspas del ventilador Extraiga y deseche los cinco topes de goma de la unidad del motor extrayendo los tornillos. -
Page 26: Vivienda / Conjunto Del Interruptor De La Copa
Vivienda / Conjunto del interruptor de la Copa Desmonte la unidad redonda de la carcasa del interruptor extrayendo los tres tornillos. (Figura 21) Unidad redonda del interruptor Figura 21 Extraiga uno de los tres tornillos del soporte colgante. Afloje ligeramente los dos tornillos restantes. Instale la unidad del adaptador en el soporte colgante de la carcasa utilizando las dos ranuras de la unidad redonda del interruptor. -
Page 27: Lista De Piezas
Lista de piezas Modelos N.° FP8042** N.° de Ref. Descripción Pieza # N.° Unidad del soporte de suspensión APGAC111BL ADRAC1-45** Unidad del barral/de la semiesfera Unidad de la cubierta circular estilizada APPAC1081** Capuchón de techo PPAC1003** Cubierta para el tornillo del APPAC1102** Cubierta de unión del motor AP1115**... - Page 28 FP8042** Despiece NOTA: la ilustración que se muestra no está hecha a escala y su configuración real puede variar.
-
Page 29: Solución De Problemas
Solución de problemas ▲ ADVERTENCIA Para su propia seguridad, desconecte la electricidad de la caja de fusibles o disyuntor antes de solucionar problemas en su ventilador. Problema Causa posible Solución sugerida 1. EL VENTILADOR NO 1. El fusible o el disyuntor están fundidos. 1. - Page 30 10983 Bennett Parkway Zionsville, IN 46077 Llame Sin Cargo al (888) 567-2055 FAX (866) 482-5215 Desde fuera de los EE.UU. llame al (317) 733-4113 Visite nuestro sitio Web en www.fanimation.com Copyright 2010 Fanimation 2010/11...
Need help?
Do you have a question about the CANCUN FP8042 SERIES and is the answer not in the manual?
Questions and answers