Table of Contents
Advertisement
Quick Links
User Manual
KOD-4000
Karaoke-On-Demand Jukebox
NOTE – Your Acesonic KOD-4000 Karaoke-On-Demand Jukebox arrives with everything you need to
start making music and performing except a microphone, amplifier, and speakers. These can be
obtained from Acesonic, or you can use any standard audio equipment that conforms to contemporary
standards.
Thank you for purchasing Acesonic's KOD-4000 Karaoke-On-Demand Jukebox. Acesonic takes pride
in providing its customers with only the most advanced and highest quality products on the market.
With proper care and use you will get many years of satisfying use from your Acesonic product.
Be sure to keep original packaging in case re-shipping is required for returns or repairs.
Care and cleaning: Use a slightly damp cloth to clean the front panel and other surfaces of the KOD-
4000. Do not use the device in areas that are wet or prone to dampness. Always allow sufficient room
around the device to provide sufficient air flow for cooling.
Advertisement
Table of Contents

Summary of Contents for Acesonic KOD-4000
- Page 1 With proper care and use you will get many years of satisfying use from your Acesonic product. Be sure to keep original packaging in case re-shipping is required for returns or repairs.
-
Page 2: First Things First
First Things First Before using your KOD-4000, there are a few things you should do and know: Check to see that your local power outlets supply the correct voltage for the AC adaptor. Do not open the device as there are no user-serviceable parts inside. For repairs, contact the local distributor, an authorized service center or Acesonic's U.S. -
Page 3: Player Specifications
Designed in the U.S.A. USB 2.0 Specifications (Compatible Media Formats) Your KOD-4000 is a robust player that can accept a wide variety of media formats (USB flash drives formatted in FAT32, USB hard drives formatted in NTFS and FAT32 up to 2TB) ... - Page 4 Full karaoke function with 2 microphone inputs. Song database management. Multiple KOD-4000 players (with or without a local hard drive) can be attached to a network drive to setup client-server file-sharing for a large environment or commercial operation ...
-
Page 5: Before Operation
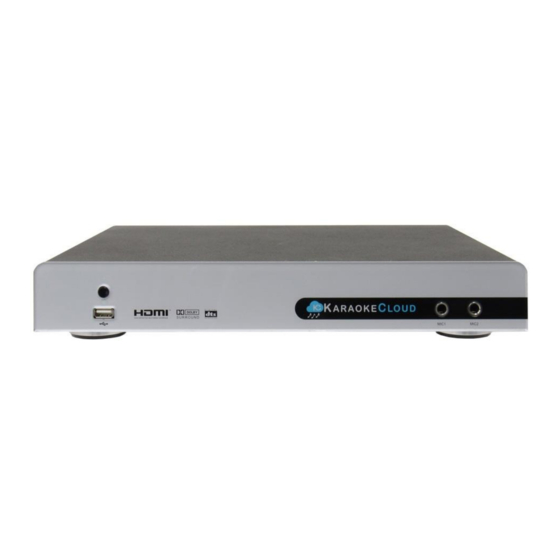
Front Panel Functions and Operation 1. POWER BUTTON: Press this button to toggle the KOD-4000 from Standby Mode to ON as long as the KOD is connected to a power source. - Page 6 7. HDMI OUTPUT: Connect an HDMI cable to a compatible television or amplifier (HDMI 1.3). 8. LAN (LOCAL AREA NETWORK): Connects the KOD-4000 to a network drive using an Ethernet cable. 9. IR EXTENDER: Connect to an IR extender device for additional IR remote control.
- Page 7 Remote Control Functions 1. POWER: Press this toggle the KOD-4000 from Standby Mode to ON as long as the KOD is connected to a power source and the rear power switch is ON. 2. MUTE: Turn the sound ON or OFF.
-
Page 8: Basic Operations
BASIC OPERATIONS Turn ON the KOD-4000 using the POWER BUTTON on the front panel or remote. When powering on the unit, please wait for the unit to load. Main Menu Operations: Use the DIRECTION BUTTONS to select an option from the Main Splash Screen. - Page 9 Song Search Playing a song: Press ENTER to go into the Song Search. Use the DIRECTION BUTTONS and press ENTER to add a highlighted song to the playlist. While a song is playing, press MENU to toggle the Song Search Menu. ...
- Page 10 Skipping a song Press the STOP button to stop playback of the current song and go to the next song. Adding a song to the playlist. During playback, press the MENU BUTTON to bring up the song search menu. ...
- Page 11 Echo Gain is selected to increase or decrease the amount of echo. My Favorite Adding My Favorite songs to the playlist Press ENTER to go into My Favorite to list the 10 Memory Locations for Favorite songs. Use the DIRECTION BUTTONS and ENTER to go into any of the Memory Locations to list the Favorite songs stored in that Memory Location.
- Page 12 Press DELETE twice to remove the song from a Favorite Memory Location. Song Manager Use the DIRECTION BUTTONS and ENTER to choose an option.
- Page 13 Song Import Importing music files to the HDD from an USB device In the USB flash drive, create a folder called mp3gsong_add. Insert all music files (CD-G, MP3-G) into the folder above. Note: File name must be modified in the following format: Artist-SongTitle.cdg/mp3/g (ie.
- Page 14 Language Code Audio Code Language Code Audio Channel Code English Left Track Mandarin Right Track Cantonese Track 0 Vietnamese Track 1 Thai Stereo Plug the USB flash drive into the KOD unit, select SONG IMPORT, and select USB Reindexing files ...
- Page 15 Song editor Navigate Song Editor Use the UP and DOWN Buttons and ENTER or the GREEN button to choose a song you want to edit. 1. Use the UP and DOWN buttons, and ENTER to navigate to TITLE, and ARTIST. 1.
-
Page 16: Media Center
Media Center Accessing media Connected media sources will be displayed in the Media Center Menu. Use the DIRECTION BUTTONS and ENTER to navigate the folders for your connected media. Press the ENTER or PLAY BUTTON to play it. ... - Page 17 Navigate to specific media using the DIRECTION BUTTONS and press the POP-UP MENU BUTTON to remove specific items from the playlist. Setup Use the DIRECTION BUTTONS and ENTER to choose an option. Auto Play Use the NUMERIC KEYPAD to type in Song Numbers in the Start and End fields to auto play the songs in shuffle mode.
- Page 18 Software Upgrade Insert an USB device containing appropriate upgrade software. Select USB (USB device). Do not disconnect the KOD-4000 during the upgrade process.
- Page 19 Karaoke Setting Show Song No - Indication of song number throughout system Repeat Mode - Different repeat modes for repeating setting Default Melody - Option to play just the melody or melody + vocal Music Volume - Modification to volume of music ...
- Page 20 Preference Press the UP and DOWN DIRECTION BUTTONS or ENTER to enter or exit a main preference category. 1. General Setting 1. System - Press the LEFT and RIGHT DIRECTION BUTTONS or ENTER to enter and exit the Sub-Menu. Press the UP and DOWN DIRECTION BUTTONS to navigate the Sub- Menu.
- Page 21 and exit the Sub-Menu. Press the UP and DOWN DIRECTION BUTTONS to navigate the Sub-Menu. 1. OSD (On Screen Display) 1. Press the RIGHT DIRECTION BUTTON or ENTER to select the Sub-Menu. 2. Press the UP and DOWN DIRECTION BUTTONS to select “English,” “Chinese,”...
- Page 22 4. Security - Press the LEFT and RIGHT DIRECTION BUTTONS or ENTER to enter and exit the Sub-Menu. Press the UP and DOWN DIRECTION BUTTONS to navigate the Sub-Menu. 1. Change Password 1. Press the RIGHT DIRECTION BUTTON or ENTER to select this option. 2.
- Page 23 2. Press the UP and DOWN DIRECTION BUTTONS to select “Auto” or “Manual.” 3. Press the ENTER BUTTON to confirm it. 2. Display Setting 1. TV - Press the LEFT and RIGHT DIRECTION BUTTONS or ENTER to enter and exit the Sub-Menu.
- Page 24 “YCbCr422,” or “Full RGB.” 3. Press the ENTER BUTTON to confirm it. 5. HDMI Deep Color 1. Press the RIGHT DIRECTION BUTTON or ENTER to select the Sub-Menu. 2. Press the UP and DOWN DIRECTION BUTTONS to select “30 bits,” “36 bits,” “48 bits,”...
- Page 25 3. Audio Setting 1. Audio Output - Press the LEFT and RIGHT DIRECTION BUTTONS or ENTER to enter and exit the Sub-Menu. Press the UP and DOWN DIRECTION BUTTONS to navigate the Sub-Menu. 1. SPDIF – choose settings for the Coaxial and Optical outputs 1.
-
Page 26: Troubleshooting
Remember to try inspecting other components and electrical appliances in use. If the trouble cannot be rectified even after exercising the steps listed below, contact Acesonic at +1-626-820-0645 to inquire about repairs. - Page 27 No sound Inspect the KOD-4000 to confirm it is connect to audio equipment and that the audio equipment or TV is connected to the player. Check that the volume levels on the TV and audio equipment are audible.
- Page 28 The microphone is too close to the speakers. Move the microphone further away or lower the volume of the microphone input. Remote won't work Ensure that there is a clear path between the KOD-4000 and the remote control or decrease the angle between the remote control and the sensor. Replace the batteries.
-
Page 29: Firmware Updates
If necessary, consulting the dealer or an experienced radio/TV technician for help 2. IMPORTANT: When connecting the KOD-4000 to audio equipment, use only high-quality, shielded cables such as what is supplied with this product. Follow all installation instructions. Do not modify the equipment in any way, as this could void your FCC authorization to use the device in the U.S.A. -
Page 30: Class 1 Laser Product
This product does not exceed the Class B limits for radio noise emissions from digital devices as set out in the Canadian standard for interference-causing equipment (“Digital Apparatus, ICES-003” from the Department of Communications). Cet appareil numerique respecte les limites de bruits radio electriques applicable aux appareils numeriques de Classe B prescrites dans la normesur le materiel brouilleur (“Appareils Numeriques, NMB-003”... -
Page 31: Technical Specifications
Refer all servicing to qualified service personnel. NOTE: With proper care and maintenance, your KOD-4000 Karaoke-On-Demand Jukebox will give you years of dependable, enjoyable use. Make sure you are using proper power sources and good (unfrayed) cables at all times. - Page 32 1 x USB 2.0 Ports 1 x Ethernet Network Interface (RJ-45) 2 x Microphone Inputs Multi-format Media Support Audio: MP3, AC3, AAC, WMA, WMAPro Video: MPEG1/2/4, Xvid, ISO, MKV, AVI, WMV9, VC1, H.264 Karaoke-On-Demand Total Solution ...
Need help?
Do you have a question about the KOD-4000 and is the answer not in the manual?
Questions and answers