Sony Xperia T LT30p User Manual
Sony mobile phone user guide
Hide thumbs
Also See for Xperia T LT30p:
- User manual (119 pages) ,
- White paper (22 pages) ,
- Startup manual (20 pages)
Table of Contents
Advertisement
Quick Links
Advertisement
Table of Contents

Related Manuals for Sony Xperia T LT30p


Summary of Contents for Sony Xperia T LT30p
- Page 1 User guide Xperia ™ LT30p...
-
Page 2: Table Of Contents
Contents Xperia™ T User guide..............5 Getting started................6 What is Android™?................6 Phone overview..................6 Assembly...................7 Turning the device on and off ............7 Screen lock..................8 Setup guide..................8 Accounts and services...............9 Getting to know your device............10 Using the keys.................10 Battery....................10 Using the touchscreen..............13 Using the lockscreen...............15 Home screen..................15 Accessing and using applications...........18 Status and notifications..............20... - Page 3 Sharing your contacts..............41 Backing up contacts................42 Messaging..................43 Using text and multimedia messaging..........43 Text and multimedia message options..........44 Email.....................45 Getting started with Email..............45 Using email..................46 Timescape™................49 About Timescape™.................49 Using Timescape™................49 Timescape™ settings..............50 Timescape™ widgets..............50 "WALKMAN" application .............51 About the "WALKMAN" application..........51 Transferring media files to your device ...........51 Using the "WALKMAN"...
- Page 4 Viewing photos and videos in the Pictures tab .......71 Viewing photos and videos in the My albums tab ......72 Movies..................76 About Movies...................76 Using Movies...................76 Web browser................78 About the web browser..............78 Connectivity.................79 Connecting to wireless networks.............79 Sharing content with DLNA Certified™ devices......82 NFC....................84 Bluetooth™...
-
Page 5: Xperia™ T User Guide
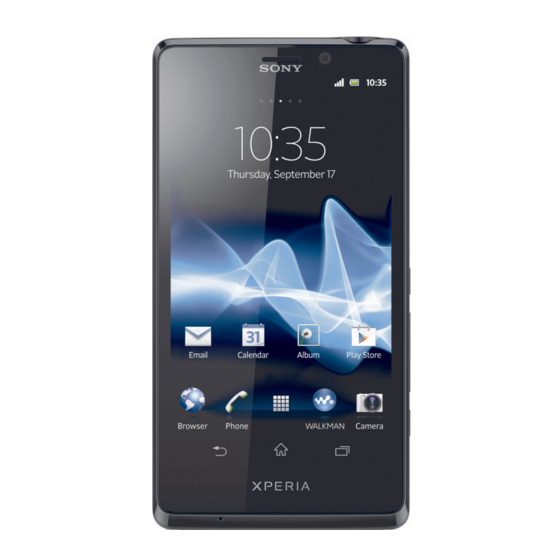
Xperia™ T User guide All illustrations are for illustration purposes only and may not accurately depict the actual phone. This is an Internet version of this publication. © Print only for private use. -
Page 6: Getting Started
Getting started What is Android™? An Android™ phone can perform many of the same functions as a computer and you can customise it to your own needs. For example, you can add and delete applications, or enhance existing applications to improve functionality. You can also integrate applications on your Android™... -
Page 7: Assembly
1. Notification LED 11. Main microphone 2. Light sensor 12. Touchscreen 3. Proximity sensor 1 13. Second microphone 4. Proximity sensor 2 14. Camera lens 5. Ear speaker 15. Camera LED light 6. Front camera lens 16. Connector for charger/USB cable 7. -
Page 8: Screen Lock
Press and hold down the power key until the device vibrates. If your screen goes dark, briefly press the power key to activate the screen. To unlock the screen, drag up or drag down. Enter your SIM card PIN when requested, then select OK. Wait a while for the device to start. -
Page 9: Accounts And Services
Accounts and services Sign in to your online service accounts from your device to get easy access when you're on the move. You can sign up to new online services from your device as well as from a computer. ® ®... -
Page 10: Getting To Know Your Device
Getting to know your device Using the keys Back • Go back to the previous screen • Close the on-screen keypad, a dialog box, an options menu, or the Notification panel Home • Go to the Home screen Task • Tap to open a window showing your most recently used applications and a small apps bar Battery Your device has an embedded battery. - Page 11 UMTS network (the test results are based on GSMA battery life test technology). Use only Sony branded original batteries intended for use with your mobile phone. If you use other batteries you may not be able to charge your phone.
- Page 12 Otherwise, your device repeatedly scans for available networks, and this consumes power. • Use a Sony original handsfree device to listen to music. Handsfree devices demand less battery power than your device's own loudspeakers. • Keep your device in standby mode whenever possible. Standby time refers to the time during your device is connected to the network and is not being used.
-
Page 13: Using The Touchscreen
The device screen is made from glass. Do not touch the screen if the glass is cracked or shattered. Avoid trying to repair a damaged screen yourself. Glass screens are sensitive to drops and mechanical shocks. Cases of negligent care are not covered by the Sony warranty service. - Page 14 Scrolling Scroll by moving your finger up or down on the screen. On some web pages you can also scroll to the sides. Dragging or flicking will not activate anything on the screen. To scroll • Drag or flick your finger in the direction you want to scroll on the screen. To scroll more quickly, flick your finger in the direction you want to go on the screen.
-
Page 15: Using The Lockscreen
to the screen. This prevents you from unintentionally activating other functions on your device when you are engaged in a call. Using the lockscreen On the lockscreen, you can play tracks, take photos and record videos without unlocking the screen. To take a photo from the lockscreen To activate the screen, briefly press the power key To activate the camera controls, drag... - Page 16 To go to the Home screen • Press To browse the Home screen • Flick right or left. To set a pane as the main Home screen pane Touch and hold an empty area on your Home screen until the device vibrates. Flick left or right to browse to the pane that you want to set as your main Home screen pane, then tap To add a pane to your Home screen...
- Page 17 Add widgets to your Home screen. Add applications and shortcuts. Set a wallpaper for your Home screen. Set a background theme. To view customisation options from the Home screen • Touch and hold an empty area on your Home screen until the device vibrates and customisation options appear at the bottom of the screen.
-
Page 18: Accessing And Using Applications
Accessing and using applications Open applications from shortcuts on your Home screen or from the Application screen. Application screen The Application screen, which you open from your Home screen, contains the applications that come pre-installed on your device as well as the applications you download. - Page 19 area of your screen. So you can interact with a small app and another application at the same time on the same screen. To open the small apps bar • Press . The small apps bar appears at the bottom of the screen. To open a small app To make the small apps bar appear, press Tap the small app that you want to open.
-
Page 20: Status And Notifications
To move an application on the Application screen Open the Application screen. Touch and hold an item until it magnifies and the device vibrates, then drag the item to the new location. You can only move your applications when Own order is selected. To uninstall an application from the Application screen From your Home screen, tap Tap , then tap Uninstall. - Page 21 To open the Notification panel • Drag the status bar downwards. To close the Notification panel • Drag the tab at the bottom of the Notification panel upwards. To open a running application from the Notification panel • Tap the icon for the running application to open it. To dismiss a notification from the Notification panel •...
-
Page 22: Settings Menu
To adjust sound settings from the Notification panel Drag the status bar downwards. To control the Bluetooth™ function from the Notification panel Drag the status bar downwards. Tap . To control the WLAN function from the Notification panel Drag the status bar downwards. To enable or disable data traffic from the Notification panel Drag the status bar downwards. - Page 23 Enter a carriage return or confirm text input. Delete a character before the cursor. All illustrations are for illustration purposes only and may not accurately depict the actual phone. To display the on-screen keyboard to enter text • Tap a text entry field. To hide the on-screen keyboard •...
-
Page 24: Chinese Input
Using the 12-Key Phonepad Enter separator Display numbers Display smileys and symbols Enter a space Select input methods and switch between Chinese and English input Enter a carriage return Delete a character before the cursor All illustrations are for illustration purposes only and may not accurately depict the actual phone. - Page 25 Adjusting the volume You can adjust the ringtone volume for incoming calls and notifications as well as for music and video playback. To adjust the ring volume with the volume key • Press the volume key up or down. To adjust the media playing volume with the volume key •...
- Page 26 To set the time manually From your Home screen, tap Find and tap Settings > Date & time. Unmark the Automatic date & time checkbox if it is marked. Tap Set time. Scroll up or down to adjust the hour and minute. If applicable, scroll up to change am to pm, or vice versa.
-
Page 27: Memory
To keep the screen active while your device is charging From the Home screen, tap Find and tap Settings > Developer options. Mark the Stay awake checkbox. Language settings You can select a default language for your device and change it again at a later time. To change the language From the Home screen, tap Find and tap Settings >... -
Page 28: Using A Headset
Safely removing the memory card You can safely remove the memory card from your phone any time when the phone is turned off. If you want to remove the memory card when your phone is on, you must first unmount the memory card before you physically remove it from the phone. This can prevent damaging the memory card or losing data stored on the memory card. -
Page 29: Controlling Data Usage
Enter all other information required by your network operator. Tap , then tap Save. Usage info For quality purposes, Sony collects anonymous bug reports and statistics regarding your device. None of the information gathered includes personal data. To allow the sending of usage info From your Home screen, tap Find and tap Settings >... -
Page 30: Mobile Network Settings
your device to avoid additional charges. You can also limit the amount of data used by individual applications. Adjusting data usage settings can help you keep greater control over data usage but cannot guarantee the prevention of additional charges. To access data usage settings From your Home screen, tap Find and tap Settings >... - Page 31 To select another network manually From the Home screen, tap Find and tap Settings > More… > Mobile networks > Service providers. Tap Search mode > Manual. Select a network. If you select a network manually, your device will not search for other networks, even if you move out of range of the manually selected network.
-
Page 32: Calling
Calling Emergency calls Your device supports international emergency numbers, for example, 112 or 911. You can normally use these numbers to make emergency calls in any country, with or without the SIM card inserted if you are within range of a network. To make an emergency call From your Home screen, tap Find and Tap Phone. -
Page 33: Voicemail
To decline a call • Drag to the left across the screen. To reject a second call • When you hear repeated beeps during a call, tap Busy. To change the ear speaker volume during a call • Press the volume key up or down. To turn on the loudspeaker during a call •... -
Page 34: Multiple Calls
To enter your voicemail number From the Home screen, tap Find and tap Settings > Call settings > Voicemail settings > Voicemail number. Enter your voicemail number. Tap OK. To call your voicemail service From your Home screen, tap Find and tap Phone. Touch and hold 1. -
Page 35: Call Settings
To release a participant from a conference call During an ongoing conference call, tap the button showing the number of participants. For example, tap 3 participants if there are three participants. next to the participant you want to release. To end a conference call •... - Page 36 Showing or hiding your phone number You can select to show or hide your phone number on call recipients' devices when you call them. To show or hide your phone number From your Home screen, tap Find and tap Settings > Call settings > Additional settings > Caller ID. Fixed Dialling Numbers If you have received a PIN2 code from your service provider, you can use a list of Fixed Dialling Numbers (FDN) to restrict outgoing calls.
-
Page 37: Contacts
Contacts About Contacts Use the Contacts application to store and manage all your numbers, email addresses, and other contact data in one place. Just tap on a contact to see all communications with that contact in one easy overview. You can add new contacts in your phone and synchronise them with contacts saved ®... - Page 38 To transfer contacts to your new device using PC Companion Make sure that PC Companion is installed on your PC. Open the PC Companion program on the PC, then click Contacts Setup and follow the instructions to transfer your contacts. Transferring contacts using an Apple®...
-
Page 39: Contacts Screen Overview
To receive contacts sent using a messaging service When you receive a new text message, multimedia message, or email message, open the message. The received contact data appears as a vCard attachment. Tap, or touch and hold the vCard file to open a menu so you can save the contact data. Contacts screen overview Shortcut tabs Tap a contact to view its details... - Page 40 To add a contact From your Home screen, tap , then tap . If you have synchronised your contacts with one or more accounts, select the account to which you want to add this contact, or tap Phone contact if you only want to use this contact on your device.
-
Page 41: Communicating With Your Contacts
To separate linked contacts From your Home screen, tap , then tap . Tap the linked contact you want to edit, then tap Tap Unlink contact. Tap OK. Favourites You can mark contacts as favourites so that you can get quick access to them from the Contacts application. -
Page 42: Backing Up Contacts
To send several contacts at once From your Home screen, tap , then tap . Press , then tap Mark several. Mark the contacts you want to send, or select all if you want to send all contacts. , then select an available transfer method and follow the on-screen instructions. -
Page 43: Messaging
Messaging Using text and multimedia messaging You can send and receive text messages from your device using SMS (Short Message Service). If your subscription includes MMS (Multimedia Messaging Service), you can also send and receive messages that contain media files, for example, pictures and videos. -
Page 44: Text And Multimedia Message Options
To delete conversations From your Home screen, tap , then find and tap Press , then tap Delete conversations. Mark the checkboxes for the conversations that you want to delete, then tap > Delete. To save a sender's number From your Home screen, tap , then find and tap >... -
Page 45: Email
Email Getting started with Email You can handle several email accounts at the same time using the Email application, including corporate Microsoft Exchange Active Sync accounts. Using email accounts To set up an email account on your device From your Home screen, tap Find and tap Email. -
Page 46: Using Email
Using email To create and send an email message From your Home screen, tap , then find and tap Email. If you are using several email accounts, tap at the top of the screen and select the account you want to send the message from, then tap Tap To and start typing the recipient's address. - Page 47 To change email preview pane settings From your Home screen, tap , then find and tap Email. Press , then tap Settings. Tap General > Preview pane, then select an option. To view an email message attachment From your Home screen, tap Find and tap Email.
- Page 48 To view all folders for one email account From your Home screen, tap . Then find and tap Email. at the top of the screen and select the account you want to check, then again and select Show all folders to view all the folders in this account. To change the inbox check frequency From your Home screen, tap Find and tap Email.
-
Page 49: Timescape
Timescape™ About Timescape™ Timescape™ collects all your communications into one integrated view. Events updates appear as tiles in a chronological flow on the screen. Browse the files to get a snack-size preview of events before choosing to open them and view the full content. -
Page 50: Timescape™ Settings
The infinite button in Timescape™ When you tap a tile, the infinite button appears in the upper right corner. If the tile is connected to a contact, you can access related content by tapping the infinite button. To view all communication with a contact in Timescape™ From your Home screen, tap Find and tap Timescape™. -
Page 51: Walkman" Application
"WALKMAN" application About the "WALKMAN" application Get the most out of your "WALKMAN" application. Listen to and organise music and audio books that you have transferred to your phone from a computer, or purchased and downloaded from online stores. To make content easily available to the "WALKMAN" application, you can use the Media Go™... -
Page 52: Using The "Walkman" Application
Using the "WALKMAN" application To play audio content From your Home screen, tap , then find and tap In My music, select a music category and browse to the track that you want to open. Tap a track to play it. You might not be able to play copyright-protected items. -
Page 53: Visualiser
To send a track In My music, when browsing your tracks , touch and hold a track title. Tap Send. Select an application from the list, and follow the on-screen instructions. You can also send albums and playlists in the same way. Visualiser The Visualiser adds visual effects to your music tracks as you play them. - Page 54 Go back to the current track Browse by album Browse your music by artist Browse your favourite playlists Categorise your music using SensMe™ channels Browse all playlists Browse audio by track To add a shortcut to a track In My music, tap , then browse to the track for which you want to create a shortcut.
-
Page 55: Managing Playlists
Managing playlists In My music, you can create your own playlists from the music that is saved on your device. In addition, you can install the Media Go™ application on a computer and use it to copy playlists from the computer to your device. To create your own playlists In My music, to add an artist, album or a track to a playlist, touch and hold the name of the artist or the title of the album or track. -
Page 56: Music Services
Music services TrackID technology Identifying music using TrackID technology Use the TrackID™ music recognition service to identify a music track you hear playing in your surroundings. Just record a short sample of the song and you’ll get artist, title and album info within seconds. For best results, use TrackID™ technology in a quiet area. -
Page 57: About The Playnow™ Service
About the PlayNow™ service You can use the PlayNow™ service to browse, purchase and download applications and games. Note that payment options for non-free applications may vary per country. The PlayNow™ service is not available in all countries. Before you download content Before you download, make sure that you have an Internet connection. -
Page 58: Fm Radio
FM radio About the FM radio The FM radio in your phone works like any FM radio. For example, you can browse and listen to FM radio stations and save them as favourites. You must connect a wired headset or headphones to the phone before you can use the radio. This is because the headset or headphones act as an antenna. -
Page 59: Using Your Favourite Radio Channels
Move down the frequency band to search for a channel Tuning dial Save or remove a channel as a favourite Tuned frequency Using your favourite radio channels You can save the radio channels you most frequently listen to as favourites. By using favourites you can quickly return to a radio channel. -
Page 60: Identifying Radio Tracks Using Trackid
Identifying radio tracks using TrackID™ Use TrackID™ technology to identify music tracks as they play on your device's FM radio. To identify a song on the FM radio using TrackID™ While the song is playing on your device's FM radio, tap TrackID™. A progress indicator appears while the TrackID™... -
Page 61: Camera
Camera About the camera Your phone camera is equipped with the highly sensitive Exmor R sensor, which enables sharp photos and videos even in low lighting conditions. From the camera, you can, for example, send your photos and videos to friends as messages, or upload them to a web service. -
Page 62: Face Detection
To take a self-portrait using the front camera Activate the camera. Tap the icon on the top left of the screen, then find and select Front camera. To take the photo, press the camera key. The photo is taken as soon as you release your finger. -
Page 63: Using Still Camera Settings
To take a photo using Smile Shutter™ When the camera is open and Smile Shutter is turned on, point the camera at your subject. The camera selects which face to focus on. The face selected appears inside a green frame and the photo is taken automatically. - Page 64 Touch a specific area on the camera screen to set the area of focus. Continuous autofocus is off. Touch and hold the camera screen until the yellow focus frame turns blue, indicating that the focus is set. The photo is taken when you release your finger. This setting is only available in Normal capturing mode.
- Page 65 Center Adjusts the exposure to the centre of the image. Average Calculates the exposure based on the amount of light striking the whole image. Spot Adjusts the exposure in a very small part of image you want to capture. This setting is only available in Normal capturing mode. White balance The white balance setting adjusts the colour balance according to the lighting conditions.
- Page 66 The flash is turned off. Sometimes photo quality can be better without the flash, even if lighting conditions are poor. Taking a good photo without using the flash requires a steady hand. Use the self-timer to avoid blurred photos. Red-eye reduction Reduces the red colour of eyes when taking a photo.
-
Page 67: Using The Video Camera
Touch capture Identify a particular focus area by touching the camera screen with your finger. The photo is taken as soon as you release your finger. This setting is only available when focus mode is set to touch focus. Shutter sound Choose to turn on or turn off the shutter sound when you record a video. - Page 68 Using the video camera settings To adjust the video camera settings Activate the camera. Tap one of the settings icons on the screen. To display all settings, tap Select the setting that want to adjust, then make your changes. To customise the video camera settings panel When the video camera is open, tap to display all settings.
- Page 69 On (10 sec.) Set a 10-second delay from when you tap the camera screen until the video begins to record. On (2 sec.) Set a 2-second delay from when you tap the camera screen until the video begins to record. The video begins to record as soon as you tap the camera screen.
- Page 70 Launch only (still camera) By pressing and holding down the camera key, the still camera is launched from sleep mode. Launch and record movie By pressing and holding down the camera key, the first video is shot immediately after the camera video camera is launched from sleep mode.
-
Page 71: Album
Auto-rotate screen checkbox under Settings > Display. Mobile BRAVIA® Engine Sony's Mobile BRAVIA® Engine technology improves the viewing quality of photos and videos after you take them, giving you clearer, sharper and more natural images. Mobile BRAVIA Engine is turned on by default, but you can turn it off if you want to reduce battery consumption. -
Page 72: Viewing Photos And Videos In The My Albums Tab
Overview of Pictures tab Grid view of photos and videos. View menu options. Scroll up or down to view content. Tap a photo or video to view it. The date and number of items in the group below. To view photos and videos in grid view From your Home screen, tap Find and tap Album. - Page 73 • My SD card – view all photos and videos saved to a removable memory card in your device. Overview of My albums tab View photos and videos on renren.com View your photos in globe mode. To view content in list view in the Camera albums tab From your Home screen, tap Find and tap Album >...
- Page 74 To view content in list view in the My SD card tab From your Home screen, tap Find and tap Album > My albums > My SD card. Tap a folder that you want to open. The folder's content appears in a chronologically ordered grid.
- Page 75 To share a photo When you are viewing a photo, tap the screen to display the toolbars, then tap In the menu that opens, tap the application that you want to use to share the photo, then follow the steps to send it. To delete a photo When you are viewing a photo, tap the screen to display the toolbars, then tap Tap OK.
-
Page 76: Movies
Movies About Movies Use the Movies application to play movies and other video content that you’ve saved on your phone. The Movies application also helps you get poster art, plot summaries, genre info and director details for each movie. You can also play your movies on other devices that are connected to the same network. - Page 77 To play a video in full screen When a video is playing, tap the screen to display the controls. To play the video in its original size, tap To share a video When a video is playing, press , then tap Share. In the menu that opens, tap the application that you want to use to share the selected video, then follow the relevant steps to send it.
-
Page 78: Web Browser
Web browser About the web browser Use your web browser to view and navigate web pages, add pages as bookmarks, and save pages for offline viewing. You can open up to 16 windows at the same time and switch among them easily. You can also request the desktop version of a web page if you don't want to view the mobile version. -
Page 79: Connectivity
Connectivity Connecting to wireless networks You can access the Internet wirelessly from your device using WLAN technology. This way you can browse the web and share media files over the same WLAN network with other DLNA Certified™ devices, for example, TVs and computers. If your company or organisation has a virtual private network (VPN), you can connect to this network using your device. - Page 80 To add a WLAN network manually Make sure that WLAN is turned on. From the Home screen, tap Find and tap Settings > WLAN . Enter the Network SSID for the network. Tap the Security field to select a security type. If required, enter a password.
- Page 81 Portable WLAN hotspot is active To share your data connection using a USB cable Deactivate all USB cable connections to your device. Using the USB cable that came with your device, connect your device to a computer. From your Home screen, tap Find and tap Settings >...
-
Page 82: Sharing Content With Dlna Certified™ Devices
To connect to a virtual private network From your Home screen, tap Find and tap Settings > More… > VPN. In the list of available networks, tap the VPN that you want to connect to. Enter the required information. Tap Connect. To disconnect from a virtual private network Drag the status bar downwards. - Page 83 as client devices. Your device works as a media server when it makes content available to client devices. When you set up file sharing on your device, you must also give access permission to client devices. After you do so, such devices appear as registered devices.
-
Page 84: Nfc
render, or play, content received from your device. A DMR device can be, for example, a TV with DLNA function, or a PC running Windows® 7 or higher. The settings for enabling the Digital Media Renderer may vary depending on the device used. Refer to the user guide for the respective device for more detailed information. - Page 85 NFC detection area The location of the NFC detection area is not the same on all devices. When sharing data with another device using NFC, refer to the User guide of the other device for more information. To share a contact with another device using NFC Make sure that both devices have the NFC function turned on, and that both screens are active.
-
Page 86: Bluetooth™ Wireless Technology
To open the tag, tap it. Connecting to an NFC compatible device You can connect your device to other NFC compatible devices produced by Sony, such as a speaker or a headphone. When establishing this kind of connection, refer to the User guide of the compatible device for more information. - Page 87 To turn on the Bluetooth™ function and make your device visible From your Home screen, tap Find and tap Settings. Tap the on-off switch beside Bluetooth to turn on the Bluetooth™ function. Tap Bluetooth. Your device and a list of available Bluetooth™ devices appear. Tap your device name to make your device visible to other Bluetooth™...
-
Page 88: Connecting Your Device To A Computer
To unpair a Bluetooth™ device From the Home screen, tap Find and tap Settings > Bluetooth. Under Paired devices, tap beside the name of the device that you want to unpair. Tap Unpair. Sending and receiving items using Bluetooth™ technology Share items with other Bluetooth™... - Page 89 helps you access additional computer applications to transfer and organise media files, update your device, synchronise device content, and more. You might not be able to transfer some copyright-protected material between your device and a computer. Transferring and handling content using a USB cable Use a USB cable connection between a computer and your device for easy transfer and management of your files.
-
Page 90: Connecting Your Device To A Tv Set
Media Go™ The Media Go™ computer application helps you transfer and manage media content in your phone and computer. You can install and access Media Go™ from within the PC Companion application. You need one of these operating systems to use the Media Go™ application: •... -
Page 91: Smart Connect
photos from the comfort of your couch. You can also use this feature to listen to music from your phone via the TV's speakers. Your TV must support screen mirroring for the functionality described above to work. If your TV does not support screen mirroring, you need to purchase a wireless display adapter separately. -
Page 92: Synchronising Data On Your Phone
Synchronising data on your phone About synchronising data on your phone You can sync contacts, email, calendar events, and other information with your phone from multiple email accounts, synchronisation services and other kinds of accounts, depending on the applications installed on your phone. Synchronising your phone with other information sources is an easy and practical way to stay up to date. -
Page 93: Maps And Locations
GPS option. In situations where the wireless network connection is weak, you should enable both options to ensure that your location is found. Sony does not warrant the accuracy of any location services including but not limited to navigational services. -
Page 94: Calendar And Alarm Clock
Calendar and alarm clock Calendar Your device has a calendar application for managing your time schedule. To set the calendar view From your Home screen, tap , then find and tap Calendar. Tap Month, Week or Day to select an option. To view multiple calendars From your Home screen, tap , then find and tap Calendar. - Page 95 To edit an existing alarm From your Home screen, tap Find and tap Alarm & clock. Tap the alarm you want to edit. Tap Time and adjust the time by scrolling up and down. Tap Done. If desired, edit other alarm settings. Tap Done.
- Page 96 To set alarms to sound when the phone is in silent mode From your Home screen, tap Find and tap Alarm & clock, then tap to select an alarm. Tap Advanced alarm settings, then mark the Alarm in silent mode checkbox. Tap Done.
-
Page 97: Support And Maintenance
Support and maintenance Updating your device Update your device to the most recent software version to get optimal performance and the latest enhancements. You can use the Update center application on your device to run a wireless update or you can use the PC Companion application on a computer to run an update using a USB cable connection. -
Page 98: Backup And Restore Application
Using a USB cable, connect your device to the Apple computer. Computer: Launch Sony™ Bridge for Mac application. After a few moments, Sony™ Bridge for Mac application detects your device and searches for new software for it. Computer: If a new software update is detected, a popup window appears. -
Page 99: Locking And Protecting Your Device
To select the data types to back up From your Home screen, tap Find and tap Backup & restore. Tap Back up. Select the data types that you want to back up. To back up content From your Home screen, tap Find and tap Backup &... - Page 100 It is very important that you remember your screen unlock pattern, PIN or password. If you forget this information, it may not be possible to restore important data such as contacts and messages. Refer to Sony Customer support for more information. To set up the Face Unlock protection From your Home screen, tap >...
- Page 101 To unlock the screen using the Face Unlock feature Activate the screen. Look at your phone from the same angle you used to capture your Face Unlock photo. If Face Unlock fails to recognise your face, you need to draw the backup pattern or PIN to unlock the screen.
-
Page 102: Help Application
To create a screen lock password From your Home screen, tap > Settings > Security > Screen lock > Password. Enter a password. If necessary, tap to minimise the keyboard. Tap Continue. Re-enter and confirm your password. If necessary, tap to minimise the keyboard. -
Page 103: Reference
Reference Settings overview Get to know the settings in your device so that you can personalise them to your own requirements. More… Turn Airplane mode on or off, configure settings for VPN and mobile networks, and enable your device to share its mobile data connection as a portable hotspot, or through USB tethering or Bluetooth™... - Page 104 NFC is activated 3G is available Sending and downloading GPRS data Sending and downloading EDGE data Sending and downloading 3G data Battery status The battery is charging GPS is activated Airplane mode is activated The Bluetooth™ function is activated The SIM card is not inserted The microphone is muted The speakerphone is on Silent mode...
-
Page 105: Application Overview
Application overview Use the Alarm and clock application to set various kinds of alarms. Use your web browser to navigate and view web pages, manage bookmarks, and manage text and images. Use the Calculator application to perform basic calculations. Use the Calendar application to keep track of your events and manage your appointments. -
Page 106: Important Information
(The SMS expense is upon the mobile fee bill from the operator) to the server of Sony Mobile Communications (China) Co., Ltd. once the phone is in use. Sony and any other 3rd party will not charge any additional cost of it. - Page 107 To use some pre-loaded applications (e.g. TrackID, MSN) you need first activate data service. Using data services (GPRS or 3G services) may incur data traffic fee. Please contact your network operator for expense details. Please visit www.sonymobile.com to get the latest version of this User's Guide. This is an Internet version of this publication.
-
Page 108: Index
Index video ..............67 accounts ..............9 viewing photos ..........62 Exchange Active Sync® ........9 viewing videos ..........67 adjusting volume .............52 zoom ..............62 Airplane mode ............27 caps lock ..............22 alarm ................94 charging ..............10 Album ..............71, 72 conference calls ............34 My albums ............73 connectivity .............79 opening ............71 contacts ..............37 pictures ............72... - Page 109 viewing artist info ..........56 GPS .................93 Visualiser ............53 music services ............56 headset ..............28 using ..............28 notification .............104 help application .............102 light ..............20 Home screen ............15 panel ............20, 21 customising .............16 ringtone ............26 setting ..............21 icons ..............103, 104 in the camera ...........68 on-screen keyboard ..........22 importing SIM contacts ...........38 improving photos with Mobile BRAVIA®...
- Page 110 recording videos ............61 telephony - See calls ..........32 using the camera key ........67 tethering recycling your phone ..........102 USB tethering ..........80 resizing with Xperia Link™ ...........80 photos .............74 text input method ............22 ringtone ..............94 themes ..............17 rotating tiles ................49 photos .............74 time ................25 time management ............94 Timescape™...
- Page 111 playlists ............55 using ..............52 using the equaliser ..........52 "WALKMAN" application widget ......55 wallpaper ..............17 web browser ............78 widgets ..............16 resizing ............16 wireless networks ............93 zoom ................62 zooming photos .............74 This is an Internet version of this publication. © Print only for private use.
Need help?
Do you have a question about the Xperia T LT30p and is the answer not in the manual?
Questions and answers