Table of Contents
Advertisement
Available languages
Available languages
Quick Links
ATTACH YOUR RECEIPT HERE
Serial Number
Questions, problems, missing parts? Before returning to your retailer, call our customer service
department at 1-866-439-9800, 8 a.m. – 6 p.m., EST, Monday - Thursday, 8 a.m. – 5 p.m., EST, Friday.
welcoming
•
Purchase Date
sophisticated
1
Lowes.com/allenandroth
•
inspiring
ITEM #0339928
PENDANT
MODEL #34535
Français p. 9
Español p. 17
Advertisement
Table of Contents

Related Manuals for Allen + Roth 34535

Summary of Contents for Allen + Roth 34535
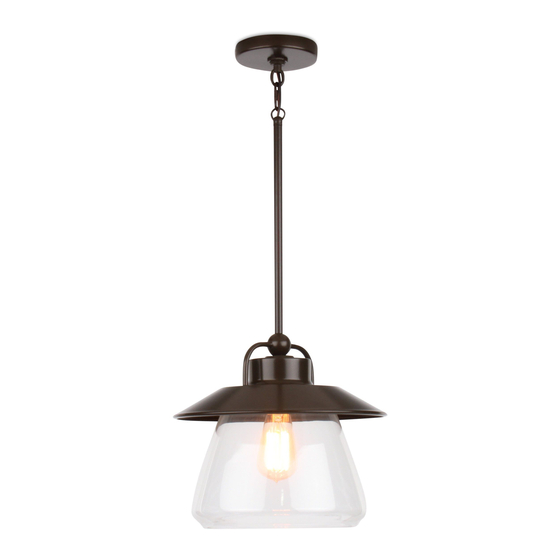
- Page 1 • sophisticated • inspiring ITEM #0339928 PENDANT MODEL #34535 Français p. 9 Español p. 17 ATTACH YOUR RECEIPT HERE Serial Number Purchase Date Questions, problems, missing parts? Before returning to your retailer, call our customer service department at 1-866-439-9800, 8 a.m. – 6 p.m., EST, Monday - Thursday, 8 a.m. – 5 p.m., EST, Friday.
-
Page 2: Package Contents
PACKAGE CONTENTS PART DESCRIPTION QUANTITY Canopy Screw Collar Ring (Preassembled to Screw Collar Loop (C)) Screw Collar Loop Threaded Pipe Fixture Body Socket (Preassembled to Fixture Body ((E)) Threaded Socket Ring (Preassembled to Fixture Body ((E)) Glass Shade Bulb Chain Fixture Loop (Preassembled to Threaded Pipe (D)) Washer Lowes.com/allenandroth... -
Page 3: Safety Information
HARDWARE CONTENTS (shown actual size) Ground Screw (Not shown to size) Hex Nut 1/2 in. Wire Qty: 1 Qty: 2 Machine Connectors Screws Threaded Mounting Qty: 3 Nipple Bracket Qty: 2 (Not shown Qty: 1 to size) Qty: 1 SAFETY INFORMATION Please read and understand this entire manual before attempting to assemble, operate or install the product. - Page 4 ASSEMBLY INSTRUCTIONS 1. Screw threaded pipe (D) into fixture body (E). (See Fig. 1.) 2. Remove threaded socket ring (G). Pass shade (H), and washer (L) over socket (F) and secure with threaded socket ring (G). (See Fig. 2.) NOTE: The socket ring should be oriented so that the threaded end of the ring screws onto the socket.
- Page 5 ASSEMBLY INSTRUCTIONS 4. Pass canopy (A) over the screw collar loop (C). Turn the screw collar loop (C) in or out of the mounting bracket (EE) until 1/2 of the screw Outlet collar loop (C) exterior threads are exposed. After a desired position is found, lock threaded (Not nipple (DD) in place by tightening the second Included)
- Page 6 ASSEMBLY INSTRUCTIONS 6. Ground wire connection guide (see Fig. 6.): • For installation in the United States: Wrap ground wire from outlet box around ground screw (FF) on mounting bracket (EE), no less than 2 in. from wire end. Tighten ground screw (FF).
-
Page 7: Care And Maintenance
ASSEMBLY INSTRUCTIONS 8. Insert bulb (I) into socket (F). (See Fig. 8.) CARE AND MAINTENANCE • Always be certain that electric current is turned off before cleaning this item. • Use a soft, moist cloth with mild, non-abrasive soap to clean fixture. Never use glass cleaner on fixture, as it will damage the metal finish. -
Page 8: Warranty
Fixture Loop TLOOP01-MIZ Washer W34535 Wire Connector WC001 Short Machine Screws SCR832X050 Hex nuts NUT18 Threaded Nipple TN18200 Mounting Bracket XBAR01 Printed in China allen + roth ® is a registered trademark of LF, LLC. All rights reserved. Rev. 11-28-17 Lowes.com/allenandroth... - Page 9 • inspiring ARTICLE #0339928 LUMINAIRE SUSPENDU MODÈLE #34535 JOIGNEZ VOTRE REÇU ICI Numéro de série Date d’achat Des questions, des problèmes, des pièces manquantes? Avant de retourner l’article au détaillant, appelez notre service à la clientèle au 1 866 439-9800, entre 8 h et 18 h (HNE), du lundi au jeudi, ou entre 8 h et 17 h (HNE) le vendredi.
-
Page 10: Contenu De L'emballage
CONTENU DE L’EMBALLAGE PIÈCE DESCRIPTION QUANTITÉ Couvercle Bague de collier à anneau (préassemblée au collier à anneau de suspension [C]) Collier à anneau de suspension Tube fileté Corps du luminaire Douille (préassemblée au corps du luminaire [E]) Bague de douille filetée (préassemblée à la douille [F]) Abat-jour en verre Ampoule Chaîne... -
Page 11: Consignes De Sécurité
QUINCAILLERIE INCLUSE (grandeur réelle) Vis de mise à la terre Capuchon Qté: 1 Écrou de connexion Vis à (gran deur hexagonal non réelle) métaux Qté : 3 Qté : 2 de 1/2 po Traverse Qté : 2 Qté : 1 Tige filetée (grandeur Qté... -
Page 12: Instructions Pour L'assemblage
INSTRUCTIONS POUR L'ASSEMBLAGE 1. Vissez le tube fileté (D) au corps du luminaire (E). (Consultez la figure 1.) 2. Glissez l’abat-jour (H), et rondelle (L) sur la douille (F) et fixez-le solidement à l'aide de la bague de douille filetée (G). (Consultez la figure 2.) NOTE: La bague de la douille doit être orientée de sorte que l'extrémité... - Page 13 INSTRUCTIONS POUR L'ASSEMBLAGE 4. Glissez le couvercle (A) sur le collier à anneau de suspension (C). Vissez le collier à anneau de suspension (C) à la traverse (EE) ou dévissez-le Boîte de jusqu’à ce que la moitié du filetage extérieur du sortie collier à...
- Page 14 INSTRUCTIONS POUR L'ASSEMBLAGE 6. Guide de connexion des fils de mise à la terre (consultez la figure 6) : • Installation aux États-Unis : Enroulez le fil de mise à la terre de la boîte de sortie autour de la vis de mise à...
-
Page 15: Entretien
INSTRUCTIONS POUR L'ASSEMBLAGE 8. Insérez une ampoule (I) dans la douille (F). (Consultez la figure 8.) ENTRETIEN • Vérifiez toujours que le courant est coupé avant de nettoyer le luminaire. • Utilisez un linge doux et humide ainsi qu’un savon non abrasif. N’utilisez jamais de nettoyants pour vitres;... -
Page 16: Garantie
Rondelle W34535 WC001 Capuchon de connexion Vis à métaux courte SCR832X050 Écrou hexagonal NUT18 Tige filetée TN18200 Traverse XBAR01 Imprimé en Chine allen + roth est une marque de commerce déposée de LF, LLC. Tous droits réservés. Rev. 11-28-17 Lowes.com/allenandroth... - Page 17 • inspirador inspiring ARTÍCULO #0339928 LÁMPARA COLGANTE MODELO #34535 ADJUNTE SU RECIBO AQUÍ Fecha de compra Número de serie ¿Preguntas, problemas, piezas faltantes? Antes de volver a la tienda, llame a nuestro Departamento de Servicio al Cliente al 1-866-439-9800, de lunes a jueves de 8 a.m. a 6 p.m., y los viernes de 8 a.m.
-
Page 18: Contenido Del Paquete
CONTENIDO DEL PAQUETE PIEZA DESCRIPCIÓN CANTIDAD Base Aro del anillo del roscado (preensamblado al anillo de enganche roscado (C)) Anillo de enganche roscado Tubo roscado Cuerpo de la lámpara Portalámpara (preensamblado en el cuerpo de la lámpara (E)) Anillo del portalámpara roscado (preensamblado cuerpo de la lámpara (E) Pantalla de vidrio Bombilla Cadena... -
Page 19: Información De Seguridad
ADITAMENTOS (tamaño real) Tornillo de puesta a tierra Conectores Tuerca Cant.: 1 de cables hexagonal Tornillos para (no es el metales tamaño real) Cant.: 2 Cant.: 3 de 1/2 in. Abrazadera Manguito de montaje Cant.: 2 roscado (no es el tamaño real) Cant.: 1 Cant.: 1... -
Page 20: Instrucciones De Ensamblaje
INSTRUCCIONES DE ENSAMBLAJE 1. Enrosque el tubo roscado (D) en el cuerpo de la lámpara (E). (Consulte la Fig. 1.) 2. Retire el anillo del portalámpara roscado (G). Pase la pantalla (H), y randela (L) por el portalámpara (F) y fíjela con el anillo del portalámpara roscado (G). - Page 21 INSTRUCCIONES DE ENSAMBLAJE 4. Pase la base (A) sobre el anillo de enganche roscado (C). Gire el anillo de enganche roscado (C) hacia adentro o fuera de la abrazadera de Caja de montaje (EE) hasta que la mitad de las roscas del salida (no anillo (C) sean visibles.
- Page 22 INSTRUCCIONES DE ENSAMBLAJE 6. Guía para la conexión de los conductores de puesta a tierra (consulte la fig. 6): • Para la instalación en los Estados Unidos: Coloque el conductor de puesta a tierra de la caja de salida alrededor del tornillo de puesta a tierra (FF) en la abrazadera de montaje (EE), a no menos de 5,08 cm del extremo del conductor.
-
Page 23: Cuidado Y Mantenimiento
INSTRUCCIONES DE ENSAMBLAJE 8. Inserte la bombilla (I) en el portalámpara (F). (Consulte la Fig. 8.) CUIDADO Y MANTENIMIENTO • Siempre asegúrese de que la corriente eléctrica esté desconectada antes de limpiar. • Utilice un paño húmedo suave y jabón suave no abrasivo para limpiar la lámpara. Nunca utilice un limpiador para vidrio en la lámpara, porque éste dañará... -
Page 24: Lista De Piezas De Repuesto
W34535 Conector de cables WC001 SCR832X050 Tornillos para metales cortos Tuerca hexagonal NUT18 Manguito roscado TN18200 Abrazadera de montaje XBAR01 Impreso en China allen + roth es una marca registrada de LF, LLC. Todos los derechos reservados Rev. 11-28-17 Lowes.com/allenandroth...
Need help?
Do you have a question about the 34535 and is the answer not in the manual?
Questions and answers