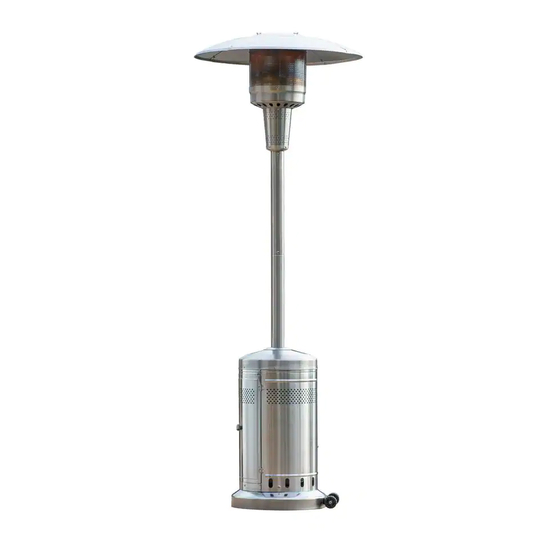
Summary of Contents for Royal garden TM21PATHTRSS1
- Page 1 Assembly Instructions Model No. TM21PATHTRSS1 Fire Heater Questions, problems, or missing parts? Before returning to the store, call Customer Service. 1-866-988-3300 8 a.m. - 5 p.m., PST Monday - Friday Retain this manual for future use.
-
Page 2: Table Of Contents
Contents Safety Instructions Parts List Assembly Operation Cleaning & Maintenance Troubleshooting Service Parts Warranty IMPORTANT: RETAIN FOR FUTURE REFERENCE, AND READ CAREFULLY. TM21PATHTRSS1... -
Page 3: Safety Instructions
TM21PATHTRSS1... - Page 4 WARNING: Improper installation, adjustment, alteration, service or maintenance can cause property damage, injury or death. Read the installation, operating and maintenance instructions thoroughly before installing or servicing this equipment. WARNING: For outdoor use only. TM21PATHTRSS1...
-
Page 5: Parts List
M8 x15mm Bolt - 2 Reflector Spacer - 3 M8 Nut - 2 M5x8mm Bolt - 16 M6x10mm Bolt - 4 M5x8mm Silver Bolt - 12 M5 Nut - 12 AAA Battery - 1 Wing Nut - 3 Shroud Fix Bracket - 5 TM21PATHTRSS1... - Page 6 PACKAGE CONTENTS Top Dome - 1 KD Dome - 4 Burner Assembly - 1 Upper Pole - 1 Beauty Ring - 1 Lower Pole Assembly - 1 Cylinder Housing Assembly - 1 Base - 1 Wheel Assembly - 1 TM21PATHTRSS1...
-
Page 7: Assembly
With the base (H) upside down, attach the wheel assembly (I) using two bolts (AA) and two nuts (CC). STEP 2 Requires: DD, JJ, H Assembling the Shroud Fix Brackets Turn the base (H) over and attach the shroud fix brackets (JJ) using five bolts (DD). TM21PATHTRSS1... - Page 8 Assembling the Pole Attach the lower pole assembly (F) onto the cylinder housing assembly (G) using four bolts (EE), and then put the beauty ring (E) through the lower pole on top of the cylinder housing assembly (G). Back Back TM21PATHTRSS1...
- Page 9 Screw three reflector spacers (BB) into the top of the burner assembly (C). STEP 6 Requires: DD, C, D Assembling the Burner Assembly Insert the regulator and hose assembly into the upper pole (D). Secure the burner assembly (C) onto the pole with three Bolts (DD). Ensure they are fully tightened. TM21PATHTRSS1...
- Page 10 Assembling the KD and Top Dome Attach the four KD domes (B) using four bolts (FF) and four nuts (GG). Then, complete the dome assembly by attaching the top dome (A) to KD domes (B) with eight bolts (FF) and eight nuts (GG). TM21PATHTRSS1...
- Page 11 Then, turn the knob on the regulator assembly counterclockwise until it is loose. WARNING: Before connecting, be sure there is no debris caught in the head of the LP-gas cylinder regulator valve or in the head of the burner and burner ports. 20 lbs 20 lbs 17.9 in. TM21PATHTRSS1 12.2 in.
- Page 12 Installing the Battery To install the battery (HH), unscrew the igniter cap preassembled to the burner assembly (C). Insert the battery (HH) into the igniter, ensuring the positive "+" end faces outward. Then replace the igniter cap. Ignite r Igniter Igniter TM21PATHTRSS1...
-
Page 13: Operation
Flame should be blue with slight yellow tips. You should see a smaller flame in LOW position than seen on HIGH. Perform flame check prior to each use. If only low flame is seen, refer to “Burner flame is low” on the “TROUBLESHOOTING” page. High TM21PATHTRSS1... -
Page 14: Cleaning & Maintenance
This heater should be thoroughly cleaned on a regular basis. After a period of storage and/or no use, check for leaks, burner obstructions and inspect for any abrasion, wear, and cuts to the hose. NOTE: A slight pop is normal when burner is extinguished. TM21PATHTRSS1... - Page 15 Store the heater upright in an area sheltered from direct contact with inclement weather (such as rain, sleet, hail, snow, dust and debris). NOTE: Never leave LP gas tank exposed to direct sunlight or excessive heat. If desired, use cover(s) to protect the heater and help prevent buildup in air passages. CAUTION: Wait until heater is cool before covering. TM21PATHTRSS1...
-
Page 16: Troubleshooting
5. The supply hose is bent or kinked. 5. Straighten the hose. There is carbon Seasonal accumulation. Wipe off before lighting. build up. There is thick black There is blockage in the burner. Remove blockage and clean the burner inside and smoke. outside. TM21PATHTRSS1... -
Page 17: Service Parts
Burner Assembly 210H001 5212715 Burner Chamber Assembly 5206364 Cylinder Housing Assembly 210H003 Insulation Plate Base 210H002 Control Panel 5207458 210H004 Wheel Assembly 2413334 2414133 Knob Weight Plate 2406521 Hardware Pack 210H005 Thermocouple 2409043 Ignition Pin 2409604 t l i 2420073 TM21PATHTRSS1... -
Page 18: Warranty
After cleaning cushions tip on end and allow to drip dry. (Never use a commercial or home dryer to tumble dry fabric goods). Do not use bleach or solvents to clean any product! This will void the warranty. TM21PATHTRSS1... - Page 19 TO BE DEFECTIVE UNDER THE TERMS AND CONDITIONS AS STATED IN THIS WARRANTY. NEITHER ARISING OUT OF ANY BREACH OF THIS WARRANTY OR NEGLIGENCE EVEN IF IT HAS BEEN ADVISED ARE NO OTHER EXPRESS OR IMPLIED WARRANTIES OTHER THAN THE WARRANTY DESCRIBED OR FITNESS FOR A PARTICULAR PURPOSE ARE EXPRESSLY DISCLAIMED. TM21PATHTRSS1...

Need help?
Do you have a question about the TM21PATHTRSS1 and is the answer not in the manual?
Questions and answers