Advertisement
Available languages
Available languages
Quick Links
Advertisement

Related Manuals for ELICA Snap


Summary of Contents for ELICA Snap
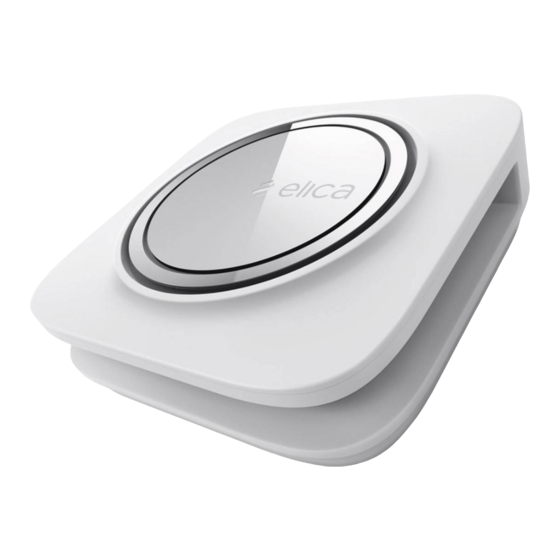
- Page 3 SNAP air quality balancer...
- Page 4 BENVENUTO NEL MONDO SNAP! Snap ‘Air Quality Balancer’ è l’innovativo sistema di aspirazione che monitora e migliora la qualità dell’aria dei tuoi ambienti in maniera automatica attraverso un intervento calibrato sulle loro caratteristiche e sulle tue esigenze. Attraverso i suoi tre sensori, in modo automatico avvia il motore in modalità aspirazione solo quando è necessario.
-
Page 5: Nella Scatola
4B_PROCEDURA DI INSTALLAZIONE CON CAVO ALIMENTAZIONE RETE ELETTRICA A VISTA IN DOTAZIONE ..... 5_PRIMA CONFIGURAZIONE ......................................_ASSOCIAZIONE DI SNAP AL TELECOMANDO ..........................5.2_ASSOCIAZIONE DI SNAP A PIÙ TELECOMANDI ................................................5.3_ASSOCIAZIONE DI SNAP ALL’APP ELICA CONNECT 5.4_ASSOCIAZIONE DI SNAP ALLA CAPPA .............................. - Page 6 2_Dove installare Snap Snap è stato progettato per la casa e per gli ambienti pubblici. Le sue funzioni avanzate gli permettono di portare benefici concreti in tutti gli ambienti in cui viene installato. È raccomandato, tra gli altri, per:...
- Page 7 SCEGLI LA SOLUZIONE PIÙ ADATTA Snap può essere installato con cavo alimentazione rete elettrica nascosto o a vista. Scegli la soluzione più adatta alle tue esigenze. PROCEDURA DI INSTALLAZIONE CON CAVO ALIMENTAZIONE NASCOSTO, pag. 6 PROCEDURA DI INSTALLAZIONE CON CAVO ALIMENTAZIONE A VISTA, pag. 10...
- Page 8 4A_Procedura di installazione con cavo alimentazione rete elettrica nascosto Prima di procedere, assicurarsi di aver sconnesso l'alimentazione della rete elettrica tramite l'interruttore generale. FORARE LA PARETE O UTILIZZARE FORO PREESISTENTE IN RIMUOVERE IL VETRO DALLA COVER ESTETICA ESERCITANDO GRADO DI CANALIZZARE L’ARIA ALL’ESTERNO UNA LEGGERA FORZA LUNGO IL PERIMETRO PER SGANCIARLO DAI MAGNETI area predisposizione...
- Page 9 SCOLLEGARE IL CAVO DI CONNESSIONE NELLA PARTE SCOLLEGARE IL CAVO ELETTRICO IN DOTAZIONE INTERNA DELLA COVER ESTETICA svitare le due viti a sinistra tagliare la fascetta di tenuta PREPARARE IL NECESSARIO PER IL FISSAGGIO posizionare il corpo posteriore usare il corpo posteriore come forare la parete nei quattro nel foro d’uscita dima per segnare i punti di fissaggio...
- Page 10 POSIZIONARE LA CORNICE E IL CORPO POSTERIORE SUL MURO PASSARE CAVO ALIMENTAZIONE RETE ELETTRICA NELL’APPOSITO FORO. cornice corpo posteriore cavo alimentazione rete elettrica EFFETTUARE LA CONNESSIONE DI SNAP ALLA RETE ELETTRICA TRAMITE CAVO ALIMENTAZIONE PREDISPOSTO. fissare alla parete con le viti. viti (x4)
- Page 11 RIPOSIZIONARE LA COVER ESTETICA E CONNETTERE IL CAVO AGGANCIARE LA COVER ESTETICA SULLA CONNESSIONE DI SNAP COME RIPORTATO IN FIGURA. CORNICE. Attenzione! raccogliere i cavetti dell’elettronica affinchè non rimangano incastrati in fase di chiusura SNAP ORA PUÒ ESSERE ALIMENTATO RIPOSIZIONARE...
- Page 12 4B_Procedura di installazione con cavo alimentazione rete elettrica a vista in dotazione FORARE LA PARETE O UTILIZZARE FORO PREESISTENTE IN RIMUOVERE IL VETRO DALLA COVER ESTETICA ESERCITANDO GRADO DI CANALIZZARE L’ARIA ALL’ESTERNO UNA LEGGERA FORZA LUNGO IL PERIMETRO PER SGANCIARLO DAI MAGNETI Ø...
- Page 13 SCOLLEGARE IL CAVO DI CONNESSIONE NELLA PARTE SCEGLIERE QUALE LATO PASSARE CAVO INTERNA DELLA COVER ESTETICA ALIMENTAZIONE RETE ELETTRICA E TAGLIARE DI CONSEGUENZA IL CORPO POSTERIORE NEL PUNTO CORRISPONDENTE PREPARARE IL NECESSARIO PER IL FISSAGGIO posizionare il corpo posteriore sul foro d’uscita usare il corpo posteriore come dima forare la parete nei quattro per segnare i punti di fissaggio...
- Page 14 SFILARE L’ELEMENTO DI CHIUSURA DELLA CORNICE POSIZIONARE LA CORNICE IN BASE ALLA DIREZIONE SCELTA PER IL PASSAGGIO DEL CAVO ALIMENTAZIONE RETE ELETTRICA uscita con cavo uscita con cavo alimentazione in alto alimentazione a destra uscita con cavo uscita con cavo alimentazione a sinistra alimentazione in basso POSIZIONARE IL CAVO ALIMENTAZIONE RETE ELETTRICA IN BASE AD UNA DELLE SEGUENTI SOLUZIONI:...
- Page 15 10a. 10b. fissare alla parete con le viti viti (x4) INSERIRE L’ELEMENTO PER PASSAGGIO CAVO ALIMENTAZIONE RIPOSIZIONARE LA COVER ESTETICA E CONNETTERE IL CAVO IN DOTAZIONE CONNESSIONE DI SNAP COME RIPORTATO IN FIGURA Attenzione! elemento raccogliere passaggio cavo 12a. alimentazione...
- Page 16 AGGANCIARE LA COVER ESTETICA SULLA CORNICE. ESERCITARE UNA LEGGERA PRESSIONE LUNGO TUTTO IL PERIMETRO FINO A SENTIRE CHE LA COVER ESTETICA SI SIA AGGANCIATA PERFETTAMENTE SULLA CORNICE SNAP È ORA PRONTO PER ESSERE RIPOSIZIONARE IL VETRO SULLA COVER COLLEGARE IL CAVO DI...
- Page 17 5_Prima configurazione Snap, dopo il primo collegamento alla rete elettrica, esegue delle operazioni di settaggio visibili tramite feedback luminosi del led centrale e della corona luminosa. Al termine, Snap si prepara per le successive fasi di associazione. ricezione telecomando logo...
- Page 18 ASSOCIAZIONE DI SNAP A PIÙ TELECOMANDI Utilizzare il telecomand o già associato e premere la combinazione d i tasti in base al telecomand o che si ha in possesso per portare Snap in fase d i associazione nuovo telecomand o: a) MIN + MUTE con pressione prolungata (>1sec)
- Page 19 ASSOCIAZIONE DI SNAP ALLA APP ELICA CONNECT Prima di iniziare la procedura di configurazione, si consiglia di procurarsi nome SSID e password della rete Wi-Fi a cui si desidera connettere Snap ed assicurarsi che lo smartphone che si userà per la procedura di configurazione sia connesso alla stessa rete Wi-Fi.
- Page 20 ASSOCIAZIONE DI SNAP ALLA CAPPA Snap si attiva in connessione alla tua Cappa Elica. Se il sensore d ella cappa rileva fumi e odori intensi Snap viene attivato automaticamente, potenziand o l’efficacia d i aspirazione. Rimuove gli od ori ind esid erati molto più...
- Page 21 6_Scheda tecnica di SNAP TECHNICAL DATA Supply Voltage (Vac): 230/50Hz Power Consumption (W): 2 (min speed) - 7 (max speed) Airflow (m3/h): 25 (min speed) - 150 (max speed) Revolution (RPM): 1100±50 (min speed) - 2350±50 (max speed) Pressure (Pa):...
- Page 22 La corona luminosa d i Snap si colora d i un colore più o meno intenso corona corona comunicandoti quando Snap sta aspirando e a quale velocità.
- Page 23 ATTENZIONE! Puoi abilitare questa funzione solo se sei in possesso di una cappa Elica abilitata alla connessione con Snap.
- Page 24 Snap attiva il suo motore perché sente la necessità d i migliorare la qualità dell’aria, puoi regolare il suo intervento attenuando la sua velocità per assicurarti un’ottima performance in termini di aspirazione e silenziosità.
- Page 25 Puoi abilitare questa funzione solo se sei in pos- termini di aspirazione e silenziosità. sesso di una cappa Elica connettibile a Snap. Bande di frequenza e potenza trasmessa dal dispositivo. Frequenza di funzionamento apparecchiatura radio: 433.92MHz...
- Page 26 6 second i, riperetere la procedura di affiliazione sia per Snap che per la cappa. Il fabbricante ELICA SPA dichiara che questo radiocomando è conforme alla direttiva 2014/53/UE. Il testo completo della dichiarazione di conformità UE è disponibile al seguente indirizzo Internet: https://elica.com/download/dichiarazione-ce-di-conformita-snap.pdf...
- Page 27 Può essere attivato/disat- tivato selezionando nuova- mente sulla funzione attiva (Automatic, Detox, Dry). Snap si attiva in presenza di un ele- 10.2 vato tasso di umidità. Per attivare/disattivare la modalità relax mode FUNZIONI DELLA CAPPA selezionare nuovamente la funzione mentre è...
- Page 28 Il servizio Elica Connect è disponibile in specifici paesi. Per ulteriori informazioni visitare la sezione dedicata del sito www.elica.com. • Modifiche future. Elica si riserva di apportare tutte le modifiche che riterrà utili al miglioramento del servizio Elica Connect. Di conseguenza le descrizioni contenute in questo manuale non sono impegnative ed hanno un valore indicativo.
- Page 30 WELCOME TO SNAP WORLD! Snap ‘Air Quality Balancer’ is an innovative product for aspiration of bad air, and is able to monitor and improve the quality of the air in your indoor environments automatically by calibrating the device according to your needs and expectations.
-
Page 31: Inside The Box
4B_VISIBLE CABLE INSTALLATION PROCEDURE ..............................5_INITIAL CONFIGURATION ......................................_CONNECTING SNAP TO THE REMOTE CONTROL ........................5.2_CONNECTING SNAP TO MORE THAN ONE REMOTE CONTROL ..................... 5.3_CONNECTING SNAP TO THE ELICA CONNECT APP ........................5.4_CONNECTING SNAP TO THE HOOD ..............................6_TECHNICAL DATA SHEET ...................................... - Page 32 2_Where to install Snap Snap is d esigned for use in the home and in public spaces. Its high-tech features provid e real benefits in any place where it is installed . It’ s recommended (and not only) for:...
- Page 33 CHOOSE THE BEST SOLUTION Snap can be installed with either a hidden power cord or visible cable. Choose the best solution for your needs. HIDDEN POWER CORD INSTALLATION PROCEDURE (pag. 6) VISIBLE CABLE INSTALLATION PROCEDURE (pag. 10)
- Page 34 4A_Hidden power cord installation procedure Before starting the procedure, make sure that you have switched off the home main power switch. MAKE A HOLE IN THE WALL OR USE AN ALREADY EXISTING ONE REMOVE THE GLASS FROM THE AESTHETIC COVER, BY GENTLY PRESSING ALL ALONG THE PERIMETER IN ORDER TO DISENGAGE IT FROM THE MAGNETS area for the power cord...
- Page 35 DISCONNECT THE CONNECTION CABLE INSIDE THE AESTHETIC DISCONNECT THE ELECTRIC CABLE SUPPLIED WITH THE COVER APPLIANCE unscrew the two screws to the left cut the clamp PREPARE WHAT IS NEEDED FOR FIXING THE APPLIANCE position the rear bod y on the use the rear body as a template d rill the 4 holes in the wall, out-let hole...
- Page 36 POSITION THE FRAME BEHIND THE REAR BODY AND INSERT POSITION THE FRAME AND THE REAR BODY THE ELECTRIC CABLE INTO THE SPECIFIC HOLE frame rear body electric cable CONNECT SNAP TO THE SELECTED CABLE fix to the wall with the screws screws (x4)
- Page 37 REFIT THE AESTHETIC COVER AND CONNECT THE ELECTRONICS OF SNAP HOOK THE AESTHETIC COVER TO THE FRAME Warning! arrange the electronics wires in such a way that they do not get stuck during closing SNAP CAN BE FED BY THE MAINS REFIT THE GLASS ON THE AESTHETIC 11b.
- Page 38 4B_Visible cable installation procedure MAKE A HOLE IN THE WALL OR USE AN ALREADY EXISTING ONE REMOVE THE GLASS FROM THE AESTHETIC COVER, BY GENTLY PRESSING ALL ALONG THE PERIMETER IN ORDER TO DISENGAGE IT FROM THE MAGNETS Ø 120 mm DISENGAGE THE AESTHETIC COVER BY GENTLY PRESSING ON THE REAR PANEL...
- Page 39 DISCONNECT THE CONNECTION CABLE INSIDE THE AESTHETIC CHOOSE WHICH SIDE YOU WANT THE CABLE TO GO COVER THROUGH, AND THEREFORE CUT OUT THE REAR BODY IN THE CORRESPONDING POINT PREPARE WHAT IS NEEDED FOR FIXING THE APPLIANCE position the rear body on the out-let hole use the rear body as a template to drill the 4 holes in the wall, mark the fixing holes...
- Page 40 REMOVE THE CLOSURE PIECE OF THE FRAME POSITION THE FRAME BASED ON THE DIRECTION CHOSEN FOR THE CABLE TO GO THROUGH outlet with cable on outlet with cable the top part to the right outlet with cable outlet with cable to the left on the bottom part POSITION THE ELECTRIC CABLE ACCORDING TO THE FOLLOWING SOLUTIONS...
- Page 41 10a. 10b. fix to the wall with screws screws (x4) INSERT THE SUPPLIED CABLE CLAMP REFIT AESTHETIC COVER CONNECT ELECTRONICS OF SNAP Warning! blocking element arrange for electric cable 11a. the electronic block the cable wires in such a way that they 11b.
- Page 42 HOOK THE AESTHETIC COVER TO THE FRAME. GENTLY PRESS ON THE ENTIRE PERIMETER SNAP READY REFIT THE GLASS ON THE AESTHETIC COVER CONNECT THE CABLE TO THE SOCKET CONFIGURED...
- Page 43 5_Initial configuration Snap, after being first connected to power supply, carries out visible setup operations through luminous feedback of the central led light and the luminous ring. When this is completed, Snap prepares itself for the following configuration phases. remote control reception...
- Page 44 If you wish to add new remote controls, use the already connected one and press the following key combination, depending on the remote control version you have, in order to set Snap onto the new remote control connection phase: a) MIN + MUTE for a prolonged period of time (>1sec) b) ON/OFF + DIMMER for a prolonged period of time (>1sec)
- Page 45 Snap gets off two acoustic luminosa signals. verde WARNING connection procedure ko If there is no connection, the luminous ring turns red and Snap gives off an acoustic signal. logo Follow the APP instructions to repeat the procedure. centrale spento...
- Page 46 Successful connection is confirmed when the luminous ring ring is green turns green and rotates in a ‘double flow’ and Snap gives off two acoustic signals. link function After a few second s, Snap automatically goes into Link mode.
- Page 47 13 or later - with Android 8 or later *The manufacturer does not guarantee the correct compatibility of the APP with the most recent operating system versions except for future official updates of the APP itself released by Elica. WIRELESS...
- Page 48 DETOX What it does Snap works on the quality of the air: it monitors and activates the aspiration when the pollutant level in the air raises. It frees the environment from odours and pollutants like dust, pollens, mites, chemical pollutants deriving from smoke, sprays, detergents, paints, and cooking odours and smoke.
- Page 49 WARNING! This feature may be activated only if you have an Elica hood suitable to be connected to Snap...
- Page 50 Snap in an even easier and functional way. LIGHTS You can check the luminous ring of Snap and use it as a courtesy light, or to create a special atmosphere. You can decide whether to switch on the ring, or to higher or lower its luminosity and create a romantic and relaxing atmosphere with chromo therapy, by selecting a specific colour or mood.
- Page 51 Press the button to activate the ON-OFF feature. Press and hold to show the Press the button to switch Snap on. air-quality level (see page 43). Press and hold , to switch Snap off completely. STANDBY AUTOMATIC When Snap is alread y on, press...
- Page 52 HOOD FEATURES These features are only available if the Elica hood is a model suitable to be connected to Snap. AFFILIATION FILTER RESET Press and hold the buttons to affiliate Press and hold the buttons to reset the hood and the remote control.
- Page 53 LINK Snap activates in connection with FAN - INCREASE your Elica Hood. Increase hood Warning! aspiration speed with just You can activate this feature only if you have an one prolonged touch. Elica hood, which can be connected to Snap.
- Page 54 • Future changes. Elica reserves the right to make any changes deemed useful to improve the Elica Connect service. As a result, the descriptions contained in this manual are not binding and should be treated as purely indicative.
- Page 55 Elica spa via Ermanno Casoli, 2 60044 Fabriano AN Italy T +39 0732 6101 F +39 0732 610249 elica.com...
- Page 56 DESIGN YOUR AIR snap.elica.com LIB0178384 Ed.07/21...
Need help?
Do you have a question about the Snap and is the answer not in the manual?
Questions and answers