Table of Contents
Advertisement
Quick Links
Advertisement
Table of Contents

Related Manuals for VersaLASER VLS3.60

Summary of Contents for VersaLASER VLS3.60
- Page 1 Safety, Installation, Operation, and Basic Maintenance Manual (Located on the back of the machine and inside the front door) 16008 North 81st Street Scottsdale, AZ 85260 USA Technical Support Department Phone: 480-609-0297 Fax: 480-609-1203 Web Based Email Support: www.ulsinc.com...
- Page 2 This publication and its contents are proprietary to Universal Laser Systems, Inc. (ULS), and are intended solely for the contractual use of ULS, Inc. customers. While reasonable efforts have been made to assure the accuracy of this manual, ULS shall not be liable for errors contained herein or for incidental or consequential damage in connection with the furnishing, performance, or use of this material.
- Page 3 We would like to thank you for your laser system purchase. Universal Laser Systems, Inc. (ULS) is the pioneer, and highest volume manufacturer, of large field, computer controlled laser engraving, marking, and cutting systems. ULS has devoted years of research and development to further the quality of our products that has resulted in a number of remarkable innovations within the laser industry.
- Page 4 VersaLASER VLS3.60, VLS4.60 and VLS6.60 System Operating Environment Requirements (User Provided) VLS3.60 VLS4.60 VLS6.60 Operating Well-ventilated office (recommended) or clean, light-duty manufacturing Environment Operating 50ºF (10ºC) to 95ºF (35º C) capable Temperature 73ºF (22ºC) to 77ºF (25º C) for best performance Storage Temperature 50ºF (10ºC) to 95ºF (35º...
- Page 5 Model System Specifications VLS3.60 VLS4.60 VLS6.60 CO2 Laser, Interlocked Safety Enclosure = Class 1 Laser Safety Red Diode Pointer = Class 3R 24 x 12 in 24 x 18 in 32 x 18 in Work Area* (609.6 x 304.8 mm) (609.6 x 457.2 mm)
- Page 6 Description of Appropriate Use ..................... General Safety ..........................Laser Safety ..........................Safety Labels ..........................EU Compliance (CE)........................FCC Compliance......................... Recycling............................. Establishing a Proper Operating Environment................Providing a Suitable Electrical Power Source................Extracting Fumes and Particulates ....................Software Installation and Operating System Requirements ............Computer Requirements ......................
- Page 7 Air Assist ............................Air Assist Compressor........................Dual Head ............................. Honeycomb Cutting Table ......................Focus Lens Kits........................... Rotary Fixture..........................Printer Driver Controls........................Manual Control Tab ........................ Focusing Methods........................Making a Sample - Manual Control Tab ..................
- Page 9 This device is designed for laser cutting and engraving, in a laboratory, workshop, or light duty manufacturing environment. Materials to be processed must fit completely inside the system for proper operation. Use of the equipment in a manner other than what is described in this manual can result in injury to yourself, others, or may cause severe damage to the equipment and your facility.
- Page 10 SAFETY We suggest that you obtain the Material Safety Data Sheet (MSDS) from the materials manufacturer. The MSDS discloses all of the hazards when handling or processing that material. processing any material that shows signs of chemical deterioration of the laser system such as rust, metal etching or pitting, peeling paint, etc.
- Page 11 SAFETY CDRH and CE regulations require that all laser manufacturers affix warning labels in specific locations throughout the equipment. The following warning labels are placed on the laser system for your safety. remove them for any reason. If the labels become damaged or have been removed for any reason, the laser system and immediately contact Universal Laser Systems, Inc.
- Page 12 SAFETY WARNING WARNING TURN THE LASER SYSTEM OFF BEFORE TO AVOID RISK OF ELECTRIC SHOCK CONNECTING OR DISCONNECTING ALWAYS DISCONNECT POWER CORD THE ROTARY FIXTURE BEFORE REMOVING THIS COVER 221-0019-0 221-0020-0 INPUT POWER: 110 VAC; 50/60 Hz; 10 A 221-0021-0 REV A 221-0022-0 REV A THIS LASER MANUFACTURED BY UNIVERSAL LASER SYSTEMS...
- Page 13 SAFETY WARNING THIS SYSTEM IS DESIGNED FOR USE WITH INERT AND NON-OXIDIZING GASES ONLY (i.e. DRY CLEAN AIR, CARBON INPUT POWER: DIOXIDE, HELIUM, NITROGEN). CONNECTING FLAMMABLE OR 230 VAC; 50/60 Hz; 5 A OXIDIZING GASES TO THIS SYSTEM CREATES A SERIOUS SAFETY AND/OR FIRE HAZARD.
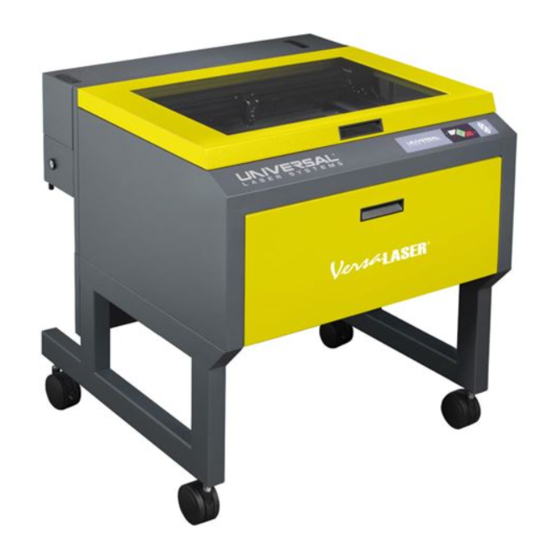
- Page 14 User Guide ULS Reference Guide Book VLS3.60, VLS4.60 and VLS6.60 VersaLASER VLS3.60, VLS4.60 and VLS6.60 Front View Laser system and labels are not to scale Link to Table of Contents...
- Page 15 User Guide ULS Reference Guide Book VersaLASER VLS3.60, VLS4.60 and VLS6.60 Back View with Rear Door Open Laser system and labels are not to scale Link to Table of Contents...
- Page 16 User Guide ULS Reference Guide Book VersaLASER VLS3.60, VLS4.60 and VLS6.60 Back View Laser system and labels are not to scale Link to Table of Contents...
- Page 17 SAFETY VLS3.60, VLS4.60 and VLS6.60 Laser Engraving and Cutting Systems Universal Laser Systems, Inc. Universal Laser Systems GmbH 16008 N. 81 Lerchenfelder Guertel 43 Scottsdale, AZ 85260 A-1160 Vienna/Austria The manufacturer hereby declares that the equipment specified below is in...
- Page 18 SAFETY This ULS laser system has been tested and found to comply with Federal Communication Commission (FCC) directives regarding Electromagnetic Compatibility (EMC). In accordance with these directives ULS is required to provide the following information to its customers. This device complied with FCC Rules Part 15. Operation is subject to the following two conditions: 1.
- Page 19 SAFETY Section 1-12...
- Page 21 User Guide ULS Reference Guide Book Software Installation and Requirements Your computer is a critical component in the operation of the VLS system. In fact, you cannot operate the VLS system if your computer is not connected, powered on, running Windows and running the Universal Control Panel (UCP) software. You can only run one VLS system per computer at a time.
- Page 22 User Guide ULS Reference Guide Book Optimizing Windows XP Performance Vista Performance Windows XP, by default, displays many “visual Windows Vista, by default, displays many “visual effects” that slow down the computer. effects” that slow down the computer. recommend that you turn off these effects by recommend that you turn off these effects by clicking right-clicking on the “My...
- Page 23 User Guide ULS Reference Guide Book Universal Control Panel (UCP) Installation CD-ROM At this point you need to install the Windows XP/Vista Universal Control Panel (UCP) and printer driver. In order to install the software, you need to have administrative privileges on the computer before starting installation. The Software Installation CD-ROM can be found on the inside of this manual reference guide.
- Page 24 User Guide ULS Reference Guide Book The installation process will proceed as indicated by a progress bar. Be patient. Loading the files can take a few minutes depending on your computer’s processor speed. When the installation process is finished, the “ Completing the ULS Software Setup Wizard”...
- Page 26 The following operational guidelines are vital to a safe and productive environment. It is your responsibility to provide a proper operating environment. This section will also give you step-by-step instructions for site preparation, and computer and software setup. Please follow the instructions in the order shown: 1.
- Page 27 User Guide ULS Reference Guide Book Note: The following diagram shows a typical exhaust system layout. Use this as a guideline for proper exhaust system installation. Although this diagram serves as an example, we recommend you consult with a licensed contractor to meet local safety and building code requirements and to also calculate the correct size blower required for your particular installation.
- Page 28 INSTALLATION constant power outages are a problem in your area, an electrical line stabilizer, UPS (Uninterruptible Power Supply), or backup generator might be required. You may also need to connect the laser system to a dedicated electrical line to resolve the problem. The laser system is designed as a Class I, Group A, pluggable device.
- Page 29 INSTALLATION Section 2-10...
- Page 30 Not all software can be used to run the laser system because many have limitations. Setting up your software correctly is essential to running the laser system properly. The following examples assume that you are configuring the software for a VersaLASER system. If you have a different laser system, substitute the correct maximum page size.
- Page 31 User Guide User Manual Adobe Illustrator CS or CS2 Note: Adobe Illustrator CS or CS2, in combination with the new ULS printer driver version 5.24.38 or later, is now capable of both raster and vector output as well as full-field engraving capability. The following procedure assumes that you are familiar with the use and operation of Windows XP and Adobe Illustrator CS or CS2.
- Page 32 User Guide User Manual Adobe Illustrator CS3 Part 1: Setting the Default Workspace Start Illustrator CS3 from your Windows XP/Vista compatible PC. Illustrator CS3 Preferences box will open. Select FILE CREATE NEW BASIC RGB DOCUMENT. The new document options box will open. Make the following settings: Set Units to inches.
- Page 33 User Guide User Manual Part 3: Editing the Swatch Palette Open your Swatch Palette as follows: Main Menu Window Swatches Left Click “OK” Delete all swatches that are not basic RGB or gray scale by left clicking to select them and then clicking the “Delete Swatch”...
- Page 34 User Guide User Manual AutoCAD 2000i, 2002 and 2004 Note: AutoCAD version 2000 is not compatible with ULS laser systems. You must upgrade to version 2000i or higher. Also, we recommend installing ULS printer driver version 5.24.38 or higher. Make sure the ULS Printer driver is installed prior to setting up AutoCAD. If AutoCAD is already installed and you are simply upgrading ULS printer drivers: Close all open programs.
- Page 35 Note: For colors requiring Vector output, pen widths should be set to 0.001 inches (0.025mm), and for colors requiring Raster output, set pen widths to greater than 0.008 inches (0.203mm). VersaLASER can only plot Black, Blue and Red. Link to Table of Contents...
- Page 36 User Guide User Manual ADD NEW PLOTTER Select FILE PLOTTER MANAGER Select ADD-A-PLOTTER WIZARD and click NEXT. Select System Printer and click NEXT. Select your Universal Laser System (i.e. VLS6.60) and click NEXT. Click the Edit Plotter Configuration button and select Modify Standard Paper Size (Printable Area). Select User-Defined LANDSCAPE (Modify) and change the margin values to zero.
- Page 37 For example, 12 inches (305 mm) for a VLS3.60. If you would like the scale to be displayed in tenths, choose “10 per Tick”...
- Page 38 User Guide User Manual While still in the “Options” dialog box, double-click on “Global” to expand the list. Double-click on “Printing” to expand the list. Now click on “Driver Compatibility. ” Make sure that the laser system name is displayed in the printer drop-down list.
- Page 39 User Guide User Manual Graphic Page Configuration for Rotary (CorelDRAW) Note: If you are using the Material Database printer driver to engrave on an object, you do not need to change the page size of your graphic software. If you are using the Manual Control printer driver, please follow the steps below. With your graphics software open, proceed immediately to “Printer”...
- Page 40 User Guide User Manual Activate the Rotary feature on the printer drive, by clicking on “Enable” box. Type the diameter of the object under “Diameter. ” Notice that while typing the diameter, the height dimension changes automatically. Remember or write down this new dimension.
- Page 41 User Guide User Manual General Software Set-up There are many software programs that you can purchase off-the-shelf that will work with the laser system. Some of them can access more features of the laser system than others may. Whichever program you choose, it must be set up to work with the laser system, otherwise unexpected results may occur.
- Page 42 User Guide User Manual If using a color other than the exact colors listed above, the driver will attempt to match it to a color in the driver that it most closely resembles. The driver will then use that color’s power setting and apply a halftone pattern to represent the original color’s shade.
- Page 43 User Guide User Manual Hidden Vector Lines in Artwork The driver does not automatically filter out outlines that are overlapped by engraved objects such as fills. If there are filled objects with some hidden outlines underneath, the laser system will engrave the fill and cut the hidden outline on top of the fill.
- Page 44 User Guide User Manual you may want to experiment by using your bitmap image-processing program to make the conversion. These software programs usually have more options for controlling the size, angle, shape and the amount of black and white dots (pixels) created when converting the image. Experiment with all of the controls to see which looks the best.
- Page 45 GRAPHICS SOFTWARE SETUP Section 3-14...
- Page 46 We will now illustrate how to use the laser system to create a product from start to finish. As an example, we will raster engrave and vector cut a key chain from a 2 by 4 inch, 1/8 inch thick piece of hardwood. It is preferable to use a hardwood such as Cherry or Walnut as opposed to grainy wood such as Oak or a manufactured product such as plywood or melamine.
- Page 47 MAKING A SAMPLE The following steps assume that CorelDraw X3 is being used as your graphics software and using the Materials Database Tab in the printer driver. Other graphic software programs may differ. When you are ready to print the file to the laser system, click FILE and then click PRINT.
- Page 48 MAKING A SAMPLE be correct, the material is not suitable for laser engraving or cutting and you processing this material or any material that may cause damage to the laser system. While the laser system is processing the material, you may stop the process by clicking the PAUSE button and waiting for the system to finish what it was doing and move to the home position (upper right corner).
- Page 49 MAKING A SAMPLE Section 5-4...
-
Page 52: Basic System Features
Section 6 Basic System Features The Universal Control Panel (UCP) Figure 1 Figure 2 Viewer Tab Systsem Tab Diagnostics Tab Section 6-3... -
Page 53: Viewer Tab
BASIC SYSTEM FEATURES Viewer Tab System Controls Basic View(drop down list) Section 6-4... - Page 54 BASIC SYSTEM FEATURES System Controls Estimate View(drop down list) Section 6-5...
- Page 55 BASIC SYSTEM FEATURES Relocate View(drop down list) Relocate Types Section 6-6...
- Page 56 BASIC SYSTEM FEATURES File Management Section 6-7...
- Page 57 BASIC SYSTEM FEATURES VLS3.60, VLS4.60 and VLS6.60 SYSTEM TAB Section 6-8...
- Page 58 BASIC SYSTEM FEATURES Section 6-9...
- Page 59 BASIC SYSTEM FEATURES VLS3.60, VLS4.60 and VLS6.60 DIAGNOSTICS TAB Section 6-10...
- Page 60 BASIC SYSTEM FEATURES The VersaLASER Keypad Section 6-11...
- Page 61 BASIC SYSTEM FEATURES Material Database Printer Driver Category List Material List Intensity Adjustment Which Laser? (Dual laser systems only) Air Assist (Computer Controlled Air Assist systems only) Material (Only available when Manual Control Tab is activated) Material Editing Section 6-12...
- Page 62 BASIC SYSTEM FEATURES Material Code Taper 3D Power Vector Marking - Blue Pen Vector Cutting - Red Pen Max Depth Shallow Cut Settings Deep Cut Settings Section 6-13...
- Page 63 BASIC SYSTEM FEATURES How to create a new Category and Material Material Thickness Units Fixture Type None Rotary Custom Section 6-14...
- Page 64 BASIC SYSTEM FEATURES Advanced Laser System Operation Note Manual Control Printer Driver Color, Power, Speed and PPI %Power %Speed Note Section 6-15...
- Page 65 BASIC SYSTEM FEATURES Mode(Drop Down Menu) Laser (Dual laser catridge system only) Z-Axis Section 6-16...
- Page 66 BASIC SYSTEM FEATURES Flow (computer Controlled Air Assist only) Flow Rate (Comouter Controlled Air Assist only) Set Button Save Button Load Button Default Button Cancel Button Apply Button Section 6-17...
- Page 67 BASIC SYSTEM FEATURES Raster Sub-Tab Print Special Effects Clip Art Choose Your Material Establishing Nominal Power Section 6-18...
- Page 68 BASIC SYSTEM FEATURES Engraving a Calibration Scale Section 6-19...
- Page 69 BASIC SYSTEM FEATURES Setup Button Rubber Stamp Setup Button Section 6-20...
- Page 70 BASIC SYSTEM FEATURES Image Density Section 6-21...
- Page 71 BASIC SYSTEM FEATURES Section 6-22...
- Page 72 BASIC SYSTEM FEATURES Definitions CONTRAST Section 6-23...
- Page 73 BASIC SYSTEM FEATURES DEFINITION : DENSITY TUNING Procedure Section 6-24...
- Page 74 BASIC SYSTEM FEATURES Step 2 : Using text to set the CONTRAST parameter Universal Laser Systems, Inc produces the “BEST” laser systems in the world! Step 3 : Adjusting DEFINITION to enhance the ascenders and descenders Step 4 : Reducing DENSITY as needed Step 5 : Fine tuning the raster strokes Section 6-25...
- Page 75 BASIC SYSTEM FEATURES Vector Sub-Tab Vector Optimizer Vector Scaling CAUTION Section 6-26...
- Page 76 BASIC SYSTEM FEATURES Engraving Field Sub-Tab Engraving Field Section 6-27...
-
Page 77: Basic Maintenance
Section 7 Basic Maintenance Motion System Components Diagram NOTE: #2 Mirror Cover and X-axis Motor Cover Plates have been removed for visibility. 1) Focus carriage 2) X-axis bearing (3) 3) #3 mirror (inside cover plate) 17) Y-axis drive gear (2) (one on right side, one on left side) 4) Focus lens (inside cover plate) 18) Y-axis shaft (2) (one on right side, one on left side) 5) X-axis rail (arm) -
Page 78: Cleaning And Maintenance Supplies
BASIC MAINTENANCE Cleaning and Maintenance Supplies • • • • • • CAUTION When using acetone or denatured alcohol, please follow the instructions on the printed label of these materials for safe handling procedures. • • • • System Cleaning and Maintenance Motion System •... - Page 79 BASIC MAINTENANCE #2 Mirror #3 Mirror and Focus Lens Beam Window Section 7-3...
- Page 80 BASIC MAINTENANCE Exhaust Plenum Cleaning 4.75) • • • Back View • • Inside Front View Cooling Fan Filters Back View Section 7-4...
-
Page 81: Adjustments And Lubrication
BASIC MAINTENANCE Adjustments and Lubrication Maintenance Schedule As a starting point, we recommend the following schedule: • As necessary Engraving table Main enclosure Top door window • Every 8 hours of engraving Clean X-axis and Y-axis bearings Clean X-axis and Y-axis rails and bearing tracks Clean X-axis belt. - Page 82 BASIC MAINTENANCE Section 7-6...
- Page 83 Part 3- Accessories...
-
Page 85: Air Assist
Section 8 Accessories Air Assist Standard and Computer Controlled styles Requirements (both styles) Section 8-3... -
Page 86: Making The Connections
ACCESSORIES Making the Connections Standard Air Assist style Computer Controlled Air Assist style Section 8-4... - Page 87 ACCESSORIES Cone Installation and Removal (both styles) How it Works Standard Air Assist Section 8-5...
- Page 88 ACCESSORIES Computer Controlled Air Assist Section 8-6...
- Page 89 ACCESSORIES Programming the PC Printer Driver Windows XP printer driver Air Flow Setting Guidelines (both styles) Maintenance (both styles) • • • Section 8-7...
-
Page 90: Air Assist Compressor
ACCESSORIES Cone Alignment Check and Adjust (both styles) Air Assist Compressor Installation • • • • • Maintenance Section 8-8... - Page 91 ACCESSORIES Removal, Cleaning, and Replacement of the Filter • • • • • • Removal, Cleaning, and Replacement of the Desiccant • • • • • • • Dual Head • • • • • Section 8-9...
-
Page 92: How It Works
ACCESSORIES How it Works #3 Mirror Beam Splitter Laser Beam Beam Tube Focus Lens Focus Lens Dual Head Single Head Installation • • • Section 8-10... - Page 93 ACCESSORIES • • • Brass Tube with bracket • • • Section 8-11...
-
Page 94: Honeycomb Cutting Table
ACCESSORIES Operation Removal Honeycomb Cutting Table Installation STRIPS Section 8-12... - Page 95 ACCESSORIES ADJUSTABLE MANIFOLD CUTTING TABLE ENGRAVING TABLE EXHAUST PLENUM ADJUSTABLE MANIFOLD SCREWS SCREWS SCREWS 1) POSITION DIODE HERE 2) THEN HERE X-AXIS RULER 3) AND FINALLY HERE SCREWS Section 8-13...
-
Page 96: Focus Lens Kits
ACCESSORIES Focus Lens Calibration Focus Lens Kits EFFECT ENGRAVING AREA HIGH POINT FOCUS HERE LOW POINT Section 8-14... -
Page 97: Rotary Fixture
ACCESSORIES FOCAL LENGTH SPOT SIZE FOCAL RANGE 1.5 “ .003 “ + / - .075 “ 2.0 “ .005 “ + / - .100 “ 2.5 “ .007 “ + / - .125 “ 4.0 “ .013 “ + / - .200 “ Rotary Fixture Installation 23 24... - Page 98 ACCESSORIES TURN THE LASER SYSTEM OFF BEFORE CONNECTING OR DISCONNECTING THE ROTARY FIXTURE Section 8-16...
- Page 99 ACCESSORIES Determining Graphic Placement 23 24 Printer Driver Settings Section 8-17...
- Page 100 ACCESSORIES 23 24 Rotary Fixture Removal Section 8-18...
-
Page 101: Part 4- Advanced User
Part 4- Advanced User... -
Page 103: Advanced System Operation
Section 9 Advanced System Operation Printer Driver Controls Definitions and Terminology Vector Graphic: Fill: Outline: Bitmap: Motion System: Laser Beam Delivery Method (Mode): Raster: Vector: Marking: Cutting: Section 9-3... -
Page 104: Manual Control Tab
ADVANCED SYSTEM OPERATION Manual Control Tab Color, Power, Speed, and PPI % Power % Speed Section 9-4... - Page 105 ADVANCED SYSTEM OPERATION Mode (drop down menu) • RAST/VECT • RAST • VECT • SKIP Laser (drop down menu) (PLS 6.150D only) Z-Axis (drop down menu) Flow (drop down menu) Flow Rate (drop down menu) Set Button Section 9-5...
- Page 106 ADVANCED SYSTEM OPERATION Save Button Load Button Default Button Cancel Button Apply Button Raster Sub-Tab Print Special Effects Clip Art Section 9-6...
- Page 107 ADVANCED SYSTEM OPERATION Choose Your Material Establishing Nominal Power Engraving a Calibration Scale Section 9-7...
- Page 108 ADVANCED SYSTEM OPERATION Setup Button APPLY Button CLOSE Button DEFAULTS Button Section 9-8...
- Page 109 ADVANCED SYSTEM OPERATION Rubber Stamp This image..turns into this ...and the engraved image by the driver... image looks like this. This image..turns into this ...and the engraved image by the driver... image looks like this. Setup Button Taper Selection Image Options Invert Page Mirror Page...
-
Page 110: Image Density
ADVANCED SYSTEM OPERATION STEP POWER % Material .002” STEP WIDTH Normal Rubber Stamp Setting ...will give you these results Image Density Print Direction Dithering Section 9-10... - Page 111 ADVANCED SYSTEM OPERATION Halftone IMAGE DENSITY ANGLE SHAPE LINES PER INCH 45 DEGREES ROUND 45 DEGREES ROUND 45 DEGREES ROUND 45 DEGREES ROUND 45 DEGREES ROUND Error Diffusion Black and White Mode Helpful Tip Image Enhancement Section 9-11...
- Page 112 ADVANCED SYSTEM OPERATION Definitions CONTRAST: Universal Laser Systems, Inc. DEFINITION: Universal Laser Systems, Inc. DENSITY: TUNING: Procedure Step 1: Establish the nominal power setting. Section 9-12...
- Page 113 ADVANCED SYSTEM OPERATION Step 2: Using text to set the CONTRAST parameter. Universal Laser Systems, Inc. produces the “BEST” laser systems in the world! Step 3: Adjusting DEFINITION to enhance the ascenders and descenders. Step 4: Reducing DENSITY as needed. Section 9-13...
- Page 114 ADVANCED SYSTEM OPERATION TUNING Step 5: Fine tuning the raster strokes. Vector Sub-Tab Vector Optimizer ENHANCE AND SORT ENHANCE ONLY SORT ONLY • • Section 9-14...
- Page 115 ADVANCED SYSTEM OPERATION NONE Vector Scaling Engraving Field Sub-Tab Units Language Engraving Field Width and Height Max Size Button Dual Head Section 9-15...
- Page 116 ADVANCED SYSTEM OPERATION Rotary Diameter Rotation Factor Section 9-16...
-
Page 117: Focusing Methods
ADVANCED SYSTEM OPERATION Focusing Methods 1. Focus Tool Method 1) Material 5) Flat Edge 2) X-axis Rail 6) Top of Beveled Edge 3) Focus Carriage 7) Focal Length 4) Focus Tool Section 9-17... - Page 118 ADVANCED SYSTEM OPERATION 2. Material Thickness (Z-Axis) Method Section 9-18...
- Page 119 ADVANCED SYSTEM OPERATION 3. AUTOFOCUS Method Making a Sample - Manual Control Tab Step 1 – Loading and Positioning the Material Step 2 – Creating the Graphic Section 9-19...
- Page 120 ADVANCED SYSTEM OPERATION Step 3 – Printing to the Laser System (Manual Control Tab) Figure 3 Step 4 – Focusing your system Step 5 – Starting the Engraving Process • • • • • Section 9-20...
- Page 121 ADVANCED SYSTEM OPERATION Step 6 – Material Removal and Reloading Section 9-21...
Need help?
Do you have a question about the VLS3.60 and is the answer not in the manual?
Questions and answers