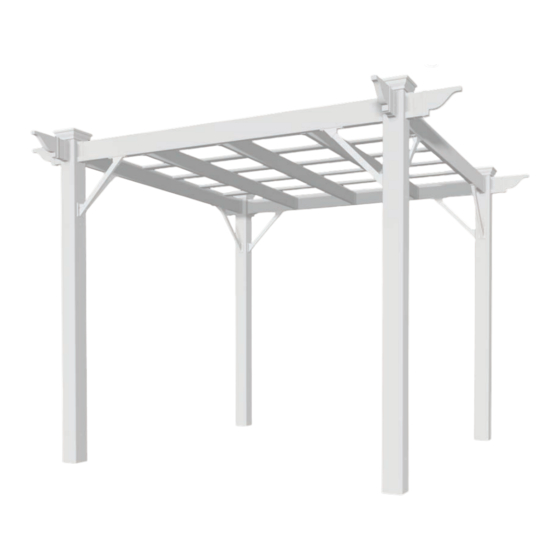
Summary of Contents for New England Arbors Lenox
- Page 1 Lenox Slide Lock Pergola A S S E M B L Y G U I D E Lenox Models: O P T I O N A L A C C E S S O R I E S • Bolt Down Bracket Kit (4 for Pergola) www.newenglandarbors.com...
-
Page 2: Table Of Contents
Ta b l e o f Co n t e n t s PAGE Lenox Slide Lock Pergola Introduction & Overview……………………………..........……….. -
Page 3: Introduction & Overview
- if there is any. Also utility or sprinkler line location is important to identify prior to excavating holes if necessary. You should also check to verify local building codes, ordinances, neighbour- hood covenants, or height restrictions regarding this type of structure. www.newenglandarbors.com Lenox Slide Lock Pergola... -
Page 4: Overview
Lenox Pergola Materials Overview 12 13 1. Post Caps (4) 2. Pergola Decorative End Caps with Pre-Installed Extension (8) 3. Post Slide Brackets (16) 4. Main Column with Pre-Installed Slide Lock Brackets (4) 5. Beams (2) 6. Beam with Brackets (2) 7. -
Page 5: Breakdown
Lenox Pergola Materials Breakdown www.newenglandarbors.com Check Boxes (Total of 4) for These Contents In the event of missing or defective parts please call our customer service department at 1 800 282 9346 (Mon. to Fri. 8:00 AM to 4:00 PM EST) 1. -
Page 6: Pergola Additional Materials List
Purchase Separately • Circular Saw with Fine Tooth Blade • Framing Level • Framing Square • Hacksaw (or a motorized cutting device designed to cut steel) CONCRETE - Ready Mix Purchase Separately Purchase Separately Not to Scale Lenox Slide Lock Pergola... -
Page 7: Wood Post Layout & Installation For In-Ground Application
4x4 wood post slightly to get the vinyl post started over the wood post. Before installing your wood posts in the ground, please check to confirm this and correct at this stage if necessary. Lenox Slide Lock Pergola... -
Page 8: Wood Post Layout & Installation Using Bolt Down Post Brackets For Concrete Or Wood Surface
4x4 wood post guides. However in extreme cases, you may need to shave down the end of your 4x4 wood post slightly 1/2”x3 1/2”x12” to allow access. shims on all four sides near bottom and the top Lenox Slide Lock Pergola... -
Page 9: Vinyl Column Assembly And Installation Over Wood Posts
If you purchased the base molds, slide the them up the post as shown. Using a step ladder guide the top vinyl columns over the wood 4x4 posts. 72” 8“ Lenox Slide Lock Pergola... -
Page 10: Beam Assembly
Attach a post slide bracket to each end of the beam as illustrated. Note: Make sure the opening of the brackets are facing the same direction. Fasten each bracket with two 5/8 in screws as shown. Repeat for second beam assembly. Opening Facing Down Lenox Slide Lock Pergola... -
Page 11: Beam With Brackets Assembly
(see illustration) Fasten each bracket with two 5/8 in screws through the pre-drilled holes. Repeat for second beam with brackets assembly. Opening Facing Down Lenox Slide Lock Pergola... -
Page 12: Rafters Assembly
Please note the orientation of the decorative end and the direction of the bracket opening. Opening Facing Down Fasten bracket with two 5/8” screws through the pre-drilled holes. Repeat for remaining seven pergola decorative end cap assemblies. Lenox Slide Lock Pergola... -
Page 13: Beams,Rafters, & Decorative End Cap Placement
Slide the two beam with bracket assemblies between two opposite posts as shown. opposite posts as shown. Slide the eight decorative end cap assemblies at the end Slide the three rafter assemblies between two beams of the posts as shown. with brackets as shown. Lenox Slide Lock Pergola... -
Page 14: Shade Slat Assembly & Installation
Install first shade slat assembly 13 1/4” away from the outer beam. Install the rest of the shade slat at the 13 1/4” spacing. Install one 1 1/2” screw at each intersection of rafter and shade slat as shown. Lenox Slide Lock Pergola... -
Page 15: Pergola Brace Assembly
With a pencil, mark the position of the beam brace bracket on the beam (a light pencil mark will do, on the front and back of the brace). Lenox Slide Lock Pergola... -
Page 16: Pergola Brace Installation
With the brace bottomed out inside the post brace bracket, center it on the post and secure with four 1 1/2” screws. Lock the braces into the brackets using two 5/8” screws as illustrated. Repeat for the remaining 7 pergola brace assemblies. Lenox Slide Lock Pergola... -
Page 17: Post Caps Installation
S T E P T H I R T E E N www.newenglandarbors.com Post Caps Installation Place the post caps onto the posts as shown. Lenox Slide Lock Pergola...

Need help?
Do you have a question about the Lenox and is the answer not in the manual?
Questions and answers