Table of Contents
Advertisement
Quick Links
Advertisement
Table of Contents

Related Manuals for Dynatech scieneo. amplio VI

Summary of Contents for Dynatech scieneo. amplio VI
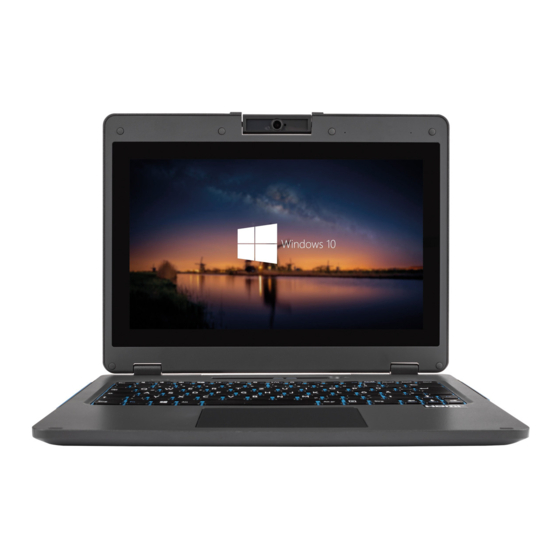
- Page 1 User Guide...
- Page 2 Regulatory Compliance Information FCC Declaration of Conformity This device complies with Part 15 of the FCC Rules. Operation is subject to the following two conditions: (1) this device may not cause harmful interference, and (2) this device must accept any interference received, including interference that may cause undesired operation. This equipment has been tested and found to comply with the limits for a Class B digital device, pursuant to part 15 of the FCC Rules.
- Page 3 Canadian Department of Communications Compliance Statement This digital apparatus does not exceed the Class B limits for radio noise emissions from di- gital apparatus set out in the Radio Interference Regulations of the Canadian Department of Communications. This device complies with Industry Canada licence-exempt RSS standard(s). Operation is subject to the following two conditions: (1) this device may not cause interferen- ce, and (2) this device must accept any interference, including interference that may cause undesired operation of the device.
- Page 4 Safety Precautions The following are lists of precautionary measures that users must understand before using this computer: 1. Do not place near the fire or other sources of heat. 2. Do not expose to magnetic fields. 3. Do not expose to direct sunlight. 4.
-
Page 5: Table Of Contents
Contents 1. Getting to know your computer ..................1 Package contents ........................ 1 Layout ........................... 2 Front..........................2 Bottom ......................... 3 Right ..........................4 Left ..........................5 Back of the LCD panel ....................6 Function keys ......................7 Folding the keyboard ......................8 Your rotatable camera...................... - Page 6 Contents 5. Battery ..........................34 Charging your battery ....................... 34 Inspecting your battery status ..................36 Indicators ........................36 Taskbar ........................36 6. Windows Help and Troubleshooting .................. 38 Troubleshooting ........................ 38 7. Specification ......................... 41...
-
Page 7: Getting To Know Your Computer
1. Getting to know your computer Package contents Carefully unpack your box and take out the items listed as below. If any of the items is mis- sing or damaged, contact your dealer immediately: 1x Laptop 1x AC adapter and power cable 1x Stylus pen 1x Windows 10 licence (optional) -
Page 8: Layout
Layout Front Name Function Often for taking self-portraits as well as for Rotatable camera video conferencing. Microphone Mainly for sound and speech recording The main display of your laptop and a see- Touchscreen touch device. You can look at it and also touch it with your fingers to control it. -
Page 9: Bottom
Bottom Name Function This integrated rubber handle allowing you to Handle carry your notebook easily and handily. The sound system has two speakers for play- Speaker ing music, notification sounds, and other audio data. -
Page 10: Right
Right Name Function Rubber cover Pull and flip it up to access the I/O interface Allows you to secure the notebook with a Kensington lock Kensington lock. Insert your SIM card slot here to acquire the SIM card slot nano type mobile connection. -
Page 11: Left
Left Name Function Rubber cover Pull and flip it up to access the I/O interface Plug your USB Type-C supported devices here. USB Type-C port Plug the provided adapter here to charge the battery. HDMI Plug your HDMI supported device here. USB 3.0 Type-A port Plug your USB Type-A devices here. -
Page 12: Back Of The Lcd Panel
Back of the LCD panel Name Function System indicator Shows the system status. Wi-Fi indicator Shows your Wi-Fi connection status. -
Page 13: Function Keys
Function keys The following function keys are no need to press Fn to make them work. Mute or unmute your system. Decreases the volume level. Increases the volume level Switches display output between your display, external monitor (if connected) and both. Decreases the display brightness Increases the display brightness. -
Page 14: Folding The Keyboard
Folding the keyboard This laptop supports a swiveling 11.6-inch touchscreen that can be used in several different ways. Opening the device as a standard laptop gives you access to the keyboard and touch- pad, while folding the keyboard behind the screen turns it into a tablet. You also can prop the notebook‘s screen up in stand mode, which is ideal for viewing videos and presentations. -
Page 15: Your Rotatable Camera
Your rotatable camera Form the angle at which the camera facing forward, you can adjust the camera angle dow- nward to make it facing d own at an angle of 35 degree. Or, you can turn it over a full 200 degree to use it like a rear-facing camera. -
Page 16: Stylus Pen Battery Replacement
Stylus pen battery replacement 1. Unscrew the end part of the stylus. 2. Replace the AAAA battery with the positive (+) end of the battery pointing toward the wri- ting tip. 3. Screw the end back on. -
Page 17: Using Your Computer
2. Using your computer Powering ON/OFF Powering on your computer 1. If this is the first time you turn this computer on, connect the AC adapter and fully charge the battery. 2. Press the power button (normally 1 to 2 seconds). You shall see the screen turning on. Powering on for the first time The laptop will require you to do the initial setup, which including: •... -
Page 18: Powering Off Your Laptop
Powering off your laptop Save all your data before powering your laptop off. To power off your system, following the steps below: A. By Start menu Click the Windows icon in the low-left corner of the Desktop. Or, press on the Windows key in the keyboard. In the Start menu, click <Power>... -
Page 19: Putting Your Laptop Into Sleep Mode
Putting your laptop into sleep mode When you will be away from your laptop for a short time, put the laptop to sleep. Do one of the following: • Close the display panel • Press the power button briefly one time. •... -
Page 20: Basic Touchpad Operations
Basic touchpad operations The touchpad works like a traditional mouse. With it, you can move the cursor and perform left-click, right-click, double-click actions. However, the actual available actions are application dependent. One finger Action Explanation Tap once on the touchpad surface or press once on the low-left corner of the touchpad to get the effect just like left clicking a mouse. -
Page 21: Three Fingers
Move two fingers together or apart while touching the screen. This is to zoom in and out on visual apps, such as pictures and maps. Drag two fingers vertically the touchpad to scroll ver- tically. Drag two fingers horizontally on the touchpad to scroll horizontally. -
Page 22: Four Fingers
Press and drag to left or right with three fingers to switch between existing active windows. Four fingers Action Explanation Clicking with four fingers can open the Action Center. -
Page 23: Basic Touchscreen Operations
Basic touchscreen operations Your system is ideal for you to use your fingers or the stylus pen to perform many actions on it. • Don’t use sharp objects to touch the screen. Or, the screen may be damaged or scratched. •... - Page 24 Pinch Move two fingers together or apart while touching the screen. This is to zoom in and out on visual apps, such as pictures and maps. Rotate Place two or more fingers on an item and then turn your hand. This enables you to turn an object.
-
Page 25: Fingerprint Login (Optional)
Fingerprint login (optional) If your system comes with the fingerprint login feature, you can follow the following steps to activate this feature: 1. Open the Settings page and select Accounts. For how to open the Settings page, please refer to page 27. 2. - Page 26 3. In the Fingerprint field, click “Setup”. This will activate a feature called Windows Hello. 4. Click “Get started” here, and the system will ask you to swipe your finger with the popup box as shown below. The system will request you to repeat this process for several times.
- Page 27 Here, you may be asked to set your PIN in case that the Windows Hello becomes unavailable for some reasons. After you follow the instructions shown on the screen, you are able to login to your laptop pc with your fingerprint.
-
Page 28: Windows Interface
3. Windows Interface Virtual desktops The Desktop screen is as shown below and natively provides virtual desktop feature. Virtual desktops gives you the ability to have multiple desktop interfaces on your laptop and to switch between them like you have multiple monitors. With this feature, you can create many desktops and respectively keep different apps open, separating types of work. -
Page 29: Creating A New Desktop
Note: 1. If you don‘t see the button, right-click on an empty spot of the Taskbar and check the Show Task View button option. 2. You can also access Task View with the keyboard shortcut Win + Tab. Creating a new desktop For the first time, you‘ll only see the view at the top of the page.The first desktop is your cur- rent one. -
Page 30: Taskbar
Taskbar The black bar on the bottom of the desktop is called Taskbar. It provides several key features and they are: • Start menu • Search box • App shortcuts area • Notification area Start menu To open the Start menu, you can either click on the windows icon (which is also known as Start button) located at the left end of the taskbar or press once on the windows key of the keyboard. -
Page 31: Search Box - Cortana
Search box - Cortana Next to the Start menu is the search box, as shown below. When you select this box, a window will pop out as shown below. This is the Cortana icon. Cortana is a new virtual assistant built into your Windows 10. -
Page 32: App Shortcuts Area
App shortcuts area In this area, you can put the shortcuts of your frequently used apps. For how to arrange this area, please refer to page 30. Notification area The right part of the taskbar holds several icons that show you the status of your system, as shown below. -
Page 33: Setup And Connection
4. Setup and Connection Settings screen To access to the Settings screen: 1. Click the Windows icon in the low-left corner of the Desktop. Or, press on the Windows key in the keyboard. 2. Click the Settings icon. This will open the Settings screen, as shown below Next, the following sections will guide you through the basic setup of your windows system. -
Page 34: Windows Activation
Windows Activation To use all features of your Windows laptop pc, you may need to activate your Windows system. Follow the following steps to register and activate your Windows. 1. Open the Start menu and click <Settings >. 2. Click <Update & security> . 3. -
Page 35: Replacing Desktop With Start Screen
Replacing Desktop with Start screen If you are more familiar with the interface similar to the Start screen introduced in Windows 8 series, you can set your system to show the Start screen instead of the Desktop every time when you power on your system. To do so, do the following steps: 1. -
Page 36: Pin And Unpin Your App
Pin and unpin your app Pinning an App to Start menu or taskbar To add an app: 1. Open the Start menu and select <All Apps>. 2. Right-click on the app that you want to appear on your Start menu or taskbar, and an op- tion menu appears. -
Page 37: Wireless Lan
Wireless LAN Enabling wireless connection 1. Open Settings menu and select <Network & Internet>. 2. Select <Wi-Fi> and set the function to ON, as shown below. 3. Make sure you have switched the Airplane mode off. To confirm that Airplane mode is disabled, go to the desktop and check the notification area. -
Page 38: Micro Sd Card Slot
Micro SD Card Slot You can utilize your micro SD cards as removable disks and conveniently exchange data with digital devices such as a digital camera, digital camcorder, MP3, etc. To insert your micro SD card 1. Insert the micro SD card into the card slot as shown below. 2. -
Page 39: To Remove Your Memory Card
To remove your memory card 1. Press the card and release. The card will pop up. 2. Pull the card out by holding the end of the card. Connecting an External Device Connecting to the USB port Your laptop comes with USB ports compatible with USB devices. Once you plug a USB device into a USB port on your laptop, Windows automatically loads a driver for that device. -
Page 40: Battery
5. Battery Charging your battery 1. Plug the power cable into the adapter. 2. Plug the USB Type-C head of the adapter into the USB Type-c port, which you can find on the left side of your laptop. 3. Plug the adapter into a wall-socket. - Page 41 4. The system and power indicators light in red to indicate the battery is being charged. 5. When the indicators turn into blue, the battery is fully charged. Note: If the remaining power in your battery capacity is 90% or above, plugging the adapter will not fully charge your battery.
-
Page 42: Inspecting Your Battery Status
Inspecting your battery status Indicators • When the power and system indicators start blinking in red, it shows the battery is in low capacity. You need to charge the battery at once. • When the battery is being charged, the indicators light in solid red. •... - Page 43 Battery is fully charged Battery is starting to drain Battery is about to completely drain, and you should stop using your laptop and charge it at once. Battery is being charged. A battery is an expendable supply, so when using it over a long time, the capacity/battery life is shortened.
-
Page 44: Windows Help And Troubleshooting
6. Windows Help and Troubleshooting Troubleshooting This section describes some common problems and suggested solutions, and ways to recover your laptop from a crash. Be aware that the problems and solutions described here are meant only as a guide. They are not definitive problem solving techniques. - Page 45 Screen problems When I turn on the laptop, • If the screen is blank, make sure that: nothing appears on the - The AC adapter is connected to the laptop and screen. the power cord is plugged into a working electrical outlet.
- Page 46 Display problem The screen is blank. • Do the following: - Charging your system and press the F7 function key to make the screen brighter. - Press the power button to resume from sleep mode. - If the problem persists, follow the solution in the next problem Incorrect characters appear •...
-
Page 47: Specification
7. Specification Processor & Graphics • Intel® SOC Celeron® Processor: N4100 • Intel® UHD Graphics600, Frequency up to 650/700 • Intel® SOC Pentium® Processor:N5000 • Intel® UHD Graphics605, Frequency up to 750 MHz Memory • LPDDR4 up to 2400MT/s • Storage •... - Page 48 GNSS (Optional) • Multi-standard GPS/Beidou/Glonass navigation system supported. • SBAS supported (at user request) • AGPS supported (at user request) • 11.6” TN 1366 x 768 • Anti-Glare Touchscreen • 10-points multi-touch, GC type • Capacitive multi-touch • Support palm rejection Camera •...
- Page 49 OS (Optional) • Windows 10 19H1(64bit) • Linux Power adapter • USB Type-c plug • DC output: 40W/19V/2.1A • Input Voltage: 100–240VAC Nominal • Input Frequency: 50–60Hz. Certification • EMC: - FCC/CE • - CE (Wi-Fi only for Europe) - FCC (LTE by request) •...
- Page 50 Notes...
- Page 51 Notes...
- Page 52 DynaTech Inh. Mirco Neubert e.K. Am Brand 4, 07580 Rückersdorf Germany www.dynatech.de Tel.: 036602 260-200 E-Mail: info@dynatech.de...
Need help?
Do you have a question about the scieneo. amplio VI and is the answer not in the manual?
Questions and answers