
Related Manuals for HOMEDEPOT 592-082

Summary of Contents for HOMEDEPOT 592-082
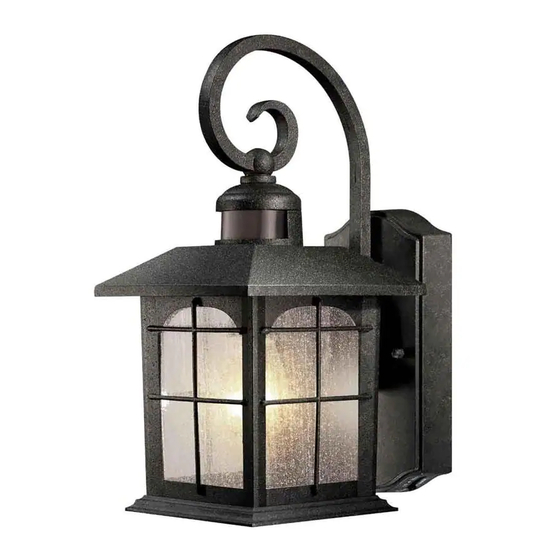
- Page 1 DECORATORS COLLECTION Exterior Wall Lantern with Motion Sensor SKU 592-082 (UPC 046335974449) (Aged Iron Finish) INSTRUCTION MANUAL HB7251MA-292 E/S Page 1...
-
Page 2: Specifications
100 W Incandescent or 26 W Compact Fluorescent QUESTIONS, PROBLEMS, MISSING PARTS: Before returning to your local Home Depot, please call our Customer Service Team at 1-800-986-3460 or visit www.homedepot.com/homedecorators. Please reference your SKU (592 082 Aged Iron Finish fixture) or UPC (046335974449). - Page 3 2.CONSTULT A QUALIFIED ELECTRICIAN IF YOU HAVE ANY ELECTRICAL QUESTIONS. 3.If you have any non-electrical questions about this fixture, please contact our Customer Service Team at 1-800-986-3460 or visit www.homedepot.com/homedecorators. Please reference your SKU (592 082 Aged Iron Finish fixture) or UPC (046335974449).
- Page 4 PARTS INCLUDED (parts are not to scale): (2) Hood Screws (2) Hex Nuts (2) Fixture (2) Bracket Mounting Screws Mounting Screws (1) Main Fixture Body (2) Lock Nuts (1) Mounting Bracket (3) Wire Nuts Page 4...
-
Page 5: Selecting A Location
CAUTION: 1.Before starting installation of this fixture or removal of a previous fixture, disconnect the power by turning off the circuit breaker or by removing the fuse at the fuse box. 2.All electrical connections must be in accordance with local and National Electrical Code (N.E.C.) standards. - Page 6 Fig. 3 SENSOR SENSOR Least Sensitivity Best Sensitivity Page 6...
- Page 7 INSTALATION & ASSEMBLY: 1.Carefully unpack the fixture. Lay out all parts on a clean surface. 2.Thread the Fixture Mounting Screws (#6) into the provided holes of the Mounting Bracket (#7) as shown. Thread the Hex Nuts (#9) onto the Fixture Mounting Screws (#6), as shown.
- Page 8 INSTALLATION & ASSEMBLY (CONTINUED): Place the Wall Plate (#10) over the Outlet Box (#4) and onto the Fixture Mounting Screws (#6), and adjust the Fixture Mounting Screws (#6) until they protrude out from the Wall Plate (#10) 1/4". Remove the Wall Plate (#10) and secure the position of the Fixture Mounting Screws (#6) by tightening the Hex Nuts (#9) against the Mounting Bracket (#7).
-
Page 9: Operation
OPERATION: GETTING STARTED: After installing the fixture, slide the “TIMER” switch to “TEST”. Restore power at the circuit breaker and turn on your wall switch (if applicable). The light will turn on and remain on for approximately 5 seconds. Then the light will flash 3 times and then turn off. (If the “TIMER”... - Page 10 OPERATION (CONTINUED): NOTE: To make sure the above functions operate properly, always keep the wall switch in the “ON” position (include the daytime). MANUAL OVERRIDE: You may manually turn on the light from inside your home using the wall switch that controls your light fixture. This feature may be used during nighttime when the light is off, while the circuit is in the Motion Sensing Mode.
-
Page 11: Troubleshooting
TROUBLESHOOTING: SYMPTOM POSSIBLE CAUSE SOLUTION Turn on a switch or Wall switch or circuit breaker is off. circuit breaker. Test the light bulb in a Light bulb may be dead. known working light fixture. Tighten the light Light bulb is loose. bulb in the socket. -
Page 12: Product Maintenance
PRODUCT MAINTENANCE: 1.Disconnect power to the fixture by turning off the circuit breaker before any maintenance. 2.To clean the outside of the fixture, use a dry or slightly dampened clean cloth (use clean water, never a solvent) to wipe the glass and surface of the fixture. 3.To clean the inside of the fixture, first disconnect power to the fixture by turning off the circuit breaker or by removing the fuse at the fuse box. -
Page 13: Limited Warranty
LIMITED WARRANTY The manufacturer warrants this lighting fixture to be free from defects in materials and workmanship for a period of three (3) years from date of purchase. This warranty applies only to the original consumer purchaser and only to products used in normal use and service. - Page 14 DECORATORS COLLECTION Linterna de Pared para Exterior Con Sensor de Movimiento SKU 592-082 (UPC 046335974449) (Acabado de Hierro Envejecido) MANUAL DE INSTRUCCIONES HB7251MA-292 E/S Page 14...
-
Page 15: Especificaciones
Fluorescente compacto PRGUNTAS, PROBLEMAS, PIEZAS FALTANTES: Antes de regresar a su tienda local de Home Depot, llame a nuestro Servicio al Cliente al 1-800-986-3460 o visite www.homedepot.com/homedecorators. Por favor, referir a SKU (592 082 Lámpara con Acabado de Hierro Envejecido) o UPC (046335974449). - Page 16 3.Si usted tiene cualquier pregunta no eléctrica de esta lámpara, por favor póngase en contacto con nuestro Servicio al Cliente al 1-800-986- 3460 o visite www.homedepot.com/homedecorators. Por favor, referir a SKU (592 082, 1000 327 721 Lámpara con Acabado de Hierro Envejecido) o UPC (046335974449).
- Page 17 PIEZAS INCLUIDAS (partes no están a escala): (2) Tornillos de la Jaula (2) Tureca Hexagonales (2) Tornillos del (2) Tornillos para (1) Cuerpo de la luminaria Montar el Luminario Soporte de Montaje (1) Ménsula de Montaje (3) Tuerca para Cables (2) Tuercas Decorativas Page 17...
- Page 18 PRECAUCIÓN: 1.Antes de iniciar la instalación de este luminario o la remoción de un luminario anterior, desconecte la energía al apagar el disyuntor de circuitos o quitar el fusible en la caja de fusibles. 2.Todas las conexiones eléctricas deben realizarse de conformidad con las normas locales y del Código Eléctrico Nacional (N.E.C.por sus siglas en ingles).
- Page 19 ELIJA UNA UBICACIÓN (CONTINUADO): 1. Cuando elija una ubicación, considere que el sensor de movimiento es más sensible al movimiento a través de su área de cobertura y menos sensible hacia y de el sensor de movimiento (Fig. 3). Fig. 3 SENSOR SENSOR Menor Sensiblidad...
-
Page 20: Instalación Y Ensamblaje
INSTALACIÓN Y ENSAMBLAJE: 1.Desempaque el luminario con cuidado. Coloque todas las superficies sobre una superficie limpia. 2.Enrosque los tornillos para montar el luminario (#6) en los agujeros provistos en la ménsula de montaje (#7), como se muestra. Enrosque las tuercas hexagonales (#9) en los tornillos para montar el luminario (#6), como se muestra. - Page 21 INSTALACIÓN Y ENSAMBLAJE (cont.): 5. Coloque la placa de pared (#10) cobre la caja de distribución (#4) y en los tornillos para montar el luminario (#6) y ajuste los tornillos para montar el luminario (#6) hasta que sobresalgan ¼” de la palca de pared (#10). Quite la placa de pared (#10) y asegure la posición de los tornillos para montar el luminario (#6) al apretar las tuercas hexagonales (#9) contra la ménsula de montaje (#7).
-
Page 22: Operación
OPERACIÓN: INICIO: Después de instalar el luminario, deslice el interruptor del “CRONÓMETRO” a la posición de “PRUEBA”. Restaure la energía eléctrica en el disyuntor de circuitos y encienda el interruptor de pared (si aplica). La luz encenderá y permanecerá así por 5 segundos aprox. Después parpadeará 3 veces y se apagará. - Page 23 OPERACIÓN (CONTINUADO): NOTA: Para asegurar que las funciones anteriores operen correctamente, siempre conserve el interruptor de pared en la posición de “ENCENDIDO” (incluso durante el día). ENCENDIDO/APAGADO MANUAL: Es probable que quieran encender manualmente la luz desde el interior de su hogar utilizando el interruptor de pared que controla su luminario.
-
Page 24: Solución De Problemas
SOLUCIÓN DE PROBLEMAS: SÍNTOMA CAUSA POSIBLE SOLUCIÓN El interruptor de pared o circuito está Encienda el interruptor o el apagado. disyuntor de circuitos. Pruebe el foco en un luminario que El foco puede estar fundido. sí esté funcionando. Cambie el foco. El foco está... - Page 25 MANTENIMIENTO DE PRODUCTOS: Interrumpa la energía eléctrica que va al luminario al apagar el disyuntor de circuitos antes de realizar cualquier mantenimiento. Para limpiar el exterior de la luminaria, utilice una tela seca o ligeramente húmeda (use agua limpia, nuca un disolvente) para limpiar la superficie de la luminaria.
-
Page 26: Garantía Limitada
GARANTÍA LIMITADA El fabricante garantiza que este accesorio de iluminación a estar libre de defectos en materiales y mano de obra durante un periodo de tres (3) años a partir de la fecha de compra. Esta garantía se aplica solo al comprador original y solo a los productos utilizados en condiciones normales de uso y servicio.
Need help?
Do you have a question about the 592-082 and is the answer not in the manual?
Questions and answers