
Related Manuals for Twelve South HoverBar Duo

Summary of Contents for Twelve South HoverBar Duo
- Page 1 HoverBar Duo owner’s guide Table of Contents What’s in the box Attach iPad Clip Choose Desk Stand or Shelf Clamp Clipping in iPad Adjusting and Tightening HoverBar Installing Shelf Clamp Tips, Tricks and New Ideas View the instructional video at:...
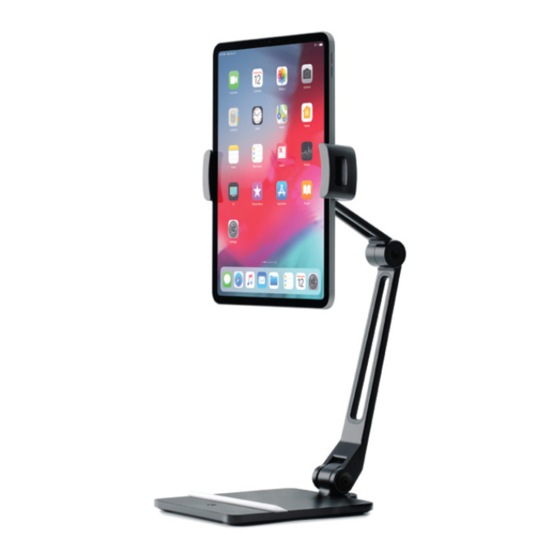
- Page 2 What’s in the Box iPad Clip Desk Base with attached arm Shelf Clamp Large Hex Wrench (4MM) Small Hex Wrench (3MM) Shelf Clamp Collar Getting Started Attach iPad Clip Position Locking Washer at the end of HoverBar Arm and align with the back of the iPad Clip Hand tighten iPad Clip onto end of iPad Arm with Locking Washer...
- Page 3 Getting Started Choose Desk Stand or Shelf Clamp HoverBar includes both a freestanding, weighted Desk Stand and a Shelf Clamp. The Desk Stand comes pre-attached and is the easiest to move from place to place. The Shelf Clamp attaches the HoverBar Arm securely to a shelf or desk edge up to 1.5-inches thick for display in any orientation.
- Page 4 Adjusting and Tightening HoverBar All moving HoverBar joints can be adjusted and tightened as needed or desired. All hinges use one of two Hex Wrenches included with HoverBar. iPad Clip Adjustment Knob Loosen to adjust the orientation and angle of iPad. Note: Utilize notch opposite the adjustment knob to position iPad parallel to HoverBar Arm.
- Page 5 Desk Stand Shelf Clamp Place Shelf Clamp Components Components onto HoverBar Arm and rotate until Locking Plate nests into the three posts HoverBar Arm of the arm Upper Collar Replace and tighten Arm Attachment Bolt Desk Stand Base Shelf Clamp Lower Collar Locking Plate Replace adjustable...
- Page 6 HoverBar and iPad - with an external keyboard & trackpad The latest iPadOS lets you use external keyboards and pointing devices (such as a TrackPad or mouse) to control iPad. With iPad control on your desk - you are now free to position iPad anywhere you like with HoverBar.
Need help?
Do you have a question about the HoverBar Duo and is the answer not in the manual?
Questions and answers