Advertisement
INSTRUCCIONES DE ENSAMBLE
ASSEMBLY INSTRUCTIONS
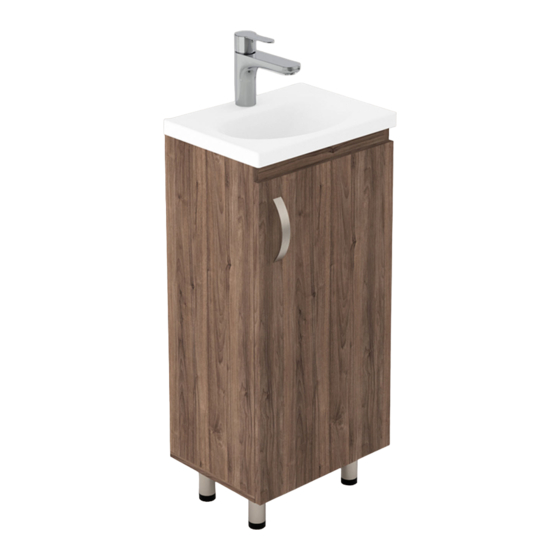
Instrucciones de Instalación:Mueble Eco piso lvm 40 x 30 cm / mueble para el baño
I n s t a l a t i o n I n s t r u c t i o n s : ECO CABINET 16" x 12" / bathroom sink cabinet
RECOMENDACIONES PREVIAS / Previous recommendations:
Si las paredes donde va a ubicar el mueble son en drywall, debe
adquirir chazos y tornillos especiales para su instalación.
If the walls where you are locating the cabinet are in drywall, you must
purchase special ramplug and screws for installation.
No golpee ni martille todo el mueble, sólo donde se le indica.
Do not strike or hammer all the cabinet, only where directed.
No pinte ni barnice el mueble.
Do not paint or varnish the cabinet.
No arrastre ni se suba al mueble, si necesita moverlo por favor
levántelo.
Do not drag or stand on the cabinet, if you need to move it please lift up.
Lea detenidamente y siga en orden consecutivo las instrucciones
de armado.
Read carefully and follow in sequence the assembly instructions.
No expongas el mueble a la intemperie, ni al calor.
Do not expose the cabinet to the outdoors or the heat.
IMPORTANTE:
Antes de empezar a ensamblar el mueble, lea detenidamente las instrucciones.
Pre-ensamble el mueble sobre su caja, para no rayarlos. Si falta una parte o
piensa que esta defectuosa no devuelva el mueble al almacén; le agradecemos
llamar al (5-74) 444 17 71, o comuniquese con su asesor principal, tambien nos
pueden escribir a servicioalcliente@firplak.com.
Lote / Lot
IMPORTANT:
Before you start to assemble the cabinet, please read the
instructions. Pre assembly the cabinet on its box, to prevent scratches.
If a part is missing or demaged, do not return the furniture to the store,
please call the (5-74) 444 17 71 or contact your sales asisstant. also you
can write to servicioalcliente@firplak.com.
Advertisement
Table of Contents

Related Manuals for firplak ECO CABINET


Summary of Contents for firplak ECO CABINET
- Page 1 Instrucciones de Instalación:Mueble Eco piso lvm 40 x 30 cm / mueble para el baño I n s t a l a t i o n I n s t r u c t i o n s : ECO CABINET 16” x 12” / bathroom sink cabinet...
- Page 2 Tenga precaución al abrir la bolsa de herrajes de no perder ningún elemento. Compruebe 1. Identificación de las partes si el contenido de las piezas es el correcto. Parts identification Be carefull opening the screw bag so you do not lose any. Chek if the number of screws is right.
- Page 3 2. Preparación de las partes Preparation of the parts Se recomienda preparar las partes del mueble sobre la caja o una superficie lisa para no rayarlo. Is recommended to prepare the parts of the cabinet on the box or on a flat surface to not scratcha it.
- Page 4 3. Preparación para ensamblar Assembly steps Se recomienda armar el mueble sobre la caja o una superficie lisa para no rayarlo. Is recommended to assemble the product top of the box or on a flat surface to not scratcha it. Para este paso necesitarás: For this step you will need: Herrajes...
- Page 5 A. Para instalar la puerta al mueble se ensamblará las bisagras. A. To install the door to the furniture, the hinges. B. Nivelar: Para nivelar la puerta parte D cuadrándola al nivel deseado, afloje el tornillo de la bisagra, como lo muestra el detalle. Cuando esté en el lugar indicado, asegure los tornillos bisagra.
- Page 6 C. Ajuste de profundidad: le permite llevar la parte D hacia dentro o hacia afuera, aflojando el tornillo de la bisagra, como lo muestra el detalle. C. Depth adjustment: allows you to move the G part in or out, loosening the hinge screw as shown in detail.
- Page 7 Mueble armado completamente IMPORTANTE: Tenga en cuenta que las paredes Fully assembled cabinet Mueble deben ser sólidas, de cemento / ladrillo. Cabinet Si va a instalar el mueble sobre paredes de Drywall (paredes secas), debe utilizar chazos y tornillo de expansión metálico especial para drywall.
- Page 8 Al terminar de armar desprenda los adhesivos (en caso de que queden residuos de pegante, limpie la superficie con alcohol). When you finish assembling, remove the adhesives (in case there is glue residue, clean the surface with alcohol). 4. Cuidados y mantenimiento Care and maintenance Cuidados y mantenimiento para los Care and maintenance for cabinet...
Need help?
Do you have a question about the ECO CABINET and is the answer not in the manual?
Questions and answers