Advertisement
Quick Links
Cobalt
Analog
OWNERS
MANUAL
CB iP Analog -A-0314
Installing the Cobalt iP Analog turnout motor
First, assemble your Cobalt ip Analog turnout motor: The throw
arm is already pre-centred to make this easy for you.
(1) Insert the fulcrum bar into the slides (The horizontal part of the bracket with the
holes can be either at the top or bottom . We usually have it at the bottom).
(2) Now add the throw wire, passing the straight end upwards through the centre hole
of the adjustable fulcrum bar and then inserting the bent end of the wire into
the smaller top hole on the end of the throw arm.
Secure the throw wire in place with the washer head screw provided.
(3) Add the pre-cut self adhesive foam pad to the top of the Cobat iP Analog
motor (leave the protective top on the pad until ready to install)
Now we are ready for the installation.
As well as the pre-cut foam pad, we include mounting screws with every
Cobalt iP Analog turnout motor so all you will need are basic tools.
You will need a screwdriver and a drill, plus both 1.5mm (for screw pilot
holes) and 10mm drills for the throw-wire installation. (The exact drill sizing
you use is not critical so close or imperial sized drills will be OK). If the
baseboard is over 20mm/0.75" thick, increase the larger drill size.
(1) Mark the position of the hole in the turnout tie-bar with the turnout blades
held at their mid-way position. This hole may be at the centre or at the end
of the tie-bar.
(2) Make a pilot hole at that mark, then drill right through the baseboard
using the larger drill bit. Be sure to keep the drill vertical as you drill.
(It is also good practice to use a countersink bit to clean up the hole top and
bottom a little after drilling)
(3) Remove the top protective layer from the self adhesive pad and from
below the baseboard, insert the throw wire into the hole in the tie bar. When
you are sure that your Cobalt iP Analog is centralised relative to the hole,
and aligned properly along the turnouts axis, press it into position on your
baseboard. (it can face either way). Test operation.
(4) Adjust the fulcrum bar as needed by raising or lowering it. Lowering it
increases throw & blade pressure. Raising it reduces throw & pressure.
(5) When happy with operation, add a small drop of PVA to the case where it
meets the fulcrum bar to hold it in position.
(6) Use screws provided to screw Cobalt iP Analog permanently in position.
Owners Manual
iP
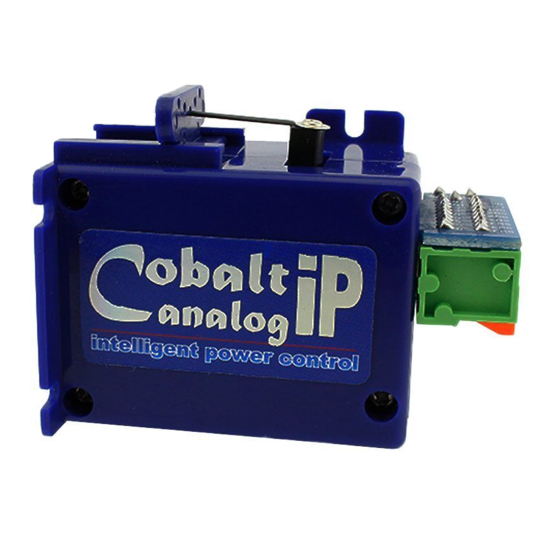
Cobalt iP Analog turnout motor.
iP stands for "Intelligent power".
The DCCconcepts Cobalt iP Analog turnout motor includes a
sophisticated internal electronic control system that interactively
adapts itself to a wide range of power supply voltages. Cobalt
iP Analog also manages its own power usage, montoring need
and only drawing power only when it is needed. Cobalt ip
analog is comfortable with drive voltages from 7 to 23 volts and
it is usable with all scales, from the diminutive T scale, to Z, N,
TT, HO, OO, EM, P4, S, O & G.
Cobalt iP Analog is easy to install, quiet and very reliable. It
has three inbuilt SPDT switches - One is directly "Diode linked"
to the drive power inputs for computer IO (feedback) or other
low power applications. The other SPDT switches are fully
independent with higher power handling for frog power control
or any other switching needs you may have. This makes
DCCconcepts ip analog incredibly versatile and the answer to
almost any conceivable layout wiring need!
Cobalt iP Analog can be powered by any voltage between 7 and
23v DC and it is changed by reversing the polarity of the DC
power. Interactive power management ensures that your Cobalt
iP Analog is also very comfortable with larger scales that have
higher accessory voltage power supplies or DCC accessory
decoders with higher output voltages.
Please read all of this manual before you install your Cobalt iP
Analog. It contains lots of detailed information you'll need.
DCCconcepts' guarantees and warranties are always made in respect of the orig-
inal owner of the products. While our first priority is to always be sure that users
of our products are given the best possible service we do also reserve the right to
request proof of purchase so we can properly establish that you were the original
purchaser and user of the product.
DCCconcepts use the best quality materials, thoroughly testing each and every
Cobalt iP Analog
have no hesitation in providing you with the best warranty possible.
Simple promises only need simple words:
If your Cobalt iP Analog ever fails or needs service when it is being used
under fair and reasonable conditions we will repair/replace it at no charge.
We offer this guarantee to you for as long as you own it.
Cobalt iP Analog turnout motor Specifications
Dimensions:
Body only: 28mm x 38mm x 52mm deep
Top overall inc Fulcrum and tabs: 40mm x 45mm
Depth inc soldering-free connectors: 68mm
Power:
7~23v DC. Drive static <5mA, active average <40mA
Connection:
9 way spring terminals. Wire diameter up to 32x.2 or 18g.
Ideal .16x.2 or 20g. Minimum 7x.2 or 24g
Control:
Change turnout by reversing polarity of DC voltage. Use
SPDT switch & DCCconcepts PSU-2, DC supply plus DPDT
switches. DCCconcepts switch packs are economical and
include both switches and a panel LED selection.
DCC/Digital:
Use with our DCCconcepts ADfx-2 or ADfx8 decoders for
the best overall performance. If you will use other brands
pre-check their performance. (Cobalt iP Analog draws very
little, but some brands are actually very weak).
Cobalt iP Analog Life-time Warranty
motor multiple times prior to packaging them for sale and so we
Cobalt turnout motors and the Co-
balt accessory range are designed
& manufactured by
DCCconcepts Ltd.
salesuk@DCCconcepts.com
www.DCCconcepts.com
20181216
Advertisement

Related Manuals for DCCconcepts Cobalt IP Analog

Summary of Contents for DCCconcepts Cobalt IP Analog
- Page 1 (3) Remove the top protective layer from the self adhesive pad and from If your Cobalt iP Analog ever fails or needs service when it is being used below the baseboard, insert the throw wire into the hole in the tie bar. When under fair and reasonable conditions we will repair/replace it at no charge.
- Page 2 Right (R) DCCconcepts AD2fx and AD8fx Decoders have enough power to change Cobalt iP Analog has a convenient “direction change switch” right on the several Cobalt plus new features including optional 1 or 2 button control PCB, so if your computer or layout operations need you to reverse the AND direct computer IO or feedback.
Need help?
Do you have a question about the Cobalt IP Analog and is the answer not in the manual?
Questions and answers