Table of Contents
Advertisement
Quick Links
Advertisement
Table of Contents

Summary of Contents for Valco Cincinnati VCX OT-120 FlexosealPro 2-Corrugated
- Page 1 VCX OT-120 VCX OT-120 VCX OT-120 VCX OT-120 VCX OT-120 FlexosealPro 2 - Corrugated FlexosealPro 2 - Corrugated FlexosealPro 2 - Corrugated FlexosealPro 2 - Corrugated FlexosealPro 2 - Corrugated Manual Number: MC091 Release Date: 3/2018 Version: C008...
- Page 2 Cincinnati, Inc. The information in this manual is furnished for educational purposes only, is subject to change without notice, and should not be construed as a commitment by Valco Cincinnati, Inc. This manual written and designed at Valco Cincinnati, Inc., 411 Circle Freeway Drive, Cincinnati, Ohio 45246.
- Page 3 Declaration of Conformity Declaration of Conformity Declaration of Conformity (According to EN 45014) Valco Melton Manufacturer: A division of Valco Cincinnati, Incorporated 411 Circle Freeway Drive Cincinnati, OH 45246 Melton S.L.U. Valco Cincinnati, Ltd. Authorized Representatives in Europe: Pol. Industrial...
-
Page 4: Table Of Contents
Valve Connections ..........................3-24 Scanner Connections ......................... 3-24 EPC 2 Connection ..........................3-25 Scanner Junction Box (E-Box) Port ....................3-27 ValveJunction Box (E-Box) Port ......................3-27 OT-120 Touchscreen ....................3-29 Mounting Bracket for OT-120 Control ..................3-32 Valco Cincinnati, Inc. TOC-1... - Page 5 Encoder Setup ......................5-19 Jam Detection Menu Button .................. 5-21 Configure the Inspection Sensor(s) ..............5-23 Exit and Shutdown ....................5-27 Section 6 - Customize the Settings ....... 6-1 Sensor Diagnostics ....................6-1 Inspection Sensor Tolerance Setup ................ 6-3 TOC-2 Valco Cincinnati, Inc.
- Page 6 Valve Cables ..........................7-12 Section 8 - Warranty............8-1 Warranty Information ....................8-1 Cold Glue Equipment and Electronic Controls ............... 8-1 Hot Melt Units, Hoses, Valves, Guns, and Related Equipment ..........8-1 Section 9 - Service ............9-1 Valco Cincinnati, Inc. TOC-3...
- Page 7 PCM4 Monitor Commands ..................A-1 ICM4 Monitor Commands ..................A-2 Appendix B - Diagnostics ..........B-1 Encoder Diagnostics ....................B-1 Scanner Diagnostics ....................B-2 Appendix C - Electrical Diagram ........C-1 Electric Wiring for VCX w/ Tipsealer ............... C-1 TOC-4 Valco Cincinnati, Inc.
-
Page 8: Section 1 - Introduction
This manual provides the information necessary to setup, maintain, and troubleshoot the VCX Control system. A parts list with options is also included. Valco Cincinnati, Inc. recommends reading this manual before beginning to use the VCX Control system. Valco Cincinnati, Inc. -
Page 9: Section 2 - Safety And Use
SECTION 2 - SAFETY AND USE SECTION 2 - SAFETY AND USE SECTION 2 - SAFETY AND USE SECTION 2 - SAFETY AND USE SECTION 2 - SAFETY AND USE Warning! Warning! Warning! Warning! Warning! Read and follow all safety precautions, warnings, Read cautions, and other recommendations in this manual. - Page 10 Section 2 - Safety Information MC091 - VCX OT-120 FlexosealPro 2 - Corrugated This symbol indicates the need to Unplug/Disconnect All Power Unplug/Disconnect All Power Unplug/Disconnect All Power Unplug/Disconnect All Power Unplug/Disconnect All Power Symbols - Continued Sources Sources Sources Sources Sources and to let them de-energize before attempting any type of work or maintenance.
-
Page 11: Owner Responsibilities
MC091 - VCX OT-120 FlexosealPro 2 - Corrugated Section 2 - Safety Information The owner of the equipment is under obligation to manage all safety Owner information. Some examples include: Responsibilities • Examine all safety materials and documents as well as jurisdictional laws and make certain all laws, recommendations, and other safety/hazard laws, certification requirements, training, and instructions are followed and kept current. -
Page 12: Limitations Of Use
Section 2 - Safety Information MC091 - VCX OT-120 FlexosealPro 2 - Corrugated Read this document and all information regarding the equipment before Limitations of handling the equipment. The intended use of the equipment is stated in Section 1 of this manual. Do not use this equipment for anything other than its intended use. -
Page 13: Shut Down Safety Information
MC091 - VCX OT-120 FlexosealPro 2 - Corrugated Section 2 - Safety Information Valco Melton hot melt units, cold glue units, controllers, inspection systems Shut Down and all related accessories have the following universal safety precautions (this is not intended to be an exhaustive list; follow all instructions and safety Safety precautions for the specific type of equipment involved): Information... -
Page 14: Hot Melt Specific General Safety Information
Section 2 - Safety Information MC091 - VCX OT-120 FlexosealPro 2 - Corrugated Valco Melton hot melt units have the following universal safety precautions in in in in in Hot Melt addition to all other universal precautions previously mentioned addition to all other universal precautions previously mentioned addition to all other universal precautions previously mentioned (this is not addition to all other universal precautions previously mentioned addition to all other universal precautions previously mentioned... -
Page 15: What To Do If Contact With Hot Adhesive Occurs
MC091 - VCX OT-120 FlexosealPro 2 - Corrugated Section 2 - Safety Information If hot adhesive comes in contact with the skin, , , , , do the following: What to Do if Contact Warning! Warning! Warning! Do not attempt to remove heated hot melt adhesive from Warning! Warning! with Hot Adhesive... -
Page 16: What To Do If Adhesive-Related Fire Or Explosion Occurs
Section 2 - Safety Information MC091 - VCX OT-120 FlexosealPro 2 - Corrugated During the heating and melting process, the surface of the adhesive will be exposed to air. The mixture of polymer fumes and air can catch fire if the hot What to Do if melt is overheated. -
Page 17: Hose Safety Information
MC091 - VCX OT-120 FlexosealPro 2 - Corrugated Section 2 - Safety Information Hose Safety Do not Do not Do not use bindings, wire ties, or unapproved Do not Do not Information fasteners around the hoses. Do use approved wrapping (P/N KAP0434), making sure the wrapping is slightly snug but not tight. - Page 18 Section 2 - Safety Information MC091 - VCX OT-120 FlexosealPro 2 - Corrugated Hose Safety Information - Do not Do not Do not Do not Do not allow hoses to rub against Continued objects or to come into contact with sharp edges or points.
-
Page 19: Section 3 - Basic Features
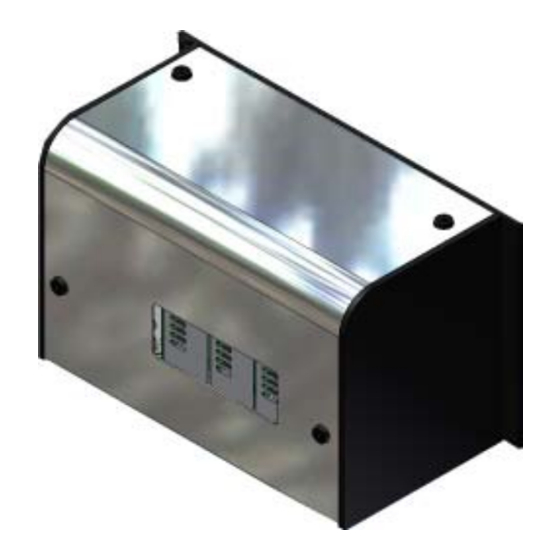
Always place the Tracking Control Module(s), if used, in the slot(s) on the right. *Do NOT carry the entire control by the cover handle. This handle is only used when attaching and removing the cover. Figure 3-1. VCX Control Valco Cincinnati, Inc. -
Page 20: Power Supply Module
Section 3 - Basic Features MC091 - VCX OT-120 FlexosealPro 2 - Corrugated Power Supply Module 230/115 VAC Valco Cincinnati, Inc. -
Page 21: Terminal Port
Power On/Off Switch CAN Switch Power Supply Module Features Fuses: Number Fuse Type Part No. Main Fuse (F1&F2) 6.3A 085xx221 Fuse Power Supply (F5); 085xx220 Pump/Alarm Fuse Power Supply (F4); 085xx220 Encoder Fuse Power Supply (F3); 085xx220 Terminal Valco Cincinnati, Inc. - Page 22 Power Supply Module Connector Pinouts Pin # Description CAN - Low CAN - High Terminal Port Terminal Port Terminal Port Terminal Port Terminal Port P Button + P Button - Remote Out + Pinout Drawing for Connector 7 Valco Cincinnati, Inc.
- Page 23 Control Link Port Control Link Port Control Link Port Connector 8 Control Link Port Pin # Description CAN - Low CAN - Ground CAN - High Remote – Out + CAN +5V Pinout Drawing for Connector 8 Valco Cincinnati, Inc.
-
Page 24: Encoder Connections - Male/Output
Encoder Connections Male/Output Male/Output Male/Output Male/Output Male/Output Pin # Description Color Ground Black A Signal Orange +24V/+12V B Signal Yellow Z Signal Brown /Z Signal Violet /B Signal Blue /A Signal Green Pinout Drawing for Connector 9 Valco Cincinnati, Inc. -
Page 25: Encoder Connections - Female/Input
Green Pinout Drawing for Connector 10 Pump Connection Pump Connection Pump Connection Pump Connection Pump Connection Connector Pump Connection Pin # Description Color 24VDC Brown N.C. White 24VDC Blue N.C. Black Shield/Gray Pinout Drawing for Connector 11 Valco Cincinnati, Inc. -
Page 26: Beacon (Alarm) Connection
Beacon (Alarm) Connection Beacon (Alarm) Connection Beacon (Alarm) Connection Beacon (Alarm) Connection Connector Beacon/Alarm Connection Pin # Description Color Ground Brown Light (Glue) White Light (Jam) Blue Buzzer Black Light (LLD) Shield/Gray Pinout Drawing for Connector 12 Valco Cincinnati, Inc. -
Page 27: Relay Feed Stop Connection
Relay Machine Stop Relay Machine Stop Relay Machine Stop Relay Machine Stop Relay Machine Stop Relay Machine Stop Connection Connection Connection Connection Connection Connection Pin # Description Color Brown N.C. White N.O. Blue Pinout Drawing for Connector 14 Valco Cincinnati, Inc. -
Page 28: Inspection Control Module (Icm)
Section 3 - Basic Features MC091 - VCX OT-120 FlexosealPro 2 - Corrugated Inspection Control Module (ICM) Modules 1-4 15a 15b 3-10 Valco Cincinnati, Inc. - Page 29 Sensor 3 Sensor 4 The modules available are: The modules available are: The modules available are: The modules available are: The modules available are: AS 601 151xx501 AS 301 151xx512 AS CGS 151xx460 Digital 151xx539 Microwave 151xx507 Valco Cincinnati, Inc. 3-11...
-
Page 30: Port
Marking Valve Connection Sensor Connection (1-2) Sensor Connection (3-4) Inspection Control Module Features Fuses: Number Fuse Type Part No. Fuse Power Supply - Sensors (F1) 3.15A 085xx208 Fuse Power Supply - Marking Valve (F2) 3.15A 085xx208 3-12 Valco Cincinnati, Inc. -
Page 31: Marking Valve Connection
Marking Valve Connection Marking Valve Connection Marking Valve Connection Marking Valve Connection Marking Valve Connection Marking Valve Connection Pin # Description Color Coil Brown Coil White Purge Blue Purge Black PE (Shield) Grey Pinout Drawing for Connector 12 Valco Cincinnati, Inc. 3-13... -
Page 32: Scanner Connection
ST. LED OUT 1 (NPN/PNP) +12V Green AN. GND AN. GND IN 2 (NPN/PNP) Yellow +12V +24V +24V +12V Grey -12V -12V OUT 2 (NPN/PNP) -12V Pink IN 4 (NPN/PNP) Blue Pinout Drawing for Connector 11 3-14 Valco Cincinnati, Inc. -
Page 33: Sensors 1-2 (J-Box) Connections
Sensor 1 - 8 Sensor 2 – 1 Sensor 2 – 3 Sensor 2 – 6 Sensor 2 – 7 Sensor 2 – 8 Pinout Drawing for Connector 13 For signal description reference table “Connector 11” Valco Cincinnati, Inc. 3-15... -
Page 34: Sensors 3-4 (J-Box) Connections
Sensor 3 – 8 Sensor 4 – 1 Sensor 4 – 3 Sensor 4 – 6 Sensor 4 – 7 Sensor 4 – 8 Pinout Drawing for Connector 14 For signal description reference table “Connector 11” 3-16 Valco Cincinnati, Inc. -
Page 35: Pattern Control Module (Pcm; Tri-Valve Version) (074Xx054)
MC091 - VCX OT-120 FlexosealPro 2 - Corrugated Section 3 - Basic Features Pattern Control Module (PCM; Tri-Valve Version) (074xx054) PCM-4 FUSES 1f (Fuse) Exhaust Valco Cincinnati, Inc. 3-17... - Page 36 F u se P o we r S u pp ly – Va lve 4 (F 5 ) 3 .1 5 A 0 8 5 xx2 08 F u se P o we r S u pp ly – M a n ifo ld 0 8 5 xx2 2 0 3-18 Valco Cincinnati, Inc.
-
Page 37: Epc2 Connection
Connector 14 Feed Enable Connection Feed Enable Connection Feed Enable Connection Feed Enable Connection Feed Enable Connection Feed Enable Connection Pin # Description Color +24V Brown White Ground Blue Black Shield Shield/Gray Pinout Drawing for Connector 14 Valco Cincinnati, Inc. 3-19... -
Page 38: Valve Connections (1-4)
P inout D raw ing for C onnector 10 Connector Valve Connections Valve Connection Valve Connection Valve Connection Valve Connection Valve Connection Pin # Description Color Coil Brown Coil White Purge Blue Purge Black PE (Shield) Green/Yellow Pinout Drawing for Connector 10 3-20 Valco Cincinnati, Inc. -
Page 39: Manifold Connections
Scanner1 - NPN Yellow Ext Purge Gray Auto/Man Pink Valve - 1 Blue Valve - Ground Valve - 2 Orange Valve - Ground Valve – 3 & 4 Black Valve - Ground Violet Pinout Drawing for Connector 11 Valco Cincinnati, Inc. 3-21... -
Page 40: Pattern Control Module (Pcm), Standard (074Xx043)
MC091 - VCX OT-120 FlexosealPro 2 - Corrugated Pattern Control Module (PCM), Standard (074xx043) 16a 16b 16c 16d 16e The bottom of the module may vary depending on the options and the style of the module. Two examples are illustrated at right. 3-22 Valco Cincinnati, Inc. - Page 41 Fuse Power Supply – Scanner, EPC, Purge (F1) 085xx220 Fuse Power Supply – Valve 1 (F2) 085xx220 Fuse Power Supply – Valve 2 (F3) 085xx220 Fuse Power Supply – Valve 3 (F4) 085xx220 Fuse Power Supply – Valve 4 (F5) 085xx220 Valco Cincinnati, Inc. 3-23...
-
Page 42: Valve Connections
Green/Yellow Pinout Drawing for Connector 10 Connector Trigger/Scanner Connections Scanner Connections Scanner Connections Scanner Connections Scanner Connections Scanner Connections Pin # Description Color +24V Brown White Ground Blue Black Shield Shield/Grey Pinout Drawing for Connector 11 3-24 Valco Cincinnati, Inc. -
Page 43: Epc 2 Connection
EPC 2 Connection EPC 2 Connection EPC 2 Connection EPC 2 Connection EPC 2 Connection Pin # Description Color +24V Brown OV (Signal) White Ground Blue 0-20 mA Black Shield Shield/Grey Pinout Drawing for Connector 12 Valco Cincinnati, Inc. 3-25... -
Page 44: Scanner Junction Box (E-Box) Port
Box) Port Box) Port Pin # Description Scanner 1 PNP Scanner 1 NPN Scanner 2 PNP Scanner 2 NPN Scanner 3 PNP Scanner 3 NPN Scanner 4 PNP Scanner 4 NPN Ground Pinout Drawing for Connector 14 3-26 Valco Cincinnati, Inc. - Page 45 Valve 2 – Coil + Valve 2 – Coil - Valve 4 – Coil + Valve 4 – Purge + Valve 4 – Purge - Valve 4 – Coil - Valve 3 – Coil + Valve 3 – Coil - Valco Cincinnati, Inc. 3-27...
-
Page 46: Valvejunction Box (E-Box) Port
Section 3 - Basic Features MC091 - VCX OT-120 FlexosealPro 2 - Corrugated Pinout Drawing for Connector 15 ValveJunction Box (E-Box) Port - Continued 3-28 Valco Cincinnati, Inc. -
Page 47: Ot-120 Touchscreen
MC091 - VCX OT-120 FlexosealPro 2 - Corrugated Section 3 - Basic Features OT-120 Touchscreen Valco Cincinnati, Inc. 3-29... - Page 48 (programmed) maximum number of consecutive faults is reached.) Power On LED Buttons: Number Name Clear Faults Button* Power On/Off Button *Clear Faults Button is available in MCU Mode. Connectors: Number Name COM Port CAN Port Power/Control Port Machine Communication 3-30 Valco Cincinnati, Inc.
- Page 49 Top Switch Function Label CAN 2 CAN 1 UNIT BACKL. BRIGHTN 120 OHM 120 OHM MCU/VCX AUTO/ON AUTO/FULL OFF/ON OFF/ON OT Cable, 2m: OT Cable, 2m: 029xx331 OT Cable, 2m: OT Cable, 2m: OT Cable, 2m: OT Cable Valco Cincinnati, Inc. 3-31...
- Page 50 Section 3 - Basic Features MC091 - VCX OT-120 FlexosealPro 2 - Corrugated The mounting bracket for the OT-120 allows the operator to swivel the control Mounting Bracket for for best viewing. OT-120 Control 3-32 Valco Cincinnati, Inc.
-
Page 51: Section 4 - Setup
Figure 4-1). Carefully remove the cover by grasping the cover “cup” handle and lifting the cover off of the unit. Reverse this procedure to replace the cover. Cover “Cup” Handle Latch Latch Figure 4-1. Remove the VCX Control Cover Valco Cincinnati, Inc. -
Page 52: Add Modules
Secure the module to the base rails with the screws located on both sides of the module (see Figure 4-2). Connect the appropriate cables/plugs on the back of the module. Reconnect the power cord and follow the powering up sequence. Screw Figure 4-2. Adding/Removing a Module Valco Cincinnati, Inc. -
Page 53: Remove Modules
Overall weight is dependent on the configuration. Base unit weight 33lb (15kg), Module weight @ 4.5lb (2kg) APPLICABLE INPUT VOLTAGES AND POWER CONSUMPTION VOLTAGE RANGE 100-125VAC and 200-245VAC (Automatic Selection) POWER CONSUMPTION 800W max. INPUTS AND OUTPUTS I/O is dependent on the configuration. Valco Cincinnati, Inc. -
Page 54: System Layout: 3-Valve, Non-Contact Boardrunner, W/Vcx
Section 4 - Setup MC091 - VCX OT-120 FlexosealPro 2 - Corrugated System Layout: 3-Valve, Non-Contact Boardrunner, w/VCX Exhaust Valco Cincinnati, Inc. -
Page 55: System Layout: 3-Valve, Contact Boardrunner, W/Vcx
MC091 - VCX OT-120 FlexosealPro 2 - Corrugated Section 4 - Setup System Layout: 3-Valve, Contact Boardrunner, w/VCX I O I OI Ex h aust Exhau s t Exhau s t Valco Cincinnati, Inc. -
Page 56: Bracket Mounting Pattern
Section 4 - Setup MC091 - VCX OT-120 FlexosealPro 2 - Corrugated Mounting pattern is enlarged to show Bracket detail. Mounting Pattern VCX Control Figure 4-4. VCX Control Valco Cincinnati, Inc. -
Page 57: Pump Bracket
MC091 - VCX OT-120 FlexosealPro 2 - Corrugated Section 4 - Setup Pump Bracket Figure 4-5. Pump Bracket Balancing Regulator Figure 4-6. Balancing Regulator Valco Cincinnati, Inc. -
Page 58: Linking Two Vcx Controls
VCX-1 will automatically be the control where valve or/and sensor #1 is located. Control Selector Switch: On “VCX -1” set to “1” (Default) On “VCX -2” set to “2” Cover Plate Figure 4-7. Control Selector Switch on the VCX Control Valco Cincinnati, Inc. - Page 59 120 Unit as shown in Figure 4-8. Reconnect the power. Perform the power up sequence. CAN Resistor “Off” “VCX-1” CAN Resistor “On” Control Link Cable “VCX-2” The encoders can be linked together as shown above. Figure 4-8. Connecting the Cables Valco Cincinnati, Inc.
-
Page 60: Ot-120 Setup - New Application
Configuration Button, located in the bottom, left-hand corner of the terminal screen. A numeric keypad will appear (Figure 4-11). The Screen may appear different, depending on your application Gate Sensor Figure 4-10. OT-120 Flexoseal Pro 2 Example 4-10 Valco Cincinnati, Inc. - Page 61 After the application closes, click on the “VLaunch” shortcut. From the VLaunch screen (Figure 4-13), scroll to and select the appropriate application from the list, and make sure “Do not show this message again” is checked. Press the Confirmation Button. Valco Cincinnati, Inc. 4-11...
-
Page 62: Ot Configuration Setup
MC091 - VCX OT-120 FlexosealPro 2 - Corrugated Checking for Preconfiguration - Continued Figure 4-13. OT-120 Application Selection After the application loads completely, click the locked OT Configuration Configuration Button. A numeric keypad will appear. Setup Figure 4-14. OT-120 Flexoseal Pro 2 Example 4-12 Valco Cincinnati, Inc. - Page 63 On the keypad (Figure 7), enter the pin “123” and press the OT Configuration Setup - Confirmation Button. Continued Figure 4-15. Keypad In the Settings Menu (Figure 4-16), click on the “Restore” Button. Restore Button Figure 4-16. Settings Menu Valco Cincinnati, Inc. 4-13...
- Page 64 Button, the terminal will shut down. On boot-up, the terminal should automatically start up in the correct application. This is the preferred method for setting the overall configurations. An older method is expalined below, for completeness, for setting Machine Communication. 4-14 Valco Cincinnati, Inc.
- Page 65 Access Configuration Files Button Figure 4-19. General Configurations Menu In the Configuration Files menu, change the Machine Communication codes as needed. Refer to the lists under “Machine Communication,” below, for the code descriptions. Figure 4-19. Configurations Files menu Valco Cincinnati, Inc. 4-15...
-
Page 66: Glue Stations
10 = Martin interface, inch mode (TCP/IP) 11 = MHI interface (9600/8/N/1)” 12 = MHI V2 Interface (9600/8/N/1) 13 = MHI V2 Interface, inch mode (9600/8/N/1) 14 = MHI V3 Interface (9600/8/N/1) 15 = MHI V3 Interface, inch mode (9600/8/N/1) 4-16 Valco Cincinnati, Inc. -
Page 67: Initialization Files Definitions
6 = BoardRunner FLP-3 7 = BoardRunner FLP-4 8 = Separated Valve NC Cycle number when the valves will switch to Jogg mode, after a restart. Valve Orientation 0 = Top Down 1 = Bottom Up Valco Cincinnati, Inc. 4-17... -
Page 68: Section 5 - Operation
Flip the power switch on the back of the VCX Power Supply Module to the “On” position (see Figure 5-2). Power Power Supply On/Off Module Slots for Modules Switch Figure 5-2. VCX Power Supply Module Power Switch Valco Cincinnati, Inc. -
Page 69: The Main Menu Screen
Setup Button Button Valve Number Delay Before Glue Line Current Pressure Glue Line Length Delay After Glue Line General Setup Button Exit Button Jam Detection Pressure Encoder Setup Button Setup Button Setup Button Figure 5-4. Main Menu Screen Valco Cincinnati, Inc. - Page 70 Valve On Countdown = 5 Current Pressure Displays the current glue pressure in percentage. Current Time and Date Displays the current day and time. Exit Button Power Down (Exit) the Flexoseal PRO system. Confirmation is necessary after pressing this button. Valco Cincinnati, Inc.
-
Page 71: Entering A Pin
Enter your PIN on the keypad and press the Confirmation Checkmark. The main Menu Screen will appear, but with your PIN level on the General Setup Button. Level Entered (Locked Icon) (Unlocked Icon) Figure 5-6. PIN level on the General Setup Button Valco Cincinnati, Inc. -
Page 72: Selecting A Glue Mode
Number of Patterns Edge Trigger (scan) Tab Trigger (scan) Auto Glue ON/OFF Glue Station 2 - No Tab Extended (Start/End) Glue Stations 1 & 2 Cancel Button Confirmation - No Tab Button Figure 5-8. Glue Mode Selection Screen Valco Cincinnati, Inc. - Page 73 Confirmation Button Press to enter the new settings. (No settings are changed until this is pressed.) Cancel Button Cancel the new settings and return to the previous settings. (Use before pressing the Confirmation Button.) Valco Cincinnati, Inc.
- Page 74 Screen will be enabled or disabled depending on the mode selected. For example, in the Glue Station 1 Standard Tab Mode, all buttons except the Extended Tab Start/End Values can be selected and changed. Edge Trigger (scan) selected Figure 5-10. Glue Mode Selection Screen Valco Cincinnati, Inc.
- Page 75 After a Mode Change, the Main Menu Screen may have different features and look slightly different. The example above shows the Leading Edge to Tab Measurement that is not shown when the mode is set on “Tab Trigger (Scan).” Valco Cincinnati, Inc.
-
Page 76: Multiple Pattern Gluing
Multiple On the Glue Mode Selection Screen, press the Glue Station 2 Pattern Gluing button. Pressing this button automatically sets the gluing mode to three (3) patterns. Glue Station 2 button Figure 5-12. Glue Mode Selection Screen Valco Cincinnati, Inc. -
Page 77: Enter Tab And Glue Lengths
Glue Line Length Value Delay After Gluing Length Value Figure 5-13. Main Menu Screen Increase value by 1 Increase value by 10 Decrease value by 10 Decrease value by 1 Confirm Cancel Backspace Figure 5-14. Numeric Keypad 5-10 Valco Cincinnati, Inc. -
Page 78: Configure The Glue Valves
Figure 5-15. Main Menu Screen Top-Down/Bottom-Up Switch Incremental Glue Line Length Valve On/Off Purge All Button Adjustment (affects all lines) Valve Number Jog/Stitch Configuration Button Valve Setup Button Valve Purge Button Confirmation Button Figure 5-16. Valve Configuration Screen Valco Cincinnati, Inc. 5-11... - Page 79 (for valve type) Valve Scanner Number Valve Type Number On Compensation Time (Ton) Off Compensation Time (Toff) Minimum Activation Time (Tmin) Minimum Speed Threshold (Vmin) Confirmation Correction Factor Cancel Button (CF) Button Figure 5-17. Valve Setup Screen 5-12 Valco Cincinnati, Inc.
- Page 80 Activation and compensation times might also require minor adjustment. After that initial setup, the system retains the settings in memory. When the Top-Down/Bottom-Up Switch (Figure 5-16) is used, the settings for the selected configuration will be applied automatically. Valco Cincinnati, Inc. 5-13...
-
Page 81: Jog/Stitch Configuration Button
Confirmation Button Press to enter the new settings. (No settings or values are entered until this is pressed.) Cancel Button Cancel the new settings and return to the previous settings. (Use before pressing the Confirmation Button.) 5-14 Valco Cincinnati, Inc. - Page 82 Jogging Mode Jogging Mode Jogging Mode Jogging Mode Jogging Mode Jogging mode is used for extremely low speeds. Jog-speed gluing is activated or deactivated using the V-jogging speed setting, input possibility of dot size, and gap length. Valco Cincinnati, Inc. 5-15...
-
Page 83: Pressure Setup
Press the Pressure Menu Button on the Main Menu Screen. The Pressure Menu opens. Pressure Setup Button Figure 5-19. Main Menu Screen Pressure Curve Current Valve Pressure Pressure Transducer Configuration Button Machine Stop (Idle) Pressure Decrease Increase Current Current Pressure Pressure Figure 5-20. Pressure Menu Screen 5-16 Valco Cincinnati, Inc. -
Page 84: Pressure Transducer Setup Dialog
Speed for each point on the curve Pressure Curve Pressure Transducer Number Number of points/ pressure curve Current Machine Pressure Stop (Idle) Pressure Confirmation Cancel Button Button Figure 5-21. Pressure Transducer Setup Dialog Valco Cincinnati, Inc. 5-17... - Page 85 Confirmation Button Press to enter the new settings. (No settings or values are entered until this is pressed.) Cancel Button Cancel the new settings and return to the previous settings. (Use before pressing the Confirmation Button.) 5-18 Valco Cincinnati, Inc.
-
Page 86: Encoder Setup
Encoder Pulse Value to change a value. When the keypad appears, enter the desired value and press the Confirmation Button on the keypad. Repeat Length Encoder Value Pulse Value Cancellation Confirmation Button Button Figure 5-23. Encoder Setup Screen Valco Cincinnati, Inc. 5-19... - Page 87 Confirmation Button Press to enter the new settings. (No settings or values are entered until this is pressed.) Cancel Button Cancel the new settings and return to the previous settings. (Use before pressing the Confirmation Button.) 5-20 Valco Cincinnati, Inc.
-
Page 88: Jam Detection Menu Button
Apply Button Fault Description Speed Products per Hour Date and Time Summary Bar Detection: Repeat Relay Dimension Length Scanner Detection: On/Off Speed Switch Threshold Setting Dimension Length/ Individual Scanner Length Settings Figure 5-25. Jam Detection Menu Valco Cincinnati, Inc. 5-21... - Page 89 When the scanner detects any product longer than this length, Length Settings it will signal a jam. Repeat Dimension Use to set the Dimension Length for all scanners that are on Length (must press the Apply Button for this to take effect) 5-22 Valco Cincinnati, Inc.
-
Page 90: Configure The Inspection Sensor(S)
User Selectable Mode Volume Tolerance End Tolerance Start Tolerance Inspection Enable Current Volume Target Glue Position Measured Glue Position Volume Enable Inspect Unglued Areas Learn Volume Setup Menu Diagnostics Tolerance Menu Figure 5-27. Inspection Sensor Configuration Screen Valco Cincinnati, Inc. 5-23... - Page 91 This is covered in FlexosealPRO2. Section 6 – Diagnostics Button Press to use the Diagnostics. This is covered in Customize the FlexosealPRO2. Confirmation Button Press to enter the new settings and go back to the Main Menu. 5-24 Valco Cincinnati, Inc.
- Page 92 The Inspection Sensor Configuration Screen appears. Trigger (currently non-selectable) Scan-Sensor Distance Glue Fault Light Enable Sensor-specific settings Glue Fault Buzzer Enable Consecutive Faults Num/Enable Correction Factor (Not Used) Minimum Speed (Vmin) Figure 5-29. Sensor Setup Screen Valco Cincinnati, Inc. 5-25...
- Page 93 Glue Fault Buzzer Enable Turns the Fault-Alert Buzzer on or off. Confirmation Button Press to enter the new settings and go back to the Main Menu. Cancel Button Cancel the new settings and return to the previous settings. 5-26 Valco Cincinnati, Inc.
-
Page 94: Exit And Shutdown
On the Confirmation Screen, press the Cancel Button to cancel the exit and go back to the previous screen, or press the Confirmation Button to exit the FlexosealPRO program. Confirmation Button Cancel Button Figure 5-31. Exit FlexosealPRO Confirmation Screen Valco Cincinnati, Inc. 5-27... - Page 95 Flip the power switch on the back of the VCX Power Supply Module to the “Off” position (see Figure 5-29). Power Power Supply On/Off Module Slots for Modules Switch Figure 5-33. VCX Power Supply Module Power Switch 5-28 Valco Cincinnati, Inc.
-
Page 96: Section 6 - Customize The Settings
Button. The Inspection Sensor Configuration Screen appears. Inspection Sensor Button Figure 6-1. Main Menu Screen On the Inspection Sensor Configuration Screen, press the Diagnostic Button. The Diagnostic Screen is displayed. Diagnostic Button Figure 6-2. Inspection Sensor Configuration Screen Valco Cincinnati, Inc. - Page 97 When you are done, press the Confirmation Button on the Sensor Diagnostics Screen (shown above). The Inspection Sensor Configuration Screen appears. Press the Confirmation Button on the Inspection Sensor Configuration Screen to return to the Main Menu Screen. Valco Cincinnati, Inc.
-
Page 98: Inspection Sensor Tolerance Setup
Button. The Inspection Sensor Configuration Screen appears. Tolerance Setup Inspection Sensor Button Figure 6-4. Main Menu Screen On the Inspection Sensor Configuration Screen, press the Tolerance Setup Button. The Tolerance Setup Screen is displayed. Tolerance Setup Button Figure 6-5. Inspection Sensor Configuration Screen Valco Cincinnati, Inc. - Page 99 Button Figure 6-6. Tolerance Setup Screen When the keypad appears, enter the desired value and press the keypad Confirmation Button. Continue this same process with each value until all changes are made. Confirmation Button Figure 6-7. Keypad Valco Cincinnati, Inc.
- Page 100 Press the Confirmation button to return to the Main Menu Screen. Tolerance Level Tolerance Level ‘Large’ Tolerance Level ‘Small’ ‘Medium’ Confirmation Button Figure 6-8. Inspection Sensor Configuration Screen Valco Cincinnati, Inc.
-
Page 101: Learn Volume Procedure
Turn it ON only when Volume Inspection switch is “ON” and the Inspection Sensor performing the system Switch is “ON.” Learn Glue Volume procedure. Inspection Sensor Switch is ON Volume Inspection Switch is ON Figure 6-10. Inspection Sensor Configuration Screen Valco Cincinnati, Inc. - Page 102 Figure 6-11. Inspection Sensor Configuration Screen When the Learn Volume Screen appears, follow the directions on the screen. “Start machine with gluing. Make sure glue volume is sufficient. Press the START button.” Start Learning Button Figure 6-12. Learn Volume Screen Valco Cincinnati, Inc.
- Page 103 Le arn Cance lled! req uest. When finished, press the Confirmation Button to return to the Inspection Sensor Configuration Screen. Press the Confirmation Button on the Inspection Sensor Configuration Screen to return to the Main Menu Screen. Valco Cincinnati, Inc.
-
Page 104: Device Status Information
On the Main Menu Screen, press the General Setup Button. The General Setup Screen appears. General Setup Button Figure 6-14. Main Menu Screen On the General Setup Screen, press the Access Parameters Button. The CAN Device Configuration Screen appears. Access Parameters Button Figure 6-15. General Setup Screen Valco Cincinnati, Inc. - Page 105 Figure 6-16. CAN Device Configuration Screen The Device Status Information Screen will appear. Version Information (MCP-12) Confirmation Button Figure 6-17. Device Status Information Screen When done, press the Confirmation Button on each screen until the Main Menu Screen appears. 6-10 Valco Cincinnati, Inc.
-
Page 106: Configure The Language
To change the language of operation, do the following: Configure the From the Main Menu Screen, press the General Setup Button. Language The General Setup Screen appears. General Setup Button Figure 6-18. Main Menu Screen Figure 6-19. General Setup Screen Valco Cincinnati, Inc. 6-11... - Page 107 -On the General Setup Screen, scroll through the languages with the up and down arrow keys until the desired language is highlighted and then press the Home Button to return to the Main Screen. Scroll with arrows Home Button Figure 6-20. General Setup Screen 6-12 Valco Cincinnati, Inc.
- Page 108 Figure 6-21. General Setup Screen Press selection to highlight Scroll Buttons Confirmation Button Figure 6-22. List of Languages Screen After finishing, press the Home Button on the General Configuration Screen to return to the Main Menu Screen. Valco Cincinnati, Inc. 6-13...
-
Page 109: Configure The Time Zone
The General Setup Screen appears. General Setup Button Figure 6-23. Main Menu Screen On the General Setup Screen, press the time zone. A list of time zones will appear. Press on the time zone Figure 6-24. General Setup Screen 6-14 Valco Cincinnati, Inc. - Page 110 Press the Set Button. This must be done or your changes will not take effect. Set Button Home Button Figure 6-26. General Setup Screen After finishing, press the Home Button on the General Configuration Screen to return to the Main Menu Screen. Valco Cincinnati, Inc. 6-15...
-
Page 111: Change And Format The Time/Date
General Setup Button Figure 6-27. Main Menu Screen On the General Setup Screen, press the time and date value you wish to change. A keypad will appear. Press on the values to change Figure 6-28. General Setup Screen 6-16 Valco Cincinnati, Inc. - Page 112 Up/Down by Ten Up/Down by One Confirmation Button Figure 6-29. Keypad Press the Set Button. This must be done or your changes will not take effect. Set Button Figure 6-30. General Setup Screen Valco Cincinnati, Inc. 6-17...
- Page 113 When done, choose the format of the display with the Date Change and Format the Time/ Format Switch. Then press the Home Button to return to the Main Date - Continued Menu Screen. Date Format Switch HomeButton Figure 6-31. General Setup Screen 6-18 Valco Cincinnati, Inc.
-
Page 114: Access Parameters
The General Setup Screen appears. General Setup Button Figure 6-32. Main Menu Screen On the General Setup Screen, press the Access Parameters Button. The CAN Device Configuration Screen will appear. Access Parameters Button Figure 6-33. General Setup Screen Valco Cincinnati, Inc. 6-19... - Page 115 Parameter Number Edit Field Figure 6-34. CAN Device Configuration Screen Method 2: -Enter two “new” numbers in the Dual Edit Fields. Dual Edit Fields Figure 6-35. CAN Device Configuration Screen 6-20 Valco Cincinnati, Inc.
-
Page 116: Print/Capture Parameter Values
Figure 6-36. Model MCP-12/4 Control Unit - Connection Module (PCM-4) On the CAN Device Configuration Screen, press the COM Port Button. Press the Confirmation Button to return to the Main Menu Screen. COM Port Button Confirmation Button Figure 6-37. CAN Device Configuration Screen Valco Cincinnati, Inc. 6-21... -
Page 117: Access Password Configuration Files
Password access can be customized. See the topic “Access General Configuration Files” in this Section for more information. On the General Setup Screen, press the Access Password Files Button. Access Password Files Button Figure 6-39. General Setup Screen 6-22 Valco Cincinnati, Inc. - Page 118 Access Password Configuration The Password Configuration Screen will appear. Files - Continued Input Panel [Level 1] Password= XXXXX [Level 2] Password= XXXXX [Level 3] Password= XXXXX [Level 4] Password= XXXXX Figure 6-40. Password Configuration Setup Screen Valco Cincinnati, Inc. 6-23...
- Page 119 Figure 6-42. Input Panel (Keyboard) Warning! Warning! Warning! Warning! Warning! Use ONLY NUMBERS for the password! The system only uses passwords in all-number form. -”Type” in a new password with the stylus, and then press the Enter Key. 6-24 Valco Cincinnati, Inc.
- Page 120 Password= XXXXX [Level 4] Password= XXXXX Confirmation Button Figure 6-43. Password Configuration Setup Screen On the General Setup Screen, press the Home Button to return to the Main Menu Screen. Home Button Figure 6-44. General Setup Screen Valco Cincinnati, Inc. 6-25...
- Page 121 The General Setup Screen appears. Files General Setup Button Figure 6-45. Main Menu Screen On the General Setup Screen, press the Access Language Translation Files Button. Access Language Translation Files Button Figure 6-46. General Setup Screen 6-26 Valco Cincinnati, Inc.
- Page 122 You would prefer the Italian translation to read “Tempo Sopra.” Therefore, highlight the term “Ton” with the stylus. IDC_RESETTIMESHIFT=Ultimo reset [IDD_MARKVALVESETUP] IDC_EDITMVALVETON= T on IDC_EDITMVALVETOFF= T off Figure 6-48. Language Translation Files Configuration Screen Valco Cincinnati, Inc. 6-27...
-
Page 123: Access/Change Language Translation Files
Figure 6-49. Language Translation Files Configuration Screen Press the Confirmation Button. The General Setup Screen appears. Press the Home Button on the General Setup Screen to return to the Main Menu Screen. Home Button Figure 6-50. General Setup Screen 6-28 Valco Cincinnati, Inc. -
Page 124: Access Configuration Files
The General Setup Screen appears. Files General Setup Button Figure 6-51. Main Menu Screen On the General Setup Screen, press the Access Configuration Files Button. The Configuration Files Screen appears. Access Configuration Files Button Figure 6-52. General Setup Screen Valco Cincinnati, Inc. 6-29... - Page 125 On the Configuration Files Screen, use the Input Panel and stylus to make changes. It is recommended that only ValcoMelton installation and service personnel make changes to the configuration. Press the Confirmation Button to save the changes. 6-30 Valco Cincinnati, Inc.
-
Page 126: Password Access Configuration Dialog
On the General Setup Screen, press the Password Access Configuration Button. The Password Access Configuration Dialog will appear. Press to turn switch on Confirm Switch on (enable editing) Switch off (default) Figure 5-55. Password Access Configuration Dialog Valco Cincinnati, Inc. 6-31... - Page 127 Pressing an alternate password option-selection button will change the configuration. When configuration is complete, press “Confirm” to save the new configurations and close the dialog window. Pressing “Cancel” closes the window without saving the configuration changes. 6-32 Valco Cincinnati, Inc.
-
Page 128: Forgotten Passwords
When the keypad appears, press the question mark button to retrieve a special number. Be sure to write this number down. Question Mark Button Write down this number and call your Valco representative! Figure 6-58. Password Screen Valco Cincinnati, Inc. 6-33... - Page 129 Enter the PIN code given by the Valco representative and press the Confirmation Button. A new keypad saying “Enter New PIN” appears. Confirmation Button Figure 6-60. Keypad 6-34 Valco Cincinnati, Inc.
- Page 130 Administrator password will be rendered invalid. If the Administrator password is lost again, the procedure for obtaining a special access PIN code for change of the Administrator password needs to be repeated. Valco Cincinnati, Inc. 6-35...
- Page 131 Section 6 - Customize the Settings MC091 - VCX OT-120 FlexosealPro 2 - Corrugated Press the Confirmation Button to return to the Main Menu Forgotten Passwords - Continued Screen. Confirmation Button Figure 6-63. Password Changed Screen 6-36 Valco Cincinnati, Inc.
-
Page 132: Lockout Configuration Access
Figure 6-64. Main Menu Screen On the General Setup Screen, press the Exit Level and Lock Button. The Main Menu Screen will appear with a locked General Setup Button. Exit Level and Lock Button Figure 6-65. General Setup Screen Valco Cincinnati, Inc. 6-37... - Page 133 Section 6 - Customize the Settings MC091 - VCX OT-120 FlexosealPro 2 - Corrugated Lockout Configuration Access - Continued General Setup Button (locked) Figure 6-66. Main Menu Screen with Locked General Setup Button 6-38 Valco Cincinnati, Inc.
-
Page 134: Tipsealer Air Cylinder Timing Values
Only available with Non- Contact Glue Station. General Setup Button Figure 6-67. Main Menu Screen On the General Setup Screen, press the CAN Device Configuration Dialog Button. CAN Device Configuration Dialog Button Figure 6-68. General Setup Screen Valco Cincinnati, Inc. 6-39... - Page 135 CAN Device Field, and the values for that item in the Dual Edit and Parameter Number Edit fields. Scroll List Field Buttons Cancel Button Confirmation Button Figure 6-70. Tipsealer Timing Values Screen 6-40 Valco Cincinnati, Inc.
- Page 136 Jogg mode, after a restart. * The Position Switch is an optional feature. Valve movement from Valve movement from Tipsealer Pad (park) Gluing Position to to Gluing Position Tipsealer Pad (park) Figure 6-71. Tipsealer Air Cylinder Timing Values Valco Cincinnati, Inc. 6-41...
-
Page 137: Upgrade Procedure
Locate the USB access cover on the OT-120 (see Figure 6-72, A or B, as applicable). M3 X 6mm Button Access Cover Head Cap Screw USB Flash Drive Figure 6-72A - USB Access Cover Removal/Installation (138xx018) 6-42 Valco Cincinnati, Inc. - Page 138 Remove the screws holding the USB access cover in place and keep them for later use. Remove the USB access cover and set it aside for later use. Place the upgrade USB Flash Drive into the USB slot. Press the Main Configuration Menu Button (Figure 6-73). Valco Cincinnati, Inc. 6-43...
- Page 139 Figure 6-74 - Type in Password and Press Confirmation Button Press the (unlocked) Main Configuration Button to open the Main Configuration Menu (see Figures 6-74 and 6-75). Main Configuration Menu Button Figure 6-74 - Main Configuration Button (On Menu Bar, Unlocked) 6-44 Valco Cincinnati, Inc.
- Page 140 MC091 - VCX OT-120 FlexosealPro 2 - Corrugated Section 6 - Customize the Settings Upgrade Procedure - Continued Figure 6-75 - Main Configuration Menu Press the Upgrade Button to begin the upgrade (see Figure 6- 76). Upgrade Button Figure 6-76 - Upgrade Button Valco Cincinnati, Inc. 6-45...
- Page 141 FlexosealPro FlexosealPro FlexosealPro FlexosealPro FlexosealPro.exe and these files FlexosealPro.exe and these files FlexosealPro.exe and these files FlexosealPro.exe and these files FlexosealPro.exe and these files Install Button Figure 6-78 - Click Full Install and Press Install Button 6-46 Valco Cincinnati, Inc.
-
Page 142: Part Number
Figure 6-72, A or B, as applicable). 17. Replace the screws for the USB access cover that were removed in Step 2. The upgrade is now complete. USB Memory Drive 119XX220 (138XX007 & 138XX008 ONLY) 119XX266 Part Number Valco Cincinnati, Inc. 6-47... -
Page 143: Replacing The Sd Memory Card In The Ot-120
Card in the OT-120 COVER SD MEMORY CARD USB PORT Figure 6-79. Top of the OT-120 Unit Remove the SD memory card and replace it with the update card. Replace the cover. Turn the unit on. 6-48 Valco Cincinnati, Inc. -
Page 144: Backup Dialog
(Figure 6-80). A confirmation window will appear (Figure 6- 81). Press the Confirmation Button to backup the settings. Restore Button Backup Button Figure 6-80. General Configuration Screen Confirmation Button Figure 6-81. Backup Confirmation Screen Valco Cincinnati, Inc. 6-49... -
Page 145: Restore Dialog
If selecting Local Backup, a selection menu will appear, from which you may select a previous configuration to which to restore the system (Figure 6-83). Confirmation Button Figure 6-83. Restore: Local Backup Selection Menu Click on a listing to highlight it, and then click the Confirmation Button. 6-50 Valco Cincinnati, Inc. -
Page 146: Section 7 - Part Number List
SECTION 7 - PART NUMBER LIST To order parts, please contact your closest Valco office by mail, phone, or How to Order Email: Parts Valco Cincinnati, Inc. Valco Cincinnati, Inc. Valco Cincinnati, Inc. Valco Cincinnati, Inc. Valco Cincinnati, Inc. 497 Circle Freeway Drive... -
Page 147: Control Base (074Xx042)
Section 7 - Part Number List MC091 - VCX OT-120 FlexosealPro 2 - Corrugated VCX-4 Control Base (074xx042) PCM-4 Module w/EPC (BAW2142) - REF. Valco Cincinnati, Inc. - Page 148 784xx653 Installation Kit Assy, VCX 091xx624 Transformer Gasket 746xx174 It is not necessary to place a module in every slot of the VCX Control base. A blank module cover (026xx211) is used to cover each empty slot. Valco Cincinnati, Inc.
-
Page 149: Module W/Epc; Vcx Control (074Xx054)
Section 7 - Part Number List MC091 - VCX OT-120 FlexosealPro 2 - Corrugated PCM-4 Module w/EPC; VCX Control (074xx054) PCM-4 TSW0968 REV-A Exhaust Valco Cincinnati, Inc. - Page 150 105XX322 *FUSE;GLASS,2A,250V,T/D,5X20MM 085XX220 TUBE END EXP/RED, 1/4 TO 5/16 799XX478 CAPTIVE SCREW,M5 783XX221 TAPERED COMPRESSION SPRING 783XX222 SCREW BEZEL 783XX223 PCB ASSY: SOLENOID DRIVER 151XX674 BHCS M3 X 6 SS 784XX541 *STANDOFF; M/L, 4MM X 8MM 091XX622 Valco Cincinnati, Inc.
-
Page 151: Standard Ot-120 (138Xx018)
Section 7 - Part Number List MC091 - VCX OT-120 FlexosealPro 2 - Corrugated Standard OT-120 (138xx018) 138xx018.DWG Valco Cincinnati, Inc. - Page 152 GASKET, COVER, OT-120 746XX249 SCREW 784XX190 MEMORY;MICRO SD 118XX187 ADAPTER; MICRO SD CARD 118XX194 FILM;ANTI-REFLECT 138XX006 SCREW 091XX267 SCREW 784XX899 SOFTWARE, CARTON PRO 119XX267 SOFTWARE, FLEX PRO 2 119XX268 LOCK WASHER 798XX382 SCREW 784XX359 PCB ASSY 151XX712 Valco Cincinnati, Inc.
-
Page 153: Mounting Assembly
Section 7 - Part Number List MC091 - VCX OT-120 FlexosealPro 2 - Corrugated Standard OT-120 (138xx018) - Continued Mounting Assembly Item Description Part Number Quantity MOUNT;MNTR,TLT/SWVL & ROTATE 582XX799 SCREW 784XX426 WASHER 784XX308 SCREW 784XX359 Valco Cincinnati, Inc. -
Page 154: Cables
MC091 - VCX OT-120 FlexosealPro 2 - Corrugated Section 7 - Part Number List Cables Description Part Number OT-120 Cable, 2m 029xx331 OT-120 Cables OT-120 Cable, 5m 029xx126 OT-120 Cable, 10m 029xx147 Valco Cincinnati, Inc. -
Page 155: Scanner Cables
Section 7 - Part Number List MC091 - VCX OT-120 FlexosealPro 2 - Corrugated Scanner Cables 7-10 Valco Cincinnati, Inc. -
Page 156: Link Cables
MC091 - VCX OT-120 FlexosealPro 2 - Corrugated Section 7 - Part Number List Link Cables Description Part Number Link Cable, 3m 029xx418 Link Cable, 6m 029xx417 Valco Cincinnati, Inc. 7-11... -
Page 157: Valve Cables
Section 7 - Part Number List MC091 - VCX OT-120 FlexosealPro 2 - Corrugated Valve Cables 7-12 Valco Cincinnati, Inc. -
Page 158: Section 8 - Warranty
This is the only authorized Valco Cincinnati, Inc. warranty and is in lieu of all other expressed or implied warranties, representations or any other obligations on the part of Valco Cincinnati, Inc. -
Page 159: Section 9 - Service
Any charges for a service call will be quoted at that time. Any part that fails during the warranty period shall be returned prepaid to Valco Cincinnati, Inc. by the customer for disposition. -
Page 160: Appendix A - Monitor Commands
APPENDIX A - MONITOR COMMANDS APPENDIX A - MONITOR COMMANDS PCM4 Monitor Commands PCM4 - 4 CHANNEL GLUE CONTROLLER 119xx209 C015.0099 01/06/10 (C) 2010 VALCO Cincinnati, Inc >help Set Global Variable sgv <Index> <SubIndex> <Value> [<EchoOff>] Get Global Variable ggv <Index> <SubIndex> [<DataOnly>] Print Global Variable pgv <Index>... -
Page 161: Icm4 Monitor Commands
Appendix A - Monitor Commands MC091 - VCX OT-120 Control System - Corrugated ICM4 Monitor Commands ICM4 - 4 CHANNEL INSPECTION CONTROL MODULE 119xx___ B002.0008 10/12/09 (C) 2009 VALCO Cincinnati, Inc Date: 01/07/2010 Time: 11:34:17 >help Set Global Variable sgv <Index> <SubIndex> <Value> [<EchoOff>] Get Global Variable ggv <Index>... -
Page 162: Appendix B - Diagnostics
Incorrect tension between the wheel and the drive belt* Damaged encoder cable Loose cable connections * These items may cause diagnostic LEDs to falsely indicate proper encoder operation. 5. Replace the encoder if the diagnostics listed above do not solve the problem. Valco Cincinnati, Inc. -
Page 163: Scanner Diagnostics
The scanner will not operate properly if the bracket is loose on the machine. This causes vibrations as the product travels. Replace the scanner if the diagnostics listed above do not solve the problem. Valco Cincinnati, Inc. -
Page 164: Appendix C - Electrical Diagram
APPENDIX C - ELECTRICAL DIAGRAM APPENDIX C - ELECTRICAL DIAGRAM APPENDIX C - ELECTRICAL DIAGRAM APPENDIX C - ELECTRICAL DIAGRAM APPENDIX C - ELECTRICAL DIAGRAM Electric Wiring for VCX w/ Tipsealer Valco Cincinnati, Inc.
Need help?
Do you have a question about the VCX OT-120 FlexosealPro 2-Corrugated and is the answer not in the manual?
Questions and answers