Table of Contents
Advertisement
Advertisement
Table of Contents

Summary of Contents for AutoDab Connect
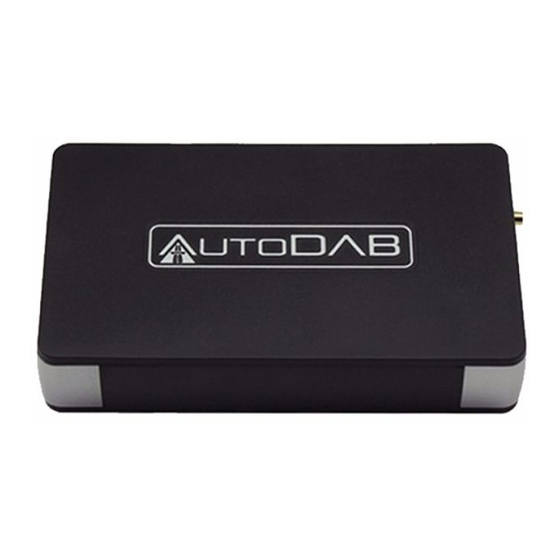
- Page 1 AutoDAB Connect In-Car DAB Adapter User Guide www.AutoDAB.com...
-
Page 2: Table Of Contents
OPERATION CONTROLS ....................8 STARTING UP THE SYSTEM .................... 11 USING REMOTE CONTROL KEYS ................... 12 To Turn AutoDAB Connect On or Off ................ 12 To Scan for the Digital Stations ................. 12 To Listen to the Digital Stations ................. 12 To Display Digital Station’s information .............. -
Page 3: Introduction
AF function before using this AFC function. If AF function is not built in your car radio, you can use AutoDAB Connect’s AutoScan function to automatically scan for 3 useable FM frequencies; you will need to choose a new frequency from the scanned frequencies to set and synchronize it between the car radio and the AutoDAB Connect manually. -
Page 4: Contents Of Package
AutoDAB Connect User Guide CONTENTS OF PACKAGE AutoDAB Connect unit Rotary Knob Power Cable Remote Control with Cigarette Lighter CR2032 Battery Dual Lock Tapes x2 Dual Lock Tape x1 25mm x 55 mm 25mm x 35 mm User Guide Screw x2... -
Page 5: Installation
AutoDAB Connect User Guide INSTALLATION Overview Connectors ❶ ❷ ➌ ❶ SMB Connector, for DAB antenna ❷ 3.5mm stereo audio jack, for aux cable ➌ Power jack, for power Cable with Cigarette Lighter Plug... - Page 6 In this case, please read the troubleshooting section for the solution. Select a location to mount your AutoDAB Connect. For the best performance, please locate it in the middle and under the car’s glove compartment. For other locations, please store it away from metal objects and in an open area.
- Page 7 There is a lock mechanism on the plug of Power Cable to AutoDAB Connect. First, plug the power cable into the 12V DC jack (1), and then you need to turn the power plug 90 degree clockwise (2) as illustrated below. This is to ensure that the power cable will be firmly connected to the AutoDAB Connect at all times.
- Page 8 AutoDAB Connect in the marked positions above. Remove the other side of the backing and adhere the AutoDAB Connect to the chosen mounting location with the cables and connectors to the back.
- Page 9 Alternatively, or in addition, secure the AutoDAB Connect with the supplied screws. Installation, Dos and Don’ts As AutoDAB Connect has an internal antenna and FM Transmitter, it is important to avoid signal interference from excessive cable coiling. Below are the dos and don’ts when you coil and store excessive antenna cable and power cable.
-
Page 10: Operation Controls
RDS text and displayed as 8 characters displayed on your car radio. Below is a list of AutoDAB Connect system messages displayed on the car radio, while operating with the remote control:... - Page 11 Adjust FM transmitting frequency by 2MHz after LINK is pressed. Press Recall memory preset P1. Press and Hold Program memory preset P1 while listening to a DAB station. Function AUX Set AutoDAB Connect to AUX mode to listen to an external audio source.
- Page 12 Press and Hold Program memory preset P3 while listening to a DAB station. Function DAB Set AutoDAB Connect to one of the 3 DAB preset modes to listen to DAB. Press Recall memory preset P4. Press and Hold ...
-
Page 13: Starting Up The System
《 DABRADIO 》. Stay tuned on this FM frequency, your AutoDAB Connect and car radio are now synchronized. If your car radio does not have AF feature, make the following to change to AutoDAB Connect’s FMTX mode to AutoScan instead of the default AFC. -
Page 14: Using Remote Control Keys
On or Off AutoDAB Connect The AutoDAB Connect operating mode can be turned off or turned on by the following: Press and hold the Rotary Knob to turn it off, while it in the operating mode. Press the Rotary Knob to return it to the operating mode, while it is off. -
Page 15: To Display Digital Station's Information
The default DLS/DL+ setting is ON. If the feature is OFF, the screen will show 《 TEXT OFF 》. To Set a Digital Preset Mode The AutoDAB Connect provides individual memory settings for up to three sets of DAB Preset Modes: DAB1, DAB2, and DAB3. Each DAB Preset Mode has its own Memory... -
Page 16: To Save A Digital Memory Preset
When you switch to a different DAB Preset Mode, the Memory Preset list of the selected DAB Preset will be loaded into the internal operating system of the AutoDAB Connect automatically. The will then perform all functions based on the settings of this DAB Preset Mode. -
Page 17: To Recall The Last Listened Digital Station
To Set the Auxiliary Input mode The AutoDAB Connect provides the capability to play audio device such as MP3 or iPod ® etc. through your car radio. Press the Rotary Knob then AUX to set the listening mode to auxiliary input mode and start listening to the audio device. -
Page 18: Fm Transmitting Frequency Settings
FM frequencies and save them into the memory in sequence (from frequency 1 to frequency 3). When you are using AutoDAB Connect to listen to a DAB service and experience constant interference from other source, which means that you are driving into an area where the present FM frequency is used by an FM broadcaster. -
Page 19: To Set Fm Transmitting Frequency Manually
As unused FM frequency may vary from one area to another, it is suggested to save a few frequencies (up to 4 frequencies) in AutoDAB Connect so that you can switch to a new FM transmitting frequency instantly when you drive into an area where the original FM frequency for DAB is no longer available. -
Page 20: To Recall Fm Transmitting Frequency Saved In Memory
To Recall FM Transmitting Frequency Saved in Memory You may drive into an area where the FM frequency transmitted by AutoDAB Connect is used by an FM broadcaster. When this happens, your reception of DAB station will be getting worse with increasing interference from another FM program. -
Page 21: To Set Fm Transmitting Frequency Setting To Preset F1
AutoDAB Connect User Guide Press and hold LINK, the screen will show《 AF Frequency 》where Frequency is the new frequency that AutoDAB Connect will set and use to transmit FM signal and force radio to tune to the same frequency automatically. -
Page 22: Menu Settings
This function allows you to reset the FM transmitting frequency to the default setting FM 87.6MHz. Reset AutoDAB Connect’s FM transmitting frequency by either way below: Enter the menu function, the screen will show 《 87.6MHz 》. Then, Press the Rotary Knob to reset FM transmitting frequency to 87.6MHz. -
Page 23: To Enable Afc (Automatic Frequency Change)
AF feature of your car radio must be activated. When the AFC function of AutoDAB Connect is enabled and the AF feature of your car radio is activated, your car radio will tune to an unused FM frequency automatically when you drive into an area where the original FM frequency for DAB is no longer available. -
Page 24: To Enable Autoscan
TROUBLESHOOTING section for detail. ATTENTION The AutoDAB Connect comes with the AFC function. In order to use this function, your car radio must have AF (alternative frequency) feature, and AF must be enabled. -
Page 25: To Enable Rc Beep Tone
Switching to the AutoScan mode, it disables the AFC function. To Enable RC Beep Tone When you enable RC beep tone, AutoDAB Connect will respond with a beep tone, each time an operation is performed on the remote control. In the menu function, rotate the Rotary Knob [◄] [►] until the screen shows 《... -
Page 26: To Perform Dab Reset
Factory reset will erase all previous system’s settings and set them to default. To Display Software Version This function allows you to display the current software version of your AutoDAB Connect. In the menu function, rotate the Rotary Knob [◄] [►] until the screen shows 《... -
Page 27: To Upgrade Software
AutoDAB Connect User Guide To Upgrade Software This function is used by the maintenance personnel only, to upgrade the existing AutoDAB Connect module software to a new version. -
Page 28: Troubleshooting
Follow the instruction on the section STARTING UP THE SYSTEM to initialize the FM transmitting frequency on AutoDAB Connect and the car radio. Make sure AutoDAB Connect is not in the Auxiliary mode, please refer to To Set the Auxiliary input mode to check and return to DAB mode. - Page 29 Press and hold BACK to reset FM transmitting frequency to FM frequency preset 1. If AutoDAB Connect is in AutoScan mode, the FM channel you selected for DAB mode may be occupied by an existing radio station. You need to change the frequency settings of FM Transmitter.
-
Page 30: Technical Specifications
AutoDAB Connect User Guide TECHNICAL SPECIFICATIONS Digital Audio Services: DAB/DAB+. RF Frequency Range: DAB Band III (174 MHz ~ 240 MHz). RF Sensitivity for DAB Band III: -98dBm ~ -100dBm. FM Transmit Range: 87.6 MHz ~ 107.9 MHz. -
Page 31: Information On Waste Disposal
AutoDAB Connect User Guide INFORMATION ON WASTE DISPOSAL This mark on a product and/or accompanying documents indicates that when it is to be disposed of, it must be treated as Waste Electrical & Electronic Equipment (WEEE). Any WEEE marked waste products must not be mixed with general household waste, but kept separate for the treatment, recovery and recycling of the materials used. - Page 32 AutoDAB Connect _ 201501...
Need help?
Do you have a question about the Connect and is the answer not in the manual?
Questions and answers