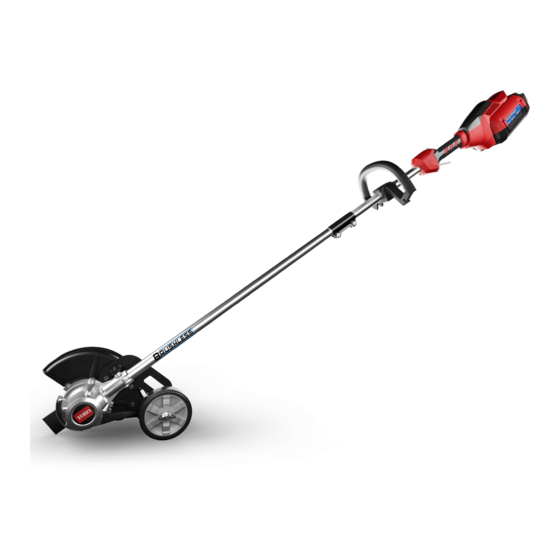
Toro Flex-Force Power System 51833 Operator's Manual
60v stick edger
Hide thumbs
Also See for Flex-Force Power System 51833:
- Operator's manual (65 pages) ,
- Operator's manual (21 pages) ,
- Manual (65 pages)
Summary of Contents for Toro Flex-Force Power System 51833
- Page 1 Form No. 3441-962 Rev B Flex-Force Power System ™ Stick Edger Model No. 51833—Serial No. 321000001 and Up *3441-962* Register at www.Toro.com. Original Instructions (EN)
-
Page 2: Important Safety Instructions
Become familiar with the controls and proper driveways, sidewalks, and more as needed outdoors. use of the appliance, battery pack, and battery It is designed to use Toro Flex-Force lithium-ion charger. battery pack Models 88620 (provided with Model 51833), 88625, Model 88640, Model 88660, or II. - Page 3 Dress properly—Wear appropriate clothing, battery pack above 68°C (154°F) or incinerate including eye protection; long pants; substantial, it. Replace the battery pack with a genuine Toro slip-resistant footwear; rubber gloves; and battery pack only; using another type of battery hearing protection. Tie back long hair and do pack may cause a fire or explosion.
- Page 4 Do not replace the existing non-metallic cutting means on the appliance with a metallic cutting means. Do not attempt to service or repair the appliance, battery pack, or battery charger except as indicated in the instructions. Have an Authorized Service Dealer perform service using identical replacement parts to ensure that the product is safely maintained.
-
Page 5: Safety And Instructional Decals
Safety and Instructional Decals Safety decals and instructions are easily visible to the operator and are located near any area of potential danger. Replace any decal that is damaged or missing. decal144-3098 decal139-5350 144-3098 139-5350 decal139-5360 139-5360 decal144-3096 144-3096 decal144-3088 144-3088... - Page 6 decal144-3094 144-3094 1. The battery pack is 3. The battery pack is over charging. or under the appropriate temperature range. decal139-5210 139-5210 2. The battery pack is fully 4. Battery pack charging fault charged. 1. Warning—read the Operator’s Manual; stay away from moving parts;...
-
Page 7: Unfolding The Handle
Setup Loose Parts Use the chart below to verify that all parts have been shipped. Procedure Description Qty. Allen wrench Unfold the handle. Auxiliary handle assembly Install the auxiliary handle. Note: The battery pack is not fully charged when you purchase it. - Page 8 g333338 Figure 1...
-
Page 9: Installing The Auxiliary Handle
Installing the Auxiliary Handle Parts needed for this procedure: Auxiliary handle assembly Procedure Separate the auxiliary handle from the handle plate by removing the 4 screws (A of Figure Line up the auxiliary handle with auxiliary handle plate on the edger handle (B of Figure Secure the auxiliary handle to the handle plate with the 4 screws previously removed (C of Figure... -
Page 10: Product Overview
Product Overview Operation Specifications Starting the Edger Align the cavity in the battery pack with the Model 51833 tongue on the handle housing (Figure Blade Length 203 mm (8 inches) Push the battery pack into the handle until the Rated Voltage 60V DC maximum, 54 VDC battery locks into the latch (Figure... -
Page 11: Adjusting The Depth Of Cut
Shutting Off the Edger Adjusting the Depth of Cut Remove the battery from the edger. To shut off the trimmer, release the trigger. Loosen the wing nut on the wheel and move it Whenever you are not using the edger or are up or down in the track to increase or decrease transporting the edger to or from the work area, the depth... -
Page 12: Charging The Battery Pack
Charging the Battery Pack Battery pack and/or battery charger is over or under the appropriate temperature range Important: The battery pack is not fully charged Battery pack charging fault* when you purchase it. Before using the tool for blinking the first time, place the battery pack in the charger and charge it until the LED display indicates the *Refer to Troubleshooting (page 15) -
Page 13: Maintenance
Tighten the blade nut by turning it counterclockwise with the wrench provided If the blade becomes worn, bent, or damaged, replace (Figure it; contact your authorized Toro distributor. Ensure that the battery is removed from the Replacing the Wheel machine. -
Page 14: Preparing The Battery Pack For Recycling
Specifications (page If the skid plate becomes worn or damaged, replace 10). it; contact your authorized Toro distributor. Important: If you are storing the battery pack for Ensure that the battery is removed from the the off-season, remove the battery pack from the machine. -
Page 15: Troubleshooting
Troubleshooting Perform only the steps described in these instructions. All further inspection, maintenance, and repair work must be performed by an authorized service center or a similarly qualified specialist if you cannot solve the problem yourself. Problem Possible Cause Corrective Action The tool does not start. - Page 16 Problem Possible Cause Corrective Action The tool does not run or run continuously. 1. There is moisture on the leads of the 1. Allow the battery pack to dry or wipe it battery pack. dry. 2. The battery is not fully installed into the 2.
- Page 17 Notes:...
- Page 18 Notes:...
- Page 19 California Proposition 65 Warning Information What is this warning? You may see a product for sale that has a warning label like the following: WARNING: Cancer and Reproductive Harm—www.p65Warnings.ca.gov. What is Prop 65? Prop 65 applies to any company operating in California, selling products in California, or manufacturing products that may be sold in or brought into California.


Need help?
Do you have a question about the Flex-Force Power System 51833 and is the answer not in the manual?
Questions and answers