Tektronix 321 A Instruction Manual
Hide thumbs
Also See for 321 A:
- Instruction manual (128 pages) ,
- Instruction manual (94 pages) ,
- Instruction manual (94 pages)

Related Manuals for Tektronix 321 A


Summary of Contents for Tektronix 321 A
- Page 1 I V I A .IN J U A L TYPE OSCILLOSCOPE Tektronix, Inc. S.W. M illikan W ay • P. O. Box 500 • Beaverton, Oregon 97005 • Phone 644-0161 • Cables: Tektronix 070-425...
- Page 2 :;• [tv»?iCi,^-. < >,v; '.Vji Ji ^ a V l a l t e , A il Tektronix instruments are warranted against defective materials and workman ship for one year. Tektronix transformers, manufactured in our own plant, are w ar...
- Page 3 N TENTS W a rra n ty „ 3 E . w - . » Z f r Section 1 Characteristics ■ ; W * f S S I -•> mSE jj Section 2 P relim inary Instructions ^ *> O perating Section 3 Inst ruct ions...
- Page 4 AUTO t f u t l O N I C f O R U A N t * . O I C O O N u > * The Typo 3 2 ! A Os ci lloscope Type 321 A...
- Page 5 Introduction deflection at 1 kc increasing to 1 major division at 6 me. The Tektronix Type 321A is a high-performance, dc-to-6 External: 1 volt peak-to-peak at 1 kc increasing to 3 volts me, transistorized oscilloscope. Its light weight, small size peak-to-peak at 6 me.
-
Page 6: Environmental Capabilities
Characteristics — Type 3 2 1 A ampere-hour cells), or 11.5 to 35 volts dc (aircraft, outo, Shock [non-operating)— 60 G's, '/j sine, 11-msec dura boat, etc.), or 103.5 to 126.5 volts or 207 to 253 volts, tion. One shock each direction along each of the three rms, 50 to 800 cycles, single-phase ac. -
Page 7: Preliminary Instructions
SECTION 2 PRELIMINARY INSTRUCTIONS Power Requirements volt operation, so these connections do not have to be changed when converting from one line voltage to the other. The regulated power supplies in the Type 321A will operate When wired for 115-volt operation, terminals 1 and 2 are form 115-v or 230-v rms ac line, from an external dc source joined by a bare bus wire, and terminals 3 and 4 are simi... -
Page 8: Battery Operation
If you prefer to completely turn off Be sure to observe cell p olarity indicated on the all power to the Type 321 A, set the POWER switch to battery cover. TRICKLE and either disconnect the power cord from the ac line or turn off the power at a wall switch (or equiv... - Page 9 103.5 v 109 v 115 v 121 v 126.5 v brand or type of rechargeable batteries being used in the Type 321 A. After setting the switches to their proper posi EXT ON tion, the line voltage can then be set to the charging rate HIGH recommended by the manufacturer of the cells.
- Page 10 The LOW BATTERIES light turns on when the following conditions exist: To turn on the Type 321 A, set the POWER switch to EXT ON. To turn off the oscilloscope, set the POWER switch to 1. The POWER switch is set to BATT ON and the internal one of the OFF positions—TRICKLE or FULL.
-
Page 11: Horizontal Deflection System
75 divisions with the sweep magnifier very little difficulty in understanding the operation of the Type 321 A. The function of many controls is the same as the function of corresponding controls on other Tektronix The HORIZONTAL POSITION control is a combination instruments. -
Page 12: Horizontal Controls
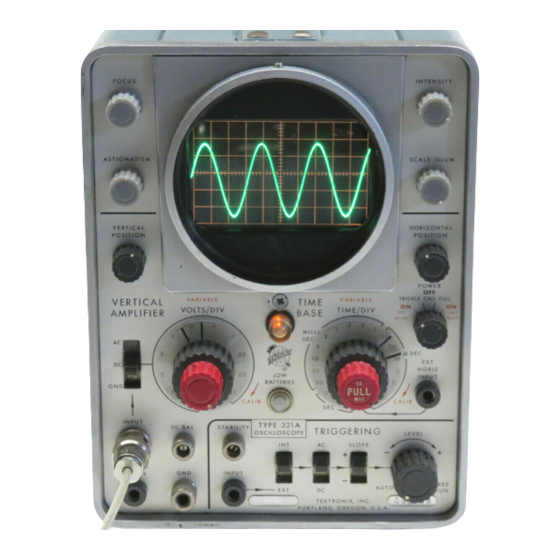
Operating Instructions — Type 3 2 1 A CRT CONTROLS FOCUS — C ontrols sharpness of INTENSITY— Controls brightness of spot or trace. ASTIGMATISM— Used in conjunc SCALE ILIU M — Adjusts brightness tio n w ith FOCUS to ob ta in overall o f graticule markings (w hen oper- focus. -
Page 13: Sweep Magnifier
(pull out the red VARIABLE TIME/DIV knob; see Fig. start at the same time, relative to some point on the observed waveform. In the Type 321 A, this is accomplished by start 3-3). Any portion of the display magnified by the horizontal... - Page 14 Operating Instructions — Type 3 2 1 A gering is convenient since no external triggering connections SLOPE switch is in the — position, the sweep is triggered on are required. Satisfactory results are obtained in most appli the falling portion of the waveform (see Fig. 3-5). cations.
- Page 15 Operating Instructions — Type 3 2 1 A SLOPE ► ► LEVEL Sweep Triggers On - f- Slope W aveform s o b tained w ith the trig * ge ring level control — region. SLOPE Swoop Triggers On — Slope SLOPE W aveform s ob tained w ith the tr ig ...
- Page 16 Triggering at frequencies below 15 cycles can be accomplished when With the Type 321 A, you can get o periodic, free-running higher amplitude triggering signals are used. sweep, independent of any external triggering or synchroniz...
-
Page 17: Input Signal Connections
O perating Instructions — Type 3 2 1 A NOTE probe may be used to decrease both the capacitive and resis tive loading caused by the oscilloscope to a negligible value. To make the deflection factor equal to that in d i cated by the VOLTS/DIV switch, set the VARIABLE In addition to providing isolation of the oscilloscope from control to the CALIB detent position. -
Page 18: Voltage Measurements
The Type 321 A Oscilloscope can be used to measure the voltage of the input waveform by using the calibrated ver 2. Multiply the setting of the VOLTS/DIV control by the dis... - Page 19 O perating Instructions — Type 3 2 1 A Fig. 3-8. M easuring the p e ak-to -pea k ac voltage o f an a p p lie d w aveform . most common type. The same general method may be used to a convenient point on the oscilloscope screen.
-
Page 20: Time Measurements
Operating Instructions — Type 3 2 1 A 3. Measure the verticol distance in divisions from the desired Time Measurements point on the waveform to the voltage reference line. The calibrated sweep of the Type 321A Oscilloscope causes any horizontal distance on the screen to represent a definite 4. -
Page 21: Frequency Measurements
O perating Instructions — Type 3 2 1 A For example, assume the TIME/DIV switch setting is 1 Frequency Measurements MILLI SEC, the magnifier is on, and you measure a horizontal The frequency of a periodically recurrent waveform con distance of 5 division between events. In this example, then, be determined if the time interval (period) of one complete 5 divisions multiplied by 1 millisecond per division gives cycle of the waveform is known. -
Page 22: Circuit Description
SECTION 4 CIRCUIT DESCRIPTION the AC-DC-GND switch SW401 (see Vertical Amplifier circuit Block Diagram diagram) is in the DC position, input signals are directly The block diagram in Section 7 of this manual shows the coupled to the VOLTS/DIV switch, in the AC position input main sections of the Type 321A Oscilloscope. - Page 23 Circuit Description — Type 3 2 1 A tion plates of the crt. A transistor, 0519, sets the emitter cur Input Emitter Follower rent for Q504 and Q514. There are two time-constant An emitter-follower stage Q443 couples the Input C.F. to networks connected between the two emitters.
- Page 24 Operating Instruction* — Type 3 2 1 A brator Q35/Q45 is a bistable Schmitt Circuit. It is forced Triggering Level from one of its stable states into the other by the trigger The setting of the (Triggering) LEVEL control determines ing signal applied to the base of Q35.
- Page 25 Circuit Description — Type 3 2 1 A increase in the negative direction which in turn pulls down base of 035 and controls the switching rate of the Trigger the base of 0163 and prevents it from going positive. The Multivibrator.
-
Page 26: Horizontal Amplifier
Circuit Description — Type 3 2 1 A During the trace portion of the sweep sawtooth the Hold- which in turn is fed to pin 6 of the crt. The 30-volt posi O ff Capacitors C180-C181 charge through 0183 as a result tive gate, whose start and duration are coincident with of the drop in voltage at the emitter of Q183. -
Page 27: Battery Charger
Circuit Description — Type 3 2 1 A rises to about 131° F (r±T5°) and closes when the chassis If the output voltage tends to increase, just the opposite will occur. The base voltage of 0634 will increase, more temperature drops to 120° F ( * 8 ° ) . Normally, for internal current will flow through Q634 and less current will flow battery mode of operation other voltage sources are not through Q624. -
Page 28: Crt Control Circuits
Circuit Description — Type 3 2 1 A CONVERTER An ac signal of approximately 100 volts, peak-to-peak, is coupled from terminal 10 of T701 to the Calibrator cir cuit (shown on the Vertical Amplifier and Calibrator dia The regulated 10 volts output of the Regulator circuit is gram). -
Page 29: Preventive Maintenance
In those shops responsible for the maintenance of several Tektronix instruments it is advisable to have a stock of solder containing about 3% silver. This type of solder is Replacement of Ceramic Terminal Strips used frequently in printed-circuit work and is generally To remove a ceramic terminal strip, unsolder all com... -
Page 30: Troubleshooting Procedure
Maintenance — Type 3 2 1 A shipped in place of the original. All Tektronix field offices To install a new strip, place the spacers in the chassis have knowledge of these changes, and your local Field holes, insert the stud through the spacers, and press down Engineer may call you if a change in your purchase order on top of the strip above the studs. -
Page 31: Incorrect Voltage
M aintenance — Type 3 2 1 A 1. Regulator Circuit TROUBLESHOOTING THE REGULATOR CIRCUIT 2. Converter Circuit Proper operation of every circuit in the Type 321A depends on proper operation of the Regulator circuit and the Con 3. Crt Circuit and High-Voltage Supply verter. - Page 32 Maintenance — Type 3 2 1 A to locate the defective component(s). The Circuit Descrip No Intensity tion (see Section 4) of the circuit involved may prove useful If the low-voltage power supply is operating normally, when troubleshooting within a given circuit. but no spot or trace is visible on the crt, the trouble could be a defective crt, a defect in the crt circuit including the —720-volt supply, an unbalanced condition in either or both...
- Page 33 Maintenance — Type 3 2 1 A plifier showing test points for checking the balance of the Refer to Section 6 for this. However, if the amplifier cannot amplifier. For this check it is convenient to have a short lead be recalibrated, or if the decrease in gain is more pro...
- Page 34 Maintenance — Type 3 2 1 A zontal deflection plates and turn the TIME/DIV control to TIME/DIV control to .1 SEC and the LEVEL control to FREE EXT HORIZ INPUT position. If the spot now appears, the RUN. Connect a voltmeter between the emitter of G173 (see Horizontal Amplifier is in balance and the trouble is being Fig.
- Page 35 Maintenance — Type 3 2 1 A can be checked by rotating the TIME/DIV switch through its trouble either be due to insufficient output from the Time- range. If a trace appears in some positions of the switch, Base Generator, or to insufficient goin in the Horizontal the trouble will lie in the components associated with the Amplifier.
- Page 36 Maintenance — Type 3 2 1 A TROUBLESHOOTING THE CALIBRATOR position. There should now be displayed on the crt 4 vertical divisions of calibrator signal. If not, and the Vertical Am plifier is known to be working, check for a defective transistor Insufficient or No Calibrator Output Q874 and associated circuit components.
-
Page 37: Equipment Required
Output frequencies of about 1 kc and 400 kc; risetime 13 nsec or faster into a 50-ohm (nominal) cable Remove the side covers from the Type 321 A. Set up the terminated at both ends; output voltage variable from 10 front-panel controls as follows: to 100 volts across on internal 600-ohm load. - Page 38 Calibration — Type 3 2 1 A Connect the Type 321A and ac voltmeter to the auto POWER switch to TRICKLE when loosening or tig h t transformer, and turn on all equipment. Set the output of the ening the lock nut. autotransformer to the design center voltage for which your instrument is wired (115 or 230 v|.
- Page 39 ± 3 % . d. When the trace and graticule line ore in coincidence, e. Disconnect the probe from the Type 321 A. hold the bottom of the graticule cover in place so 4. Adjust Dc Balance (Vertical Am plifier) the crt does not dislodge it and push the crt for...
- Page 40 Type 321A crt brightens. This is the point where the time base free runs. f. Disconnect the Type 105 signal from the Type 321 A. Note the base-line position of the negative-going sawtooth waveforms displayed on the test oscillo...
- Page 41 Adjust the Type 190A to produce a deflection of Turn o ff the Type 105 dc ou tput when removing the attenua tor to ovoid a shock hozard. exactly 4 major divisions on the Type 321 A. • • Remove the 50-ohm term inatio n...
- Page 42 <n VERT G A IN SOV ADJ CAl AMPt, R A51 C508 R384 R468 F621 F601 C413C C414C Chorgef Switch...
- Page 43 Calibration — Type 3 2 1 A Use the HORIZONTAL POSTION control to align the g. Increase the Signal Generator output frequency to 1-millisec markers with the 0-, 5-, and 10-major- 6 me. division graticule lines. h. The deflection should now be 2.8 major divisions or more.
- Page 44 (1 3 ) SWEEP (1 4 ) LENGTH M AG G AIN HORIZ G A IN GEOM AO) R176 R348 X338 R861 117) (7 ) C l 601 D 1 3 1 /Q 1 3 5 B a t* Junction...
- Page 45 Type 321A (Verti insert rechargeable cells in the battery holder. cal Amplifier) INPUT connector. c. Reconnect the line cord to the Type 321 A. Check c. Adjust the Signal Generator output amplitude to that the autotransformer is set to design-center line obtain exactly 5 major divisions of vertical deflec...
-
Page 46: Section 7 Parts List And Diagrams
If a part you have ordered has been replaced with a new or improved part, your local Tektronix Field Office will contact you concerning any change in part number. ABBREVIATIONS AND SYMBOLS... -
Page 47: Front & Rear
Parts List — Type 3 2 1 A FRONT & REAR... - Page 48 Ports List — Type 321A FRONT & REAR SERIAL/MODEl NO. O PAR T R E F . DESCRIPTION DISC. IFF. KNOB, gray — FOCUS 366-203 ..Includes: SCREW, set, 4-40 x 3 / „ inch HSS 213-075 .
- Page 49 Parts List — Type 3 2 1 A FRONT & REAR IC o n t'd ) SERIAl/MOOEL NO. R E F . PART NO. DESCRIPTION E F F DISC. CHASSIS, attenuator 441-0581-00 Mounting Hardware: (not included) LOCKWASHER, internal, # 4 210-0004-00 NUT, hex, 4-40 x 3 / )4 inch 210-0406-00...
- Page 50 Parts List — Type 3 2 1 A FRONT & REAR (Confd) SERIAL/MODEL NO. KEF. DESCRIPTION PART N O . EFF. DISC. SWITCH, unwired— AC-DC-GND 260-0448-00 Mounting Hardware: (not included) NUT, hex, 4-40 x inch 210-0406-00 3 / u SWITCH, unwired— INT-EXT 260-0449-00 Mounting Hardware.- (not included) NUT, hex, 4-40 x 3 / u inch...
- Page 51 Parts List — Type 3 2 1 A FRONT & REAR (Coat'd) SERIAL/MODEl NO. REF. PART N O . DESCRIPTION N O . DISC. 337-0652-00 SHIELD, switch Mounting Hardware.- (not included) 211 -0504 00 SCREW, 6-32 x '/, inch PHS 387-0938-00 PLATE, bulkhead, front Includes:...
- Page 52 Parts List — Type 3 2 1 A (Confd) FRONT ft REAR SER IAl/M O DEL NO. REF. DESCRIPTION PART N O . N O . IFF. DISC. Mounting Hardware For 5 W att Resistor: 210-0478-00 NUT, hex, alum., resistor mounting: 210-0601-00 EYELET 211-0507-00...
- Page 53 Parts List — Type 3 2 1 A CHASSIS...
- Page 54 Paris List — Type 3 2 1 A CHASSIS S E R IA L/M O D E L N O . REF. FART DESCRIPTION N O . N O . EFF. DISC. SOCKET, graticule light 136-035 ..Mounting Hardware: (not included) 210-457 NUT, hex, 6-32 x s / i 4 inch...
- Page 55 Parts List — Type 3 2 1 A CHASSIS (C o n t'd l SERIAl/MODEl NO. O PART R E F . DESCRIPTION E F F . DISC. PLATE, fiber, large 386-254 ..Mounting Hardware: (not included) LOCKWASHER, internal, # 6 210-006 NUT, hex, 6-32 x % inch...
- Page 56 Parts List — Type 3 2 1 A CABLE HARNESS & CERAMIC STRIPS...
- Page 57 Parts List — Type 3 2 1 A CABLE HARNESS & CERAMIC STRIPS SERIAL/MODEL NO. PART NO DESCRIPTION DISC. 1999 CABLE HARNESS, sweep 179-0883-00 CABLE HARNESS, sweep 179-0883-01 2000 CABLE HARNESS, transformer 179-0886-00 STRIP, ceramic, 7 /u inch x 20 notches 124-0145-00 Each Includes: STUD, nylon...
- Page 58 Part* List — Type 3 2 1 A CABLE HARNESS & CERAMIC STRIPS (C o n fd ) S E R IA l/M O O E l NO. REF. PART DESCRIPTION EFF. DISC. 124-148 STRIP, ceramic, inch x 9 notches - - - - Each Includes: STUD, nylon...
-
Page 59: Standard Accessories
Parts List — Type 3 2 1 A STANDARD ACCESSORIES SERIAL/MODEL NO. DESCRIPTION PART NO EEF. DISC. 010-0127-00 PROBE, pockage, P6006 103-0013-00 ADAPTER, 3 to 2 wire 161-0015-00 1672 CORD, power, AC CORD, power, AC 161-0015-01 1673 161 -0016-00 1672 CORD, power, DC 161-0016-01 1673... -
Page 60: Electrical Parts
Part* Ust — Type 321A ELECTRICAL PARTS Values are fixed unless marked Variable. Tektronix S /N Range Description Ckt. N o . Part N o. Bulb* B424 150-027 Neon, NE-23 150-001 Incandescent, # 4 7 Graticule Light B601 150-001 Incandescent, # 4 7... - Page 61 Parts List — Type 3 2 1 A Capacitors (C ont'dJ Tektronix Ckt. No. Part No. Description S /N Range C300 281-513 27 pf 500 v 281-501 4.7 pf 500 v C311 ± 1 pf C312 Use 281-0506-00 12 pf...
- Page 62 Part* List — Type 3 2 1 A Capacitors (C o n t'd ) Tektronix Ckt. No. Part No. Description S /N Range C730 290-117 50 juf 50 v 290-117 50 pf C731 50 v C734 290-117 50 pf 50 v...
- Page 63 Parts List — Type 3 2 1 A Diodes (C o n t'd l Tektronix Description Get. No. Part No. S /N Range D661 152-066 Silicon 1N3194 D692 152-066 Silicon 1N3194 Germanium 1N91 D700 152-001 Germanium 100-399 D710 152-008 D710...
- Page 64 Part* List — Type 321A Transistors (Cont'd) Tektronix Ckt. N o. Part N o. Description S /N Range Q183 151-063 2N2207 2N2207 Q194 151-063 Q199 151-071 2N1305 2N2207 Q313 151-063 Q323 151-063 2N2207 Q334 2N2207 151-063 2N2207 034 4 151-063...
- Page 65 Parts List — Type 3 2 1 A Resistors (Conf'dJ T e k t r o n ix D e s c r ip tio n S / N R a n g e C k t. N o . P a r t N o .
- Page 66 Parts List — Typo 3 2 1 A Resistors (C o n i'd ) Tektronix Ckt. No. Part No. Description S /N Range R198 315-243 24 k ’A w R199 27 k 'A w 316-273 R300 61.9 k Prec Use 322-365 '/ .
- Page 67 Parts List — Type 3 2 1 A Resistors (C o n l'd ) Tektronix Ckt. No. Part No. Description S /N Range R454 315-223 22 k ’A w R455 311-346 2 x 20 k 0.2 w VERTICAL POSITION R457...
- Page 68 Part* List — Type 321A Resistors IC o n t'd ) Tektronix Ckt. No. Part No. Description S /N Range 'A w R696 323-163 487 0 Prec 323-204 1 3 k 'A w Prec R697 'A w R699 302-101 100 0...
- Page 69 Parts List — Type 3 2 1 A (Conf’dJ Switches Tektronix Description Ckt. No. Port No. Unwired W ired TIME/DIV SW160 ) Rotary 260-376 *262-660 X 5 MAG SW348 ) AC-DC-GND 260-448 Slide SW401 Rotary VOLTS/DIV SW410 260-625 *262-661 260-617...
- Page 70 IMPORTANT A ll c irc u it v o lta g e s w e re o b ta in e d w ith a 2 0 ,0 0 0 f i / v V O M . A ll re a d in g s a re in v o lts. A c tu a l p h o to g ra p h s o f w a v e fo rm s a re sh o w n.
- Page 71 P O W E R C O U U E C T O R 3 2 1 A t y p e o s c i l l o s c o p e...
- Page 72 5<&*4 B L O C K D I A G R A M...
-
Page 73: Vertical Position
VERTICAL AMPLIFIER & CALIBRATOR Q u ie sce n t VO LTA G E READINGS w e re o b ta in e d w ith c o n tro ls set as f o l low s: V O L T S /D IV VERTICAL P O SITIO N (u p p e r re a din g s) c w (lo w e r re a din g s) - Page 74 f y d j ? { T ] V r“*- J T "T • • 7T S W 4 -0 I [ i k l P U T L O W E R D E F L E C T I O N P L A T E ( C R T ) R SIT <...
-
Page 75: Trig G Er In G Level
TIME-BASE TRIGGER VO LTA G E & W A V E F O R M d y n a m ic m easurem ents w e re o b ta in e d w ith co n tro ls set as fo llo w s : TRIG G ER IN G LEVEL A U T O V O L T S /D IV... - Page 76 T R IG G E R M U L T IV IB R A T O R t r i g g e r i n p u t a m p l i f i e r IV /O IV :- VERTICAL A M P L IF IE R $ C ALIBRATOR T IM E - B A S E G E N E R A T O R m r w...
-
Page 77: Time-Base Generator
TIME-BASE GENERATOR Q u ie s ce n t V O LTAG E READING S w e re o b ta in e d w ith c o n tro ls set as fo l lo w s: V O L T S /D IV CAL 4 D IV 3 0 °... - Page 78 u n & l a n k i n g AMPLIFIER t i o v + IO V R I3 S ©20 SV/DlVq; 2 V / DlV SAWTOOTH TO SW IfeO • rpr;:} • \ ; :\ i N ? 4 T .
- Page 79 4" swi&o I---------------------------------------------- T ------------------------------------------------ | ---------------------------------------------------------------------------- 1--------[ TIM E / P I V > - - T ------------ p -----------------------------------------------------------------------------1 ------------------------------------------------------------------------- 1 I F i R S F ^ C €>F * F ^ R T F * R 2 F $ R Bfi.r E * 1 ^ ,^ ,^ , &...
-
Page 80: Horizontal Position
H O R IZ O N T A L AMPLIFIER Q u ie sce n t VO LTA G E READING S w e re o b ta in e d w ith c o n tro ls set as f o l lo w s: V O L T S /D IV CAL 4 D IV... - Page 81 v A - :A i — T - h | 4 ^ | 4 ^ ; 5 . + I mSEC / biv S A W T O O T H F R O M Q 17 =b E X T O R I Z I N P U T SEE PARTS U5T KW lAJtU K...
- Page 82 L E F T M A N D D E F L E C T IO N P L A T E ( C R T ) T O RIGUT H A N D tE F L E C T lO N P L A T E C R T ) R E F E R E N C E...
- Page 83 REGULATOR VO LTAG E READING S w e re ta k e n w ith V O M n e g a tiv e le a d co nn e cte d to C O M M O N N EG ATIVE bus. A lso , see IM P O R TAN T n ote on Block d ia g ra m .
- Page 84 8 6 4 R E G U L A T O R C I R C U I T T Y P E 3 2 1 A O S C I L L O S C O P E <§>...
- Page 85 CONVERTER W AVE FO R M S w e re ta k e n a fte r in s e rtin g a 3 -to - 2 w ire lin e cord a d a p te r in series w ith th e Type 3 2 1 A ac p o w e r c o rd to reduce hum m o d u la tio n . If hum m o d u la tio n is n ot reduce d w h e n using an a d a p te r, u n p lu g the a d a p te r fro m th e lin e , tu rn th e p lu g 1 8 0 °...
- Page 86 <$> <$>...
- Page 87 See IM PO R TAN T n ote on Block d ia g ra m .
- Page 88 5 * T ^ O E K *r oETTtNC £ M fc.F fc C O W T R O L H ‘-OAomc R E F E R E N C E D I A G R A M S T IM E -B A S E GEWERATOR C O N V E R T E R WITH Blue OUTMNE...
-
Page 89: Manual Change Information
MANUAL CHANGE INFORMATION At Tektronix, we continually strive to keep up with latest electronic developments by adding circuit and component improvements to our instruments as soon as they are developed and tested. Sometimes, due to printing and shipping require ments, we can’t get these changes imm ediately into printed manuals. - Page 90 TYPE 321A TENT SN 2890 PARTS LIST CORRECTION CHANGE TO: 523-0^81-01 RUlOC 1 MO 1/2 W l/2* 325-0195-01 1 k f l 1/2 W l/2* RU12C 1/2 W 061^-01 990 k f l l/2* RUl2E 322-1289-01 10.1 k f l 1 /2 w 1/2* k f l...
- Page 91 TYPE 32 LA TENT 3030 PARTS LIST CORRECTION CHANGE 8 -0 0 1+70 C e r...
- Page 92 TYPE 321A TENT SN 3130 F-ECHANICAL PARTS LIST CORRECTION Fage 7-1^, STANDARD ACCESSORIES, Change REF. NO. 1 to read* 010-0203-00 PROBE, package, P6012 1/1 1 6 6 K l l ,...
- Page 93 TYPE 321A TENT SN 3290 PARTS LIST CORRECTION ADD: 6185 D151 152-0185-00 Silicon R160K 316-0186-00 18 meg l / k SCHEMATIC CORRECTION R160K is added in parallel with Rl60J. Mil, 715/167...
- Page 94 TT ; ■ HBM-- BI"---- *' 7 ---H O B ---I | ..■ __________ CHARACTERISTIC S U M M A R Y __________ • VERTICAL 6 -M H x BANDW ID TH AT l O m V / D I V BANDWIDTH—...
-
Page 95: Vertical Deflection
Recharge requires at least 16 hours. BATTERY CHARGER TEKTRONIX CRT Internal charger provides two different charging currents to 6x 10-div display area; each div is '/* inch. 3-inch tube pro the internal batteries. A trickle charge or a full charge is ap... -
Page 96: Optional Accessories
See catalog accessory pages for additional information on these and other items. CARRYING CASE Protects Type 321 A, provides convenient accessory storage compartment, order 016-0026-00 ........$38 RECHARGEABLE BATTERIES Each NiCd cell, order 146-0010-00 ........$ 7 Set of 10 NiCd cells, order 016-0077-01 ......
Need help?
Do you have a question about the 321 A and is the answer not in the manual?
Questions and answers