
Summary of Contents for Nightowl Stage Lighting THD Series
- Page 1 USER’S MANUAL THD SERIES www.NightOwlSP.com Specifically Specifically Designed for Designed for Smartphones Tablets...
- Page 2 “How to Videos”. You can also view our instructional videos by clicking the “How to Videos” tab within your product’s page on our website. Register at www.NightOwlSP.com Night Owl’s THD Series Camera Compatibility: The Night Owl THD System is compatible with the following models: CM-AHD10W-BU; CM-AHD7B-BU; CM-HDA10W-BU; CM-HDA10W-DMA; CM-HDA7B-BU; CM-PIRHDA10W-BU;...
- Page 3 TABLE OF CONTENTS...
-
Page 4: Table Of Contents
Table of Contents Chapter 1: FCC Warnings ..........8 Chapter 2: Safety Instructions . - Page 5 Chapter 8: Menus and Settings ........47 8.1 Video Playback .
- Page 6 Chapter 9: Glossary ..........81 Chapter 10: Warranty .
- Page 7 CHAPTER 1 FCC WARNINGS...
-
Page 8: Chapter 1: Fcc Warnings
Chapter 1: FCC Warnings This device complies with Part 15 of the FCC Rules. Operation is subject to the following two conditions: (1) this device may not cause harmful interference and (2) this device must accept any interference received, including interference that may cause undesired operation. FCC Compliance Statement These limits are designed to provide reasonable protection against frequency interference in residential installation. - Page 9 CHAPTER 2 SAFETY INSTRUCTIONS...
-
Page 10: Chapter 2: Safety Instructions
Chapter 2: Safety Instructions USE THE PROVIDED POWER ADAPTER. Do not use this product with a power source that applies more than the specified voltage. NEVER INSERT METAL INTO THE DVR CASE OR ITS OPENINGS. Inserting metal into the DVR case may cause electric shock. DO NOT OPERATE IN WET OR DUSTY AREAS. - Page 11 CHAPTER 3 APP OVERVIEW...
-
Page 12: Chapter 3: App Overview
Chapter 3: App Overview NOTE: The following instructions lead you through the steps for downloading the correct application for your Smart Device. Please refer to Pg. 33 of this User’s Manual for instructions on how to create an account and add your device. Night Owl fits right in with your mobile lifestyle by allowing you to remotely monitor your home or business. - Page 13 CHAPTER 4 SPECIFICATIONS...
-
Page 14: Chapter 4: Specifications
Chapter 4: Specifications 4.1 System Requirements Please be sure that your PC/MAC complies with the following specifications: ® • PC Operating System; Windows 7, Windows 8/8.1 and Windows ® ® ® • PC Browser: IE 8, and above (System requirements for PC Browser are for on-line viewing only) ®... -
Page 15: Dvr Diagram
4.2.1 DVR Diagram Once you have downloaded Night Owl X or Night Owl X HD and connected your DVR to your router, you can network your DVR by scanning the QR code which is located on the top of the DVR. Model # FRONT VIEW QR Code... -
Page 16: Camera Diagram
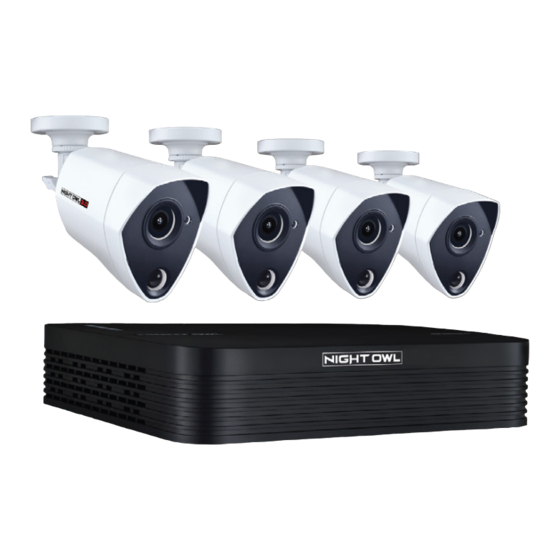
4.2.2 Camera Diagram CAMERA 3MP Resolution IR Cut Filter Wide Viewing Angle 80º Night Vision up 130 ft. Infrared PIR Sensor 3-Axis Mounting Bracket (Vandal-Proof Wire Camera Protection) Video/Power Cables Connect all cameras locally before final placement to ensure that all components function properly. 4.2.3 Mouse Diagram MOUSE Live Viewing:... - Page 17 CHAPTER 5 CAMERA INSTALLATION...
-
Page 18: Chapter 5: Camera Installation
Chapter 5: Camera Installation 5.1 Video/Audio Connect all cameras locally before final placement to ensure that all components function properly. Locate an included 60 foot Video/Power cable. Connect a camera to one end of the cable by matching the BNC connectors and DC power connectors. Audio enabled cameras (not included) will have an additional (white) RCA connection which will transmit the audio signal and will connect to the audio in port on the back of your DVR. -
Page 19: Power
5.2 Power 5.2.1 Standard Camera Power Locate an included power splitter. Power Splitter Connect the power splitter to the remaining DC power connectors (red) of the cables. Plug the power splitter into the labeled camera power supply, then plug the camera power supply into an available wall outlet or UPS. -
Page 20: Mounting The Cameras
5.3 Mounting the Cameras Connect all cameras locally before final placement to ensure that all components function properly. Camera distance from DVR. The further the camera is from the DVR or monitor, the higher the chances of signal degradation. The camera’s power supply should be located as near to the camera as possible when the distance exceeds 200 ft. - Page 21 Follow these instructions to correctly install your cameras. Locate a camera and choose a location where you would like to mount the camera. Indicate screw positions by marking three holes on the surface where you plan to mount the camera, using the holes in the camera base as a guide.
- Page 22 CHAPTER 6 DVR INSTALLATION...
-
Page 23: Chapter 6: Dvr Installation
Chapter 6: DVR Installation 6.1 Connecting to a TV (via HDMI) Locate the included HDMI cable. Plug one end of the cable into the HDMI port on the back of the DVR. Connect the other end of the cable to an available HDMI input on your TV or monitor. Select the appropriate video input channel on your TV or monitor to view the DVR. -
Page 24: Power
6.2 Power Locate the labeled DVR power adapter. NOTE: The camera power adapter and DVR power adapter should never be interchanged. DVR power adapter may vary slightly. Plug the included power adapter cable into the back of the DVR. Plug the other end of the power adapter cable into an available wall outlet. If you are using an uninterruptible power supply (UPS), plug the adapter cable into one of its output sockets. - Page 25 CHAPTER 7 GETTING STARTED...
-
Page 26: Chapter 7: Getting Started
Chapter 7: Getting Started 7.1 Startup Wizard When your DVR is powered on it will display the Night Owl logo while initializing. After initialization, you will be prompted to use the Startup Wizard. Follow the on-screen instructions to: Complete the basic setup of your DVR. Test your cameras locally. -
Page 27: Camera Test
7.1.1 Camera Test The Camera Test screen of the Startup Wizard serves as a reminder to test the camera connections to the DVR. If a connected camera displays a “No Signal” message, please visit www.NightOwlSP.com and click on the Support tab. 7.1.2 Network Check The Network Check screen of the Startup Wizard displays instructions for how to connect your DVR to the Internet. - Page 28 The Advanced Network Configuration tab is recommended only for advanced users. Once the internet connection has been established, the Startup Wizard will display a successful connection screen. If your DVR is not able to establish Internet connectivity, a Connection Failed screen will appear. Follow the instructions on this screen to re-test the network.
-
Page 29: Firmware Check
7.1.3 Firmware Check The Firmware Check screen of the Startup Wizard will automatically check for a firmware update. The Startup Wizard will notify you if a firmware upgrade alert is detected. Please select “Update” to download and install the latest firmware available for your system. The DVR will restart automatically when the update is complete. -
Page 30: Password Creation
7.1.4 Password Creation The Password Creation screen of the Startup Wizard requires you to create an admin password for your DVR system. Night Owl strongly suggests that you write down your admin password on page 5 of the Quick Setup Guide of your DVR, as you will be required to log in any time you want to configure or adjust your system settings. -
Page 31: Date And Time Setup
7.1.5 Date and Time Setup The Date and Time Setup screen of the Startup Wizard will allow you to set the current date and time. You may choose to use Network Time Protocol (NTP) to auto-configure the current date and time. NOTE: You must be connected to the Internet to use NTP. - Page 32 Once you have installed the Night Owl X or Night Owl X HD app on your smart device and created an account, you can scan the QR code on the Startup Wizard to configure your DVR with the Night Owl X or Night Owl X HD app! NOTE: In order to view your system remotely, your DVR must be connected to the Internet.
-
Page 33: A) Using Night Owl X And Night Owl X Hd
7.1.6 (a) Using Night Owl X and Night Owl X HD Download and Install Application Download the appropriate app from the App Store or Google Play Store and install the application on your device. NOTE: Use correct app for compatibility. Tablet: Smartphone: Night Owl X HD... - Page 34 Connecting and Adding your Device NOTE: When adding a new device, it may take 5–10 minutes before you begin receiving notifications. A device can be added to the Night Owl X app by using the application’s Smart Auto Detection or through a QR Code Setup.
- Page 35 Login to your App On the Device Login screen, enter the login information for the DVR (Remember, the DVR login and Night Owl X app login are different). The DVR username is admin by default. If you are not the admin, login with your username credentials.
-
Page 36: B) App Overview
7.1.6 (b) App Overview Live View Displays real-time footage of your system. Playback Notifications Settings View recordings & Manage custom Display connected devices, images and save them Push Notifications. change view layout, view to your phone’s album. favorites, manage accounts and access the help section. -
Page 37: Password Verification
7.1.7 Password Verification The Password Verification screen of the Startup Wizard will display your Admin password. Night Owl strongly recommends writing down your password within the Quick Setup Guide of your DVR. 7.1.8 Camera/Channel Settings The Camera/Channel Settings screen of the Startup Wizard serves as a reminder to mount your system’s cameras in the final position so you can make accurate adjustments to positioning, detection area and channel sensitivity. -
Page 38: Camera Adjustment
7.1.9 Camera Adjustment The Camera Adjustment screen of the Startup Wizard shows how you can use the Live View feature of the Night Owl X or Night Owl X HD app to easily adjust your cameras’ position and viewing angle. 7.1.10 Channel Settings The Channel Settings screen of the Startup Wizard explains in detail how you will configure your Channel Settings. -
Page 39: Default View
The Channel Settings screen of the Startup Wizard explains in detail how you will configure your Channel Settings. 7.1.11 Default View The Default View screen of the Startup Wizard allows you to select the default view of the monitor connected to your DVR. -
Page 40: Helpful Links
Live View: 1*1 channels onscreen Live View: 2*2 channels onscreen Live View: 1+5 channels onscreen Live View: 1+7 channels onscreen Live View: 3*3 channels onscreen 7.1.12 Helpful Links NOTE: Please scan these QR Codes directly from your TV/Monitor, NOT directly from this page. The Helpful Links and Support screen of the Startup Wizard contains QR codes linked to: DVR Troubleshooting Guide PC/MAC... -
Page 41: Wizard Complete
7.1.13 Wizard Complete Once you have successfully completed the Startup Wizard, click Finish to begin using your Night Owl DVR. -
Page 42: Displays And Icons
7.2 Displays and Icons The following sections will describe the main screens you will access for login, playback, recording and configuration. 7.2.1 Live View (All Channels) After you have completed the initial setup of your DVR through the Startup Wizard, whenever you power on your DVR, the first thing you will see is the Live View screen. -
Page 43: Right-Click Menu
7.2.2 Right-Click Menu Menu: Open the Main Menu. Viewing Options: Manually locks or unlocks screen. Once the screen is locked, you will need to enter your username and password to gain access. Single Camera View: Open a single channel for viewing in full-screen mode. The slide-out menu contains a list of channels to choose from. -
Page 44: Channel Toolbar
7.2.3 Channel Toolbar The Channel Toolbar is a ‘shortcut’ to commonly used DVR functions which you can use to operate a particular channel. Whether you want to playback recordings, zoom in on the image or just adjust the camera’s image settings, the Channel Toolbar is a quick and convenient way to keep up with what is happening on your cameras. -
Page 45: Login
7.2.4 Login Any time you want to configure or adjust your system settings you will be required to log in by entering your username and password. It is important you save your login information or you will not be able to access your DVR. - Page 46 CHAPTER 8 MENUS AND SETTINGS...
-
Page 47: Chapter 8: Menus And Settings
Chapter 8: Menus and Settings Some menu screens will allow you to copy similar settings to multiple channels. Choose the channel you would like to copy information from in the first dropdown box (Copy), then select the channel you would like to copy the information to from the second dropdown box (To). - Page 48 Menu The main menu lets you access many of your DVR’s great features. You can customize camera names, keep track of recent events, create recording schedules, configure advanced motion detection settings, check up on the hard drive’s condition and change other DVR settings. Video Playback: Search and watch all video recordings by channel, type of recording, date or time period.
-
Page 49: Video Playback
8.1 Video Playback The Video Playback menu allows you to search your DVR’s Hard Drive for recorded video. You may view, tag and export video clips from within this menu. Playback Type: Choose which video recordings to playback. Options are: Normal (i.e, Motion and Continuous, Event, Tag, Smart, Sub-periods and External File.) Camera Selection: Search for recordings from one or more cameras. - Page 50 6 7 8 9 Start / Stop Clipping: Clip interesting parts of the recorded video by setting the mark in and mark out points on the video recording. When a video file is playing, click the Start Clipping button at the mark in point and click it again at the mark out point.
- Page 51 10 11 12 13 14 15 16 17 18 Reverse Playback: Playback the video in reverse. Stop: Stop playback. Pause playback: Click again to resume playback. 30s Rewind: Rewind video by 30 seconds. 30s Fast Forward: Fast forward video by 30 seconds. Rewind: Slow down video playback (x1/2, x1/4, x1/8, Single Frame).
-
Page 52: Search/Export
8.2 Search/Export When a video is recorded, it is stored as a file on your DVR’s hard drive. In this menu, you can copy video recordings from your DVR’s hard drive to an external storage device such as a USB flash drive. NOTE: Before exporting a video file, the external USB flash drive or memory stick MUST be in FAT32 or NTFS file format. -
Page 53: Camera Management
In the Device Name list, make sure your USB device is the current selection. You can also create a new folder in your USB device to store your DVR recordings by clicking New Folder. Click Export. Select Video and Log, then click OK to begin copying the selected recordings to your USB storage device. -
Page 54: On Screen Display
PTZ: Configure settings on your DVR to control a PTZ-enabled camera. Motion: Configure the motion detection settings and sensitivity level for each camera. By default, the DVR has motion recording enabled on every channel, configured to operate at an average level of sensitivity. -
Page 55: Image Settings
Camera Name: You can specify a name of up to 32 characters for the selected camera. By default, all channels are named as the Camera No. field, but this can be set to anything you like. Display Name: Select whether the name of the camera appears on the screen. Display Date: Select whether the current date appears on the screen. -
Page 56: Camera Parameter Settings
Contrast: Increase the difference between the blackest black and the whitest white in the image. Useful if sections of the image “grey out” but setting the contrast too high will degrade image quality. Saturation: Alter how much color is displayed in the image. The higher the saturation, the more bright and vivid colors will appear to be. -
Page 57: Ptz
8.3.4 PTZ The PTZ menu applies to any connected PTZ-enabled camera. Camera: Select the camera you want to configure. PTZ Controls: Use the PTZ controls to move the camera to the desired focal position. The zoom and focus controls can also be used. You can use the speed control to determine how fast or slow the camera will move. Preset: A preset is a position within the image that you would like the camera to focus on. -
Page 58: Motion
8.3.5 Motion In this menu, you can adjust or modify individual camera settings connected to your DVR. Camera: Select the channel you want to configure. Notifications Settings: Specify how your DVR should respond and notify you when it detects motion. You can trigger additional cameras to start recording, you can adjust your arming schedule, send email alerts or trigger the DVR’s internal alarm to sound. -
Page 59: Privacy Mask
8.3.6 Privacy Mask In this section of the menu, you can create and place “privacy masks” to conceal parts of the camera’s image on the screen. This restricts what can be seen in Live View and on the video recording–useful when you want to protect personal privacy or sensitive areas. -
Page 60: Video Loss
Settings: Specify the DVR’s actions when it detects tampering on the selected camera. Options available are: Full Screen Monitoring: The affected camera’s screen is displayed in full screen mode. Audible Warning: A continuous audible beeping is heard from the DVR. Push Notification: A warning message is sent to the Night Owl X or Night Owl X HD client software. -
Page 61: Record
8.4 Record This menu allows you to edit DVR record scheduling, video quality settings and set overwrite preferences. 8.4.1 Schedule Within this menu, you can specify when the DVR records video and under what mode for each channel. By default, all channels are armed to use Motion Detection as their recording mode. The schedule presented on-screen applies to one camera over one entire week. -
Page 62: Video Quality Settings
How to change the camera’s recording schedule: In the Camera list, select a channel. To set a recording mode for a specific time and day, first select the mode and then click the corresponding square(s) in the timeline. The color of the square changes to the assigned recording mode. - Page 63 Recording Quality Settings: You can change Main Stream settings for both Continuous and Event recordings, and it is recommended to select the same settings for both recording types. Resolution: The number of frames per second (fps) that the DVR will record. Video Quality: The actual amount of data that the DVR uses to record video.
-
Page 64: Overwrite Recordings
8.4.3 Overwrite Recordings The Overwrite option is enabled by default. This allows the DVR to be able to record events as they happen. If the hard drive is full, the DVR will record over recordings already stored on the hard drive. The DVR will always record over the oldest files on your hard drive first. -
Page 65: Configuration
8.6 Configuration Within this menu, you can configure general, network, live view, system events and user settings for your DVR system. 8.6.1 General The General tab of the Configuration menu will allow you to access display and system settings for your DVR. -
Page 66: B) Dst (Daylight Savings Time)
8.6.1 (b) DST (Daylight Savings Time) In this section of the menu, you can configure settings related to daylight savings time. Auto DST Adjustment: DST will adjust automatically. Enable DST: Enable this setting if you want the DVR to adjust the time when daylight savings time begins. From/To: Define when daylight savings applies to your location. -
Page 67: Network
8.6.2 Network ADVANCED In this menu, you can configure network settings for your DVR, obtain information regarding remote access and email notifications. 8.6.2 (a) General In this section of the menu, you can manually configure network settings for your DVR. It is usually not required as the DVR automatically configures them for you when you connect the DVR to your router via the Ethernet cable. -
Page 68: B) Remote Access
8.6.2 (b) Remote Access This section of the menu will show you how to pair the Night Owl X app with your DVR. 8.6.2 (c) DDNS Enable or Disable DDNS service to view your DVR from a computer. Device Domain Name: Set to the domain name you created when registering your DDNS. User: The username created during the DDNS registration process. -
Page 69: D) Ntp
8.6.2 (d) NTP You can configure the NTP server details to obtain current date and time. Enable NTP: Enable the DVR to connect to an NTP server. Interval (min): The amount of time in minutes that will elapse between the DVR updating its internal clock to match that of the NTP server. - Page 70 Username: The username for the outgoing email account. Password: The password for the outgoing email account. SMTP Server: The SMTP server address of your email provider. For commonly used mail server settings, see “Common Email Provider Settings” below. If your email provider is not listed in the table, use your Internet browser to easily find your email provider’s server address and port by searching ‘smtp settings’...
-
Page 71: Live View
iCloud Server Address: smtp.mail.me.com Port: 587 Requires SSL: Yes Outlook.com Server Address: smtp.live.com Port: 587 Requires SSL: Yes 8.6.3 Live View These options allow you to configure Live View display settings. Video Output Interface: The default output is VGA/HDMI. Live View Mode: Select which Multiview format to be the default in Live View mode. Dwell Time: Set the number of seconds to dwell on a video channel before switching to the next channel when enabling Start Auto-switch via the Mouse Menu in Live View. -
Page 72: System Events
8.6.4 System Events In this section of the menu, you can enable the DVR to monitor for alarm events or exceptions. An exception is any deviation from the DVR’s normal behavior– phrased another way, it’s like saying the DVR’s been working fine except for these events. -
Page 73: User
Audible Warning: A continuous audible beeping is heard from the DVR when an exception occurs. Push Notification: A warning message is sent to the Night Owl X client softwarewhen an exception occurs. Send Email: If you’ve have configured your email account details, an alert is sent to your email address when an exception occurs. -
Page 74: System Info
8.7.1 System Info The System Info tab of the menu contains your DVR’s system information, camera status, recording and network configuration and the status of your hard drive. 8.7.1 (a) Device Info Within this menu, you can view your DVR’s (default) name, model, serial number, firmware version, hardware version and request for a firmware upgrade. -
Page 75: C) Record
8.7.1 (c) Record In this section of the menu, you can check on the recording settings for each camera connected to the DVR. You can also find out if any camera has a recording in progress. DISCLAIMER: Data shown above is for example purposes only. 8.7.1 (d) Network In this section of the menu, you can view your current network settings. -
Page 76: E) Hdd
8.7.1 (e) HDD In this section of the menu, you can check on the status of hard drives connected to the DVR. 8.7.2 Log Information The DVR continuously creates information logs for every alarm event, operation and exception as they happen. These logs are stored in the DVR’s hard drive and can be viewed and exported at any time. -
Page 77: Import/Export
To Export logs: Click Search and Export. 8.7.3 Import/Export In this section of the menu, you can export or import a configuration file containing all the DVR settings you have customized, including your recording settings, schedule, and so on using a USB storage device. This will come in handy as it will save you time if you need to reset the DVR back to factory default settings. -
Page 78: Upgrade
8.7.4 Upgrade In this section of the menu, you can upgrade the firmware of the DVR by using a USB storage device. NOTE: This feature is for advanced users only, unless directed by a technical support agent, please disregard this menu screen. How to upgrade DVR firmware using a USB device: Connect a USB storage device containing the firmware update file to the USB port on the back of the DVR. - Page 79 You can reset the DVR and load factory default settings. There are two options available: Factory Default: Will reset all the parameters including network and user settings. Restore Defaults: Will do the same but will maintain your network and user settings. The DVR will reboot after you click Yes.
- Page 80 CHAPTER 9 GLOSSARY...
- Page 81 Chapter 9: Glossary DDNS: Dynamic Domain Naming System. Method for automatically updating hostnames, address or other information like a URL on a given name server. DHCP: Dynamic Host Configuration Protocol. A network protocol that allows a server to automatically assign a device and IP address.
- Page 82 CHAPTER 10 WARRANTY...
- Page 83 Chapter 10: Warranty NIGHT OWL, LLC (‘Night Owl”) provides the following warranty to the original retail purchaser only (the “Purchaser”) with respect to this product (the “Product”): For a period of one (1) year after the date of sale, the Product shall be free from manufacturing defects in material and workmanship.
- Page 84 Returns Under This Warranty In order to obtain service, please make sure that you have registered your product on-line no later than thirty (30) days after purchase at www.NightOwlSP.com in the warranty registration section or in any other manner described in the instructions. Disclaimer Certain uses, publication and/or distribution of video/audio recordings from security cameras and/or audio devices are prohibited or restricted by federal, state and local laws.
- Page 85 CHAPTER 11 TROUBLESHOOTING...
- Page 86 Chapter 11: Troubleshooting If a problem occurs, you may be able to easily correct it yourself. The following table describes some common issues and their most likely solutions. Please refer to the table before calling technical support. Error Possible Causes Solutions 1.
- Page 87 Error Possible Causes Solutions 1. Check the camera video cable and connections. 2. Disconnect and reconnect the There is no picture on selected Camera cables are loose of have cable at the system and at channels/camera picture Is not become disconnected. the camera.
- Page 88 CHAPTER 12 USER INFORMATION...
- Page 89 Chapter 12: User Information Be sure to write down all the important information below and place it in a secure location. General DVR Information NOTE: The Mac Address can be found within the Network tab of your DVR’s Maintenance Menu. The Component Model Number can be found within the Device Info tab of your DVR’s Maintenance Menu.
- Page 90 Need Help? For system manuals, troubleshooting guides, FAQs, video tutorials and more: Please refer to the sticker located on top of the device for steps on how to access your product’s support material. CONTACT US PHONE EMAIL WEBSITE (English, Spanish & French) Sales / Technical Support Sales Support 24/7 Product Support...