Advertisement
Available languages
Available languages
Quick Links
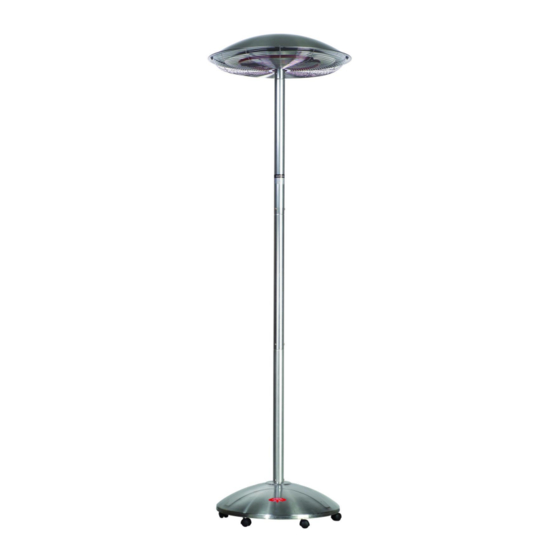
360° CALEFACTOR INFRAROJO ELÉCTRICO
MANUAL DE INSTRUCCIONES
Contenidoss
Especificaciones
Instrucciones de seguridad
importantes
Instalació n
Nombres de los componentes
Funcionamientos
Cuidado y mantenimiento
Funcionamientos inadecuados y
revisió n de la unidad
POR FAVOR LEA LAS INSTRUCCIONES DEL MANUAL ANTES DEL MONTAJE Y
COLOCACIÓN DE LA UNIDAD EN UN LUGAR SEGURO
Advertisement

Subscribe to Our Youtube Channel
Summary of Contents for Microsonic EPT800
- Page 1 360° CALEFACTOR INFRAROJO ELÉCTRICO MANUAL DE INSTRUCCIONES Contenidoss Especificaciones Instrucciones de seguridad importantes Instalació n Nombres de los componentes Funcionamientos Cuidado y mantenimiento Funcionamientos inadecuados y revisió n de la unidad POR FAVOR LEA LAS INSTRUCCIONES DEL MANUAL ANTES DEL MONTAJE Y COLOCACIÓN DE LA UNIDAD EN UN LUGAR SEGURO...
- Page 3 Especificaciones Series EPT 800 de los calefactores MODELO N-º VOLTAJE POTENCIA ALTURA TIPO Base ponderada con EPT 800 220-240V 2000-2400W 2 m. ruedas bloqueables LEA TODAS LAS INSTRUCCIONES Y ADVERTENCIAS ANTES DE INSTALAR O USAR ESTE CALEFACTOR INSTRUCTIONES DE SEGURIDAD IMPORTANTES (ESTE APARATO ES PESADO) Cuando use el calefactor, deberí...
- Page 4 30. El sistema de potencia elé ctrica debe poder soportar un mí nimo de 16amperios, 240V para series de calefactores un EPT800 y la salida de potencia elé ctrica debe estar instalada correctamente, así como bien fijada al suelo y de acuerdo con todos los có digos de electricidad necesarios.
- Page 5 su lugar. 38. El calefactor no está diseñ ado para ser usado por personas (niñ os incluí dos) con capacidades sensoriales, mentales o fí sicas reducidas o con falta de experiencia o conocimiento, a menos que tengan supervisió n o instrucciones acerca del calefactor por una persona responsible por su seguridad.
- Page 6 Este calefactor está equipado con un enchufe de puesta a tierra. El sistema de energí a elé ctrica debe ser capaz de soportar al menos 16 amperios, 240V en un calefactor de la serie EPT800 y la salida de potencia elé ctrica debe estar instalada correctamente de acuerdo con los có digos ce seguridad elé...
- Page 7 CABLES DE EXTENSIÓN Para evitar sobrecargar el circuito elé ctrico, evite usar cables de extensió n. Este calefactor está suministrado con un enchufe precableado y un cable elé ctrico con una longitud adecuada. Es necesario que haya un enchufe elé ctrico apropiado colocado a una distancia del calefactor equivalente a la longitud del cable elé...
- Page 8 EVITE TENER EL CALEFACTOR EN FUNCIONAMIENTO CUANDO UNA PARTE DE ÉSTE (INCLUYENDO CABLEADO Y ENCHUFES) NO ESTÉ DEL TODO SECA O HAYA UNA BAÑERA, DUCHA O PISCINA EN LAS PROXIMIDADES. NO PONGA EN FUNCIONAMIENTO EL CALEFACTOR DESPUÉS DE UNA AVERÍ...
- Page 9 Inserte el cableado de base a travé s del segmento del polo medio (tubo que sobresale) como se muestra en la Figura 2. Alinee los agujeros del tornillo de este segmento con los del conjunto de la base y asegure los mismos con 6 de los tornilos proporcionados como se muestra en la Figura 2.
- Page 10 Ponga en posició n vertical tanto el conjunto de la base como el conjunto de la resistencia elé ctrica, conecte el cableado de la resistencia elé ctrica al cableado de la base con enchufes elé ctricos en los extremos de estos cables, ordene los cables elé ctricos y sitú elos en el centro del polo medio como se muestra en la Figura 4.
- Page 11 NAMES OF PARTS...
- Page 12 FUNCIONAMIENTO Procedimientos de funcionamiento Botó n de interruptor Botó n de interruptor 0-----apagado I-----encendido Primer paso : Monte el calefactor segú n las instrucciones de montaje. Segundo Paso: Conecte este calefactor adecuadamente al sistema de suministro elé ctrico correcto segú n las instrucciones. :...
- Page 13 AVERÍ AS Y REVISIONES Averí as de funcionamiento má s habituales Averí a Posibles motives Contramedida 1 : Calefactor El enchufe de la alimentació n Desconecte el enchufe de la corriente elé ctrica está conectado elé ctrica y vuelva a conectarlo no arranca correctamente.
- Page 14 Constitució n 2070 Montevideo, Uruguay Tel : +598 2403 3070...
-
Page 15: Table Of Contents
ELECTRIC INFRARED RADIANT HEATER RATED VOLTAGE : 220-240V POWER : 2000-2200W INSTRUCTION MANUAL Contents Specifications Important Safety Instructions Installation Names of Parts Operations Care and Maintenance Malfunction and Examination PLEASE READ INSTRUCTION MANUAL CAREFULLY BEFORE ASSEMBLY AND KEEP IT IN A SAFE PLACE FOR REFERENCE... -
Page 17: Specifications
Specifications Series EPT MODEL NO. VOLTAGE POWER HEIGHT TYPE Weighted Base with EPT800 220-240V 2000-2400W 2.0M Lockable Wheels PLEASE READ ALL INSTRUCTIONS BEFORE USE IMPORTANT SAFETY INSTRUCTIONS READ ALL INSTRUCTIONS AND WARNINGS BEFORE INSTALLING OR USING THIS HEATER (THIS APPLIANCE IS HEAVY) - Page 18 28. Do not touch or place hand in front of the heating element while it is working to avoid getting burned. 29. The electric power system must be able to carry a minimum of 16-amp 220- 240V circuit for an EPT800 series heater and the electric power outlet must...
- Page 19 be properly installed and grounded/earthed in accordance with all applicable electric codes. 30. The heater must be used in a completely dry condition. 31. Do not place this heater in immediate vicinity of a bath, shower or swimming pool or the like. 32.
-
Page 20: Installation
This heater is equipped with a grounding/earthing plug. The electric power system must be able to carry a minimum of 16-amp 220V-240V circuit for an EPT800 series heater and the electric power outlet must be properly installed and grounded/earthed in accordance with all applicable electric and safety codes. - Page 21 necessary for a suitable electrical socket to be located within a distance of the heater equivalent to the length of the electrical flex and be easily accessible. WARNING TO PROVIDE CONTINUOUS PROTECTION AGAINST ELECTRIC SHOCK CONNECT TO PROPERLY GROUNDED/EARTHED OUTLETS ONLY. ...
- Page 22 ASSEMBLY Warning: Please assemble the heater according to the following procedures, and make sure the electric wiring is connected properly and segments of the center pole are properly secured Remove all parts out of the carton and plastic covers and place these parts on the floor, carpet or carton paper for assembly.
- Page 23 Drawing 2 Connect the remaining segment (for Free-Standing Models only) of the center pole (standing tube), align the screw holes on the segments of the center pole and secure the same with the remaining screws provided as shown in Drawing 3 and, after all three (3) screws are in place, tighten the screws to secure the segment(s) properly Drawing 3 Erect both the base assembly and the heating element assembly vertically, connect the heating...
- Page 24 Drawing 4...
-
Page 25: Names Of Parts
NAMES OF PARTS... -
Page 26: Operations
OPERATIONS Operation Procedures The Switch Button Switch Button 0-----OFF I-----ON : Assemble the heater according to the Assembly Instructions. First Step Second Step : Connect this heater properly to the right electric power system according to the instructions. : Turn the power on and press the switch button to the right working condition. Third Step CARE AND MAINTENANCE ALWAYS UNPLUG HEATER AND BE SURE HEATER IS COOLED TO ROOM... -
Page 27: Malfunction And Examination
MALFUNCTION AND EXAMINATION Common Operation Malfunctions Malfunction Possible Reasons Countermeasure Power plug is not properly Disconnect the power plug from the 1:Heater connected electric power supply and reconnect cannot start again. Safety setting cut off the circuit or Redesign the safety setting or enlarge the the fuse of the electric circuit is rating capacity of the fuse of the electric burned... - Page 28 Constitució n 2070 Montevideo, Uruguay Tel : +598 2403 3070...
Need help?
Do you have a question about the EPT800 and is the answer not in the manual?
Questions and answers