Table of Contents
Advertisement
Quick Links
Advertisement
Table of Contents

Summary of Contents for Peak Controlmicro PNX13-10001
- Page 1 Controlmicro User manual V 1.1.3...
- Page 2 User manual, Controlmicro Product Item number Controlmicro PNX13-10001 This user manual contains the most important information for operating the Controlmicro in a safe manner. Please study this manual carefully before working with the device. This applies to all persons who come into contact with the device. The product names mentioned in this document may be brands or registered trademarks of their respective owners.
-
Page 3: Warning Symbols And Signal Words Used In This Manual
User manual, Controlmicro Warning symbols and signal words used in this manual Warning Obey warning to avoid death or serious injury Caution Obey instructions to avoid personal injury or damage to property Note Instructions and facts to be followed Additional, useful hints Important safety instructions, please read before installation! Warning The device can carry dangerous voltages if improperly installed! -
Page 4: Table Of Contents
User manual, Controlmicro Table of Contents Page Warning symbols and signal words used in this manual Important safety instructions, please read before installation! 1 Target audience 2 Intended use 3 Product description 3.1 Software 3.1.1 Operating system 3.1.2 Operation with the PEAKnx software YOUVI 3.1.3 Operation with third-party software 3.2 Product features 3.3 Device components... -
Page 5: Target Audience
User manual, Controlmicro 1 Target audience These instructions are intended to explain basic aspects of the installation, commissioning, operation and maintenance of the Controlmicro. Depending on the use phase, this manual is aimed at other target groups: Commissioning ▪ Installation and commissioning may only be carried out by qualified electricians and system integrators. -
Page 6: Product Description
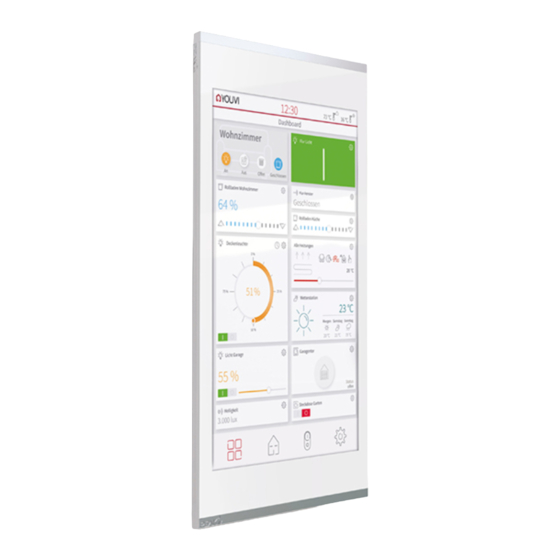
User manual, Controlmicro Unauthorized repairs or changes to the device ▪ 3 Product description The Controlmicro (short: panel) is a high-quality panel computer for wall mounting. It serves as a display and control unit for the KNX controlled components and installations of a building. 3.1 Software The panel can be operated both with the supplied YOUVI software and with other Windows- compatible software. -
Page 7: Operation With Third-Party Software
User manual, Controlmicro 3.1.3 Operation with third-party software The Windows 10 LTSC operating system pre-installed on the panel allows the use of other Windows-based software for e.g. visualizations and door intercoms. Depending on the software used, the functional scope of the panel can be expanded considerably. A list of compatible soft- ware can be found in the FAQs: www.peaknx.com/FAQ, topic “compatibility”. -
Page 8: Device Components
User manual, Controlmicro 3.3 Device components Position Description Panel with touchscreen Mounting plate; Suitable switch box for mounting: standard screw spacing 60 mm, depth min. 35 mm... -
Page 9: Touch Panel Elements
User manual, Controlmicro 3.4 Touch panel elements Position Description Microphone Proximity sensor Brightness sensor Touchscreen MicroSD card slot Screw holes for fixing the panel USB 2.0 Type C Status LED: red: panel is shut down, green: panel is switched on... -
Page 10: Mounting Plate
User manual, Controlmicro 3.5 Mounting plate ^ r q e l o = k ^ j b q fq i b ` o b ^ q fl k = a ^ q b p r _ q fq i b p r mb o s fp l o = k ^ j b ` e b ` h = a ^ q b p ` ^ i b... -
Page 11: Power Supply
User manual, Controlmicro 3.6.2 Power supply The plug-in terminal for the voltage supply is designed for a conductor cross-section (rigid) from 0.14 mm² to 1.5 mm². The conductor cross-section (flexible) with wire end ferrule without plastic sleeve must be in the range of 0.25 mm² to 1.5 mm². 3.6.3 Ethernet port Note: A cable of category CAT5e is recommended for using the 100 Mbit LAN connection,... -
Page 12: Delivery
User manual, Controlmicro You open the application by typing http://localhost:31521/ into the panel‘s browser or using the icon in the taskbar: 4 Delivery Controlmicro panel ▪ USB flash drive: YOUVI Basic software package, Controlmicro user manual ▪ Brief instructions for commissioning the panel and software ▪... -
Page 13: Important Safety And Handling Information
User manual, Controlmicro 5 Important safety and handling information Warning The Controlmicro may only be installed and commissioned by qualified electricians! Warning Observe the national regulations applicable in your country regarding installation, func- tional testing, repair and maintenance of electrical products! ▪... - Page 14 User manual, Controlmicro Connect the network cable to the LAN board as shown in the picture on the left. Plug the LAN board onto the LAN connector as shown in the picture on the right. Fasten the network cable to the black housing using a cable tie. −...
-
Page 15: Initial Commissioning And Operation
User manual, Controlmicro The panel is held by magnets on the mounting plate. Optional: Secure the panel from the side or from below with the 4 grub screws included, see 3.4 Touch panel elements Pos. 6. Use the included tool. 7 Initial commissioning and operation Caution Avoid damage to the panel due to early commissioning! -
Page 16: Setting Up The Visualization
User manual, Controlmicro If you need to restart the panel after shutdown, there are 2 ways: Switch off the circuit breaker that is associated to the panel. − This procedure is suitable if the anti-theft screws are inserted. Disconnect the panel from the mounting plate so that the power supply is cut off. Afterwards, reconnect the panel to the mounting plate or turn the circuit breaker back on. -
Page 17: Maintenance
User manual, Controlmicro Select “Try it out”. ▪ Test the function by clicking on “Execute”. ▪ A corresponding “Request URL” link will be created to copy the command. ▪ At the end of the expanded area it will be shown if the execution was successful: “Success“. ▪... -
Page 18: Troubleshooting
User manual, Controlmicro Switching on the cleaning mode If you are using the supplied YOUVI visualization, switch on the cleaning mode for cleaning. Therefore, proceed as follows: In the YOUVI visualization, switch to the settings. ▪ Tap on “Activate cleaning mode” in the upper left corner. ▪... -
Page 19: Technical Support
User manual, Controlmicro Each Controlmicro is provided with an image for restoring the software to the state of delivery. To restore the panel to this state, proceed as follows: Note: It is recommended to create a backup of the YOUVI server in YOUVI Configuration > General >... -
Page 20: Technical Data
User manual, Controlmicro 10 Technical data Supply Power supply specification 24 V DC; 2.5 A Connection terminal, con- rigid: 0.14 mm² - 1.5 mm² ductor cross section flexible with wire end ferrule without plastic sleeve: 0.25 mm² - 1.5 mm² Power consumption Operation (Idle): 5 W Operation (Full load): 20 W... - Page 21 User manual, Controlmicro Periphery Speakers Broadband, stereo Microphone Room characteristics WLAN WiFi 2,4GHz IEEE 802.11b/g/n Bluetooth Dimensions Size of the panel 223 x 125 x 13 mm (without mounting body) Weight of panel and mounting plate 602 g Environment Ambient temperature 0 bis +35 °C Temperature for storage and transport -20 bis +60 °C...
-
Page 22: Subject To Change Without Notice
User manual, Controlmicro Subject to change without notice Content changes in this documentation, which serve the technical progress, are made without prior notice. This documentation has been prepared with great care and will be revised at regular intervals. Nevertheless, we cannot guarantee complete accuracy. All known errors are eliminated in new editions. - Page 23 User manual, Controlmicro EU Declaration of Conformity This declaration applies to the following product: Product name: Controlmicro Item number(s): PNX13-10001 Manufacturer: PEAKnx GmbH Otto-Roehm-Strasse 69 64293 Darmstadt Germany We declare under our sole responsibility that the mentioned product is in conformity with the following directives and the affiliated harmonized standards: EU Directive 2011/65/EU (RoHS 2) + 2015/863/EU (amended list of restricted substances)
-
Page 24: About Peaknx
As the newest division of the PEAK group headquartered in Darmstadt, Germany, PEAKnx can draw from more than 25 years of experience in hardware and software development. Through a broad network of certified partners, PEAKnx also offers the associated services –...
Need help?
Do you have a question about the Controlmicro PNX13-10001 and is the answer not in the manual?
Questions and answers