TP-Link RE190 User Manual
Ac750
Hide thumbs
Also See for RE190:
- Quick installation manual (51 pages) ,
- Manual (3 pages) ,
- User manual (52 pages)
Table of Contents
Advertisement
Advertisement
Table of Contents

Subscribe to Our Youtube Channel
Related Manuals for TP-Link RE190


Summary of Contents for TP-Link RE190
- Page 1 User Guide AC750 Wi-Fi Range Extender RE190 REV4.0.0 1910012665...
-
Page 2: Table Of Contents
4. 3. 1. Add TP-Link ID to Manage the Extender ...... - Page 3 Chapter 6 Manage Your Extender 6. 1. Set System Time ............35 6.
-
Page 4: About This Guide
The Quick Installation Guide can be found where you find this guide or inside the package of the extender. Specifications can be found on the product page at https://www.tp-link.com. A community is provided for you to discuss our products at https://community.tp-link.com. -
Page 5: Chapter 1 Get To Know About Your Extender
Chapter Get to Know About Your Extender This chapter introduces what the extender can do and its appearance. It contains the following sections: • Product Overview • Appearance... -
Page 6: Product Overview
Product Overview Bring Dead Zones Back to Life Tired of Wi-Fi “dead zones”? The TP-Link extender is connected to your router wirelessly, strengthening its signal and expanding its coverage into areas that could not otherwise be reached. The device also reduces signal interference to ensure reliable Wi-Fi coverage throughout your home or office. -
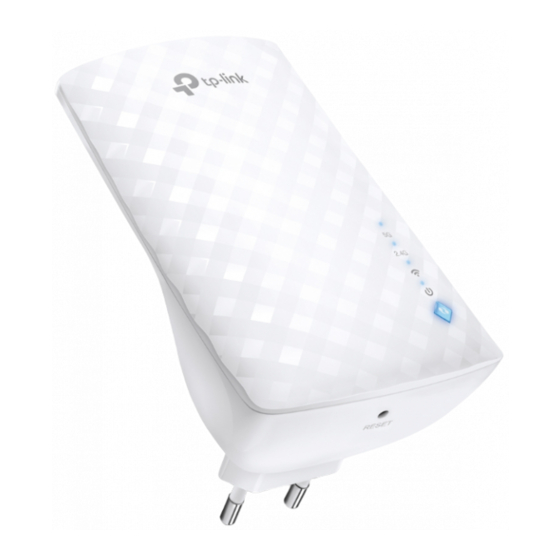
Page 7: Led Explanation
Chapter 1 Get to Know About Your Extender 1 2 1 LED Explanation You can check the extender’s working status by following the LED Explanation table. Name Status Indication The extender is connected or not connected to the 5GHz 5GHz On/Off wireless network of your host router. -
Page 8: Chapter 2 Set Up Internet Connection
Chapter Set Up Internet Connection This chapter introduces how to boost your host wireless coverage. Please follow the step-by-step instructions to set up the internet connection. It contains the following sections: • Power On the Extender • Set Up the Extender... -
Page 9: Power On The Extender
Next to Solid On Set Up the Extender There are three ways to set up the extender: via the WPS button, via the TP-Link Tether app, or via a web browser. 2 2 1 Method 1: Via the WPS Button Use this way if your router has a WPS button. - Page 10 Chapter 2 Set Up Internet Connection Solid On 3. (Optional) If the extender connects to a dual band router, repeat steps 1 and 2 above to connect to the other band. 4. Relocate your extender for optimal Wi-Fi coverage and performance. 1 ) Plug in the extender about halfway between your router and the Wi-Fi dead zone.
-
Page 11: Method 2: Via The Tp-Link Tether App
3. If you want to customize the extended network name, refer to To change the wireless network name (SSID). 2 2 2 Method 2: Via the TP-Link Tether App 1. Launch the Apple App Store or Google Play Store and search TP-Link Tether or simply scan the QR code to download and install the app. -
Page 12: Method 3: Via A Web Browser
Chapter 2 Set Up Internet Connection 5. Follow app instructions to set up your extender. 6. (Optional) Enable Join OneMesh to copy the router’s wireless settings for seamless roaming. For more information about OneMesh, refer to OneMesh with Seamless Roaming. Tip: It is recommended to enable Smart Connect... - Page 13 Chapter 2 Set Up Internet Connection 2 ) Click the Wi-Fi icon on the taskbar and connect to the extender’s wireless network: TP-Link_Extender. Connections are available Wireless Network Connection TP-Link_Extender √ Connect automatically Connect • For Mac OS X Users 1 ) Unplug the Ethernet cable from your computer (if any).
- Page 14 Next. Tip: If you connect the extender to a TP-Link OneMesh router, the extender will automatically join the router’s OneMesh network and copy the router’s wireless settings. For more information, refer to OneMesh with Seamless...
- Page 15 Chapter 2 Set Up Internet Connection 6 ) Follow web instructions to relocate your extender for optimal Wi-Fi coverage and performance, and then click Done. Enjoy! Connect to the extended network and enjoy the internet.
- Page 16 Set Up Internet Connection Tip: If you connect the extender to a TP-Link OneMesh router and a success screen as below appears at the end of the setup, the extender has successfully joined the router’s OneMesh network and copied the router’s wireless settings.
-
Page 17: Chapter 3 Onemesh With Seamless Roaming
Chapter OneMesh with Seamless Roaming This chapter introduces the TP-Link OneMesh feature. It contains the following sections: • What‘s a OneMesh Network • How to Set Up a OneMesh Network • Remove Extender from OneMesh Network... -
Page 18: What's A Onemesh Network
Set up a OneMesh network with a push of WPS buttons. Manage all network devices on the Tether app or at your router’s web management page. To check full list of TP-Link OneMesh devices, scan the QR code, or visit https://www.tp-link.com/One-Mesh/compatibility. -
Page 19: How To Set Up A Onemesh Network
OneMesh with Seamless Roaming How to Set Up a OneMesh Network Once the extender is connected to a TP-Link OneMesh router via web browser or WPS button, the extender will automatically join the router’s OneMesh network and copy the router’s wireless settings. You can manually join a OneMesh network during the configuration via the TP-Link Tether app. -
Page 20: Remove Extender From Onemesh Network
If you want to remove the extender from the OneMesh network, follow the steps below: 3 3 1 Method 1: Via the TP-Link Tether App 1. Launch Tether and select the extender you want to remove from the OneMesh network. - Page 21 Chapter 3 OneMesh with Seamless Roaming 1. Launch Tether and select your host router of the OneMesh network. 2. Go to Tools > OneMesh and select the extender you want to remove from the OneMesh network. 3. Click Remove Device.
-
Page 22: Method 2: Via A Web Browser
Chapter 3 OneMesh with Seamless Roaming 3 3 2 Method 2: Via a Web Browser 1. Visit http://tplinkrepeater.net, and log in with the password you set for the extender. 2. Go to Settings > OneMesh and disable Join OneMesh. -
Page 23: Chapter 4 Tp-Link Cloud Service
TP-Link Cloud service provides a better way to manage your cloud devices. Log in to your cloud device with a TP-Link ID, and you can easily monitor and manage your home network when you are out and about via the Tether app on your smartphone or tablet. -
Page 24: Register A Tp-Link Id
Manage the User TP-Link IDs. • Once you have registered a TP-Link ID on the web management page, you can only register another TP-Link ID via the Tether APP. Please refer to Manage the Extender via the TP-Link Tether App to install the app and register a new one. -
Page 25: Manage The User Tp-Link Ids
Password. 2. Enter the current password, then a new password twice. And click Save. Manage the User TP-Link IDs The TP-Link ID used to log in to the extender for the first time will be automatically bound as the Admin account. -
Page 26: Add Tp-Link Id To Manage The Extender
3. Click , enter another TP-Link ID as needed and click Save. Note: If you need another TP-Link ID, please register a new one via the Tether app. Please refer to Manage the Extender via the TP-Link Tether App to install the app and register a new TP-Link ID. -
Page 27: Manage The Extender Via The Tp-Link Tether App
QR code to download and install the app. 2. Connect your device to the extender’s or host router’s wireless network. 3. Launch the Tether app, select the model of your extender and log in with your TP-Link ID or the password your set for the extender. -
Page 28: Chapter 5 Customize Your Network
Chapter Customize Your Network This chapter guides you on how to configure network settings that are available for this extender. It contains the following sections: • Check Internet Status • Configure Wireless Network • Change LAN Settings • Adjust Wi-Fi Coverage •... -
Page 29: Check Internet Status
You can view the internet status of your extender to check whether you have successfully set up the extended network(s). 1. Visit http://tplinkrepeater.net, and log in with your TP-Link ID or the password you set for the extender. 2. Go to Settings >... -
Page 30: Configure Wireless Network
If you want to extend another host network after Quick Setup, you can refer to this section. Moreover, you can change the wireless settings for your extended networks. Visit http://tplinkrepeater.net, and log in with your TP-Link ID or the password you set for the extender. -
Page 31: Change Lan Settings
If the IP address conflicts with another device on your local network or your network requires a specific IP subnet, you can change it. 1. Visit http://tplinkrepeater.net, and log in with your TP-Link ID or the password you set for the extender. 2. Go to Settings >... -
Page 32: Adjust Wi-Fi Coverage
You can set the extender’s Wi-Fi coverage depending on how large you want your Wi-Fi area to be. 1. Visit http://tplinkrepeater.net and log in with your TP-Link ID or the password you set for the extender. 2. Go to Settings >... -
Page 33: Set Access Control
Access Control is not available when your range extender is in a OneMesh network, where it automatically synchronizes network settings from your host router. 1. Visit http://tplinkrepeater.net and log in with your TP-Link ID or the password you set for the extender. 2. Go to Settings >... - Page 34 Chapter 5 Customize Your Network 5. Click Save. • To permit specific device(s): 1. Select Whitelist and click Save. 2. Click in the Devices in Whitelist table. Enter the Device Name Address. And you can set the Effective Time for a certain entry as needed. 3.
-
Page 35: Set High Speed Mode
Additionally, if you are going to disable the 2.4GHz network, it’s recommended to first make sure all your wireless devices support 5GHz network connection. 1. Visit http://tplinkrepeater.net and log in with your TP-Link ID or the password you set for the extender. 2. Go to Settings >... - Page 36 Chapter 5 Customize Your Network 5. Click Save.
-
Page 37: Chapter 6 Manage Your Extender
Chapter Manage Your Extender This chapter presents how to manage and maintain your extender. It includes the following sections: • Set System Time • Control LEDs • Set Power Schedule • Upgrade the Firmware • Backup and Restore Configuration Settings •... -
Page 38: Set System Time
Power Schedule function. If you have enabled the Daylight Saving Time feature, the system time will be synchronized with the daylight saving time you configure. 1. Visit http://tplinkrepeater.net, and log in with your TP-Link ID or the password you set for the extender. 2. Go to Settings >... -
Page 39: Set Power Schedule
Chapter 6 Manage Your Extender 1. Visit http://tplinkrepeater.net, and log in with your TP-Link ID or the password you set for the extender. 2. Go to Settings > System Tools > Control. • To turn off the LEDs: Disable Status. -
Page 40: Upgrade The Firmware
• Backup your extender configuration. • Do not power off the extender during the firmware upgrade. 6 4 1 Online Upgrade 1. Visit http://tplinkwifi.net, and log in with your TP-Link ID or the password you set for the router. 2. Go to Settings >... -
Page 41: Local Upgrade
6 4 2 Local Upgrade 1. Download the latest firmware file for the extender from our website https://www.tp-link.com. 2. Visit http://tplinkrepeater.net, and log in with your TP-Link ID or the password you set for the extender. 3. Go to Settings >... -
Page 42: Change Login Password
Change Login Password The account management feature allows you to change your login username and password of the web management webpage. 1. Visit http://tplinkrepeater.net, and log in with your TP-Link ID or the password you set for the extender. 2. Go to Settings >... -
Page 43: Check System Log
If the extender is not working properly, you can save the system log and send it to our technical support team. 1. Visit http://tplinkrepeater.net, and log in with your TP-Link ID or the password you set for the extender. 2. Go to Settings >... - Page 44 Factory Restore. Q2 What should I do if I forget my login password? • If you are using a TP-Link ID to log in, or you have enabled the Password Recovery feature of the extender, click Forgot Password? on the login page and then follow the instructions to reset it.
- Page 45 Q5 I have enabled wireless MAC filter, wireless access control, or access control list (ACL) on my router What should I do before configuring the extender? When a device connects through the extender to your router, the MAC address of the device shown on the router is translated to another MAC address.
- Page 46 Specifications are subject to change without notice. is a registered trademark of TP-Link Technologies Co., Ltd. Other brands and product names are trademarks or registered trademarks of their respective holders. No part of the specifications may be reproduced in any form or by any means or used to make any derivative such as translation, transformation, or adaptation without permission from TP-Link Technologies Co., Ltd.
- Page 47 FCC compliance information statement Product Name: AC750 Wi-Fi Range Extender Model Number: RE190 Responsible Party: TP-Link USA Corporation, d/b/a TP-Link North America, Inc. Address: 145 South State College Blvd. Suite 400, Brea, CA 92821 Website: http://www.tp-link.com/us/ Tel: +1 626 333 0234 Fax: +1 909 527 6803 E-mail: sales.usa@tp-link.com...
- Page 48 This device is restricted in indoor environment only. We, TP-Link USA Corporation, has determined that the equipment shown as above has been shown to comply with the applicable technical standards, FCC part 15. There is no unauthorized change is made in the equipment and the equipment is properly maintained and operated.
- Page 49 5250 MHz -5350 MHz (23dBm) 5470 MHz -5725 MHz (23dBm) EU Declaration of Conformity TP-Link hereby declares that the device is in compliance with the essential requirements and other relevant provisions of directives 2014/53/EU, 2009/125/EC, 2011/65/EU and (EU) 2015/863. The original EU declaration of conformity may be found at https://www.tp-link.com/ce...
- Page 50 L’émetteur/récepteur exempt de licence contenu dans le présent appareil est conforme aux CNR d’Innovation, Sciences et Développement économique Canada applicables aux appareils radio exempts de licence. L’exploitation est autorisée aux deux conditions suivantes : 1. L’appareil ne doit pas produire de brouillage; 2.
- Page 51 NCC Notice & BSMI Notice 注意! 依據 低功率電波輻射性電機管理辦法 第十二條 經型式認證合格之低功率射頻電機,非經許可,公司、商號或使用者均不得擅 自變更頻率、加大功率或變更原設計之特性或功能。 第十四條 低功率射頻電機之使用不得影響飛航安全及干擾合法通信;經發現有干擾現象 時,應立即停用,並改善至無干擾時方得繼續使用。前項合法通信,指依電信規定作業 之無線電信。低功率射頻電機需忍受合法通信或工業、科學以及醫療用電波輻射性電機 設備之干擾。 4.7.9.1應避免影響附近雷達系統之操作。 4.7.9.2高增益指向性天線只得應用於固定式點對點系統。 安全諮詢及注意事項 • 請使用原裝電源供應器或只能按照本產品注明的電源類型使用本產品。 • 清潔本產品之前請先拔掉電源線。請勿使用液體、噴霧清潔劑或濕布進行清潔。 • 注意防潮,請勿將水或其他液體潑灑到本產品上。 • 插槽與開口供通風使用,以確保本產品的操作可靠並防止過熱,請勿堵塞或覆蓋 開口。 • 請勿將本產品置放於靠近熱源的地方。除非有正常的通風,否則不可放在密閉位 置中。 • 請不要私自打開機殼,不要嘗試自行維修本產品,請由授權的專業人士進行此項 工作。 限用物質含有情況標示聲明書 限用物質及其化學符號 鉛 鎘 汞 六價鉻 多溴聯苯...
- Page 52 Продукт сертифіковано згідно с правилами системи УкрСЕПРО на відповідність вимогам нормативних документів та вимогам, що передбачені чинними законодавчими актами України. Safety Information • Keep the device away from water, fire, humidity or hot environments. • Do not attempt to disassemble, repair, or modify the device. •...
Need help?
Do you have a question about the RE190 and is the answer not in the manual?
Questions and answers