Table of Contents
Advertisement
Available languages
Available languages
Quick Links
Advertisement
Chapters
Table of Contents

Related Manuals for Renkforce DL-PAR103 LED-Spot


Summary of Contents for Renkforce DL-PAR103 LED-Spot
- Page 1 D Bedienungsanleitung DL-PAR103 LED-Spot Best.-Nr. 1233876 Seite 3 - 21 G Operating Instructions DL-PAR103 LED-Spot Item No. 1233876 Page 22 - 41 F Mode d’emploi Spot à DEL DL-PAR103 N° de commande 1233876 Page 42 - 61 O Bedieningshandleiding DL-PAR103 LED-spot Bestelnr.
-
Page 2: Table Of Contents
Inhaltsverzeichnis Seite Einführung ................................3 Bestimmungsgemäße Verwendung ........................4 Symbolerklärung ..............................4 Sicherheitshinweise .............................5 Featurebeschreibung ............................6 Lieferumfang ................................6 Montage .................................7 DMX-Anschluss ..............................8 Netzanschluss ...............................9 10. Bedienung ................................9 a) Einstellung der Betriebsart ...........................9 b) Sound-to-Light-Betrieb ..........................13 c) Automatikbetrieb ............................13 d) FADE-Betrieb ..............................13 e) Betrieb mit manueller Farbeinstellung ......................13 f) Helligkeitseinstellung ...........................13 g) Einstellung der Display/Fernbedienung ....................14 h) Fernbedienung ..............................14... -
Page 3: Einführung
1. Einführung Sehr geehrte Kundin, sehr geehrter Kunde, wir bedanken uns für den Kauf dieses Produkts. Dieses Produkt erfüllt die gesetzlichen nationalen und europäischen Anforderungen. Um diesen Zustand zu erhalten und einen gefahrlosen Betrieb sicherzustellen, müssen Sie als Anwender diese Bedienungs- anleitung beachten! Diese Bedienungsanleitung gehört zu diesem Produkt. -
Page 4: Bestimmungsgemäße Verwendung
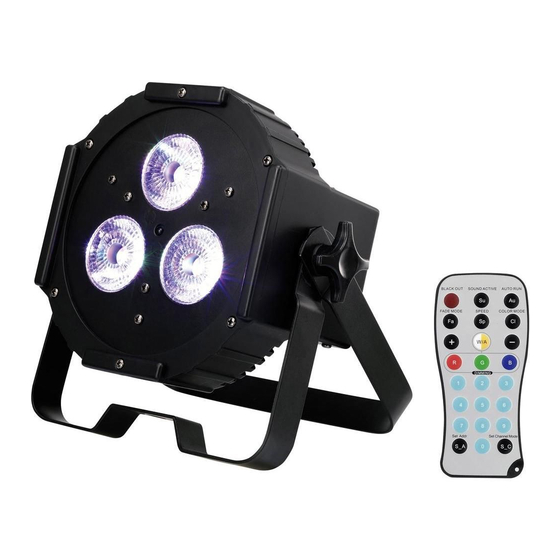
2. Bestimmungsgemäße Verwendung Der DL-PAR103 LED-Spot dient zur Erzeugung von Lichteffekten in Dekobeleuchtungen, Lightshow- Anlagen, Partyräumen etc. und wird über den eingebauten Controller, die Fernbedienung oder einen externen DMX-Controller gesteuert. Dieses Produkt ist nur für den Anschluss an 100-240 V/ 50/60 Hz Wechselspannung und nur für Schutz- kontaktsteckdosen zugelassen. -
Page 5: Sicherheitshinweise
4. Sicherheitshinweise Bei Schäden, die durch Nichtbeachten dieser Bedienungsanleitung verursacht werden, erlischt die Gewährleistung/Garantie. Für Folgeschäden übernehmen wir keine Haftung. Bei Sach- oder Personenschäden, die durch unsachgemäße Handhabung oder Nichtbeach- ten der Sicherheitshinweise verursacht werden, übernehmen wir keine Haftung. In solchen Fällen erlischt die Gewährleistung/Garantie. -
Page 6: Featurebeschreibung
• Stellen Sie keine offenen Brandquellen wie brennende Kerzen auf oder direkt neben dem Gerät ab. • Wenden Sie sich an eine Fachkraft, wenn Sie Zweifel über die Arbeitsweise, die Sicherheit oder den Anschluss des Produktes haben. • Betreiben Sie das Gerät nicht unbeaufsichtigt. •... -
Page 7: Montage
7. Montage Die Montage und die Installation des Gerätes darf nur durch eine Fachkraft erfolgen, die mit den Gefahren und den einschlägigen Vorschriften hierfür vertraut ist. Die Wartung, Bedienung und Inbetriebnahme dieses Produktes darf nur durch Personen ausgeführt werden, die ent- sprechend qualifiziert sind. -
Page 8: Dmx-Anschluss
8. DMX-Anschluss Es können max. 30 DL-PAR103 in einer DMX-Kette betrieben werden, da ansonsten der Cont- roller überlastet wird. Die maximale Gesamtlänge der DMX-Kette sollte 100 m nicht überschreiten. Bei der Verwendung von XLR-Mikrofonkabeln kann es zu Störungen bei der DMX-Signalüber- tragung kommen. -
Page 9: Netzanschluss
9. Netzanschluss Die Netzsteckdose, an die der Lichteffekt angeschlossen wird, muss sich in der Nähe des Ge- rätes befinden und leicht zugänglich sein, damit das Gerät im Fehlerfall schnell und einfach von der Netzstromversorgung getrennt werden kann. Lassen Sie die Netzleitung nicht mit anderen Leitungen in Kontakt kommen. Seien Sie vorsichtig beim Umgang mit Netzleitungen und Netzanschlüssen. - Page 10 Die folgenden Tabellen zeigen die möglichen Einstellungen. MODE SETUP UP/DOWN A001-A512 DMX-Adresse A001-A512 Ch 1-Ch 8 DMX-Mode So01-So30 Sound-to-Light Programme So01-So30 Strobe-Geschwindigkeitseinstellung für die Sound-to-Light-Programme SP01-SP99 (nur bei So21 bis So30 möglich) AU01-AU16 Auto Programme AU01-AU16 SP01-SP99 Geschwindigkeitseinstellung für die Auto Programme FA01-FA15 FADE Programme FA01-FA15...
- Page 11 Tabelle 1 Kanal Wert Effekte Anzeige im Display (bei der manuellen Eingabe) 0-15 Licht aus 16-31 Co01 32-47 Grün Co02 48-63 Blau Co03 64-79 Amber Co04 80-95 Rot, Grün und Amber Co05 96-111 Rot, Blau Co06 112-127 Rot, Amber Co07 128-143 Grün, Blau Co08...
- Page 12 Tabelle 2 Kanal Wert Effekt Kanal Wert Effekt 0-11 Licht aus 132-135 AU01 12-15 So01 136-139 AU02 16-19 So02 140-143 AU03 20-23 So03 144-147 AU04 24-27 So04 148-151 AU05 28-31 So05 152-155 AU06 32-35 So06 156-159 AU07 36-39 So07 160-163 AU08 40-43 So08...
-
Page 13: B) Sound-To-Light-Betrieb
b) Sound-to-Light-Betrieb • Wählen Sie den Sound-to-Light-Betrieb (Display So01-So30) mit der Taste MODE aus. • Wählen Sie das gewünschte Sound-to-Light-Programm So01-So30 mit den Tasten UP bzw. DOWN aus. • Drücken Sie die Taste SET UP (nur bei So21-So30). • Wählen Sie mit den Tasten UP bzw. DOWN die Strobeeinstellung (Display SP01-SP99) für den Sound-to- Light-Betrieb aus. -
Page 14: G) Einstellung Der Display/Fernbedienung
g) Einstellung Display/Fernbedienungsfunktion Folgende Einstellungen können hier vorgenommen werden: LED-Display ein-/ausschalten (LEon - LEoF); Displayanzeige drehen (LED); IR-Fernbedienungssteuerung aktivieren bzw. deaktivieren (Iron - IroF); • Drücken Sie die MODE Taste bis im Display die Anzeige LEon-LEoF leuchtet. • Wählen Sie mit der Taste SET UP den entsprechenden Modus aus (LEon-LEoF, LED, Iron-IroF). •... -
Page 15: I) Betrieb Mit Externem Dmx-Controller
AUTO RUN Diese Taste aktiviert den Automatikbetrieb. Drücken Sie die Taste AUTO RUN (Au). Wählen Sie mit den Tasten +/- oder mit den Zifferntasten das ent- sprechende Programm. Drücken Sie die Taste SPEED. Mit den Tasten +/- oder den Zifferntasten wird die gewünschte Geschwindigkeit für den Progammablauf bzw. - Page 16 Einstellung der DMX-Startadresse und des DMX-Mode • Wählen Sie den DMX-Betrieb (Display A001-A512) mit der Taste MODE aus. • Wählen Sie die gewünschte Startadresse A001-A512 mit den Tasten UP bzw. DOWN aus. • Drücken Sie die Taste SET UP. • Wählen Sie die den DMX Mode (Ch1-Ch8) mit den Tasten UP bzw. DOWN aus. Die Anzeige wechselt automatisch nach wenigen Sekunden wieder zur Adresseinstellung.
- Page 17 DMX- Mode Ch5 DMX Kanal Kanal Wert Funktion Hinweis 0-255 Rot 0% - 100% 0-255 Grün 0% - 100% 0-255 Blau 0% - 100% 0-255 Amber 0% - 100% 0-255 Gesamthelligkeitseinstellung 0-255 Master-Helligkeitsregler DMX- Mode Ch6 DMX Kanal Kanal Wert Funktion Hinweis 0-255...
-
Page 18: Wechsel Der Fernbedienungsbatterie
DMX- Mode Ch8 DMX Kanal Kanal Wert Funktion Hinweis 0-255 Rot 0% - 100% Der Wert muss bei 0-255 Grün 0% - 100% CH5 von 0-15 und bei CH7 von 0-11 eingestellt 0-255 Blau 0% - 100% sein 0-255 Amber 0% - 100% 0-15 COLOR MACROS aus CH7 von 0-11... -
Page 19: Wartung
12. Wartung Überprüfen Sie regelmäßig die technische Sicherheit des Effektstrahlers z.B. auf Beschädigung der Netz- leitung und des Gehäuses. Wenn anzunehmen ist, dass ein gefahrloser Betrieb nicht mehr möglich ist, so ist das Gerät außer Betrieb zu setzen und gegen unbeabsichtigten Betrieb zu sichern. Netzstecker aus der Steckdose ziehen! Es ist anzunehmen, dass ein gefahrloser Betrieb nicht mehr möglich ist, wenn: •... -
Page 20: Handhabung
13. Handhabung • Ziehen Sie Netzstecker nie an der Leitung aus der Steckdose, ziehen Sie sie immer nur an den dafür vorgesehenen Griffflächen aus der Netzsteckdose. • Ziehen Sie bei Nichtbenutzung den Netzstecker aus der Netzsteckdose. • Ziehen Sie aus Sicherheitsgründen bei einem Gewitter immer den Netzstecker aus der Netzsteckdose. •... -
Page 21: Technische Daten
15. Technische Daten Betriebsspannung........100-240 V/50/60 Hz Sicherung ............F1AL/250 V (5x20 mm) Leistungsaufnahme ........14,2 W Batterie Fernbedienung ......3V Lithium-Knopfzelle CR2025 LEDs..............3 DMX-Protokoll ..........DMX 512 DMX-Kanäle..........1 - 8 Abmessungen ..........195 x 185 x 95 mm Gewicht............ca. 1,2 kg... - Page 22 Table of contents Page Introduction................................23 Intended use ................................24 Symbols ................................24 Safety information...............................25 Features ................................26 Scope of delivery ..............................26 Installation................................27 DMX connection ..............................28 Mains connection ...............................29 10. Operation ................................29 a) Setting the operating mode ........................29 b) Sound-to-light mode ............................33 c) Automatic operation ............................33 d) FADE mode ..............................33 e) Operation with manual colour settings: ....................33 f) Setting brightness ............................33...
-
Page 23: Introduction
1. Introduction Dear Customer, thank you for purchasing this product. This product complies with the statutory national and European specifications. To maintain this status and to ensure safe operation, you as the user must observe these operating instructions! These operating instructions are part of this product. They contain important notes on commis- sioning and handling. -
Page 24: Intended Use
2. Intended use The DL-PAR103 LED-Spot is used to generate light effects in decorative lighting, light show equipment, par- ty rooms, etc. and is controlled by the built-in controller, the remote control or an external DMX con-troller. This product is only approved for connection to 100-240 V/50/60 Hz alternating current and only for use with an earthed mains socket. -
Page 25: Safety Information
4. Safety information The guarantee/warranty will expire if damage is incurred resulting from non-compliance with these operating instructions. We do not assume liability for any consequential damage. Nor do we assume any liability for damage to property or personal injury caused by improper use or failure to observe the safety instructions. -
Page 26: Features
• Do not leave any packaging material unattended. It may become a dangerous toy for children. • n commercial institutions, the accident prevention regulations of the Employer’s Liability In- surance Association for Electrical Systems and Operating Materials are to be observed. •... -
Page 27: Installation
7. Installation Assembly and installation of the device must be carried out by a specialist familiar with the hazards and the relevant regulations. Maintenance, operation and commissioning of this de- vice must only be carried out by qualified persons. When choosing a location for your device, make sure to avoid impact, vibration, dust, hot and cold temperatures and dampness. -
Page 28: Dmx Connection
8. DMX connection You can operate a maximum of 30 DL-PAR103 in a DMX chain without overloading the control- ler. The maximum total length of the DMX chain should not exceed 100 m. Use of XLR microphone cables may cause interferences in the DMX signal transmission. In this case, please use special DMX high-frequency cables. -
Page 29: Mains Connection
9. Mains connection The mains socket to which the effect light is connected must be close to the device and easily accessible to quickly separate the device from the mains voltage in case of an error. Do not let the mains cable come into contact with other cables. Be careful when handling mains cables and mains connections. - Page 30 The following tables show the possible settings. MODE SETUP UP/DOWN A001-A512 DMX address A001-A512 Ch 1-Ch 8 DMX mode So01-So30 Sound-to-light program So01-So30 Strobe speed setting for the sound-to-light-program (only possible with SP01-SP99 So21 to So30) AU01-AU16 Auto program AU01-AU16 SP01-SP99 Speed setting for the Auto program FA01-FA15...
- Page 31 Table 1 Channel value Effects Shown in display during manual input 0-15 light off 16-31 Co01 32-47 green Co02 48-63 blue Co03 64-79 amber Co04 80-95 red, green and amber Co05 96-111 red, blue Co06 112-127 red, amber Co07 128-143 green, blue Co08 144-159...
- Page 32 Table 2 Channel value Effect Channel value Effect 0-11 Light closed 132-135 AU01 12-15 So01 136-139 AU02 16-19 So02 140-143 AU03 20-23 So03 144-147 AU04 24-27 So04 148-151 AU05 28-31 So05 152-155 AU06 32-35 So06 156-159 AU07 36-39 So07 160-163 AU08 40-43 So08...
-
Page 33: B) Sound-To-Light Mode
b) Sound-to-light mode • Select sound-to-light operation (display So01-So30) with the button MODE. • Select the desired sound-to-light programme So01-So30 with the buttons UP or DOWN. • Push the button SET UP (for So21-So30 only). • Select the strobe setting (display SP01-SP99) for sound-to-light operation with the buttons UP or DOWN. c) Automatic operation •... -
Page 34: G) Setting Display/Remote Control Function
g) Setting display/remote control function The following settings can be made here: Switching the LED display on/off (LEon - LEoF); turning the display (LED); activating and deactivating the IR remote control (Iron - IroF); • Push the MODE button until the display LEon-LEoF lights up in the display. •... -
Page 35: I) Use With An External Dmx Controller
AUTO RUN This button activates automatic mode. Push the button AUTO RUN. Use the buttons +/- or the number buttons to select the corresponding pro- gramme. Push the button SPEED. Use the buttons +/- or the number buttons to select the desired speed for the programme process or the strobe effect. - Page 36 Setting the DMX start address and the DMX mode • Select DMX operation (display A001-A512) with the button MODE. • Select the desired start address A001-A512 with the UP and DOWN buttons. • Push the button SET UP. • Select DMX mode (Ch1-Ch8) with the buttons UP and DOWN. The display automatically switches back to address settings after a few seconds.
- Page 37 DMX- Mode Ch5 Channel Function Note Channel Value 0-255 Red 0% - 100% 0-255 Green 0% - 100% 0-255 Blue 0% - 100% 0-255 Amber 0% - 100% 0-255 Overall brightness setting 0-255 Master brightness control DMX- Mode Ch6 Channel Function Note Channel...
-
Page 38: Replacement Of The Remove Control Battery
DMX- Mode Ch8 Channel Function Note Channel Value 0-255 Red 0% - 100% Set the value at 0-255 Green 0% - 100% CH5 from 0-15 and at CH7 from 0-11 0-255 Blue 0% - 100% 0-255 Amber 0% - 100% 0-15 COLOR MACROS off CH7 from 0-11... -
Page 39: Maintenance
12. Maintenance Regularly check the technical safety of the effect spotlight, e.g. for damage to the mains cable or the cas- ing. If you have reason to believe that the device can no longer be operated safely, disconnect it immediately and make sure it is not operated unintentionally. -
Page 40: Handling
13. Handling • Never pull the mains plug from the mains socket by the cable. Only pull it from the mains socket by the intended grip areas. • Always pull it from the socket using the intended grips. • Disconnect the mains plug from the mains socket during thunderstorms for reasons of safety. •... -
Page 41: Technical Data
15. Technical data Operating voltage.........100-240 V/50/60 Hz Fuse ..............F1AL/250 V (5x20 mm) Power consumption........14.2 W Battery remote control ........3V-Lithium button cell CR2025 LEDs..............3 DMX protocol..........DMX 512 DMX channels ..........1 - 8 Dimensions............195 x 185 x 95 mm Weight ............Approx. 1.2 kg... - Page 42 Table des matières Page Introduction................................43 Utilisation conforme ............................44 Explication des symboles ..........................44 Consignes de sécurité............................45 Description des fonctions..........................46 Étendue de la livraison ............................46 Montage ................................47 Prise DMX ................................48 Raccordement au réseau ..........................49 10. Utilisation ................................49 a) Réglage du mode de fonctionnement .......................49 b) Mode Sound-to-Light ...........................53 c) Mode automatique ............................53 d) Mode FADE ..............................53...
-
Page 43: Introduction
1. Introduction Chère cliente, cher client, Nous vous remercions pour l’achat du présent produit. Le produit est conforme aux exigences des directives européennes et nationales en vigueur. Afin de main- tenir cet état et de garantir un fonctionnement sas danger, l’utilisateur doit impérativement observer le présent mode d’emploi ! Ce mode d’emploi fait partie intégrante du produit. -
Page 44: Utilisation Conforme
2. Utilisation conforme Le spot à DEL DL-PAR103 permet de créer des effets lumineux avec les éclairages décoratifs, les équi-pe- ments de jeux de lumières, dans les salles de fêtes, etc. et se contrôle à l’aide du contrôleur intégré, de la télécommande ou d’un contrôleur DMX externe. -
Page 45: Consignes De Sécurité
4. Consignes de sécurité Tout dommage résultant d’un non-respect du présent mode d’emploi entraîne l’annulation de la garantie. Nous déclinons toute responsabilité en cas d’éventuels dommages consécutifs. De même, nous déclinons toute responsabilité pour les dommages matériels ou corporels ré- sultant d’une utilisation de l’appareil non conforme aux spécifications ou du non-respect des présentes consignes de sécurité. -
Page 46: Description Des Fonctions
• N’exposez pas l’appareil à des températures extrêmes ni à des gouttes ou projections d’eau ni à de fortes vibrations ou contraintes mécaniques. • Ne placez jamais de sources de chaleur susceptibles de provoquer un incendie telles que des bougies allumées sur ou à proximité de l’appareil. •... -
Page 47: Montage
7. Montage Le montage et l’installation de l’appareil doivent uniquement être effectués par un technicien spécialisé connaissant parfaitement les risques potentiels encourus et les prescriptions spé- cifiques en vigueur. La maintenance, l’utilisation et la mise en service de ce produit ne doi-vent être effectuées que par des personnes qualifiées. -
Page 48: Prise Dmx
• En cas de montage à grande hauteur, il convient de séuriser l’appareil à l’aide d’un câble de retenue de sûreté ou d’un filet. Indépendamment de la fixation principale, le câble ou le filet d’arrêt de sécurité doit être en mesure de retenir le projecteur à effets lumineux en cas de défaillance affectant la suspension principale. -
Page 49: Raccordement Au Réseau
9. Raccordement au réseau La prise de courant à laquelle le projecteur à effets lumineux est raccordé doit se trouver à proximité de l’appareil et être facilement accessible afin de pouvoir facilement et rapidement déconnecter l’appareil de l’alimentation électrique en cas de panne. Le cordon d’alimentation ne doit pas entrer en contact avec d’autres câbles. - Page 50 Les tableaux suivant montrent les réglages possibles. MODE SETUP UP/DOWN A001-A512 Adresse DMX A001-A512 Ch 1-Ch 8 Mode DMX So01-So30 Programme Sound-to-Light So01-So30 Réglage de la vitesse du stroboscope pour le programme Sound-to-Light SP01-SP99 (possible uniquement de So21 à So30) AU01-AU16 Programme Auto AU01-AU16...
- Page 51 Table 1 Valeur de canal effet affichage à l‘écran (en cas de saisie manuelle) 0-15 Lumière éteinte 16-31 Rouge Co01 32-47 Vert Co02 48-63 Bleu Co03 64-79 Ambre Co04 80-95 Rouge, Bleu et Ambre Co05 96-111 Rouge, Bleu Co06 112-127 Rouge, Ambre Co07 128-143...
- Page 52 Table 2 Valeur de canal Effet Valeur de canal Effet 0-11 Lumière éteinte 132-135 AU01 12-15 So01 136-139 AU02 16-19 So02 140-143 AU03 20-23 So03 144-147 AU04 24-27 So04 148-151 AU05 28-31 So05 152-155 AU06 32-35 So06 156-159 AU07 36-39 So07 160-163 AU08...
-
Page 53: B) Mode Sound-To-Light
b) Mode Sound-to-Light • Sélectionnez le mode Sound-to-Light (affichage So01 à So30) à l’aide de la touche MODE. • Sélectionnez le programme Sound-to-Light souhaité So01 à So30 à l’aide des touches UP et DOWN. • Appuyez sur la touche SET UP (uniquement avec So21 à So30). •... -
Page 54: G) Configuration De L'écran / De La Fonction De La Télécommande
g) Configuration de l’écran / de la fonction de la télécommande Les réglages suivants peuvent être modifiés ici : Activer / désactiver l’affichage à DEL (LEon - LEoF) ; modifier l’orientation de l’écran (LED) ; activer ou désactiver la commande de la télécommande infrarouge (Iron - IroF) ;... -
Page 55: I) Fonctionnement Avec Un Contrôleur Dmx Externe
AUTO RUN Cette touche active le mode automatique. Appuyez sur la touche AUTO RUN (Au). Sélectionnez le programme correspondant à l’aide des touches +/- ou à l’aide des touches numériques. Appuyez sur la touche SPEED. Les touches +/- et les touches numériques permttent de sélectionner la vitesse souhaitée pour l’exécution du programme ou l’effet stro- boscopique. - Page 56 Définition de l’adresse de départ DMX et du mode DMX • Sélectionnez le mode DMX (affichage A001 à A512) à l’aide de la touche MODE. • Sélectionnez l’adresse de départ souhaitée A001 à A512 à l’aide des touches UP et DOWN. •...
- Page 57 Mode DMX, Ch5 Canal DMX Valeur de Fonction Remarque canal 0-255 Rouge : 0 % - 100 % 0-255 Vert : 0 % - 100 % 0-255 Bleu : 0 % - 100 % 0-255 Ambre : 0 % - 100 % 0-255 Réglage de la luminosité...
-
Page 58: Remplacement De La Pile De La Télécommande
DMX- Mode Ch8 Canal DMX Valeur de Fonction Remarque canal 0-255 Rouge : 0 % - 100 % La valeur doit être 0-255 Vert : 0 % - 100 % comprise entre 0 et 15 pour CH5 et de 0-255 Bleu : 0 % - 100 % entre 0 et 11 pour CH7 0-255... -
Page 59: Entretien
12. Entretien Contrôlez régulièrement la sécurité technique du projecteur à effets lumineux en vous assurant par ex. de l’absence de détérioration au niveau du cordon d’alimentation et du boîtier. Lorsqu’un fonctionnement sans danger de l’appareil n’est plus garanti, il convient de mettre celui-ci hors service et d’empêcher toute remise en marche accidentelle. -
Page 60: Manipulation
13. Manipulation • Ne tirez jamais sur le câble pour débrancher la fiche de la prise de courant ; retirez toujours la fiche en la saisissant au niveau des surfaces de préhension prévues à cet effet. • En cas d’inutilisation, retirez la fiche de la prise de courant. •... -
Page 61: Caractéristiques Techniques
15. Caractéristiques techniques Tension de service ........100-240 V/50/60 Hz Fusible ............F1AL/250 V (5x20 mm) Puissance absorbée ........14,2 W Pile de la télécommande ......Pile bouton au lithium 3V CR2025 DEL..............3 Protocole DMX ..........DMX 512 Canaux DMX ..........1 à 8 Dimensions............195 x 185 x 95 mm Poids...............env. - Page 62 Inhoudsopgave Pagina Inleiding ................................63 Voorgeschreven gebruik ...........................64 Verklaring van symbolen ...........................64 Veiligheidsaanwijzingen ............................65 Eigenschappen ..............................66 Leveringsomvang ..............................66 Montage ................................67 DMX-aansluiting ..............................68 Netaansluiting ..............................69 10. Bediening ................................69 a) Instelling van de bedrijfsmodus .........................69 b) Sound-to-Light modus ..........................73 c) Automatische modus ...........................73 d) FADE-modus ..............................73 e) Werking met manuele kleurinstelling......................73 f) Helderheidsinstelling ...........................73...
-
Page 63: Inleiding
1. Inleiding Geachte klant, Hartelijk dank voor de aanschaf van dit product. Dit product voldoet aan de voorwaarden van de nationale en Europese wetgeving. Volg de instructies van de gebruiksaanwijzing op om deze status van het apparaat te handhaven en een ongevaarlijke werking te garanderen! Deze gebruiksaanwijzing hoort bij dit product. -
Page 64: Voorgeschreven Gebruik
2. Voorgeschreven gebruik De DL-PAR103 LED-spot dient voor het opwekken van lichteffecten in decoratieverlichting, lichtshowin- stallaties, feestzalen, enz. en wordt via de ingebouwde controller, afstandsbediening of een externe DMX- controller bestuurd. Dit product is alleen goedgekeurd voor aansluiting op 100-240 V/50/60 Hz-wisselspanning en voor rand- geaarde contactdozen. -
Page 65: Veiligheidsaanwijzingen
4. Veiligheidsvoorschriften Bij schade veroorzaakt door het niet opvolgen van de bedieningshandleiding, vervalt het recht op garantie. Voor gevolgschade die hieruit ontstaat, zijn wij niet aansprakelijk. Voor materiële of persoonlijke schade, die door ondeskundig gebruik of niet inachtname van de veiligheidsvoorschriften veroorzaakt worden zijn wij niet aansprakelijk. In zulke gevallen vervalt de garantie. -
Page 66: Eigenschappen
• Zet geen brandende voorwerpen, zoals kaarsen, op of naast het toestel. • Raadpleeg een vakman wanneer u vragen heeft over de werkwijze, veiligheid of aansluiting van het product. • Het toestel mag nooit zonder toezicht in werking zijn. • Gebruik het toestel uitsluitend in een gematigd klimaat; niet in een tropisch klimaat. •... -
Page 67: Montage
7. Montage De montage en de installatie van het apparaat mogen uitsluitend door een vakman worden uitgevoerd die vertrouwd is met de gevaren en relevante voorschriften. Het product mag al- leen onderhouden, bediend en in gebruik genomen worden door personen die overeenkomstig gekwalificeerd zijn. -
Page 68: Dmx-Aansluiting
8. DMX-aansluiting Er kunnen max. 30 DL-PAR103 in een DMX-ketting worden opgenomen, omdat anders de con- troller wordt overbelast. De maximale totale lengte van de DMX-ketting mag 100 m niet overschrijden. Bij gebruik van XLR-microfoonkabels kan het tot storingen in de DMX-signaaloverdracht ko- men. -
Page 69: Netaansluiting
9. Aansluiting op het net Het stopcontact waarop het lichteffect wordt aangesloten, moet zich in de buurt van het ap- paraat bevinden en makkelijk toegankelijk zijn zodat het apparaat in geval van storingen snel en zonder gevaren van de netspanning kan worden gescheiden. Zorg ervoor dat het netsnoer niet met andere kabels in aanraking komt. - Page 70 De onderstaande tabellen tonen de mogelijke instellingen. MODE SETUP UP/DOWN A001-A512 DMX-adres A001-A512 Ch 1-Ch 8 DMX-mode So01-So30 Sound-to-light-programma‘s So01-So30 Strobe-snelheidsinstelling voor de sound-to-light-programma‘s (alleen SP01-SP99 mogelijk bij So21 tot en met So30) AU01-AU16 Automatische programma‘s AU01-AU16 SP01-SP99 Snelheidsinstelling voor de automatische programma‘s FA01-FA15 FADE-programma‘s FA01-FA15...
- Page 71 Tabel 1 Kanaalwaarde Effect Weergave in de display (bij handmatige invoer) 0-15 Licht uit 16-31 Rood Co01 32-47 Groen Co02 48-63 Blauw Co03 64-79 Amber Co04 80-95 Rood , Groen en Amber Co05 96-111 Rood , Blauw Co06 112-127 Rood , Amber Co07 128-143 Groen, Blauw...
- Page 72 Tabel 2 Kanaalwaarde Effect Kanaalwaarde Effect 0-11 Licht uit 132-135 AU01 12-15 So01 136-139 AU02 16-19 So02 140-143 AU03 20-23 So03 144-147 AU04 24-27 So04 148-151 AU05 28-31 So05 152-155 AU06 32-35 So06 156-159 AU07 36-39 So07 160-163 AU08 40-43 So08 164-167 AU09...
-
Page 73: B) Sound-To-Light Modus
b) Sound-to-Light modus • Kies Sound-to-Light-modus (scherm So01 - So30) met de toets MODE. • Kies het gewenste Sound-to-Light-programma So01-So30 met de toetsen UP of DOWN. • Druk op de toets SET UP (alleen bij So21-So30). • Kies met de toetsen UP of DOWN de strobe-instelling (scherm SP01-SP99) voor de Sound-to-Light-mo- dus. -
Page 74: G) Instelling Scherm/Afstandsbedieningsfunctie
g) Instelling scherm/afstandsbedieningsfunctie De volgende instellingen kunnen hier worden uitgevoerd: LED-scherm in-/uitschakelen (LEon - LEoF); schermweergave draaien (LED); IR-afstandsbedieningsturing activeren of deactiveren (Iron - IroF); • Druk op de MODE-toets tot de indicatie LEon-LEoF op het scherm oplicht. • Selecteer met de toets SET UP de overeenkomstige modus (LEon-LEoF, LED, Iron-IroF). •... -
Page 75: I) Gebruik Met Een Externe Dmx-Controller
AUTO RUN Deze toets activeert de automatische modus. Druk op de toets AUTO RUN (Au). Kies met de toetsen +/- of met de cijfertoetsen het overeenkomstige pro- gramma. Druk op de toets SPEED. Met de toetsen +/- of met de cijfertoetsen wordt de gewenste snelheid voor het programmaverloop of strobe-effect geselecteerd. - Page 76 Instelling van het DMX-startadres en de DMX-modus • Kies DMX-modus (scherm A001-A512) met de toets MODE. • Selecteer het gewenste startadres A001-A512 met de toetsen UP resp. DOWN. • Druk op de toets SET UP. • KIies de DMX-modus (Ch1-Ch8) met de toetsen UP of DOWN. Het scherm keer na enkele seconden automatisch terug naar de adresinstelling.
- Page 77 DMX- modus ch5 DMX-kanaal Kanaal- Werking Aanwijzing waarde 0-255 Rood 0% - 100% 0-255 Groen 0% - 100% 0-255 Blauw 0% - 100% 0-255 Amber 0% - 100% 0-255 Totale helderheidsinstelling 0-255 Master-helderheidsregelaar DMX- modus ch6 DMX-kanaal Kanaal- Werking Aanwijzing waarde 0-255 Rood 0% - 100%...
-
Page 78: Vervangen Van De Batterij Van De Afstandsbediening
DMX- modus ch8 DMX-kanaal Kanaal- Werking Aanwijzing waarde 0-255 Rood 0% - 100% De waarde moet bij 0-255 Groen 0% - 100% CH5 van 0-15 en bij 0-255 Blauw 0% - 100% CH7 van 0-11 zijn ingesteld 0-255 Amber 0% - 100% 0-15 COLOR MACROS uit CH7 van 0-11... -
Page 79: Onderhoud
12. Onderhoud Controleer regelmatig de technische veiligheid van de effectstraler, b.v. op beschadiging van de netlei-ding en de behuizing. Wanneer kan worden aangenomen dat een veilig gebruik niet meer mogelijk is, mag het apparaat niet meer worden gebruikt en moet het worden beveiligd tegen onbedoeld gebruik. Neem de stekker uit de contactdoos! U mag ervan uitgaan dat een veilig gebruik niet meer mogelijk is indien: •... -
Page 80: Gebruik
13. Gebruik • Trek nooit aan het netsnoer om de stekker uit de contactdoos te verwijderen, pak altijd de netstekker beet bij de daarvoor bestemde greepvlakken om deze uit de contactdoos te verwijderen. • Neem de netstekker uit het stopcontact als u deze niet gebruikt. •... -
Page 81: Technische Gegevens
15. Technische gegevens Bedrijfsspanning ..........100-240 V/50/60 Hz Zekering ............F1AL/250 V (5x20 mm) Vermogensopname ........14,2 W Batterij afstandsbediening ......3V lithium knoopcel CR2025 LED‘s...............3 DMX-protocol ..........DMX 512 DMX-kanalen ..........1 - 8 Afmetingen ............195 x 185 x 95 mm Gewicht............ca. 1,2 kg... - Page 84 D Impressum Dies ist eine Publikation der Conrad Electronic SE, Klaus-Conrad-Str. 1, D-92240 Hirschau (www.conrad.com). Alle Rechte einschließlich Übersetzung vorbehalten. Reproduktionen jeder Art, z. B. Fotokopie, Mikroverfilmung, oder die Erfassung in elektronischen Datenverarbeitungsanlagen, bedürfen der schriftlichen Genehmigung des Herausgebers. Nachdruck, auch auszugsweise, verboten. Die Publikation entspricht dem technischen Stand bei Drucklegung.
Need help?
Do you have a question about the DL-PAR103 LED-Spot and is the answer not in the manual?
Questions and answers