Table of Contents
Advertisement
Available languages
Available languages
Quick Links
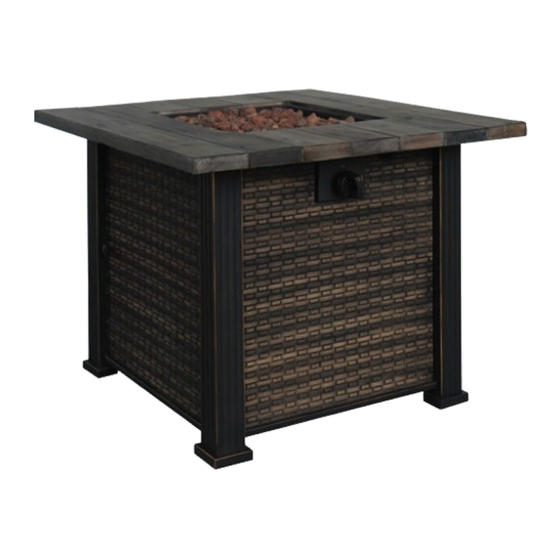
OUTDOOR GAS
FIRE TABLE
MESA DE EXTERIOR CON
BRASERO DE GAS
DA NG E R
CARBON MONOXIDE HAZARD
This appliance can produce
carbon monoxide which has no
odor.
Using it in an enclosed space can
kill you.
Never use this appliance in an
enclosed space such as a camper,
tent, car or home.
User Manual
Manual del
usuario
To the installer: Please leave
instructions with the consumer
DANGER
If you smell gas:
1. Shut off gas to the appliance.
2. Extinguish any open flame.
3. If odor continues, keep away
from the appliance and immediately
call your gas supplier or fire
department.
WARNING
Do not store or use gasoline or
other flammable vapors and liquids
in the vicinity of this or any other
appliance. An LP-cylinder not
connected for use shall not be stored
in the vicinity of this or any other
appliance.
WARNING
For outdoor use only.
Improper installation, adjustment,
alteration, service or maintenance
can cause injury or property damage.
Read the owner's manual thoroughly
before installing or servicing this
equipment. If the information in this
manual is not followed exactly, a
fire or explosion may result causing
property damage, personal injury
or loss of life.
English.... 2
Español... 14
Advertisement
Chapters
Table of Contents

Subscribe to Our Youtube Channel
Related Manuals for Gardenline 50440

Summary of Contents for Gardenline 50440
- Page 1 User Manual Manual del usuario To the installer: Please leave instructions with the consumer DANGER If you smell gas: 1. Shut off gas to the appliance. OUTDOOR GAS 2. Extinguish any open flame. 3. If odor continues, keep away from the appliance and immediately FIRE TABLE call your gas supplier or fire department.
-
Page 2: Table Of Contents
Contents Parts list ............3 Safety instructions ...........4 Assembly instructions ........7 User instructions ..........11 Cleaning and maintenance ......12 Other useful information ....... 12... -
Page 3: Parts List
Parts list Main parts 1. Lid 13. Control knob (preassembled) 2. Tabletop 14. Guard (preassembled) 3. Door 15. Firebowl (preassembled) 4. Front panel 16. Burner (preassembled) 5. Side panel (x2) 17. Electronic igniter (preassembled) 6. Left leg (x2) 18. M6 x 10 screw (x24) Right front leg 19. -
Page 4: Safety Instructions
Safety instructions General information Before you assemble or operate this unit, please carefully read this entire manual. Failure to do so may result in a fire, explosion, injury or death. WARNING 1. The installation of this unit must adhere to local codes or either the National Fuel Gas Code, ANSI Z223. - Page 5 Safety instructions 33. Combustible material should not be within 72 inches of the top of the unit, or within 48 inches around the entire unit. 34. Keep the appliance area clear and free from combustible material, gasoline and other flammable vapors and liquids. 35.
- Page 6 Safety instructions heating item is in use. Only use the regulator and hose assembly provided with this unit. Replacement parts must be supplied directly by Bond Manufacturing Co. Inspect the burner before use of this unit. If the burner shows any kind of damage, do not operate the appliance.
-
Page 7: Assembly Instructions
Assembly instructions Checking the gas control 1. Check that the control knob (13) for the gas supply system is turned to the “OFF” position before starting any assembly. Attaching the legs 2. Attach right front leg (7), right back leg (8) and 2 left legs (6) to the metal stand (9) using 4 pcs M6 x 10 screws (18). - Page 8 Assembly instructions Attaching the steel base 4. Attach steel base to the bottom part of the table top (2) using 8 pcs M6 x 10 screws (18). Tighten with wrench (23). Attaching the door 5. Insert the door (3) to right front leg and attach door knob (22) to the door using 1 M4 x 8 screw (20) and 1 washer (21).
- Page 9 Assembly instructions Securing the propane tank 7. Place propane gas tank (not included) into the metal stand (9). Make sure the gas tank sits on the metal stand (9) completely. Turn the preassembled wing screw on the outer part of metal stand (9) clockwise to secure the propane gas tank tightly.
- Page 10 Assembly instructions Pouring the lava rocks 10. Pour the box of lava rocks (10) into the firebowl (15). CAUTION To ensure proper function, the guard (14) on this burner (16) should be free of lava rocks at all times.
-
Page 11: User Instructions
User instructions Before performing a leak test, be sure that no sparks can occur and you are in a spacious outdoor area. Connect the propane gas tank to the regulator and turn the valve on the unit to the “off” position. Brush a soap and water mixture on all connections. -
Page 12: Cleaning And Maintenance
Cleaning and maintenance Cleaning and maintenance 1. Before performing any maintenance always disconnect propane gas tank. 2. Keep the heating item free and clear from combustible materials. 3. Visually inspect burner for obstructions and keep tank enclosure free and clear from debris. - Page 14 Contenido Lista de componentes ........15 Instrucciones de seguridad ......16 Instrucciones de ensamblaje ......20 Instrucciones para el usuario ......24 Limpieza y mantenimiento ......25 Otra información de utilidad ......25...
-
Page 15: Lista De Componentes
Lista de componentes Componentes principales 1. Tapa 13. Perilla de control (preinstalada) 2. Tablero de mesa 14. Protector (preinstalado) 3. Puerta 15. Cuenco (preinstalado) 4. Panel frontal 16. Quemador (preinstalado) 5. Panel lateral x2 17. Encendedor electrónico (preinstalado) 6. Pata izquierda x2 18. -
Page 16: Instrucciones De Seguridad
Instrucciónes de seguridad Información general Antes de montar o de utilizar este aparato, lea todo este manual detenidamente. El no hacerlo puede causar un incendio, una explosión, una lesión o la muerte. ADVERTENCIA 1. La instalación de este aparato debe cumplir con los códigos locales o con el Código Nacional de Gas Combustible, ANSI Z223.1/NFPA 54, o CAN/CGA-B149.1, Código Nacional de Instalación de Gas y Propano. - Page 17 Instrucciónes de seguridad 24. No pinte ni coloree ninguna parte de este aparato de calefacción. 25. El aparato puede estar caliente al usarlo; no intente moverlo mientras esté en uso. 26. Nunca deje este aparato de calefacción sin vigilancia durante el uso. 27.
- Page 18 Instrucciónes de seguridad 54. No se debe utilizar este aparato de calefacción sobre plataformas de plástico o de madera artificial. 55. Los niños y los adultos deben mantenerse alerta a los peligros de las superficies a alta temperatura y mantener una distancia prudente para evitar quemaduras o incendio de ropa.
- Page 19 Instrucciónes de seguridad Espacio Libre Min. 72 pulg (182.88 cm) Espacio Libre Min. Espacio Libre Min. 72 pulg (182.88 cm) 72 pulg (182.88 cm) No debe haber materiales combustibles a menos de 72 pulgadas (182.88 cm) de la parte superior de la unidad o a menos de 48 pulgadas alrededor de toda la unidad.
-
Page 20: Instrucciones De Ensamblaje
Instrucciones de ensamblaje Comprobación del control de gas 1. Verifique que la perilla de control (13) del sistema de suministro de gas esté en la posición ‘OFF’ (apagado) antes de empezar cualquier montaje. Instalación de las patas 2. Sujete la pata delantera derecha (7), la pata posterior derecha (8) y las 2 patas izquierdas (9) al soporte metálico (I) utilizando 4 tornillos M6 x 10 (18). - Page 21 Instrucciones de ensamblaje Instalación de la base de acero 4. Sujete la base de acero a la parte inferior del tablero de mesa (2) utilizando 8 tornillos M6 x 10 (18). Apriete con la llave (23). Instalación de la puerta 5.
- Page 22 Instrucciones de ensamblaje Instalación del tanque de propano 7. Coloque el tanque de gas propano (no provisto) en el soporte metálico (9). Asegúrese de que el tanque de gas quede bien colocado en el soporte metálico (9). Gire el tornillo de mariposa preinstalado de la parte exterior del soporte metálico (9) en sentido horario para bien fijar el tanque de gas propano.
- Page 23 Instrucciones de ensamblaje Vertido de las rocas de lava 10. Vierta la caja de rocas de lava (10) en el cuenco (15). PELIGRO Para asegurar un funcionamiento adecuado, el protector (14) de este quemador (16) debe estar libre de rocas de lava en todo momento.
-
Page 24: Instrucciones Para El Usuario
Instrucciones para el usuario Antes de realizar un ensayo de fugas, asegúrese de que ninguna chispa pueda producirse y que usted esté en un espacio exterior amplio. Conecte el tanque de gas propano al regulador y gire la válvula del aparato a la posición ‘off’ (apagado). Aplique con un cepillo una mezcla de agua jabonosa en todas las conexiones. -
Page 25: Limpieza Y Mantenimiento
Limpieza y mantenimiento Limpieza y mantenimiento 1. Antes de hacer cualquier mantenimiento, desconecte siempre el tanque de gas propano. 2. Mantenga el aparato de calefacción despejado y libre de materiales combustibles. 3. Visualmente revise el quemador para descartar obstrucciones, y mantenga el cerramiento del tanque despejado y libre de residuos. - Page 26 ALDI INC. FULL WARRANTY CONDITIONS Dear Customer: The ALDI warranty is a fully warranty offering you the following benefits: Warranty period: 2 years from date of purchase. 6 months for movable parts and consumables under normal and proper conditions of use (e.g. rechargeable batteries).
- Page 27 CONDICIONES DE LA GARANTÍA COMPLETA DE ALDI INC. Estimado cliente: La Garantía ALDI es una garantía completa que le ofrece los siguientes beneficios: Período de garantía: 2 años a partir de la fecha de la compra. 6 meses para las piezas de recambio y consumibles en condiciones normales y adecuadas de uso (por ejemplo, baterías recargables).
- Page 28 DISTRIBUTED BY • DISTRIBUIDO POR: ALDI INC., BATAVIA, IL 60510 WWW.ALDI.US AFTER SALES SUPPORT • SERVICIO POSVENTA 52531 1-866-771-2663 customer.service@bondmfg.com YEAR WARRANTY AÑOS DE GARANTÍA MODEL: 50440 04/2019...
Need help?
Do you have a question about the 50440 and is the answer not in the manual?
Questions and answers