Advertisement
Quick Links
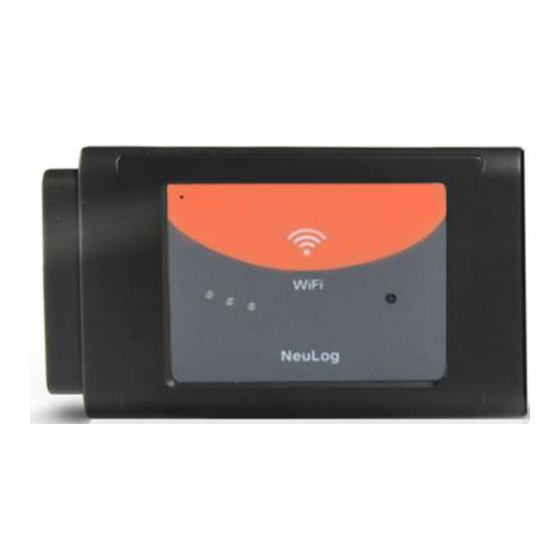
NeuLog WiFi communication module
WIFI-201
The WiFi module is without a doubt one of the most advanced and innovative
elements that the NeuLog line has to offer. Data collection and analysis with NeuLog
sensors can be performed through any device which has wireless capabilities such as
iPads, Android tablets, smartphones, Windows, Mac, and Linux based computers.
The WiFi module can seamlessly transform group projects by connecting up to 5
devices onto the wireless network at a single time – promoting interaction and allowing
each member to have their own dataset.
There is no downloaded application or software installation as they are built directly
into the WiFi module which transmits its own closed wireless network. This means
that you do not need your own wireless network – though if you have one a simple
setting can be changed on the WiFi module to allow surfing of the web at the same
time!
All current popular browsing programs can be used with the WiFi module to allow you
to use whichever browser you and your students feel most comfortable with.
Using the NeuLog WiFi module:
The NeuLog WiFi module is a very advanced piece of equipment; having capability to
transmit its own wireless network as well record data from up to 5 NeuLog sensors at
a time.
You'll notice that on the front of the WIFI-201 module there are four LED lights labeled
A, C, T, and U.
A: (blue LED) When the blue LED is the only light on, the WIFI module is in Access
Point mode (described below) and is transmitting a closed wireless network which you
can connect devices to.
C: (green LED) When the green LED is the only light on, the WIFI module is in Client
Mode (described below) and allows your wireless devices to control sensors through
the website
www.Wifi201.com
as well as browse the internet.
T: (red LED) The red LED will blink when there is active communication between any
connected sensors and the NeuLog software.
NEULOG WIFI COMMUNICATION MODULE GUIDE
U: (yellow LED) The yellow LED will remain lit when the WiFi module is working in
USB mode (detailed below). USB mode can be turned on and off by pressing the
button on the front of the WiFi module three times.
Materials needed:
NeuLog USB module or battery module
Any NeuLog sensor
NeuLog WiFi module
Any device with wireless capabilities.
Access point mode:
Access point mode is the default operating mode for the the NeuLog WiFi module – it
transmits it's own closed wireless network which allows up to 5 devices to connect to it
at a time. No prior wireless networks are required, making this option both very
portable and unique. Because the network is closed; you will not be able to browse
the internet, if you wish to browse the internet while using the WiFi module please
locate the "Client mode" procedural guide in this manual beginning on page 5.
1.
Connect up to 5 NeuLog sensors directly to the left side of the WIFI-201
module (no wires required).
2.
Connect either a BAT-200 or a USB-200 module to the right side of the
WIFI-201 module.
Note: Although not required, we recommend plugging the BAT-200 to an
outlet using a USB to micro USB charger (such as a typical cell phone
charger). The WIFI-201 module will run for 15-75 minutes (depending on
the sensor) without being plugged in.
3.
For further WIFI-201 instructions or the WIFI-201 quick start guide please
visit www.NeuLog.com/download.
4.
The WIFI-201 indicator lights will flash; take no action until the LED to the
far left turns blue.
5.
Take your tablet or smart phone and go to the Wi-Fi settings and select the
NeuLog network which matches the WIFI module ID found on the back of
the WIFI-201 device. (NeuLog1334 for example)
6.
Give your device 1-2 minutes to connect to the WIFI-201 network.
7.
Once the device is connected go to your browser and type in the website
wifi201.com into the URL bar, then wait for 30-60 seconds.
Advertisement

Related Manuals for NeuLog WIFI-201

Summary of Contents for NeuLog WIFI-201
- Page 1 Connect either a BAT-200 or a USB-200 module to the right side of the WIFI-201 module. You’ll notice that on the front of the WIFI-201 module there are four LED lights labeled Note: Although not required, we recommend plugging the BAT-200 to an A, C, T, and U.
- Page 2 Input your local internet connection’s name and password in their respective text fields. Note: To view the password in characters, click the “Show” USB mode allows you to use your WiFi module as if it were a NeuLog USB-200. This button.
- Page 3 USB to micro USB cable, you’ll see the LED lights blink for a moment while the module powers on. Connect your NeuLog sensors to the side of the WiFi module, the red LED on each sensor should blink to acknowledge they are working properly.
- Page 4 NEULOG WIFI COMMUNICATION MODULE GUIDE V05072013...
Need help?
Do you have a question about the WIFI-201 and is the answer not in the manual?
Questions and answers