Table of Contents
Advertisement
Quick Links
Advertisement
Table of Contents

Subscribe to Our Youtube Channel
Summary of Contents for Gee Mini Tramp
- Page 1 Owner’s & User’s Manual Safety Information, Installation and Care & Maintenance Instructions. Mini Trampoline (also known as Mini Tramp) Warning: Read this manual before assembling and using the Mini Tramp. Page 1 (Revision 1.0) Copyright © 2018 GeeTramp® All Rights Reserved.
-
Page 2: Table Of Contents
SAFE USE WARNING ......................4 BASIC TRAMPOLINING INSTRUCTIONS ................4 MINI TRAMP SAFE USE ......................5 MINI TRAMP LOCATION – REDUCING SAFETY RISKS ............6 Correct Mini Tramp Positioning .......................... 6 Surface that the Mini Tramp is on: ........................6 The area surrounding the Mini Tramp: ....................... -
Page 3: Safe Use Information
Mini Tramp will be at ground level, so the floor surface and area around the Mini Tramp becomes even more important. -
Page 4: Safe Use Warning
SAFE USE WARNING Note: The warning label below is like what your Mini Tramp will have, except the model you have will also have the actual kg rating instead of the “X”. BASIC TRAMPOLINING INSTRUCTIONS This trampoline is designed primarily as a domestic Mini Tramp, not a top end gymnastics Mini Tramp, however it can provide relatively high performance. -
Page 5: Mini Tramp Safe Use
The feet of the Mini Tramp need to be inspected prior to each use, they need to be in place, spread out wide on the frame legs with all feet taking a balanced load. (no frame rock) The frame needs to sit stable on the ground at all times, do not modify any manufacturer settings by artificially increasing leg angles by external props or placing on un level surfaces. -
Page 6: Mini Tramp Location - Reducing Safety Risks
MINI TRAMP LOCATION – REDUCING SAFETY RISKS Correct Mini Tramp Positioning For safe use of the Mini Tramp, please be aware of the following points when selecting a place for your Mini Tramp: Surface that the Mini Tramp is on: Make sure this is flat and level. -
Page 7: Maximum Weight Of The User
(especially the exit side) and start with basic manoeuvres and build up from there. To avoid overloading the Mini Tramp or risk of injury use the following as a guide:... - Page 8 MAXIMUM WEIGHT OF THE USER (CONT.) Here are the main settings of the leg adjustments (configurations 1,2,3 & 4) in detail. Entry View Side View Exit View Entry - Low Exit - Low Entry - High Exit - Low Entry - Low Exit - High...
-
Page 9: Parts List
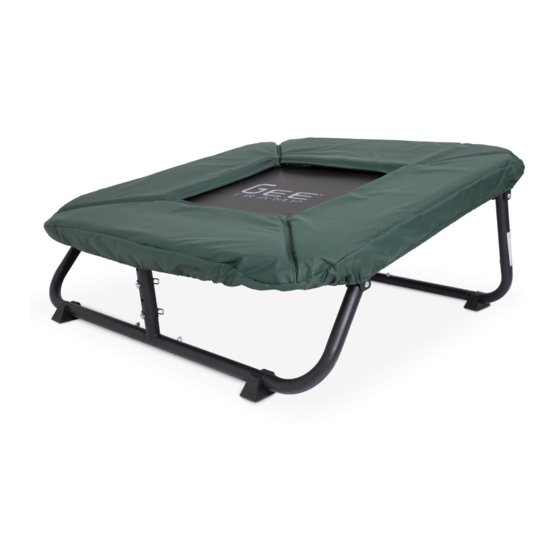
Make sure you have all parts listed in the table below. If you think you’re missing any parts, please contact your supplier. Parts List Select your Trampoline Size Item # Item Image Description 1.2x1.2m Mini Tramp Carry Bag Leg Locking Pin Transport/Storage Cap Spring tool User manual Page 9 (Revision 1.0) -
Page 10: Assembly
Basically, the legs need to be set and pinned to the leg angle desired prior to use. Step 1.0 Remove Mini Tramp (ref #1) from its packaging. Lay Mini Tramp upside down on a suitable surface to protect the mat and pads from sharp objects (e.g. on a layer of cardboard or carpet etc.) Step 1.1... -
Page 11: Transporting And Storage
TRANSPORTING AND STORAGE If you have plenty of space in a vehicle (e.g. a station wagon, SUV or van then the Mini Tramp can be left completely assembled for transport, be mindful to keep the Mini Tramp restrained and the mat protected from any other objects in the vehicle. -
Page 12: Jumping Mat & Safety Pad With Protection Barrier
JUMPING MAT & SAFETY PAD WITH PROTECTION BARRIER The following is provided as a reference for any future maintenance. Warning: Before attaching any springs read “How to Use the Spring Tool” instructions in step 2. Fitting the mat and pad assembly. Step 3.1 Lay out the jumping mat inside the frame, then attach the corner springs as per diagrams to the left. - Page 13 JUMPING MAT & SAFETY PAD WITH PROTECTION BARRIER (CONT.) Step 3.3 Slide the protection barrier material (netting) fully over each spring V-ring. Step 3.4 Continue to slide the safety pad’s protection barrier material over each spring V-ring and then attach the corresponding spring until all springs are installed.
- Page 14 JUMPING MAT & SAFETY PAD WITH PROTECTION BARRIER (CONT.) Step 3.6 Now the jumping mat and the safety pad’s protection barrier are fully secured you may now secure the safety pads to the jumping mat and frame with the included bungee cords. Thread the bungee through the pad underside black hoop.
-
Page 15: Care And Maintenance Instructions
Frame The frame works best on a level surface; if the Mini Tramp is used on a surface that’s not level the frame will need to absorb uneven localised loads that could be above the design capacity. Ensure the leg bottoms are on the ground evenly to keep the loads evenly distributed. -
Page 16: User Inspection Checklist
USER INSPECTION CHECKLIST A Mini Tramp in poorly maintained condition will increase your risk of getting injured. Please inspect the Mini Tramp before each use, check for damaged or worn parts, for example: Date of inspection: or X Mini Tramp Positioning Mini Tramp is positioned on a stable &...
Need help?
Do you have a question about the Mini Tramp and is the answer not in the manual?
Questions and answers