Samsung HW-R650 Full Manual
Hide thumbs
Also See for HW-R650:
- Full manual (150 pages) ,
- User manual (31 pages) ,
- User manual (68 pages)

Related Manuals for Samsung HW-R650


Summary of Contents for Samsung HW-R650
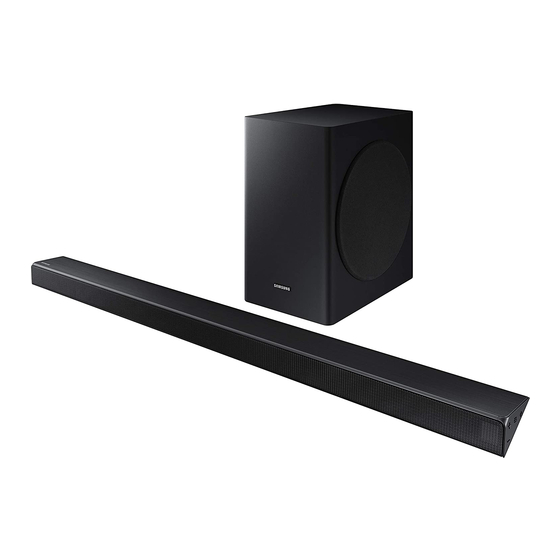
- Page 1 FULL MANUAL HW-R650 Imagine the possibilities Thank you for purchasing this Samsung product. To receive more complete service, please register your product at www.samsung.com/register...
- Page 2 BLADE OF PLUG TO WIDE SLOT, FULLY Refer to the table below for an explanation of INSERT. symbols which may be on your Samsung product. • This apparatus shall always be connected to a AC outlet with a protective grounding connection.
- Page 3 You can access the FULL MANUAL on cold temperatures. If transporting the unit Samsung’s on-line customer support centre by during the winter, wait approximately scanning the QR code. To see the manual on...
-
Page 4: Table Of Contents
CONTENTS Checking the Components Inserting Batteries before using the Remote Control (AA batteries X 2) ------------------------- Product Overview Front Panel / Right Side Panel of the Soundbar ------------------------- Bottom Panel of the Soundbar ------------------------- Connecting the Soundbar Connecting Electrical Power ------------------------- Connecting the Soundbar to the Subwoofer -------------------------... - Page 5 Connecting a Mobile Device Connecting via Bluetooth ------------------------- Using the Samsung Audio Remote App ------------------------- – Installing the Samsung Audio Remote App ------------------------- – Launching the Samsung Audio Remote App ------------------------- Using the Remote Control How to Use the Remote Control...
-
Page 6: Checking The Components
• The power components are labelled ( 1 , 2 , 3 ). For more information about power connections, see page 5. • To purchase additional components or optional cables, contact a Samsung Service Centre or Samsung Customer Care. • Depending on the region, the appearance of the AC plug may differ from the plug displayed above, or it may be supplied integrated with the AC/DC adapter. -
Page 7: Product Overview
02 PRODUCT OVERVIEW Front Panel / Right Side Panel of the Soundbar Position the product so that the SAMSUNG logo is located on the top. Right Side of the Soundbar Display Displays the product’s status and current mode. +/- (Volume) Button Adjusts the volume. -
Page 8: Bottom Panel Of The Soundbar
Bottom Panel of the Soundbar DIGITAL AUDIO IN (OPTICAL) HDMI IN HDMI IN USB (5V 0.5A) HDMI OUT (TV-ARC) HDMI OUT (TV-ARC) DC 24V AUX IN DC 24V HDMI IN DIGITAL AUDIO IN (OPTICAL) USB (5V 0.5A) HDMI OUT (TV-ARC) AUX IN DIGITAL AUDIO IN (OPTICAL) Connect to the digital (optical) output of an external device. -
Page 9: Connecting The Soundbar
03 CONNECTING THE SOUNDBAR Connecting Electrical Power Use the power components (1, 2, 3) to connect the Subwoofer and Soundbar to an electrical outlet in the following order: 1 Connect the power cord to the Subwoofer. 2 Connect the power output cable to the power adapter, and then to the Soundbar. 3 Connect the power cord to a wall socket. -
Page 10: Connecting The Soundbar To The Subwoofer
Soundbar unit is connected properly. Connect again. See the instructions for Connection failed manual connection on page 7. Red and See the contact information for the Blinking Malfunction blue Samsung Service Centre in this manual. ENG - 6... -
Page 11: Manually Connecting The Subwoofer If Automatic Connection Fails
Manually connecting the Subwoofer if automatic connection fails Before performing the manual connection procedure below: • Check whether the power cables for the Soundbar and subwoofer are connected properly. • Make sure that the Soundbar is turned on. 1. Press and hold ID SET on the rear of the subwoofer for at least 5 seconds. •... -
Page 12: Connecting An Swa-8500S (Sold Separately) To Your Soundbar
Wireless Receiver Module (sold separately) is clear of any obstructions. Connecting an SWA-8500S (Sold Separately) to your Soundbar Expand to true wireless surround sound by connecting the Samsung Wireless Rear Speaker Kit (SWA-8500S, sold separately) to your Soundbar. 1. Connect the Wireless Receiver Module to 2 Surround Speakers. - Page 13 2. Check the standby status of the Wireless Receiver Module after plugging it into an electrical outlet. • The LINK LED indicator (blue LED) on the Wireless Receiver Module blinks. If the LED does not blink, press the ID SET button on the back of the Wireless Receiver Module with a pen tip for 5~6 seconds until the LINK LED indicator blinks (in Blue).
-
Page 14: Connecting To Your Tv
04 CONNECTING TO YOUR TV Hear TV sound from your Soundbar through wired or wireless connections. • When the Soundbar is connected to selected Samsung TVs, the Soundbar can be controlled using the TV’s remote control. – This feature is supported by 2017 and later Samsung Smart TVs that support Bluetooth when you connect the Soundbar to the TV using an optical cable. -
Page 15: Connecting Using An Optical Cable
• If “TV ARC” does not appear in the display window of the Soundbar main unit, confirm that the HDMI cable is connected to the correct port. • Use the volume buttons on the TV’s remote control to change the volume on the Soundbar. NOTES •... -
Page 16: Method 2. Connecting Wirelessly
2. Select Bluetooth mode on the TV. (For more information, see the TV’s manual.) 3. Select “[AV] Samsung Soundbar R6-Series” from the list on TV’s screen. An available Soundbar is indicated with “Need Pairing” or “Paired” on the TV’s Bluetooth device list. - Page 17 If the device fails to connect • If a previously connected Soundbar listing (e.g. “[AV] Samsung Soundbar R6-Series”) appears in the list, delete it. • Then repeat steps 1 through 3. NOTE • After you have connected the Soundbar to your TV the first time, use the “BT READY” mode to reconnect.
-
Page 18: Connecting An External Device
05 CONNECTING AN EXTERNAL DEVICE Connect to an external device via a wired or wireless network to play the external device’s sound through the Soundbar. Connecting using an HDMI Cable Bottom of the Soundbar HDMI OUT HDMI IN HDMI Cable External Device HDMI OUT (TV-ARC) -
Page 19: Connecting Using An Optical Or Analogue Audio (Aux) Cable
Connecting using an Optical or Analogue Audio (AUX) Cable Right Side of the Soundbar BD / DVD player / Set-top box / Game console DIGITAL AUDIO IN OPTICAL OUT Optical Cable (OPTICAL) HDMI IN (not supplied) - AUDIO - USB (5V 0.5A) HDMI OUT (TV-ARC) AUX IN... -
Page 20: Connecting A Usb Storage Device
2.0 USB jack (Type A) on the other end to the micro USB jack on your Soundbar. • The Micro USB to USB adapter cable is sold separately. To purchase, contact a Samsung Service Centre or Samsung Customer Care. - Page 21 File Format Type Compatibility list Extension Codec Sampling Rate Bitrate *.mp3 MPEG 1 Layer2 16kHz ~ 48kHz 80kbps~320kbps MPEG 1 Layer3 16kHz ~ 48kHz 80kbps~320kbps MPEG 2 Layer3 16kHz ~ 48kHz 80kbps~320kbps MPEG 2.5 Layer3 16kHz ~ 48kHz 80kbps~320kbps *.wma Wave_Format_MSAudio1 16kHz ~ 48kHz 56kbps~128kbps...
-
Page 22: Connecting A Mobile Device
3. Play music files from the device connected via Bluetooth through the Soundbar. If the device fails to connect • If a previously connected Soundbar listing (e.g. “[AV] Samsung Soundbar R6-Series”) appears in the list, delete it. • Then repeat steps 1 and 2. - Page 23 • You cannot connect the Soundbar to a Bluetooth device that supports only the HF (Hands Free) function. • Once you have paired the Soundbar to a Bluetooth device, selecting “[AV] Samsung Soundbar R6-Series” from the device’s scanned devices list will automatically change the Soundbar to “BT”...
- Page 24 Disconnecting the Bluetooth device from a Soundbar You can disconnect a Bluetooth device from the Soundbar. For instructions, see the Bluetooth device’s user manual. • The Soundbar will be disconnected. • When the Soundbar is disconnected from the Bluetooth device, the Soundbar will display “BT DISCONNECTED”...
-
Page 25: Using The Samsung Audio Remote App
Market search : Samsung Audio Remote Launching the Samsung Audio Remote App To launch and use the Samsung Audio Remote app, touch the Audio Remote icon on your smart device, and then follow the directions on the screen. Audio Remote •... -
Page 26: Using The Remote Control
08 USING THE REMOTE CONTROL How to Use the Remote Control Turns the Soundbar on and off. Power Press to select a source connected to the Soundbar. PAIR • BT PAIRING mode Source To turn on “BT PAIRING” mode, change the source to “BT”... - Page 27 Anynet+ and Auto Power Link are turned on and turned off by the Right and Left buttons respectively. – Anynet+ : If the Soundbar is connected to a Samsung TV through an HDMI cable, you can control your Soundbar with a Samsung TV remote control.
- Page 28 • Volume Restriction function To protect your hearing, the Volume Restriction function restricts the volume to 20 if you turn on the Soundbar when the volume is set higher than 20. – The default value for the Volume Restriction function is Off. You must turn it on to activate it.
-
Page 29: Adjusting The Soundbar Volume With A Tv Remote Control
For more information, see the TV’s user manual. The default mode for this function is control by a Samsung TV remote. If your TV is not – Each time you push the WOOFER button a Samsung TV, follow the directions below to up and hold it for 5 seconds, the mode change the settings of this function. -
Page 30: Using The Hidden Buttons (Buttons With More Than One Function)
2.0 ch 3.1 ch 5.1 ch SMART 5.1 ch 3.1 ch 5.1 ch WOOFER • The Samsung Wireless Rear Speaker Kit can be purchased separately. To purchase a Kit, contact the vendor you purchased the Soundbar from. ENG - 26... -
Page 31: Installing The Wall Mount
09 INSTALLING THE Wallmount Components WALL MOUNT Wall Mount Guide Installation Precautions • Install on a vertical wall only. • Do not install in a place with high Holder-Screw Screw temperature or humidity. • Verify whether the wall is strong enough to support the product’s weight. - Page 32 2. Align the Wall Mount Guide’s Centre Line 5. Push a screw (not supplied) through each with the centre of your TV (if you are Holder-Screw, and then screw each screw mounting the Soundbar below your TV), and firmly into a support screw hole. then fix the Wall Mount Guide to the wall using tape.
-
Page 33: Software Update
USB device with the Holder-Screws. firmware update stored on it to the USB port on your Soundbar. For more information about how to download update files, go to the Samsung Electronics website at www.samsung.comSupport. Then, enter or select the model number of your Soundbar, select the Software &... -
Page 34: Updating Procedure
2. Follow the steps below to download the • After the update is completed, the user setup product software: in the Soundbar is initialised so you can reset Go to the Samsung website at your settings. We recommend you write (samsung.com) search for the model name ... -
Page 35: Troubleshooting
11 TROUBLESHOOTING Before seeking assistance, check the following. The unit will not turn on. Is the power cord plugged into the outlet? ; Connect the power plug to the outlet. A function does not work when the button is pressed. Is there static electricity in the air? ;... -
Page 36: Licence
12 LICENCE 13 OPEN SOURCE LICENCE NOTICE To send inquiries and requests regarding open sources, contact Samsung via Email Manufactured under license from Dolby (oss.request@samsung.com). Laboratories. Dolby, Dolby Audio, Pro Logic, and the double-D symbol are trademarks of Dolby 14 IMPORTANT Laboratories. -
Page 37: Specifications And Guide
Press and hold the SOUND MODE button for Bluetooth more than 5 seconds to turn off Bluetooth Power Port deactivation method function. NOTES • Samsung Electronics Co., Ltd reserves the right to change the specifications without notice. • Weight and dimensions are approximate. ENG - 33... - Page 38 • Hereby, Samsung Electronics, declares that this equipment is in compliance with Directive 2014/53/EU. The full text of the EU declaration of conformity is available at the following internet address: http://www.samsung.com go to Support > Search Product Support and enter the model name.
- Page 39 SERVİS İŞLEMLERİNİ, YETKİN SERVİS • ELEKTRİK ÇARPMASINI ENGELLEMEK İÇİN PERSONELİNE BIRAKIN. FİŞİN GENİŞ UCUNU YUVAYLA EŞLEŞTİRİN Samsung ürününüzde bulunabilecek sembollerin VE YERİNE TAM OTURTUN. açıklaması için aşağıdaki tabloya bakın. • Bu cihaz, koruyucu topraklama bağlantısına sahip bir AC prizine takılmalıdır.
- Page 40 çıkarın. Bu ürün, endüstriyel kullanım için tasarlanmamıştır. Bu ürün sadece kişisel TAM KILAVUZ kullanım içindir. Ürün veya diskini, soğuk TAM KILAVUZ Samsung’un çevrimiçi müşteri sıcaklıklarda depolanmışsa yoğuşma destek merkezinden QR kodunu taratarak ulaşabilirsiniz. Kullanım kılavuzunu meydana gelebilir. Kış şartlarında ünitenin bilgisayarınızda veya mobil cihazınızda...
- Page 41 IÇINDEKILER Bi ̇ l eşenleri ̇ denetleme Uzaktan Kumandayı kullanmadan önce pilleri takma (2 adet AA pil) ------------------------- Ürüne genel bakiş Soundbar Ön Paneli / Sağ Yan Paneli ------------------------- Soundbar Alt Paneli ------------------------- Soundbar’i bağlama Elektrik Gücünü Bağlama ------------------------- Soundbar’ı Subwoofer’a Bağlama ------------------------- –...
- Page 42 Mobi ̇ l ci ̇ h az bağlama Bluetooth Aracılığıyla Bağlama ------------------------- Samsung Audio Remote Uygulamasını Kullanma ------------------------- – Samsung Audio Remote Uygulamasını Yükleme ------------------------- – Samsung Audio Remote Uygulamasını Başlatma ------------------------- Uzaktan kumandayi kullanma Uzaktan Kumandayı Kullanma Şekli ------------------------- Soundbar ses düzeyini TV’nin uzaktan kumandasıyla ayarlama...
-
Page 43: Bi ̇ L Eşenleri ̇ Denetleme
• Güç bağlantısı adımları etiketlenmiştir ( 1 , 2 , 3 ). Güç bağlantıları hakkında daha fazla bilgi için bkz. sayfa 5. • Ek bileşenler ya da isteğe bağlı kablolar satın almak için bir Samsung Servis Merkezine veya Samsung Müşteri Hizmetleri’ne başvurun. -
Page 44: Ürüne Genel Bakiş
02 ÜRÜNE GENEL BAKIŞ Soundbar Ön Paneli / Sağ Yan Paneli Ürünü SAMSUNG logosu üstte olacak şekilde konumlandırın. Soundbar’ın Sağ Tarafı Ekran Ürünün durumunu ve geçerli modunu görüntüler. +/- (Ses Düzeyi) düğmesi Ses düzeyini ayarlayın. • Ayarlandığında, Soundbar’ın ön ekranında ses düzeyi belirir. -
Page 45: Soundbar Alt Paneli
Soundbar Alt Paneli DIGITAL AUDIO IN (OPTICAL) HDMI IN HDMI IN USB (5V 0.5A) HDMI OUT (TV-ARC) HDMI OUT (TV-ARC) DC 24V AUX IN DC 24V HDMI IN DIGITAL AUDIO IN (OPTICAL) USB (5V 0.5A) HDMI OUT (TV-ARC) AUX IN DIGITAL AUDIO IN (OPTICAL) Harici cihazın dijital (optik) çıkışına bağlayın. -
Page 46: Soundbar'i Bağlama
03 SOUNDBAR’I BAĞLAMA Elektrik Gücünü Bağlama Subwoofer ve Soundbar’ı aşağıdaki sırada prize bağlamak için güç bileşenlerini kullanın (1, 2, 3): 1 Güç kablosunu Subwoofer’a bağlayın. 2 Güç çıkış kablosunu önce güç adaptörüne ve sonra Soundbar’a takın. 3 Güç kablosunu prize takın. Aşağıdaki çizime bakın. -
Page 47: Soundbar'ı Subwoofer'a Bağlama
Bekleme (Soundbar ana kablosunun düzgün bağlanıp ünitesi kapalıyken) bağlanmadığını kontrol edin. Kırmızı Açık Yeniden bağlayın. Bkz. manuel bağlantı Bağlantı başarısız oldu talimatları, sayfa 7. Kırmızı ve Yanıp Kılavuzdaki Samsung Servis Merkezi Arıza mavi sönüyor iletişim bilgilerine bakın. TUR - 6... -
Page 48: Otomatik Bağlantı Başarısız Olursa Subwoofer'ı Manuel Olarak Bağlama
Otomatik bağlantı başarısız olursa subwoofer’ı manuel olarak bağlama Aşağıdaki manuel bağlantı işlemini uygulamadan önce: • Soundbar ve subwoofer güç kablolarının düzgün bağlanıp bağlanmadığını kontrol edin. • Soundbar’ın açık olduğundan emin olun. 1. Subwoofer’ın arkasındaki ID SET düğmesini en az 5 saniye basılı tutun. •... -
Page 49: Swa-8500S'i (Ayrı Satılır) Soundbar'a Bağlama
SWA-8500S’i (Ayrı Satılır) Soundbar’a Bağlama Samsung Kablosuz Arka Hoparlör Kitini (SWA-8500S - Ayrı Satılır) Soundbar’ınıza bağlayarak doğru kablosuz surround sesi genişletin. 1. Kablosuz Alıcı Modülü’nü 2 Surround Hoparlöre bağlayın. - Page 50 2. Prize taktıktan sonra Kablosuz Alıcı Modülü’nün bekleme durumunu kontrol edin. • Kablosuz Alıcı Modülü’ndeki LINK LED göstergesi (mavi LED) yanıp söner. LED yanıp sönmüyorsa, LINK LED göstergesi (Mavi) yanıp sönene kadar bir kalemle 5~6 saniye Kablosuz Alıcı Modülünün arkasındaki ID SET düğmesine basın. LED hakkında daha fazla bilgi için lütfen SWA-8500S kullanıcı...
-
Page 51: Tv'ni̇ze Bağlama
04 TV’NİZE BAĞLAMA Kablolu veya kablosuz bağlantı aracılığıyla Soundbar’ınızdan gelen TV sesini duyun. • Soundbar, belirli Samsung TV’lere bağlandığında TV’nin uzaktan kumandası aracılığıyla kontrol edilebilir. – Bu özellik 2017’ye kadar ve optik kablo kullanarak Soundbar’ı TV’ye bağladığınızda Bluetooth’u destekleyen sonraki Samsung Smart TV’lerde desteklenmektedir. -
Page 52: Optik Kablo Kullanarak Bağlama
• Soundbar ana ünitesinin görüntü penceresinde “TV ARC” görüntülenmezse HDMI kablosunun doğru bağlantı noktasına bağlanıp bağlanmadığını onaylayın. • Soundbar’daki ses düzeyini değiştirmek için TV’nin uzaktan kumandasında bulunan ses düğmelerini kullanın. NOTLAR • HDMI, ses ve görüntü verilerinin tek bir konektör aracılığıyla dijital iletimine olanak sağlayan bir arabirimdir. -
Page 53: Yöntem 2. Kablosuz Olarak Bağlama
(Kaynak) düğmesine 5 saniyeden uzun basılı tutun. 2. TV’de Bluetooth modunu seçin. (Daha fazla bilgi için TV’nin kılavuzuna bakın.) 3. TV ekranındaki listeden “[AV] Samsung Soundbar R6-Series” seçimini yapın. Kullanılabilir Soundbar, TV Bluetooth cihazı listesinde “Need Pairing” veya “Paired” olarak belirtilir. - Page 54 Cihaz bağlanamazsa • Daha önce bağlanan Soundbar liste öğesi (örn. “[AV] Samsung Soundbar R6-Series”) listede görünüyorsa bunu silin. • Sonra adım 1 ile 3 arasını tekrarlayın. • Soundbar’ı televizyonunuza ilk kez bağladıktan sonra yeniden bağlanmak için “BT READY” modunu kullanın.
-
Page 55: Hari̇ci̇ Bi̇r Ci̇haz Bağlama
05 HARİCİ BİR CİHAZ BAĞLAMA Harici cihazın sesini Soundbar’dan çalmak için kablolu veya kablosuz ağ aracılığıyla bir harici cihaz bağlayın. HDMI Kablosu Kullanarak Bağlama Soundbar’ın Alt Kısmı HDMI OUT HDMI IN HDMI Kablosu Harici Cihaz HDMI OUT (TV-ARC) HDMI IN HDMI Kablosu (ARC) HDMI... -
Page 56: Optik Veya Analog Ses (Aux) Kablosu Kullanarak Bağlama
Optik veya analog ses (AUX) Kablosu kullanarak bağlama Soundbar’ın Sağ Tarafı BD / DVD oynatıcı / Set üstü kutusu /Oyun konsolu DIGITAL AUDIO IN OPTICAL OUT Optik Kablo (OPTICAL) HDMI IN (birlikte verilmez) - AUDIO - USB (5V 0.5A) HDMI OUT (TV-ARC) AUX IN Ses (AUX) Kablosu... -
Page 57: Usb Depolama Ci̇hazi Bağlama
1. Bir Mikro USB - USB adaptör kablosunu bir uçta erkek USB 2.0 Mikro USB fişiyle (Tür B) ve diğer uçta standart dişi 2.0 USB jakıyla (Tür A) Soundbar’ınızdaki mikro USB jakına bağlayın. • Mikro USB - USB adaptör Kablosu ayrı satılır. Satın almak için, bir Samsung Servis Merkezi’ne veya Samsung Müşteri Hizmetleri’ne başvurun. - Page 58 Uyumluluk listesi Uzantı Codec Örnekleme Hızı Bit oranı *.mp3 MPEG 1 Layer2 16kHz ~ 48kHz 80kbps~320kbps MPEG 1 Layer3 16kHz ~ 48kHz 80kbps~320kbps MPEG 2 Layer3 16kHz ~ 48kHz 80kbps~320kbps MPEG 2.5 Layer3 16kHz ~ 48kHz 80kbps~320kbps *.wma Wave_Format_MSAudio1 16kHz ~ 48kHz 56kbps~128kbps Wave_Format_MSAudio2 16kHz ~ 48kHz...
-
Page 59: Mobi̇l Ci̇haz Bağlama
3. Bluetooth aracılığıyla bağlı cihazdaki müzik dosyalarını Soundbar’dan çalın. Cihaz bağlanamazsa • Daha önce bağlanan Soundbar liste öğesi (örn. “[AV] Samsung Soundbar R6-Series”) listede görünüyorsa bunu silin. • Sonra adım 1 ve 2’yi tekrarlayın. • Soundbar ürününü mobil cihazınıza bir kez bağladıktan sonra, yeniden bağlanmak için “BT READY”... - Page 60 • Soundbar’i yalnızca HF (Eller Serbest) işlevini destekleyen bir Bluetooth cihazına bağlayamazsınız. • Soundbar ile Bluetooth cihazını eşleştirdiğinizde, cihazın taranmış cihazlar listesinden “[AV] Samsung Soundbar R6-Series” seçeneğini seçerseniz Soundbar otomatik olarak BT moduna geçer. – Sadece Soundbar, Bluetooth cihazının eşlenen cihazları listesinde bulunuyorsa kullanılabilir.
- Page 61 Bluetooth cihazının Soundbar ile bağlantısını kesme Bluetooth cihazının Soundbar bağlantısını kesebilirsiniz. Talimatlar için Bluetooth cihazının kullanım kılavuzuna bakın. • Soundbar bağlantısı kesilecektir. • Soundbar’ın Bluetooth cihazından bağlantısı kesildiğinde, Soundbar’ın ön ekranında “BT DISCONNECTED” ifadesi görüntülenir. Soundbar’ın Bluetooth cihazı bağlantısını kesme Sağ...
-
Page 62: Samsung Audio Remote Uygulamasını Kullanma
Samsung Audio Remote uygulamasını başlatmak ve kullanmak için, akıllı cihazınızda Audio Remote simgesine dokunun ve sonra ekrandaki talimatları izleyin. Audio Remote • Samsung Audio Remote uygulaması yalnızca Android OS 3.0 veya üstünü çalıştıran Android cep telefonları ve mobil cihazlarıyla uyumludur. TUR - 21... -
Page 63: Uzaktan Kumandayi Kullanma
08 UZAKTAN KUMANDAYI KULLANMA Uzaktan Kumandayı Kullanma Şekli Soundbar'ı açar ve kapatır. Güç Soundbar’a bağlı bir kaynağı seçmek için basın. • BT PAIRING modu PAIR “BT PAIRING” modunu açmak için, kaynağı Kaynak “BT” modu olarak değiştirin ve sonra (Kaynak) düğmesini 5 saniyeden uzun süreyle basılı... - Page 64 Anynet+ ve Auto Power Link sırasıyla Sağ ve Sol düğmelerine basarak açılır ve kapatılır. – Anynet+ : Soundbar, HDMI kablosuyla bir Samsung TV’ye bağlanırsa, Soundbar’ınızı Samsung TV uzaktan kumandasıyla kontrol edebilirsiniz. Anynet+ işlevini ON ve OFF arasında değiştirmek için Sağ düğmesini 5 saniye basılı tutun.
- Page 65 • Ses Kısıtlama işlevi Ses Kısıtlama işlevi işitme duyunuzu korumak için, Ses Çubuğunun ses seviyesi 20’den daha yukarıya ayarlanmışsa ses seviyesini 20’ye sabitler. – Ses Kısıtlama işlevi varsayılan olarak Kapalı’dır. Etkinleştirmek için işlevi açmalısınız. – Açıldıktan sonra Ses Kısıtlama işlevi güç kapalı olduğunda bile açık kalır. –...
-
Page 66: Soundbar Ses Düzeyini Tv'nin Uzaktan Kumandasıyla Ayarlama
Soundbar’ın ses düzeyini ayarlayabilirsiniz. (Varsayılan mod) Önce Samsung TV’nizde TV sesini harici hoparlörler SAMSUNG-TV REMOTE 5 Sec olarak ayarlamak için TV menüsünü kullanın, sonra Soundbar’ın ses düzeyini kontrol etmek için Samsung uzaktan kumandanızı kullanın. Daha –... -
Page 67: Gizli Düğmeleri Kullanma (Birden Fazla Işlevi Olan Düğmeler)
5.1 kn 2.0 kn 3.1 kn 5.1 kn SMART 5.1 kn 3.1 kn 5.1 kn WOOFER • Samsung Kablosuz Arka Hoparlör Kiti ayrı olarak satın alınabilir. Bir Kit satın almak için Soundbar’ı satın aldığınız satıcıyla iletişime geçin. TUR - 26... -
Page 68: Duvar Montajini Takma
09 DUVAR Duvar Montaj Bileşenleri MONTAJINI TAKMA Duvara Montaj Kılavuzu Kurulum Önlemleri Tutucu Vida Vida • Sadece dikey bir duvara takın. • Sıcaklık veya nemin yüksek olduğu bir yere kurmayın. • Duvarın ürün ağırlığını taşıyabilecek dayanımda olduğunu doğrulayın. Değilse, Braket-Duvara Montaj duvarı... - Page 69 2. Kağıt Şablonunun Duvara Montaj 5. Her Tutucu Vida öğesinin içine bir vida Kılavuzu’nun Orta Çizgi öğesini TV’nizin (birlikte verilmez) itin ve sonra her vidayı sıkı merkeziyle (Soundbar’ı TV’nizin altına monte bir şekilde destek vidası deliğine vidalayın. ediyorsanız) hizalayın ve sonra Duvara Montaj Kılavuzu öğesini bant kullanarak duvara sabitleyin.
-
Page 70: Yazilim Güncellemesi
şekilde durması için Duvara Montaj bağlayarak bellenimi güncelleyebilirsiniz. Kelepçelerini aşağı kaydırın. Güncelleme dosyalarını indirme hakkında daha fazla bilgi için (www.samsung.com Support) bağlantısından Samsung Electronics web sitesine gidin. Daha sonra Soundbar’ınızın modelini girin ya da seçin; Yazılım ve Uygulamalar ve ardından İndirmeler seçimini yapın. -
Page 71: Güncelleme Prosedürü
çalışmayabilir. • Mikro USB - USB adaptör Kablosu ayrı • Güncellemeler gerçekleştirilirken gücü satılır. Satın almak için, bir Samsung kapatmayın veya USB cihazını çıkarmayın. Servis Merkezi’ne veya Samsung Müşteri Cihaz yazılımı güncellemesi tamamlandığında Hizmetleri’ne başvurun. ana ünite otomatik olarak kapatılır. -
Page 72: Sorun Gi̇derme
11 SORUN GİDERME Yardım istemeden önce şunu kontrol edin. Ünite açılmıyor. Güç kablosu prize takılı mı? ; Elektrik fişini prize bağlayın. Düğmeye basıldığında işlev çalışmıyor. Havada statik elektrik var mı? ; Güç kablosunu sökün ve yeniden bağlayın. BT modunda ses kayıpları oluyor. ;... -
Page 73: Patentleri
12 PATENTLERI 13 AÇIK KAYNAK LISANS BILDIRIMI Açık kaynaklarla ilgili soru ve talepleriniz için E-posta yoluyla Samsung’a başvurun Manufactured under license from Dolby (oss.request@samsung.com). Laboratories. Dolby, Dolby Audio, Pro Logic, and the double-D symbol are trademarks of Dolby 14 HİZMET Laboratories. -
Page 74: Spesi̇fi̇kasyonlar Ve Kilavuz
Bluetooth Güç fonksiyonunu kapatmak için Bluetooth SOUND MODE düğmesini en az Bağlantı Noktası Devre Dışı Bırakma yöntemi 5 saniye basılı tutun. NOTLAR • Samsung Electronics Co., Ltd, önceden bildirimde bulunmaksızın özellikleri değiştirme hakkını saklı tutmaktadır. • Ağırlık ve boyutlar yaklaşık değerlerdir. TUR - 33... - Page 75 İş kullanıcıları tedarikçileri ile irtibat kurup satın alma sözleşmesinin hüküm ve koşullarına bakmalıdır. Bu ürün ve ürünün elektronik aksesuarları, imha için diğer ticari atıklarla karıştırılmamalıdır. Samsung’un çevre taahhütleri ve REACH, WEEE, Piller gibi ürüne özgü düzenleme zorunlulukları hakkında bilgi için şu adresi ziyaret edin: http://www.
- Page 76 (Ho-dong), 113, Yejik-ro, Cheoin-gu, Yongin-si, Gyeonggi-do, Korea © 2019 Samsung Electronics Co., Ltd. All rights reserved. Contact SAMSUNG WORLD WIDE If you have any questions or comments relating to Samsung products, please contact the SAMSUNG customer care Centre. Area Contact Centre ...
Need help?
Do you have a question about the HW-R650 and is the answer not in the manual?
Questions and answers