
Subscribe to Our Youtube Channel
Related Manuals for MRMC MRMC-2058-00

Summary of Contents for MRMC MRMC-2058-00
- Page 1 XL Turntable Quick Start Guide Product Code: MRMC-2058-00 Product Covered: MRMC-2032-01 CRANES AND RIGS | BROADCAST | HEADS & DSLR | PRODUCT PHOTOGRAPHY | RENTALS...
- Page 2 XL Turntable Quick Start Guide Product Code: MRMC-2058-00 Product Covered: MRMC-2032-01 © 2020 Mark Roberts Motion Control ® Ltd. All rights reserved. No part of this publication may be reproduced, transmitted, or translated by any means — graphical, electronic, or mechanical — including...
-
Page 3: Table Of Contents
XL Turntable Quick Start Guide Contents Turntable Quick Start Guide XL Turntable Quick Start Guide Chapter 1 Quick Start..............1 Important safety instructions ..........1 General care..............1 Location .................1 Intellectual property .............1 Overview .................2 Transporting the XL Turntable ..........2 Lifting XL Turntable using a Gantry Hoist ....2 Removing Castor Wheels............3 Anchoring XL Turntable to the floor ........3 Fixing Equipment (Motion Base etc.) on XL... - Page 4 XL Turntable Quick Start Guide...
-
Page 5: Chapter 1 Quick Start
XL Turntable Quick Start Guide Chapter 1 Quick Start Turntable Quick Start Guide XL Turntable Quick Start Guide Important safety instructions To ensure the best from the product, please read this manual carefully. Keep it in the safe place for future reference. To reduce the risk of electric shock, do not remove the cover from the unit. -
Page 6: Overview
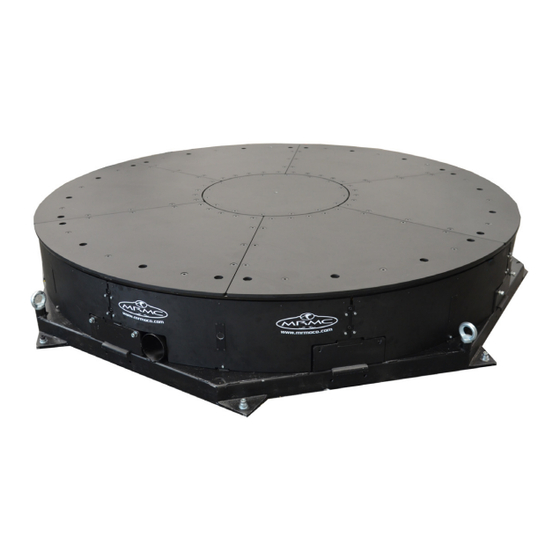
Overview Thank you for using the XL Turntable from Mark Roberts Motion Control (MRMC). You can use the Turntable for day in and day out use in product photography and filming. The XL Turntable can be used as an additional axis of a Bolt on Track System or as a stand-alone EtherCAT unit controlled by Flair or RTL. -
Page 7: Removing Castor Wheels
XL Turntable Quick Start Guide Remove the gantry hook and the straps from the arm. Removing Castor Wheels When in position you can either jack the castor wheels up so they don’t touch the ground or remove the castor wheels by removing the 2 x M10 cap head screws to prevent them from coming into way of the Turntable load. - Page 8 XL Turntable Quick Start Guide At one corner of the turntable, use one of the two holes to draw a circle on the concrete with a pencil, to mark the position of the hole. You can use either hole. Repeat for the other three corners of the turntable. Add the lifting eye bolts to the 4xM20 threaded lifting points.
- Page 9 XL Turntable Quick Start Guide 14. Insert the four retaining bolts through the corners of the base and into the drop-in anchor inserts, and tighten.
-
Page 10: Fixing Equipment (Motion Base Etc.) On Xl Turntable
XL Turntable Quick Start Guide Fixing Equipment (Motion Base etc.) on XL Turntable Use the M16 threaded holes on the outer ring to fix equipment on the XL Turntable. If required, you can remove the top plate to allow the cables to pass through. -
Page 11: Connecting The Cables For Xl Turntable As A Stand-Alone
Robot Only EtherCAT In Not used Estop Service Power (3-phase, 4-wire including (MRMC only) Ground) Safety PLC E-stop Relay Using the XL Turntable as a Stand-alone Connect all the cables as shown in Connecting the Cables for XL Turntable as a Stand-alone section. Refer to the Universal Estop... - Page 12 XL Turntable Quick Start Guide Turn the power on using the power switch on the XL Turntable. Start the Flair PC (if not already turned on). Start Flair on the Flair PC. Ensure that Flair is not running before the XL Turntable has fully powered up. Release the E-stop that is plugged into the computer stack, by turning the button clockwise until the red button pops up and then pressing the Reset button.
-
Page 13: Connecting The Cables For Xl Turntable When Used With A Bolt On Track
Robot only Power (3-phase, 4-wire including Service Estop Ground) (MRMC only) Safety PLC E-stop Relay Using the XL Turntable with Bolt on Track Connect all the cables as shown in Connecting the Cables for XL Turntable when used with a Bolt on Track section. Ensure that the... -
Page 14: Brake Release
XL Turntable Quick Start Guide PC used in this configuration is that configured for use with XL Turntable and Bolt. You do not need to open the Bolt Base side panel. These would be done as part of the installation of the rig. Note This guide covers the connections that you need to make when using the Turntable with Bolt on Track. -
Page 15: Zero Position Marker
XL Turntable Quick Start Guide Zero Position Marker The XL Turntable uses absolute encoders and Zero marker therefore stores its position even when turned off and doesn’t need to be zeroed. To move the XL Turntable physically to the zero position, the physical zero marker arrows can be used. - Page 16 XL Turntable Quick Start Guide Notes...
- Page 17 XL Turntable Quick Start Guide Notes...
- Page 18 XL Turntable Quick Start Guide Notes...
-
Page 19: Appendix 1 Specifications
XL Turntable Quick Start Guide Appendix 1 Specifications Turntable Quick Start Guide XL Turntable Quick Start Guide System Properties Turntable Platform Diameter 2,200 mm (maximum) Table Hollow Bore Diameter 520 mm (minimum) Turntable Max. Width 2,500 mm (maximum, excluding removable jacking castors) Turntable Max. -
Page 20: Motion Performance
Maximum Operating Time Typically, up to 1 minute of continuous operation at full speed/full load Max. Operating Duty Cycle Control/Drive Enclosure Host Control MRMC Flair 6 Supply Voltage 415V AC Three Phase... - Page 21 XL Turntable Quick Start Guide Supply Current 48 Amps Number of Axes Command Interface EtherCAT Operator Controls Rotary Mains Isolator Emergency Stop Buttons Operator Illuminators Servo Power ON: Blue LED on electrical panel Emergency Stop Input Single Channel Power Connector Industrial 5 Pin Chassis Mount Receptable (Pins) Motor/Brake Connector...
-
Page 22: Payload Mounting
XL Turntable Quick Start Guide Payload Mounting Turntable Payload 12 off M16 on 1,972 mm PCD (Position Fixings shown below) MRMC Motionbase 12 off M16 on 1,972 mm PCD (Position Fixings shown below) Payload Loading User’s responsibility Method Physical Specification... - Page 23 XL Turntable Quick Start Guide Notes...
- Page 24 Mark Roberts Motion Control Ltd. Unit 3, South East Studios, Blindley Heath, Surrey RH7 6JP United Kingdom Telephone: +44 (0) 1342 838000 info@mrmoco.com www.mrmoco.com...
Need help?
Do you have a question about the MRMC-2058-00 and is the answer not in the manual?
Questions and answers