Table of Contents
Advertisement
Quick Links
Advertisement
Chapters
Table of Contents

Summary of Contents for German pool HSX
- Page 1 智 能 熱 水 控 制 系 統 家 用 伺 服 器 HSX Home Server 在 使 用 之 前 請 詳 細 閱 讀 「 使 用 說 明 書 」及「 保 用 條 款 」 , 並 妥 為 保 存 。...
- Page 2 請即進行保用登記﹗ 有關保用條款細則,請看本說明書最後一頁。 Please register your warranty information now ! For Warranty Terms & Conditions, please refer to the last page of these operating instructions.
-
Page 3: Table Of Contents
目錄 重要提示 如何使用本使用及安裝說明書 安全指引 設備簡介 概覽 技術規格 尺寸 包裝內含物 安裝 安裝條件 安裝位置 掛牆安裝 初次使用 使用方法 介面及信號燈 家用伺服器與現有網路的連接 4.2.1 通過無線網路連接家用伺服器 4.2.2 通過網路電線連接家用伺服器 軟件更新 4.3.1 APP更新 4.3.2 家用伺服器的軟件更新 如何使用APP 恢復出廠設定 4.5.1 重設APP 4.5.2 重設家用伺服器 清潔與保養 疑難排解及客戶服務 客服地址 廢物處理 環境與回收利用 本使用及安裝說明書的可拆分內頁隨附安裝模型圖。... -
Page 4: 重要提示
重要提示 重要提示 - 使用及安裝前,請先細閱本使用及安裝說明書。 - 請妥善保存本使用及安裝說明書,以便日後需使用。 1.1 如何使用本使用及安裝說明書:本使用及安裝說明書只供專業技術人員及終端用戶使用。 1.2 安全指引 - 除非IT網絡受防火牆保護,否則切勿將設備連接到任何IT網絡,以防止未獲授權人士使用設備。 - 請使用安全的無線網路密碼,以防止未獲授權人士使用設備。密碼必須由字母、數字及特殊 符號組成。 - 設備僅可於密閉空間使用,請避免極端環境對設備的影響,潮濕、高溫、震盪及陽光直射可 能會對設備造成損壞。 - 請確認通風口沒有阻塞,避免因溫度過熱而造成設備損毀。 - 請使用專用的電源線,不當的電壓和極性會損壞設備。 - 請勿擅自拆卸設備。不正確修理可能會危及用戶。 - 使用操控應用程式(以下簡稱為APP)遙距控制熱水器時,請確保同一時間無其他用戶正在 使用熱水器。對兒童來說高於約43 ° C的熱水是非常熱的,並可能引起灼燒感。可啟動的溫 度保護裝置遠優於遠端控制。 - 凡在有適當監督下,或已事前獲悉家用電器使用安全說明,並了解相關危害的前提下,8歲 以上兒童及身體、感官或心理障礙者或經驗或知識不足者,亦可使用本機器。禁止兒童在 隨意操作本熱水器。禁止兒童在未經適當監督的情況下進行清潔及維修保養工作。 - 同時也請注意熱水器的操作及iPad的安全應用。這些注意事項在相應的指引中提供。... -
Page 5: 設備簡介
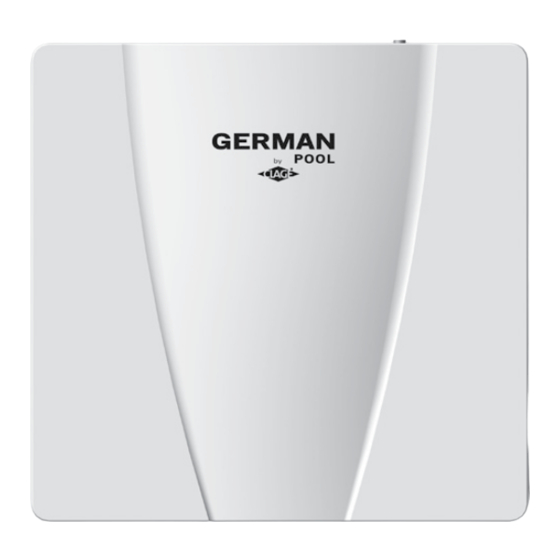
設備簡介 2.1 概覽... -
Page 6: 技術規格
設備簡介 佳捷家庭即熱式熱水器是一款綜合型熱水器,配備了無線網路控制器及無線電適配器,使其能作為 一個連接介面,連接APP與DSX、DEX、CFX、CEX和GPI-M8等型號的熱水器。伺服器提供多種必要服 務,以通過APP控制出水溫度及取得熱水器的運行參數。 APP為家用伺服器的使用介面。您可以通過觸屏隨心控制熱水器,並管理使用者的個人檔案及資料 數據。 2.2 技術參數 類別 智能操控家用伺服器 電壓/伏 100-240(50/60赫茲) 功率/瓦 尺寸(除電源線)高*寬*深/毫米 137*142*38 重量/克 環境溫度/攝氏度 0-50 空氣濕度/百分比 <70(非冷凝) 無線網路/吉赫 2.4(802.11b/g/n) 無線網路範圍/米 取決於建材 天線介面(可選) MMCX 無線電頻率/兆赫 868.3 無線電有效範圍/米 10(含牆面) 最多可連接的熱水器數量/台... -
Page 7: 包裝內含物
設備簡介 2.3 尺寸 2.4 包裝內含物 電源線 家用伺服器 安裝螺釘 使用及安裝說明書 網線... -
Page 8: 安裝條件
安裝 只有經認可的專業人員方可從事本設備的安裝、初始操作及維護工作,該等專業人員須遵守適用 標準及安裝規定。德國寶不對由於未遵守以下說明而導致的任何損害負責。 使用家用伺服器所需工具: - 最少一台2013年4月1日後出產的DSX、DEX、CFX、CEX或GPI-M8熱水器 (生產日期識辨方法:每 台產品都有專屬的12位元的系列號。如:系列號*DDDDD-XXXXXX:當DDDDD≥13091,即表示該 設備產於2013年4月1日後生產。) - 使用家用伺服器時,即熱式電熱水器必須裝有無線電元件。無線電元件在系列DSX和CFX出廠時已 安裝配備,必要時可以作為上述其他型號熱水器的配件運用(型號:3200-34031)。 - 一台備有iOS5或iOS6作業系統的iPad。 - 安裝APP時需有一個蘋果帳戶,以及進入蘋果AppStore的許可權。 3.2 安裝地點 請確認以下兩點: 1.在安裝的規定範圍內,在電源線(大概1.7米)的有效範圍內預留一個可用插頭。 2.所有的熱水器均要安裝在距離家用伺服器安裝位置的10米範圍內。家用伺服器可安裝在穩固的 地面上,或者垂直懸掛在牆上使用。 提示:請不要在干擾源(如微波)或在金屬表面附近使用該設備。以確保安全穩定的無線連接及 實現最佳的無線覆蓋範圍。... -
Page 9: 安裝位置
安裝 3.3家用伺服器的牆面安裝 圖片4 牆面安裝方法 1.借助本使用及安裝說明書所附的安裝模型圖確認好鑽孔位置。請確保螺絲在十字進孔的上端。 2.用跟機的螺釘,以及直徑4mm的鑽頭鑽至牆體25mm深。 3.把木栓塞到鑽孔,然後用螺絲擰緊,直至牆體到螺帽的距離剩下6mm。 4.把家用伺服器上的十字進孔放入螺絲中。 5.請暫時不要用提供的電源線連接伺服器。請閱讀「初次啟動」章節後再操作。... -
Page 10: 初次使用
安裝 3.4 初次啟動 1.請確保所有受控於家用伺服器的熱水器通電。 2.用所提供的電源線連接伺服器,然後插進插座。請注意選擇合適的插座(在說明書上和在銘牌上 有相應的技術參數)。 3.在您的iPad上安裝操控APP。在蘋果AppStore中搜索「CLAGE Smart Control」。然後安裝 該軟件。安裝後請暫勿啟動該程式。 App 圖標 4.連接家用伺服器與iPad a.在iPad設定中選擇Wi-Fi,通過無線網路連接iPad與伺服器: 名稱=CLAGE-HS-…(省略號是銘牌上印製的MAC地址的後四位) 密碼=Warmwasser b.或者您也可以通過網路電纜用路由器連接伺服器。在此種安裝情況下,如果在初次使用時出現 故障,可以通過無線連接方式重新連接。 5.應用設置: a.啟動APP,系統會察知您是家用伺服器新用戶。 b.點擊「安裝」鍵,進入設置菜單。 c.點擊您想要設置的伺服器,然後選擇「添加伺服器」。 d.點擊新添加的伺服器,以便打開設置頁面。 e.在設置頁面您可以為新增的伺服器更名及檢查連接狀態。 f.點擊「可用設備」,可檢索出在家用伺服器有效範圍內的所有熱水器。(如沒成功搜索出所有 熱水器,請重複該步驟。)您也可以將標記為未連接的加熱器連接至伺服器,點擊「熱水器」欄, 以及確認安全查詢。 g.需要時請連接其他的熱水器至伺服器。 h.點擊功能表項目中的「空間」選項,並給它命名。在「空間」選項裡,有可控制應用的按鍵。 點擊「創建 空間」,確認之前的錄入資料。必要時再添加更多空間。 i.點擊功能表列中的「設備」,然後點擊「最新設備」。 j.在配置功能表列中的欄目,每個按鍵有相對應的設備,請整理歸類。 k.命名設備,然後根據需要設定最高溫度值。 P.10... - Page 11 安裝 l.點擊命名後的空間按鍵,然後點擊「+」,添加新任務(洗手或者淋浴)。 m. 您可以在下拉式功能表下改變任務或標準溫度。需要時您也可以添加更多的任務。 n. 選擇功能表列中的「用戶」,命名並選擇頭像圖示。 o. 點擊「新增用戶」以確認添加操作。有需要時,可以添加其他用戶。 p. 點選已設置好的使用者,然後在配置功能表列中選擇「溫度」。根據使用者喜好設置相應的溫度。 q. 點擊「主頁」,關閉配置功能表。通過在出水時調校其中一台熱水器的溫度,檢查控制功能是 否運行正常。錶盤上的選定額定值展示了工作狀態中機器的耗電量(0至100%)。在APP上的溫度變 化將自動在熱水器上顯示。 6. 家用伺服器可以直接連至當前可用網路(「用戶端」),或者(「接入點」)連至無線網路。 當伺服器以第一種方式連至路由器時,它將自動切換至用戶端運行。作為用戶端的伺服器配置 方法可參考「應用」章節。 如果您想把伺服器作為一個接入點使用,則必須設置個人安全密碼,防止未經授權的使用: - 在配置功能表中選擇「家用伺服器」選項,確認您想要加密的家用伺服器。 - 選擇「更多」,在「網路密碼」中設置一個僅有本人知道的安全密碼。 7. 為了獲取使用家用伺服器的許可權,請在www.clage.de/de/service/geraeteregistrierung 網址 上用郵箱地址登記註冊您的家用伺服器。 P.11...
-
Page 12: 使用方法
使用方法 伺服器是作為iPad及熱水器的連接介面。熱水器的控制及伺服器的設置都由APP來實現。有關APP的 應用方法,請仔細閱讀「APP應用」章節,或點擊配置功能表列上的「i」選項。配置功能表即為主 畫面左下角的「齒輪」圖示。 4.1 介面及信號燈 電源供給 電源信號燈 狀態燈 4個乙太網介面 天線介面(背面) 圖5 提示:請使用所提供的電源連接家用伺服器。 家用伺服器通過無線電及無線網路與其他設備連接。另外,伺服器也可通過網線連接路由器,作為 DHCP客戶聯網。當網線正確插到乙太網插口時,無線網路將會自動取消連接。注:最左邊的RJ45插 口不可用。 為了增強家用伺服器的無線網路覆蓋範圍,可以添加一個帶無線射頻功能的天線介面。該介面可以 增強家用伺服器和iPad間的聯網品質,但並不能增加伺服器與熱水器的聯網品質。有關介面在專門 店有售。當家用伺服器透過電源線通電時,「電源信號燈」閃爍。 當伺服器作為接入點連接至無線網路時,「狀態燈」閃爍。如果出現信號燈閃爍情況,代表家用伺 服器存在故障問題。這種情況下必須聯繫客服。 P.12... -
Page 13: 家用伺服器與現有網路的連接
使用方法 4.2 家用伺服器連接至當前可用網路 家用伺服器可以完全獨立運行(作為接入點),或者作為用戶聯網運行。為方便使用,建議選 擇後者,因後者可連接無線網路或有線網路。 提示:為了使伺服器通過無線連接聯網,無線網路名稱和密碼是必須的。 4.2.1 通過無線連接家用伺服器 1.在配置功能表中選擇「家用伺服器」。點擊您想設置的伺服器後再點擊「建立連接」,以確 認連接狀態。點擊「更多」按鈕然後選擇「客戶」。 2.在「網路選擇」欄上點擊您想連接的網路,然後設立一個密碼。如果您使用的是隱藏的SSID, 則必須要取消隱藏,直到網路可見。 3.點擊「接納設置」。 4.家用伺服器完成無線網路設置,並會嘗試以新通道資料在路由器上註冊登記。iPad在切換中 登錄至家用網路。請您在無線設置下查看iPad的無線連接狀態。 5.返回APP。在成功註冊家用網路後,家用伺服器MAC地址的IP位址更改,狀態燈熄滅。 6.在APP中您可以點擊「家用伺服器」→「設置」→「建立連接」,以檢查是否安裝成功。如 成功,將會出現「與伺服器的連接正常(Connection to the serve OK.)」字樣。 提示:如果以提供的登錄資料登記失敗的話,短暫等候後,家用伺服器會返回接入點模式。這時 候需要重新連接iPad及伺服器,檢查登錄資料。 如果連接至伺服器的無線網路不可用(比如路由器沒有開啟,或者家用網路密碼被更改),家用伺 服器在下次啟動時又重新作為接入點的角色啟動。這種情況下可以參照「初次啟動」章節中提及的 登錄資料,以便重新登錄至其它網路。 P.13... -
Page 14: 通過網路電線連接家用伺服器
使用方法 4.2.2 家用伺服器連網 1. 請把網線一端插至伺服器中的其中一個Ethernet埠,另一端連至路由器。 2. 家用伺服器自動取消無線連接,連接入使用者服務端。狀態燈此時熄滅。 3. 在APP中您可以點擊「家用伺服器」→「設置」→「建立連接」,以檢查是否安裝成功。如成 功,將會出現「與伺服器的連接正常(Connection to the server OK.)」字樣。 軟件更新 4.3.1 APP更新 - 為了保證家用伺服器的安全與流暢的運行,我們建議您使用最新版本的軟件。 - 當有新版本的APP可用時,會在Appstore裡展現。進行軟件更新時,在Appstore介面的右方選 擇「更新」按鈕。 4.3.2 家用伺服器軟件的更新 提示:當家用伺服器正在更新的時候請勿關閉電源。 當家用伺服器可更新時,您將會在當初在CLAGE註冊的郵箱地址收到通知。在該郵件裡下載最新的 家用伺服器軟件並按其所述步驟進行安裝。 您可以在www.clage.de/de/service/geraeteregistrierung註冊您的郵箱,以便獲悉最新的可用更新資訊。 P.14... -
Page 15: 如何使用App
使用方法 4.4 APP的使用 APP 由三個元素組成:「主頁」、「資料庫」及「配置功能表」。後兩者可以直接在「主頁」 上找到。 溫度額定值 計時器 用戶選擇 功能鍵 配置功能表 資料庫 節能按鈕 場地選擇 節能目標 圖6 「主頁面」 您可在主頁面進行連接及控制溫度。另外當前的預設溫度資訊,預設時間及節能目標也能呈現。 在溫度控制盤上,每個鍵都被線分隔開來,每個鍵都至少有一個功能,此外也用於顯示相應裝置 的當前溫度值。按功能鍵即可設定在配置功能表中預存的溫度。選擇用戶,則該用戶預設的溫度 值將被自動設定。如果想設置短時間的溫度變化,長按相應鍵的功能鍵,並轉動溫度控制盤,直 到顯示相應溫度。 P.15... - Page 16 使用方法 返回主頁 提示資訊 版本說明 簡明視圖 功能表列 配置功能表 圖7 配置功能表列 為了能廣泛使用該APP的所有功能效果,配置欄必須附有例如空間,使用者和能耗等條件。 配置功能表分為不同的種類。功能表列中各自的選項資訊可以通過點擊「提示資訊」獲取。 警告:在計時器設置時請注意。預設溫度會在預設的時間啟動,預設溫度會顯示在當前的溫度顯 示幕上,但是熱水器當前溫度與此設定溫度無關。 P.16...
- Page 17 使用方法 使用 返回主頁 時間 細節顯示 篩選設置 重置篩選設置 圖8 「資料顯示」 從「資料顯示」中可以看到使用及耗能參數。為能準確呈現所耗費用,要在配置功能表的「設置」 輸入現時的水費與電費。 提示: 耗能參數僅供參考。 在家庭伺服器斷電後,請用iPad或者其他軟件聯網同步其系統時間。於同步前之任何指示均可能 會丟失。 家用伺服器斷電的情況下,使用及耗能參數最後十五分鐘的資料可能會丟失。 P.17...
-
Page 18: 恢復出廠設定
使用方法 恢復出廠設定 4.5.1 APP的重置 必須先移除該APP,然後於AppStore重新下載。 接下來按照「初始啟動」章節內容來進行下一步動作。 提示:我們建議在重新設置後存儲設置的資料,在有必要的時候或新安裝APP的時候,可以 從家用伺服器下載之前存儲的資料。針對這一個步驟,您可以在設置的功能表列上選 擇「配置」設置。在下拉式功能表中可以選擇已存儲好的配置參數。 4.5.2 家用伺服器的重置 為操作家用伺服器,如曾重置密碼,則必須拔掉電源,靜候一會後重新插上電源。 家用伺服器在完成重啟(有可能長達一分鐘)後大約三分鐘後,會在出廠狀態中顯示為接入 點。在此期間狀態燈會持續閃爍。要改變家庭服務中的無線配置,可以在家用伺服器上註冊 您的iPad,方法如下: 無線網名稱=CLAGE-HS-….(省略號的數字代表在銘牌上印刷的MAC地址的後四位) 密碼=Warmwasser 提示:如果在三分鐘後作出改動,則家用伺服器中會顯示最後的無線設置。 4.6 清潔與維護 應避免家用伺服器及其電源線受潮,以防損壞電路。如須清理家用伺服器及電源線,請先拔掉 電源,然後用乾軟毛巾擦拭表面,請勿使用任何清潔溶劑。 P.18... -
Page 19: 疑難排解及客戶服務
疑難排解及客戶服務 該產品生產嚴格,在交貨之前亦通過多次合格檢測。如出現故障問題,僅屬於個別現象。請您確認 一下能否根據下表解決故障問題,以節省不必要的服務費用。 問題 可能性原因 解決方法 家用伺服器未正常啟動 以電源線連接家用伺服器 將iPad放在更靠近路由器 或家用伺服器的地方 超過無線網絡接受範圍 APP無法搜索 將外接天線接收器連接到 家用伺服器 到家用伺服器 未啟動iPad無線網絡 重啟或打開無線網路 (打開了飛行模式) iPad無法連接上家用 改變iPad的無線網路設置 伺服器所在網路 未啟動熱水器 檢查熱水器開關是否已經打開 改變一下家用伺服器 APP無法搜索 和內天線介面的位置 家用伺服器與熱水器 到某個熱水器 之間距離太遠 縮短家用伺服器 與熱水器之間的距離 APP無法搜索 檢查伺服器是否通電, 家用伺服器並未啟動 到任何一個熱水器 並檢查網線是否連接妥當 將iPad放在更靠近路由器 無線連接不穩定 或家用伺服器的地方 熱水器無法對 檢查熱水器開關... -
Page 20: 客服地址
疑難排解及客戶服務 問題 可能性原因 解決方法 手動調控 協調控制使用 協調控制使用 將外接天線接收器連接到 手動調控FX無線遠端服務 家用伺服器 顯示的溫度不穩定 調控另一台iPad 協調控制使用 防燙傷保護啟動 取消熱水器上的防燙傷設置 狀態燈閃爍 內部故障 聯繫客服 5.1 客服地址 若仍無法解決故障,請您聯繫下方地址 德國寶(香港)有限公司 香港九龍紅磡暢通道1號中旅貨運物流中心8樓 電話:+852 2333 6249 傳真:+852 2356 9798 電郵:repairs@germanpool.com 網址:www.germanpool.com 如果設備存在瑕疵,請把該設備和單據寄回我司檢查及/或維修。 廢物處理 環境與回收利用 該產品是由高質的元件與材料組成的,均可回收與重複利用。在產品上的 這些標記,代表著這些電子(氣)產品必須和家庭生活垃圾分類處理。請 您把這些產品帶到當地的原材料回收處,比如可回收物品收集處,這些地 方可以免費接收處理。正確地處理這些產品的,有利於環境保護,並減少 對人和自然的危害。關於最近的垃圾回收處資訊,可從當地政府獲悉。對 於商業用戶來說:如果您想要處理這些電子(氣)設備,請聯繫代理商或 供應商。他們會給您提供進一步的資訊,此標記僅適用於歐盟。... - Page 21 Table of contents 1. Important notes How to use this instruction manual Safety instructions 2. Description of the device Overview Technical data Dimensions Scope of delivery 3. Installation Prerequisites Place of installation Installation of the Home Server on the wall Initial operation 4.
-
Page 22: Important Notes
Important notes Important notes - Before installing or using this device, you must read these instructions carefully until the end. - Keep these instructions together with the device for later use. 1.1 How to use this instruction manual - These instructions are intended for experts responsible for the installation of the device as well as for end users. -
Page 23: Description Of The Device
Description Of The Device Overview P.23... -
Page 24: Technical Data
Description Of The Device CLAGE Home Server is an integrated server which is equipped with a Wi-Fi controller and a special radio adapter. Thus it can be used as interface between the control app and the instanta neous water heaters DSX, DEX, CFX, CEX and GPI-M8. The server provides all services which are required to control the discharge temperature of the instantaneous water heaters and capture the operating data of the instantaneous water heaters by means of the control app. -
Page 25: Dimensions
Description Of The Device 2.3 Dimensions Figure 2: “Dimensions” 2.4 Scope of delivery Power pack Home server Installation screws and dowels Operating and installation instructions LAN cable Figure 3: “Scope of delivery” P.25... -
Page 26: Installation
Installation The installation, initial operation and maintenance of the device may only be carried out by an approved qualified servicing company which is fully responsible for the compliance with appli cable standards and installation provisions. We do not assume any liability for damage caused by the non-compliance with these instructions! 3.1 Prerequisites The following is required for the use of the home server:... -
Page 27: Installation Of The Home Server On The Wall
Installation 3.3 Installation of the Home Server on the wall Figure 4: “Wall installation” 1. Determine the position of the boreholes using the template provided inside these operating instructions. Please note that the screws must be positioned at the top of the snap cross. 2. - Page 28 Installation 3.4 Initial operation 1. Make sure that all instantaneous water heaters which you want to connect with the Home Server are supplied with voltage. 2. Connect the Home Server with the supplied power pack and plug it into the socket. The technical data provided in this instruction manual and on the nameplate of the Home Server must be observed when selecting an appropriate socket.
- Page 29 Installation j. In the configuration field you must now assign the room with the appropriate tap connection to the corresponding device. k. Enter a name for the device and limit the maximum temperature, if required. l. Select the tab with the room name and tap on the “+” in order to create a new action (e.g. washing hands or taking a shower) for this device in this room.
-
Page 30: Use
The Home Server is used as the interface between the iPad and the instantaneous water heater. The control of the instantaneous water heater and the configuration of the Home Server is accomplished with the control app. For more information on the use of the control app please read the chapter “How to use the app“... -
Page 31: Integration Of The Home Server In The Existing Network Infrastructure
Integration of the Home Server in the existing network infrastructure You can either use the Home Server as a stand-alone device (a so-called access point), or inte grate it as a client in the infrastructure of an existing home network. For convenient use, we recommend integrating the Home Server in an existing network. -
Page 32: Connecting The Home Server Via Lan Cable
4.2.2 Connecting the Home Server via LAN cable Connect the LAN cable to one of the four Ethernet terminals at the right side of the Home Server and to one of the open network terminals at your router. The Home Server will automatically deactivate its Wi-Fi connection and switch to client mode. The status LED goes off. -
Page 33: How To Use The App
How to use the app The app consists of three elements: “Main screen“, “Statistics“ and “Configuration menu“. The “Configuration menu“ and the “Statistics“ can be directly accessed from the “Main screen“. Temperature set point Timer event User selection Action button Configuration menu Statistics eco button Room selection... - Page 34 To main page Info button Legal notice Overview field Menu items Configuration field Figure 7: “Configuration menu” If you want to use all functions of the app, the configuration must be adapted to conditions such as rooms, users and energy prices. The configuration menu is subdivided into different items.
- Page 35 To main page Period Details Filter settings Reset filter settings Figure 8: “Statistics” The data on consumption and use can be seen on the “Statistics” screen. For the correct display of costs, the current prices for electricity and water must be entered in the “Settings” menuitem in the configuration menu.
-
Page 36: Restoring The Factory Settings
Restoring the factory settings 4.5.1. Resetting the control app If you want to restore the delivery status of the control app, you must uninstall the app and reinstall it via the AppStore. Make the settings according to the “Initial operation“ chapter. Note: We recommend saving the configuration after you have completed the set ting. -
Page 37: Self-Help In Case Of Problems, And Customer Service
5. Self-help in case of problems, and customer service Your CLAGE Home Server was produced with care and cross-checked before delivery. Problems that might occur are often the result of minor causes. Check whether you can probably solve the problem on the basis of the annexed table. Thus you help avoid costs for unnecessary customer service. -
Page 38: Customer Service Address
Contact customer service 5.1 Customer service address If it is not possible to solve the problem, please contact German Pool (Hong Kong) Limited 8/F, China Travel (Cargo) Logistics Centre 1 Cheong Tung Road Hung Hom, Kowloon, Hong Kong Telefon: +852 2333 6249... -
Page 39: Disposal
Disposal Environment and recycling Your product has been designed and produced on the basis of high-quality materials and components which can be recycled and reused. This symbol on products and/or accompanying documents means that electrical and electronic products must not be disposed of together with the household garbage after the expiration of their service life. - Page 40 傳真 Fax:+853 2875 2661 HONG KONG TOP BRAND TEN YEAR ACHIEVEMENT AWARD © 版權所有。未獲德國寶授權,不得翻印、複製或使用本說明書作任何商業用途,違者必究。 © All rights reserved. Copying, reproducing or using the contents of this manual is not allowed without prior authorization from German Pool, violators will be prosecuted. P.40 P.16 GPI_HSX-M-14(1)
Need help?
Do you have a question about the HSX and is the answer not in the manual?
Questions and answers